Peer Networking Grouping Service Isn't Running [Fix]
If you're having this issue, ensure that dependent services are running
6 min. read
Updated on
Read our disclosure page to find out how can you help Windows Report sustain the editorial team. Read more
Key notes
- If you're getting peer networking error 1068 you might want to try removing idstore.sst file.
- Modifying the registry or group policy settings can also help with this problem.
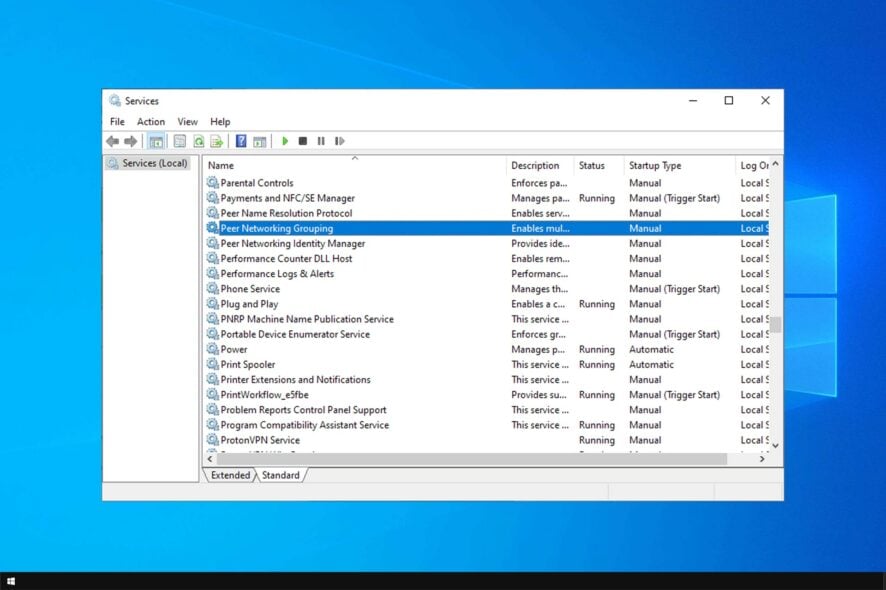
Sharing files is rather simple in a local network, but sometimes all sorts of issues can occur. For example, users reported that Peer Networking Grouping Service isn’t running.
If that’s also the problem you’re experiencing, fear not. Today we’re going to show you how to fix this Windows 10 problem with ease.
What can I do if Peer Networking Grouping Service isn’t running?
Before trying to fix this issue:
- Ensure that you have the latest updates installed. If you’re using a third-party antivirus, temporarily disable it.
1. Check if Peer networking services are running
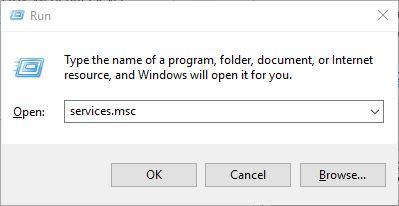
- Press Windows key + R and enter services.msc. Press Enter or click OK.
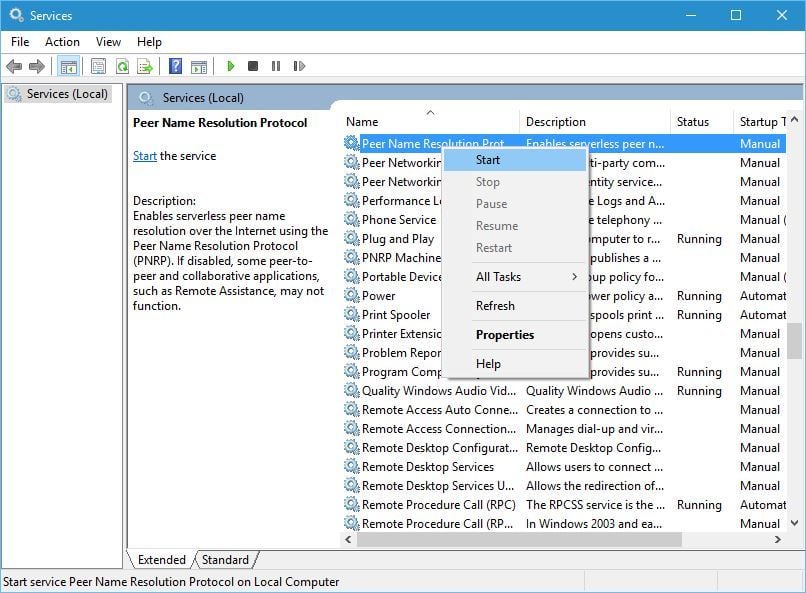
- When the Services window opens locate Peer Name Resolution Protocol, Peer Networking Identity Manager, Peer Networking Grouping, and PNRP Machine Name Publication services and enable them. To do that, simply right-click a service and choose Enable from the menu.
- A few users suggested enabling Windows Search service as well since these ones depend on it, so be sure to do that as well.
Moreover, don’t forget about the importance of also updating your drivers. Outbyte Driver Updater is a tool that will easily keep all your computer’s drivers up to date.
Install it right away and there’s literally one click that stands between your current situation and the one of downloading the latest versions of all your out-of-date device drivers.
2. Delete the idstore.sst file
- Go to this folder:
C:\Windows\ServiceProfiles\LocalService - Go to the AppData folder. If that folder is missing, you need to show hidden files. To do that go to the View tab and check Hidden items.
- Now go to the following folder:
Roaming\PeerNetworking - Once you enter PeerNetworking folder locate and remove idstore.sst file.
- Some users are suggesting to delete all files from PeerNetworking folder, so you might want to try that as well.
3. Edit the registry
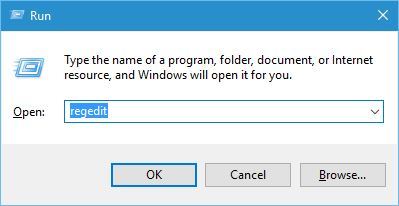
- Press the Windows key + R shortcut and enter regedit.
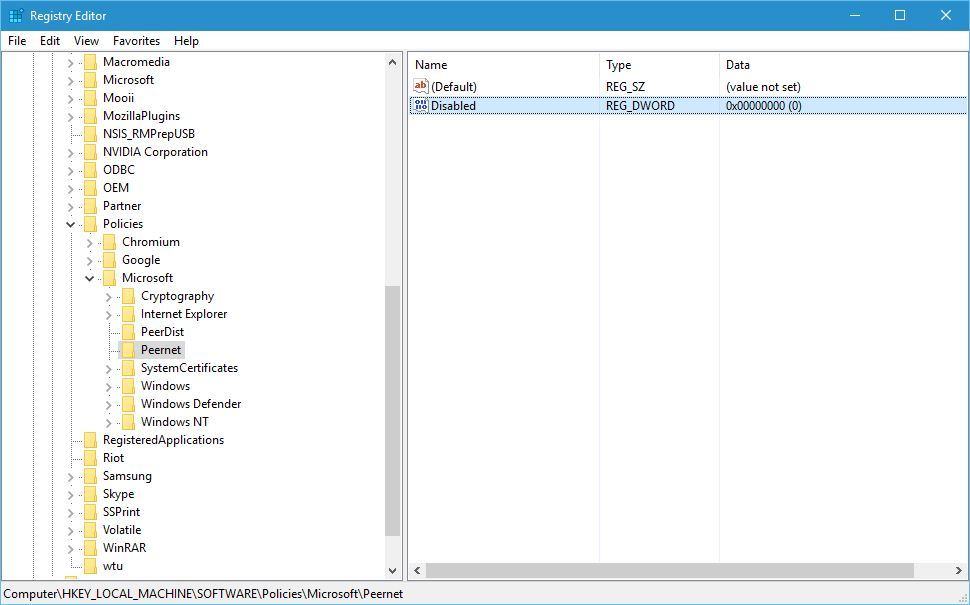
- Go to the following key in the left pane:
HKEY_LOCAL_MACHINE\SOFTWARE\Policies\Microsoft\Peernet - Locate Disabled DWORD in the right pane and double-click it.
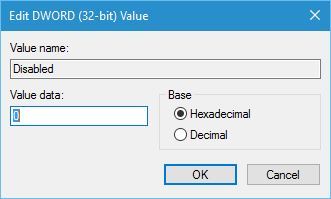
- Make sure the Value data is set to 0. Click OK to save changes.
In addition to editing the registry, users are also suggesting using Local Group Policy. To do that, follow these steps:
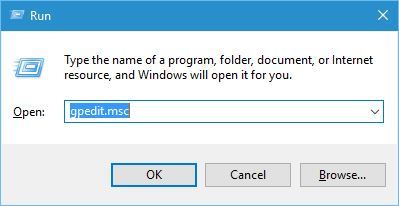
- Press Windows key + R and enter gpedit.msc. Press Enter or click OK to run it.
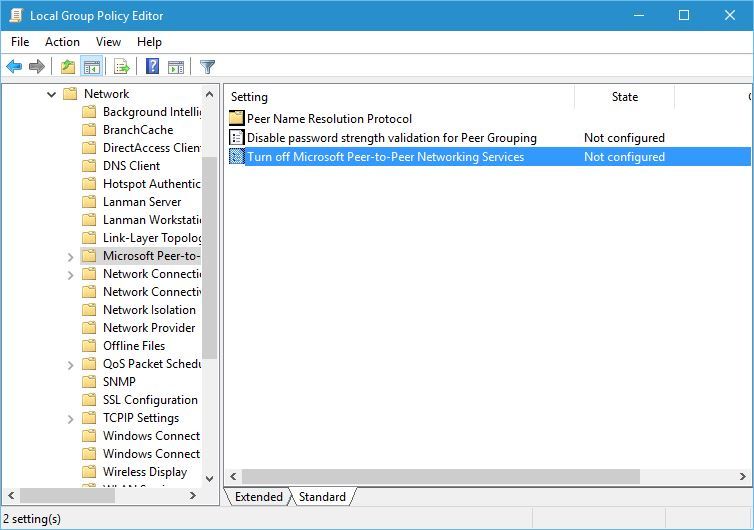
- In the left pane go to Computer Configuration and expand Administrative Templates. Next, go to Network and choose Microsoft Peer-to-Peer Networking Services.
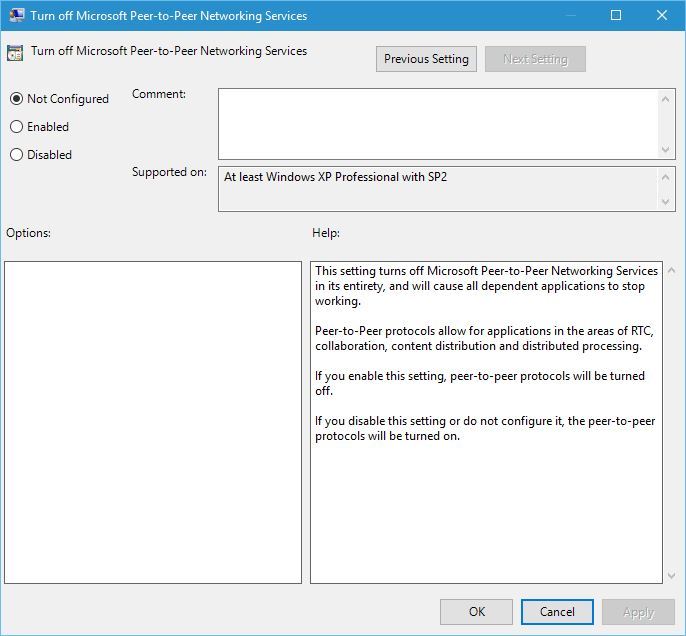
- In the right pane, double-click Turn off Microsoft Peer-to-Peer Networking Services.
- When the properties window opens make sure that Not Configured option is selected.
- Click Apply and OK to save changes.
4. Delete all files from the MachineKeys directory
- Go to
C:\ProgramData\Microsoft\Crypto\RSA\MachineKeys - Delete all files from it. If you want, you can copy them to a safe location in case you need them for backup.
- After deleting the files restart your computer.
5. Change the security permissions for the MachineKeys folder
- Go to this folder:
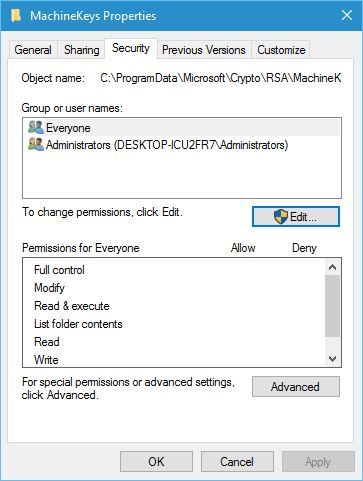
C:\ProgramData\Microsoft\Crypto\RSA - Right-click the MachineKeys folder and choose Properties.
- Go to the Security tab and click Edit.
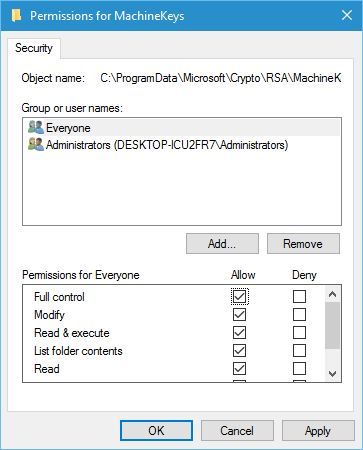
- Select Everyone and check the Full control option.
- Click Apply and OK to save changes.
6. Use PowerShell
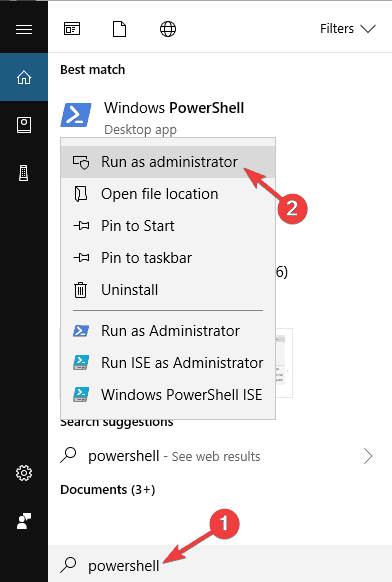
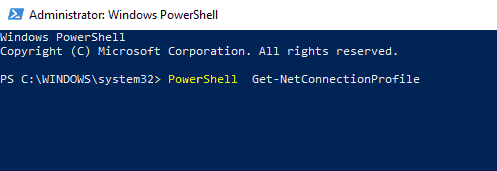
- Press Windows key + S and enter Powershell. Right-click Windows Powershell from the list of results and choose Run as administrator from the menu.
- Now enter the following command: PowerShell Get-NetConnectionProfile.
- Close PowerShell.
7. Change Peer Name Resolution Protocol settings
- Open Services window.
- When the Services window opens, double-click Peer Name Resolution Protocol to open its properties.
- Navigate to Log On tab and select Local System account. Now click Apply and OK to save changes.
After doing that, the problem should be resolved. Alternatively, you can use the Local Service. To do that, follow these steps:
- Repeat the previous steps, but instead of selecting the Local System Account, enter Local Services as the account name and clear the password fields. Click Apply and OK to save changes.
- After doing that, restart Peer Name Resolution Protocol service.
- After the service restarts, check if the problem is resolved.
8. Make sure that all required services are running properly
Peer networking error 1068 can appear if the required services aren’t running, so be sure to enable the following services:
- Application Layer Gateway Service
- Network Connections
- Network Location Awareness (NLA)
- Plug and Play
- Remote Access Auto Connection Manager
- Remote Access Connection Manager
- Remote Procedure Call (RPC)
- Telephony
Keep in mind that you might not be able to enable all services that are on the list such as Remote Access Connection Manager.
This service is dependent on Windows Event Log service, and if Windows Even Log service won’t start, you’ll need to change certain permissions by doing the following:
- Navigate to this directory:
C:\Windows\System32\winevt - Locate the Logs directory, right-click it, and choose Properties from the menu.
- Navigate to the Security tab and click the Edit button.
- Now click the Add button.
- In the Enter the object names to select, enter Local Service. Now click Check Names and OK.
- Now repeat steps 4-5 but instead of Local Service enter Network Service.
- Now Select Local Service, and check Full Control in the Allow column. Do the same for Network Service. Now click Apply and OK to save changes.
After doing that, restart your PC. Once your PC restarts, go back to the Services window and start Windows Event Log along with other services that weren’t able to start before.
Once you enable all the required services, the issue should be resolved, and everything will start working again.
If the Peer Networking Grouping Service isn’t running, be sure to try removing idstore.sst file or our other solutions.
In case you’re having additional problems, you can check our Homegroup cannot be set up or Homegroup encountered an error guides.
Have you managed to solve your issue? In the comments area below, let us know which solution worked in your case.




User forum
1 messages