How to Make PowerPoint to Automatically Advance Slides
You can set timings for each slide in PowerPoint
Presentations can be stressful enough without having to manually advance your slides. Luckily, PowerPoint offers several ways to automate this process, ensuring your presentation flows smoothly. Here’s how you can set up your PowerPoint slides to automatically advance with ease.
How do I set PowerPoint to auto advance slides?
1. Set up Auto Advance in PowerPoint desktop version
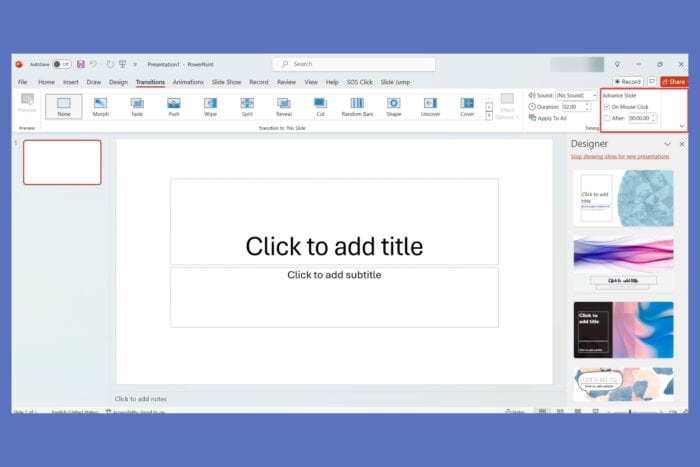
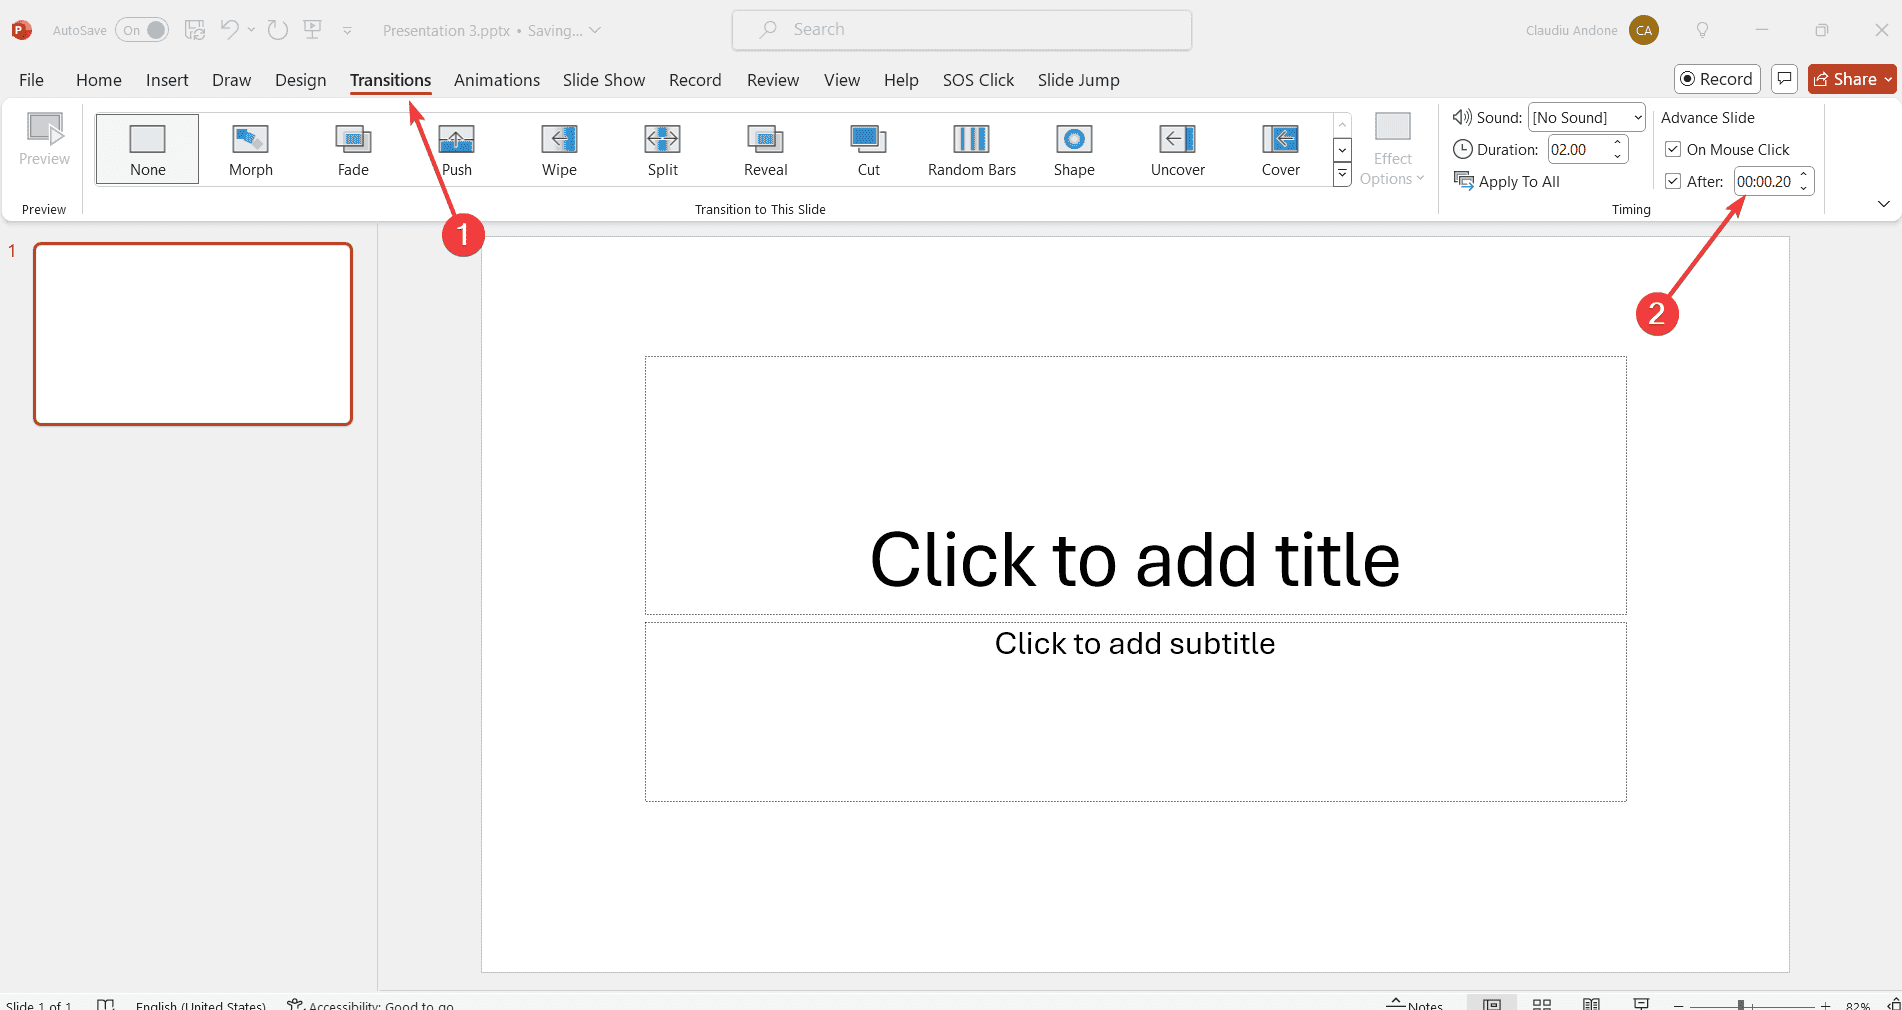
- Launch the desktop version of PowerPoint.
- Click on the Transitions tab on the toolbar.
- In the Timing group, click the checkbox next to After.

- Enter the desired interval (e.g., 10 seconds).
- Click Apply to All in the Timing group to ensure all slides will follow the same timing.
- If you want to have different timing for each slide, follow the first 4 steps for each one.
Setting up auto advance in PowerPoint ensures your slides move on their own, perfect for a smooth, unattended presentation.
1. Rehearse and record slide timings
- Click on the Slide Show tab.
- Click Rehearse Timings. This will open a toolbar with options to play, pause, and record timings for each slide.
- Play your presentation and set the timing for each slide by clicking Next to go to the next slide when you’re ready.
- Pause and repeat as necessary until all timings are set.
- Once done, you will be prompted to save the slide timings. Click Yes.
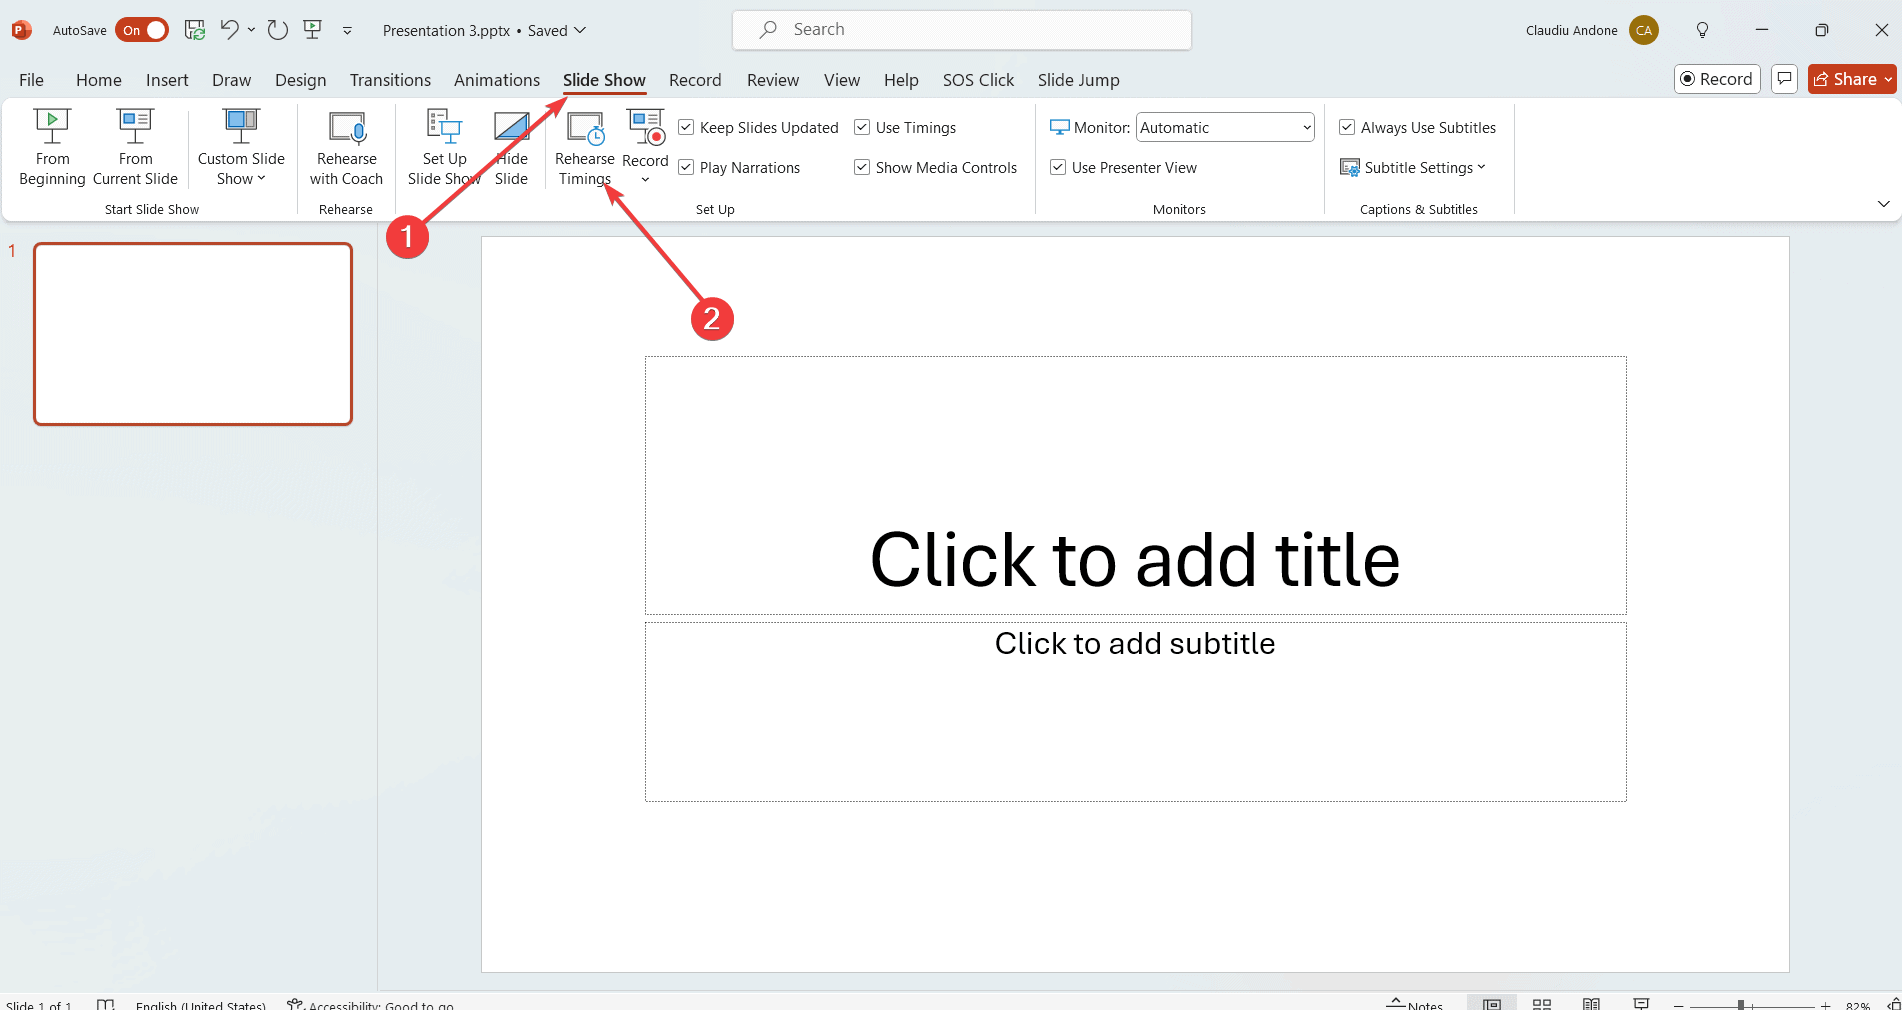
This method allows you to meticulously control how long each slide is shown, ensuring precise flow for your presentation.
3. Configure Slide Show to Loop
- Go to the Slide Show tab.
- In the Set Up group, click Set Up Slide Show.
- Check Loop continuously until ‘Esc’ under the Show options section.
- Click OK.

By configuring your slide show to loop, your presentation will continue to run seamlessly until manually stopped. This setting is ideal for trade shows or kiosks if you run a presentation without any input from anyone.
4. Export the presentation as a video
- Click on File in the top-left corner and select Export.
- Choose Create a Video and set the desired quality and timing for each slide.
- Click Create Video and save it.
Exporting your presentation as a video guarantees that all timings are preserved and the presentation runs as intended on any device.
By following these steps, you can ensure your PowerPoint slides will advance automatically, creating a professional and smooth presentation experience. For future presentations, always rehearse and double-check your settings to avoid any last-minute hiccups.
If you’d like to keep track of your time, we recommend getting the Sliders Timer extension.
Read our disclosure page to find out how can you help Windows Report sustain the editorial team. Read more
Improve this guide


User forum
0 messages