The Printer Couldn't Print: 5 Easy Methods You Can Use
Find verified solutions to get the printer running
5 min. read
Updated on
Read our disclosure page to find out how can you help Windows Report sustain the editorial team. Read more
Key notes
- If you get The printer couldn’t print message, it’s usually a trivial issue to blame.
- The problem arises due to misconfigured network settings, improper connection, or critical services not running.
- To fix things, make sure the connections are in order, assign the printer a static IP, or reinstall the driver, amongst other solutions.
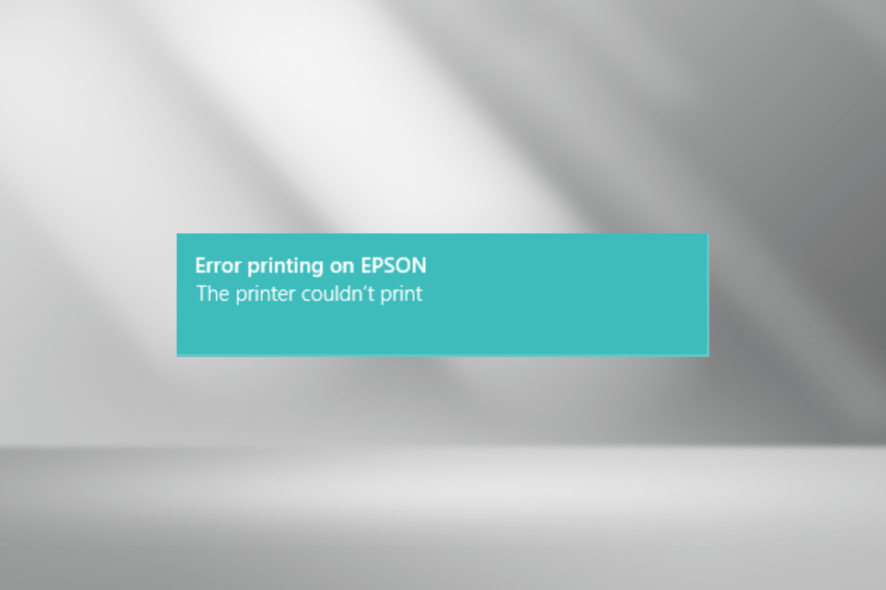
Printers are a vital part of most modern-day computers, especially in office setups where users require documenting stuff. But, the device is known to throw errors more often than others. And one such is The printer couldn’t print error on Epson, HP, and other manufacturers.
When you can’t find the printer, it at least makes sense as to why the print jobs are stuck. But, when everything looks in order, the printer is visible, set as default, and has no warning sign, troubleshooting is slightly trickier. So, let’s find out how you can fix things!
Why does my HP printer say it can’t print?
Here are a few reasons The printer couldn’t print test page in Windows 10:
- Improper connection: Some older ones can only print when connected via a cable, and if that’s not the connection type, the error message will appear.
- Issues with the driver: If the printer drivers are outdated, incompatible, or corrupt, it will have trouble printing and will throw a range of errors, including The printer couldn’t print in Microsoft Word.
- Critical services not running: A few services need to be running for the printing jobs to go through effectively.
How can I fix The printer couldn’t print error?
Before we start making changes to the two devices, here are a few quick things you can try:
- Restart both the computer and the printer.
- Verify that the connection between the two is in order. To be sure, unplug the cable from both ends and reconnect it.
- If the problem is limited to limited, download the HP Print and Scan Doctor tool to automatically identify and eliminate problems. Once done, check whether The printer couldn’t print a full page photo problem is fixed.
- Assign a static IP to the printer. This could be done from the embedded web server accessible via the printer’s IP address. The interface for each manufacturer would be different, so we recommend you check the official website for the exact steps.
If these didn’t work, move to the changes listed next.
1. Run the Print Spooler service
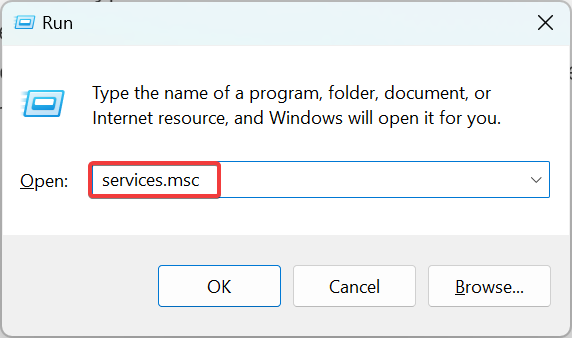
- Press Windows + R to open Run, type services.msc in the text field, and hit Enter.
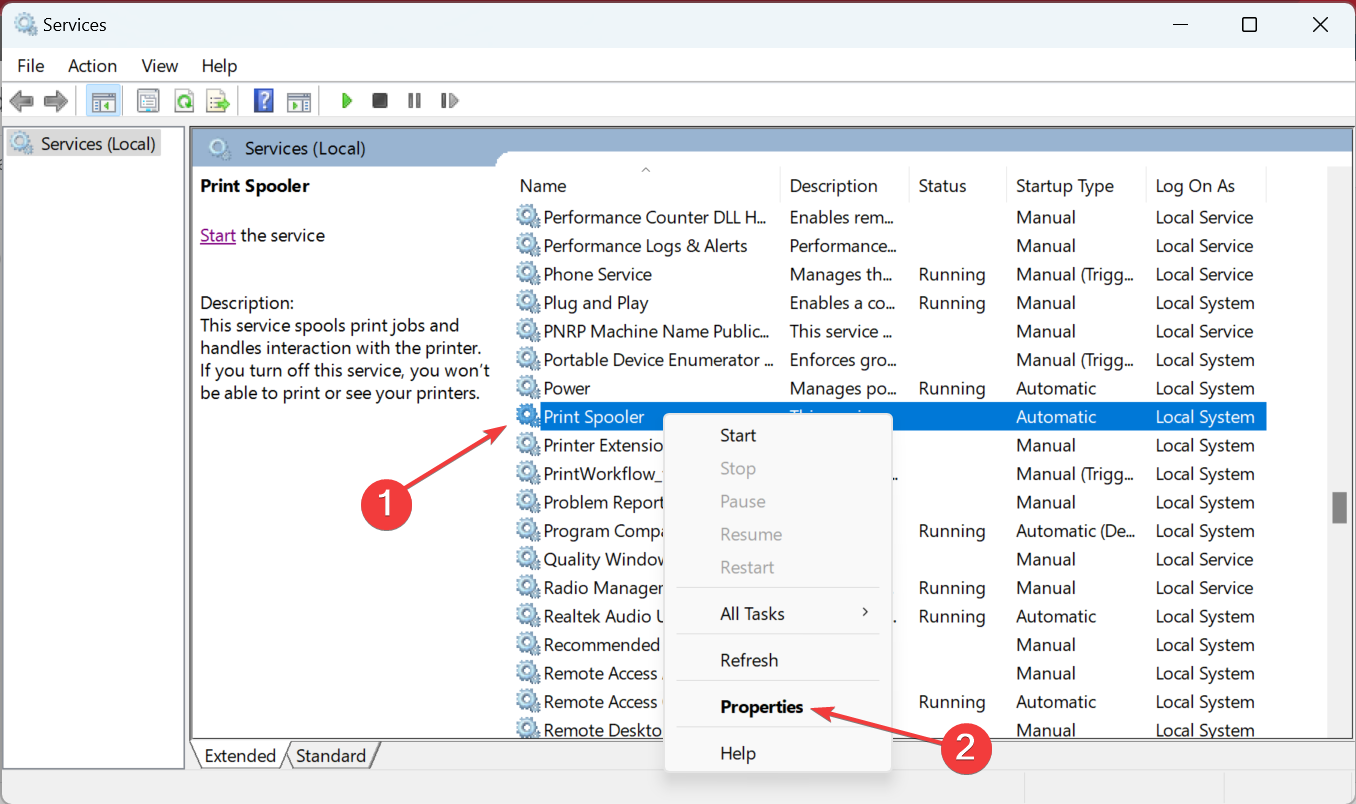
- Locate the Print Spooler service, right-click on it, and choose Properties.
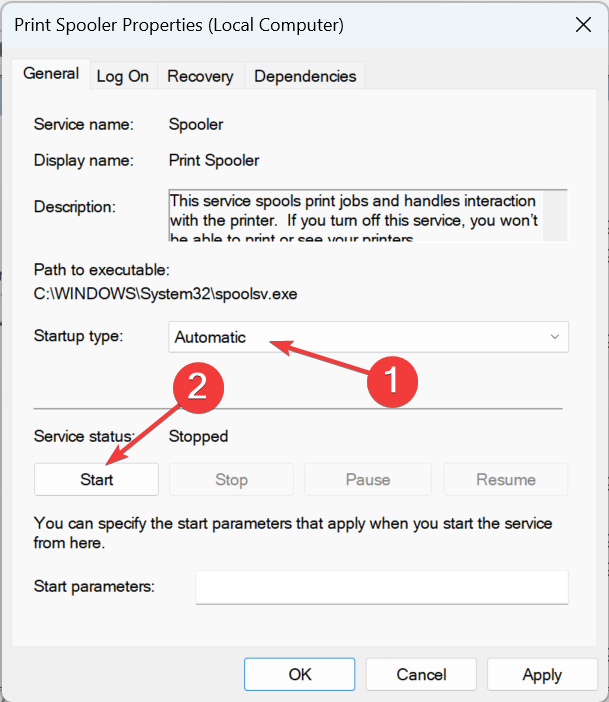
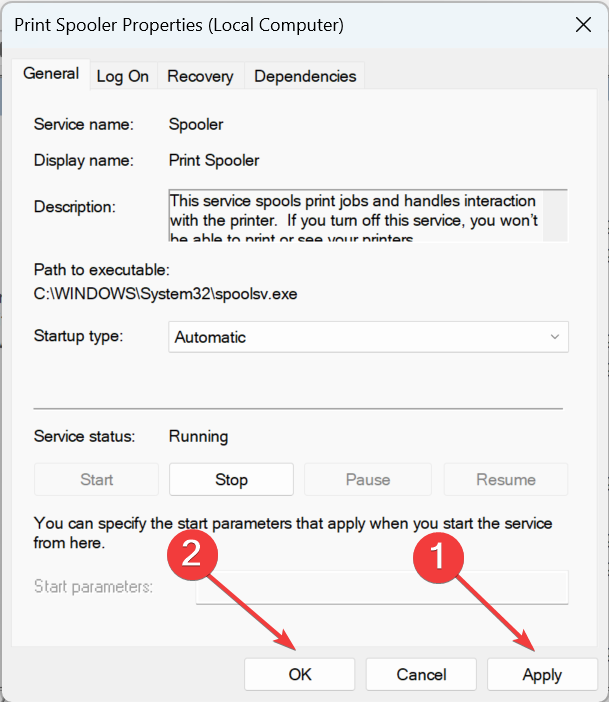
- Select Automatic from the Startup type, and click the Start button if the service is not running.
- Once done, click Apply and OK to save the changes.
In most cases, it turns out to be the Print Spooler service to blame when The printer couldn’t print message shows up. So, make sure it’s active. Also, restarting the service should do the trick if it is already running.
2. Clear the print queue
- Stop the Print Spooler service as described earlier.
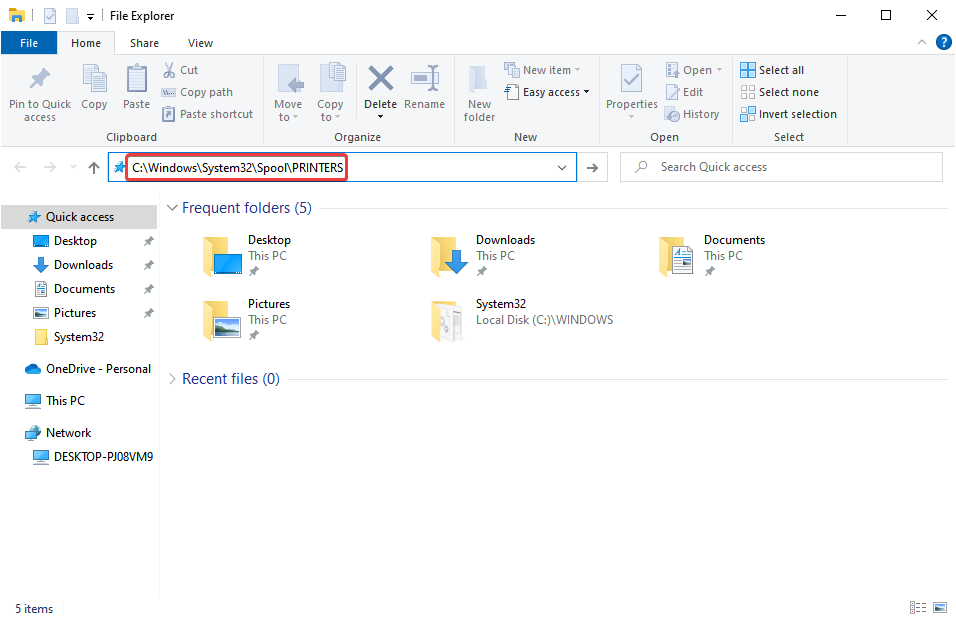
- Press Windows + E to open File Explorer, paste the following path, and hit Enter:
C:\Windows\System32\Spool\PRINTERS - Press Ctrl + A to select all the files here and hit Delete to clear them.
- Once done, restart the Print Spooler service.
- You can now try printing and check whether the error message disappears.
3. Reinstall the printer driver
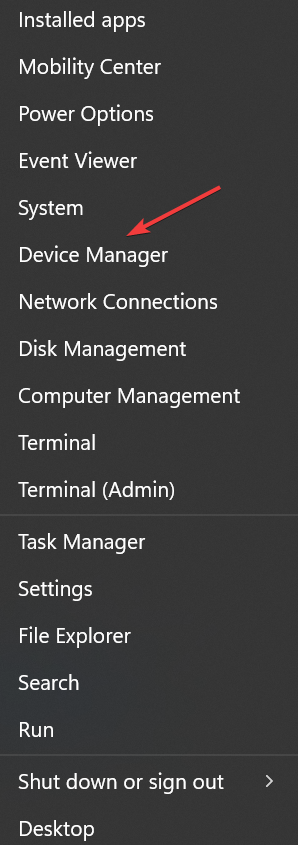
- Press Windows + X to open the Power User menu, and select Device Manager.
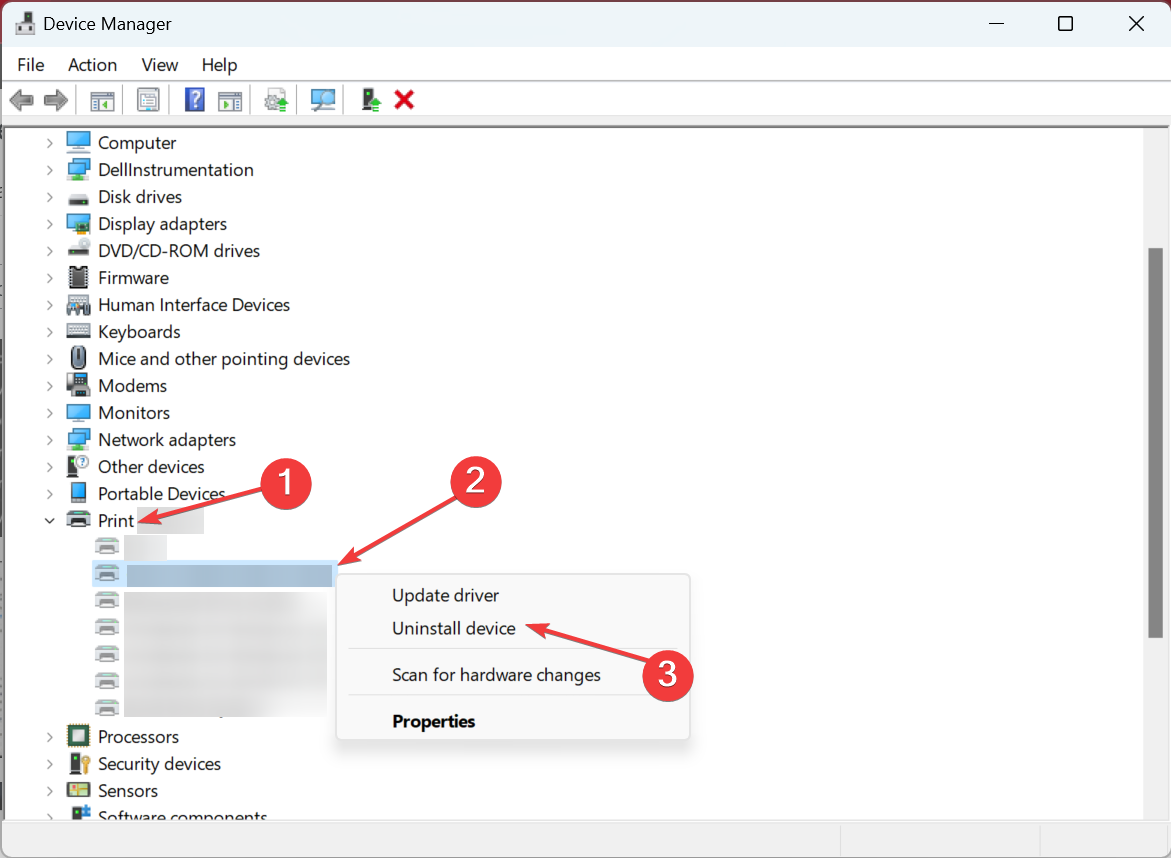
- Expand the Printers entry, right-click the problematic printer, and choose Uninstall device from the context menu.
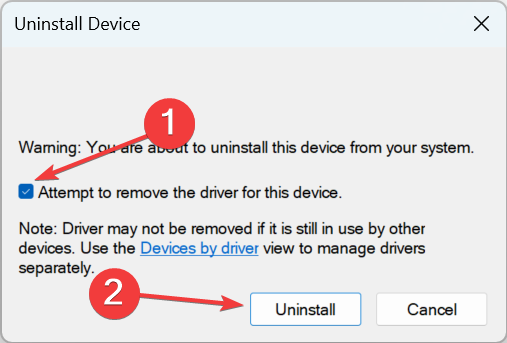
- Now, tick the checkbox for Attempt to remove the driver for this device and click Uninstall.
- Once done, restart the computer, and Windows will automatically install a fresh copy of the best available driver.
Another quick solution when you get The printer couldn’t print message is reinstalling the driver as shown in the guide above.
If this doesn’t work out, you can certainly rely on a smart driver app that can help you solve any PC driver matters in a short time.
- Download and install Outbyte Driver Updater.
- Launch the software.
- Wait for the app to detect all faulty drivers.
- Now, it will show you all the malfunctioning drivers listed to select the ones to Update or Ignore.
- Click on Update & Apply Selected to download and install the newest versions.
- Restart your PC to ensure the applied changes.

Outbyte Driver Updater
Secure your Windows PC with Outbyte from various errors caused by problematic drivers.4. Turn off the offline mode
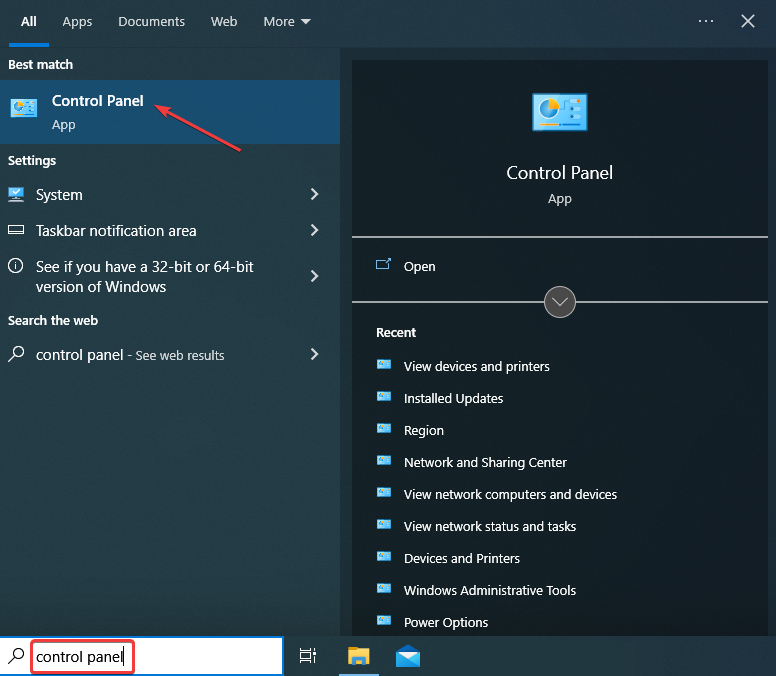
- Press Windows + S to open Search, type Control Panel, and click the relevant search result.
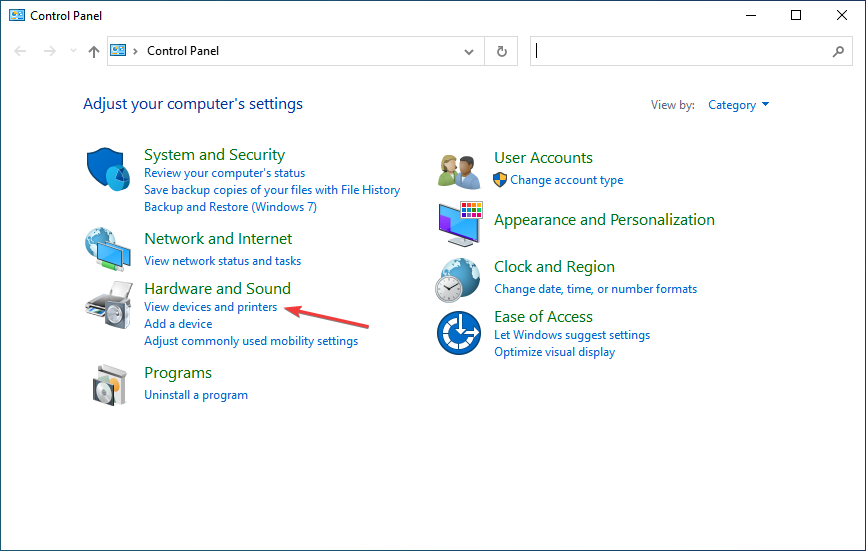
- Click on View devices and printers.
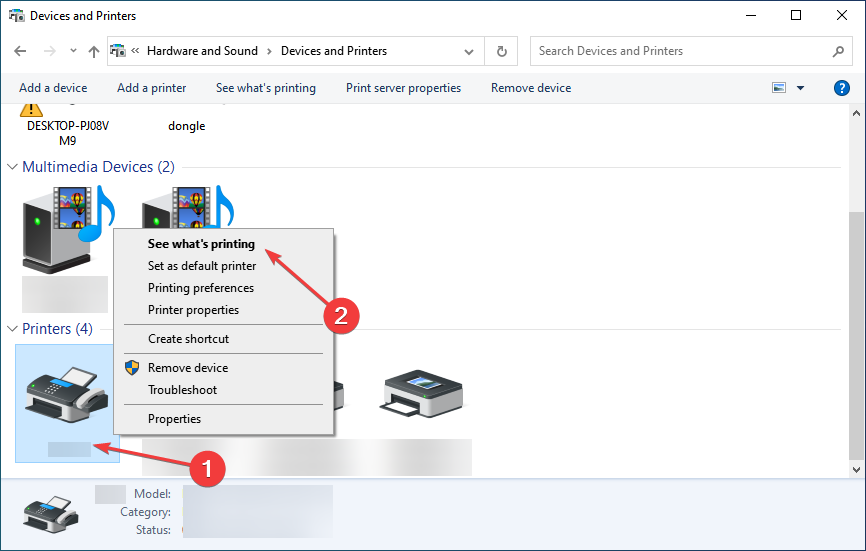
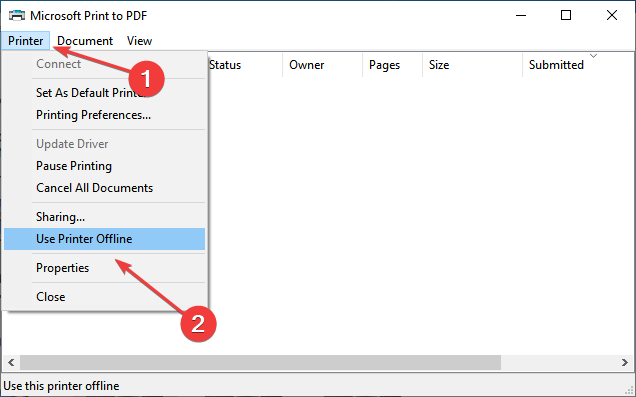
- Right-click on the affected printer and select See what’s printing.
- Now, click on the Printer menu, and uncheck the Use Printer Offline option.
5. Soft reset the printer
- Turn off the printer and disconnect the power cord from its rear end and also that of the router.
- Now, power off the computer and wait for 30 seconds.
- Next, turn on the router by connecting the power cable and wait for it to get ready. It usually takes 30 seconds to 1 minute.
- Turn the computer back on, and once Windows fully loads, connect the power cord to the printer and turn it on.
That’s it! This is how you soft reset a printer. While the steps are for an HP device, the process is similar for other manufacturers. In case you face issues, check the official website.
One of the solutions here should have helped get rid of The printer couldn’t print message, and you should be able to use the device again. If the problem persists, we recommend you replace the cable used for the connection.
If you use the PC a lot, check some quick tips to manage your device and printer settings and how to improve the performance of Windows to make it faster than ever.
For any queries or to share another solution with us, use the comments section below.


User forum
0 messages