PUA:Win32/Presenoker Removal Guide: 5 Quick Methods
This PUA is not so hard to remove, but you need administrative privileges
![]() 4 min. read
4 min. read
![]() Published on
Published on
Share this article
Improve this guide
Read our disclosure page to find out how can you help Windows Report sustain the editorial team. Read more

Dealing with the PUA:Win32/Presenoker can be a real headache, especially when it starts affecting your system’s performance and security. In this guide, we’ll walk you through several effective methods to remove this pesky potentially unwanted application (PUA) from your Windows system.

Secure your devices with award-winning cybersecurity technology.

Maximize your PC's security and performance with top-notch digital threat detection.

Keep secure with groundbreaking AI detection and prevention technology.
Browse the web securely for up to 3 devices across Windows, Mac, iOS or Android systems.

Best security tool for intense browsing activity.
How do I remove PUA:Win32/Presenoker for good?
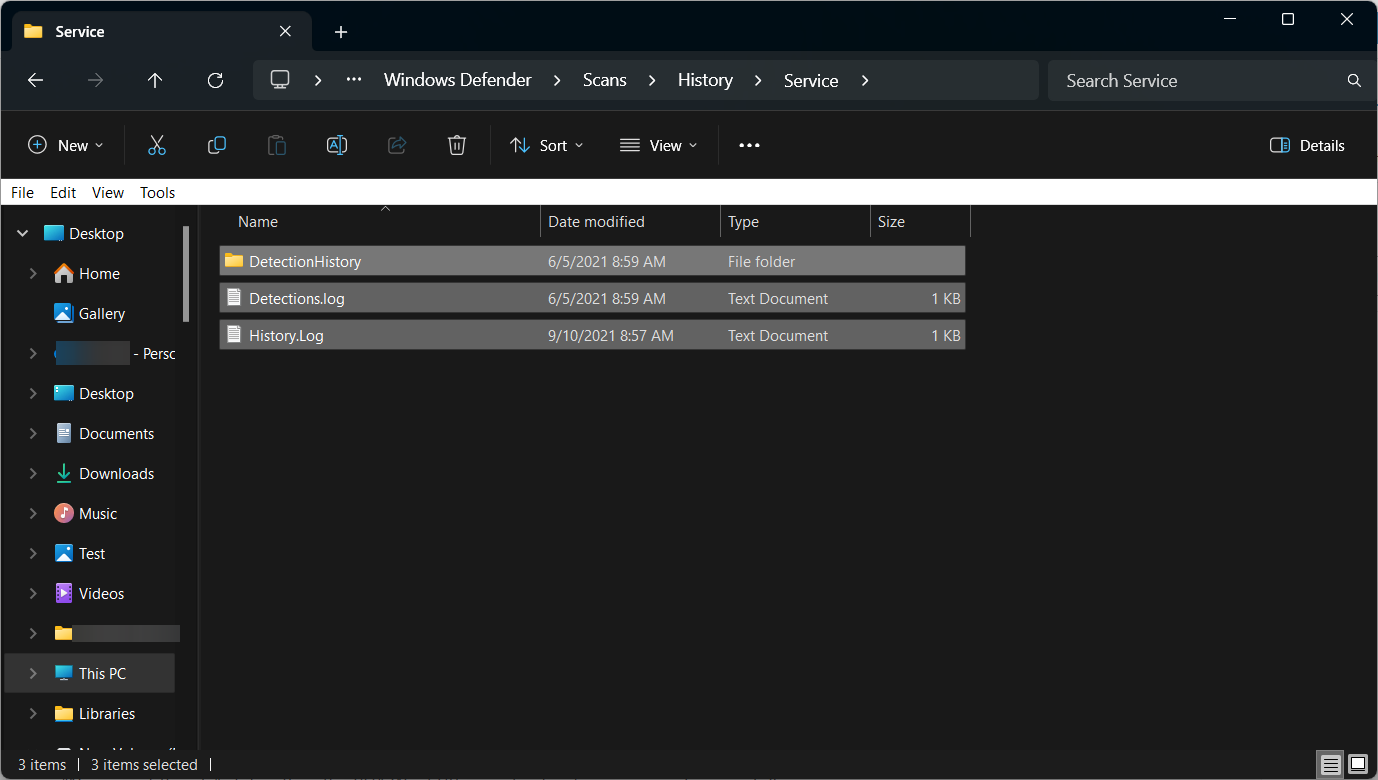
1. Delete the Detection History Folder in File Explorer
- Press the Win + E keys to open the File Explorer.
- Navigate to the following path:
C:\ProgramData\Microsoft\Windows Defender\Scans\History\Service - Inside the Service folder, press Ctrl + A keys to select all files and folders, and then press the Delete key.

- Navigate to the following directory and open the CacheManager folder:
C:\ProgramData\Microsoft\Windows Defender\Scans\History\CacheManager - Select all files and folders in the CacheManager folder and delete them.
- Type virus in the Windows search box and click the Virus & threat protection app from the top result.
- In the Virus & threat protection window, scroll down to the Current threats section. If it shows No current threats status, then the PUA:Win32/Presenoker has been removed successfully.
This solution helps by manually clearing the residual files left by the PUA:Win32/Presenoker, ensuring that Windows Defender no longer flags these items during scans.
2. Reset the browser settings to default (Google Chrome Example)
- Launch Google Chrome and click on the three vertical dots at the upper right corner, then select Settings.
- Scroll down and click on Advanced at the bottom of the Settings screen.
- In the Reset and clean up section, click on Restore settings to their original defaults.
- Confirm by clicking on Reset Settings in the pop-up dialog.
Resetting your browser settings helps remove any changes made by PUA:Win32/Presenoker, such as malicious extensions and altered settings, restoring the browser to its default state.
3. Use a trusted antivirus software
- Download and install a trusted antivirus software, like ESET HOME Security Essential, as it is ideally fit for PUA removal.
- Open the antivirus software and perform a full system scan.
- Follow the on-screen instructions to quarantine or delete any detected threats.
Using ESET HOME Security Essential as reliable antivirus software ensures that any hidden or residual malicious files related to PUA:Win32/Presenoker are identified and removed from your system, providing an added layer of security.
4. Uninstall suspicious programs from Control Panel
- Press the Windows key + I to open Settings.
- Navigate to Apps, then Apps & features.
- Scroll through the list of installed programs to find any suspicious or unknown entries.
- Click on the three dots next to the suspicious entry and select Uninstall.
- Follow the prompts to complete the uninstallation process.
Uninstalling suspicious applications prevents any potentially unwanted programs (PUAs) from running on your computer, reducing the risk of infections and performance issues.
5. Manually remove malicious extensions from browsers
For Google Chrome:
- Open Chrome and go to Settings > Extensions.
- Find the suspicious extension and click Remove.
- Restart Chrome.
For Firefox:
- Open Firefox and go to Preferences > Extensions & Themes.
- Locate any suspicious extensions and click Remove.
- Restart Firefox.
For Microsoft Edge:
- Open Edge and go to Settings > Extensions.
- Remove any suspicious extensions.
- Restart Edge.
Removing malicious extensions manually ensures that your browser is free from components that may have been installed by PUA:Win32/Presenoker, enhancing your browsing security.
As a bonus, we recommend using Microsoft’s Malicious Software Removal Tool which is pretty good on removing PUA. Click on the highlighted link to learn how to install and use it.
By following these steps, you should be able to effectively remove PUA:Win32/Presenoker from your system.
We also have a complete guide on how to block PUAs from Windows 11 and prevent this situation in the future.
If you have any suggestions or questions, the comments section below awaits for your input.


User forum
0 messages