How to View Reliability History and use it to Fix Issues
The Reliability Monitor is user-friendly and easy to navigate
3 min. read
Updated on
Read our disclosure page to find out how can you help Windows Report sustain the editorial team Read more
Key notes
- The Reliability Monitor allows you to keep track of errors on your PC, giving you information about them, such as the date and time and the application that caused them.
- You can view the reliability history on your Windows 10 device in multiple ways.
- We will show you all of them in our article.
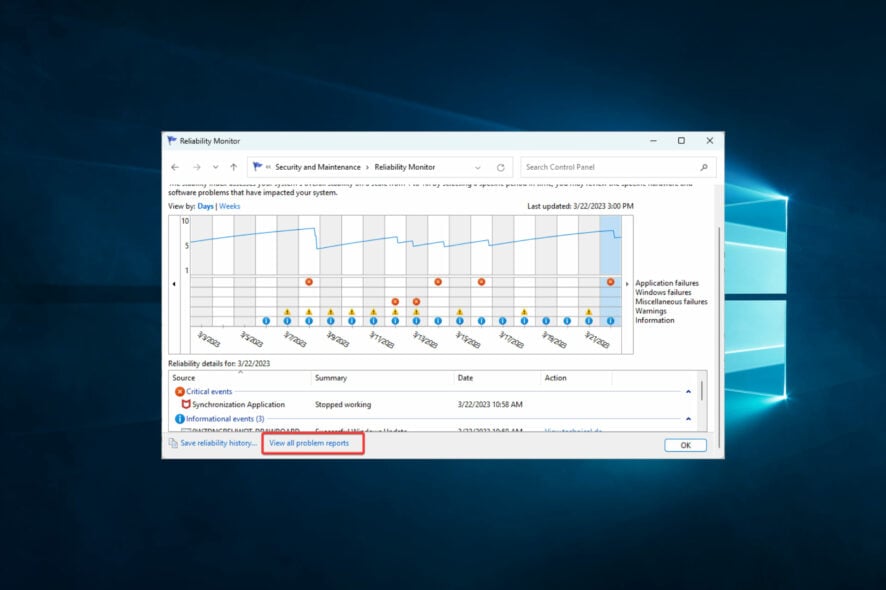
Computer issues will occur sooner or later on your PC. Unfortunately, fixing those problems isn’t always a simple task, but there’s one Windows tool that can help you. If you want to check your reliability history on Windows 10, today we will show you how to use Reliability Monitor.
Let us get straight to it.
What is Reliability History?
Reliability History is a built-in feature in Windows operating systems that provides a detailed report of the system’s stability and performance over time.
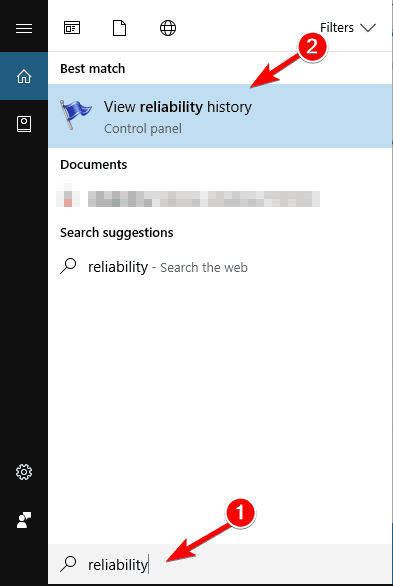
This utility tracks and logs all system events, including errors, warnings, application crashes, and other issues affecting the system’s stability. It can be accessed by searching for Reliability History in the Start menu or Control Panel.
The report is presented as a graph that shows the stability index of the system over a selected period, along with details of any events that have occurred during that time. The stability index is a score ranging from 1 to 10 that reflects the system’s overall stability.
A score of 10 indicates that the system has been running without any issues, while a score of 1 indicates that the system has experienced frequent crashes and other issues.
Additionally, using this utility, users can quickly identify and troubleshoot issues that may be affecting the performance and stability of their Windows system. It also provides valuable information for system administrators to maintain and monitor the health of their networked computers.
How can I use Reliability History on Windows 10?
1. Opening Reliability History
1.1 Open Reliability History from Windows Search
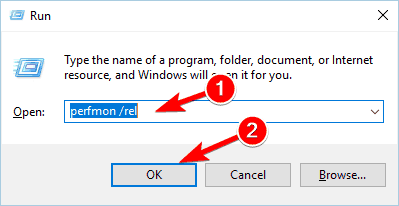
1.2 Open Reliability History from the Run Dialog
- Press Windows Key + R to open the Run dialog.
- When the Run dialog opens, enter perfmon /rel, press Enter, or click OK.
1.3 Open Reliability History via Control Panel
Lastly, you can start the Reliability Monitor simply by navigating to the Control Panel. The Security and Maintenance menu allows users to view the reliability history in a few clicks.
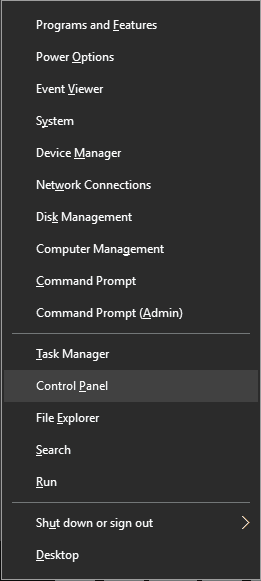
1. Press Windows Key + X to open the Win + X menu.
2. Choose Control Panel from the list of options.
3. When Control Panel opens, navigate to the System and Security section.

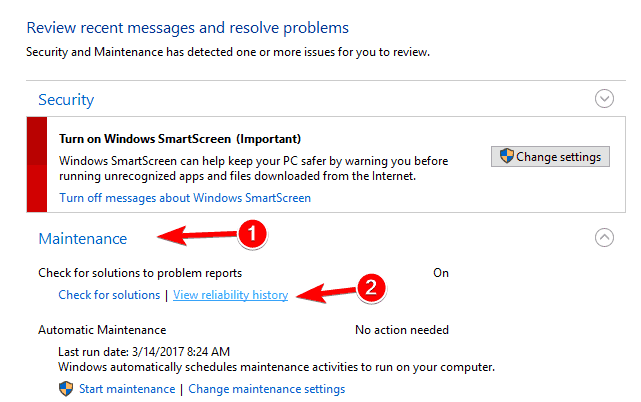
5. When the Security and Maintenance window opens, expand the Maintenance section.
6. Now click on View reliability history.
7. The report will now generate. This can take a while.
8. Reliability Monitor also offers detailed information for each day. Simply select a specific day on the chart and you’ll see a detailed report at the bottom.
9. You can also view technical details about errors on your device. You can see which application caused a warning or a critical event to appear. In addition, you can also see the type of critical event or warning.
Lastly, you’ll see the exact time and date when a specific issue occurred, which makes it easier for you to troubleshoot a problem.
2. Track stability and performance
- Open the utility using any of the methods described above.
- The utility will show a graph of the system’s stability index over time. The stability index ranges from 1 to 10, with 10 being the most stable.
- You can click on any point on the graph to see details about the events that occurred at that time, including warnings, errors, and other issues.
- You can also filter the view by date range or by selecting a specific event type to display in the graph.
- Lastly, clicking on an individual event will show more detailed information, including a description of the problem, any related files or applications, and suggested actions to resolve the issue.
How do I clear my Reliability History?
- Use any of the three approaches discussed above to open Reliability History.
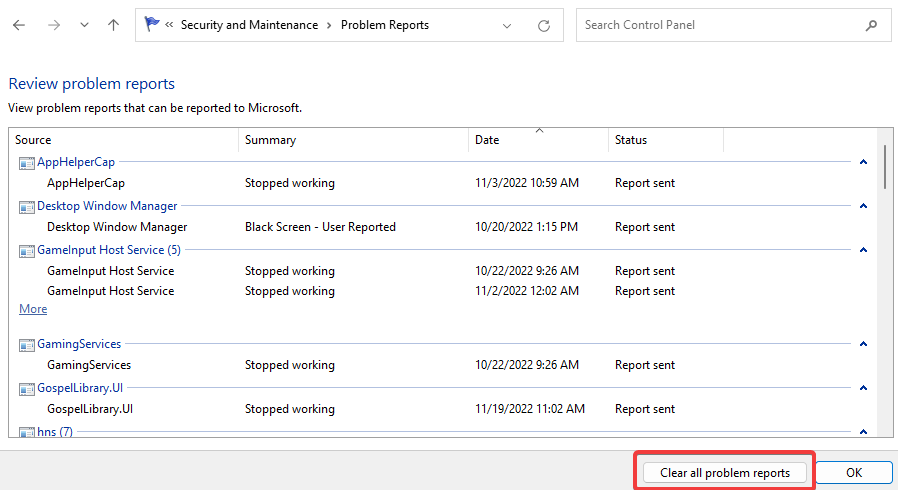
- Scroll to the bottom and click View all problem reports.
- Click Clear all problem reports at the bottom right.
- Finally, click Yes to confirm your choice and wait for the process to complete.
Many advanced users are probably familiar with the Event Viewer. This powerful tool can detect every event, warning, or error. The device uses the information from the Event Viewer but displays it in a user-friendly manner.
Lastly, if you’re having any issues with your PC, we advise you to check your Reliability History using this tool.

