How to Quickly Remove the Login Password From Windows 10
Remove password by adjusting your account settings
4 min. read
Updated on
Read our disclosure page to find out how can you help Windows Report sustain the editorial team Read more
Key notes
- The password security feature on Windows PCs helps keep the system secure from intruders and unauthorized users.
- Removing the login password from Windows 10 can make the system vulnerable to unauthorized access.
- Disabling the login password in the User Account setting will help remove the password.
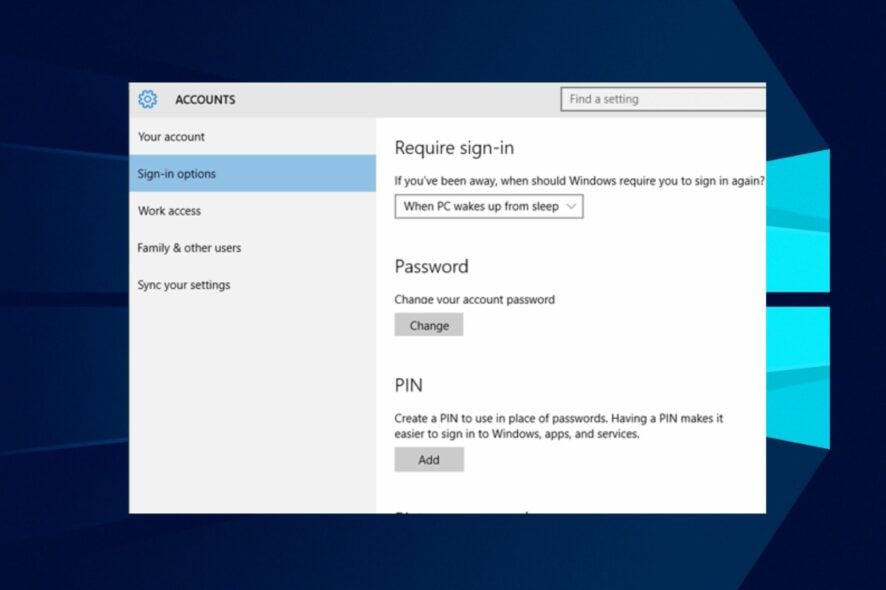
Many users complain about the stress of entering a password whenever they need to sign in to their computers. So, they seek ways to remove the login password even though it is not recommended. However, this guide will discuss how to quickly remove login passwords from Windows 10.
Also, we have a detailed guide about the error code 0x80280013 when you try to log in to Windows and some steps for fixing it.
Can I secure my PC without a password?
Windows security lock features allow you to add a unique password to help keep your business computer’s information secure.
It prevents other users or intruders from accessing it without your consent. Thus, your PC will be rendered vulnerable when you set up passwordless login for Windows 10.
Furthermore, newer devices have other biometric security features like facial recognition and fingerprint scanning technologies. So, you can secure your PC without a password if you use such a device. If otherwise, your PC will be vulnerable to unauthorized access locally and remotely.
However, you have nothing to worry about concerning security if you have a device without critical files and only need quick access.
How can I remove the password from Windows 10?
1. Disable the password login in User Accounts
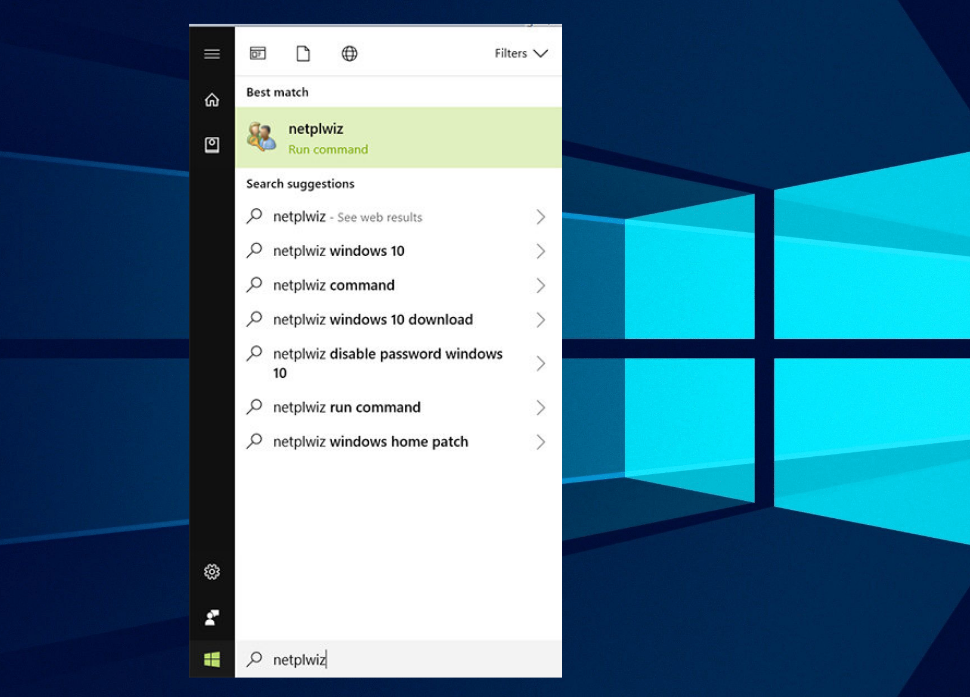
- Left-click the Start button, type netplwiz in the search box, then select netplwiz from the result to open User Accounts.
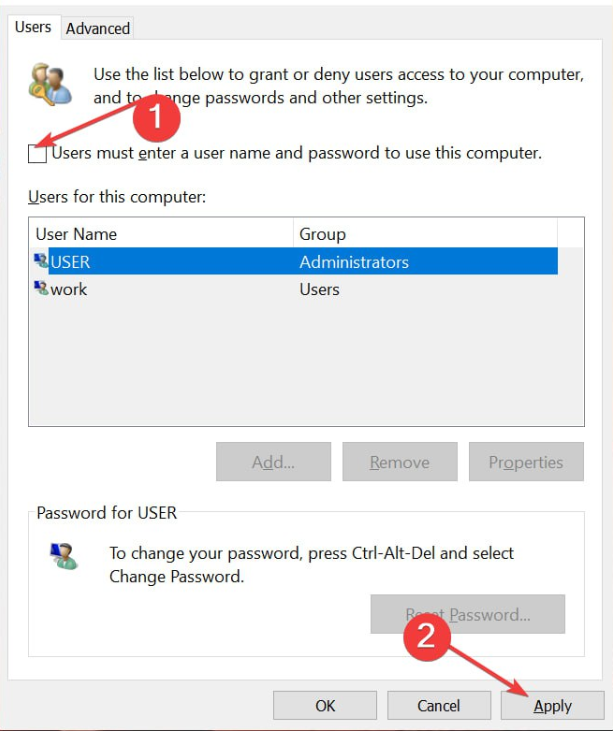
- Uncheck the box for the Users must enter a username and password to use this computer option, then click the Apply button.
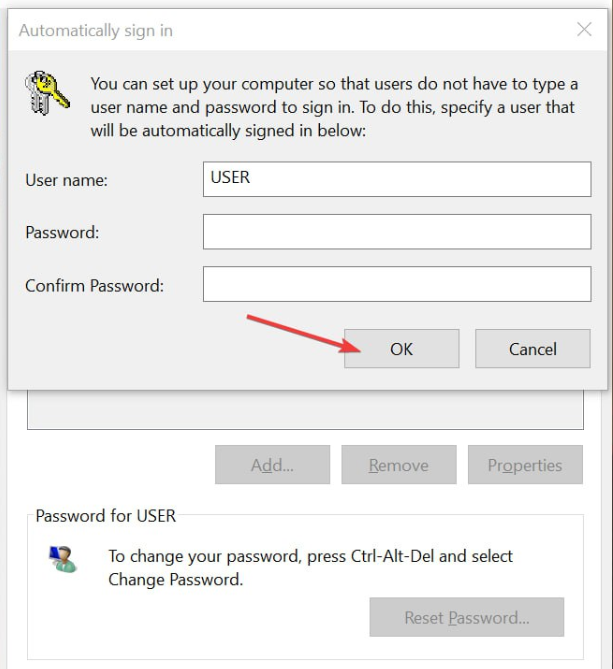
- On the Sign In automatically prompt, enter your Username and Password, then click the OK button.
- Click OK to apply the changes.
- Restart your computer and check if it requires a password before login.
The above steps will disable the password and prevent the system from requiring users to enter a username and password before using the computer.
If there is no checkbox in the netplwiz window, check the link above for detailed steps to get it back.
2. Remove the password from Settings
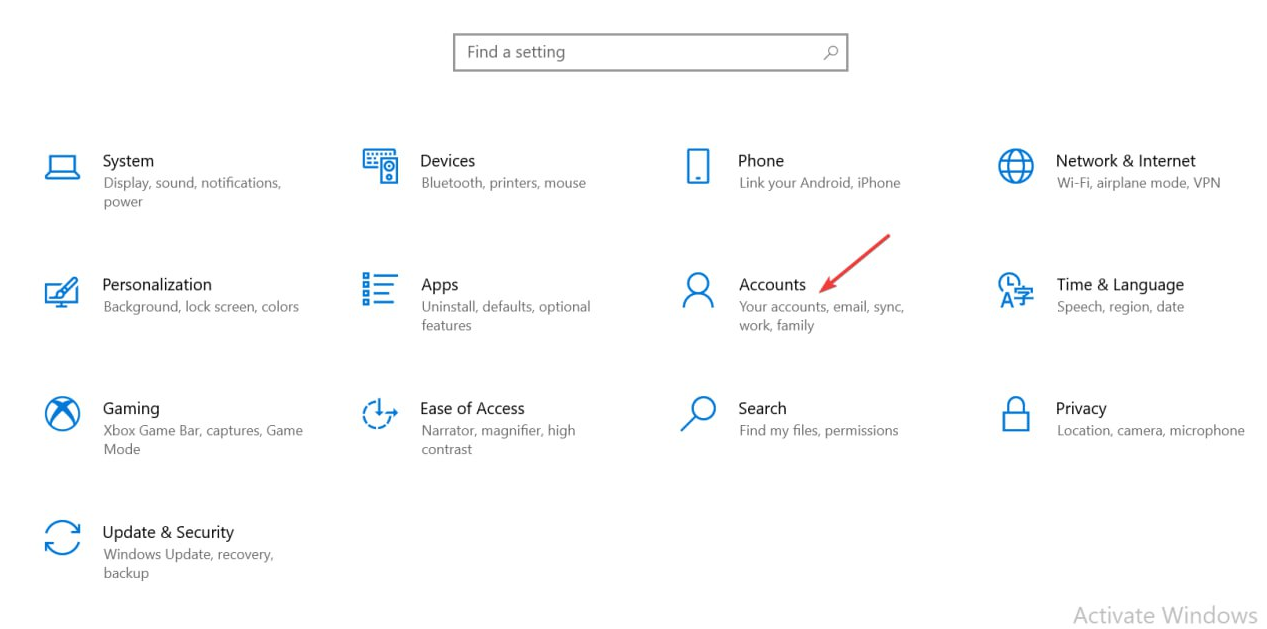
- Press Windows + I key to open the Windows Settings app.
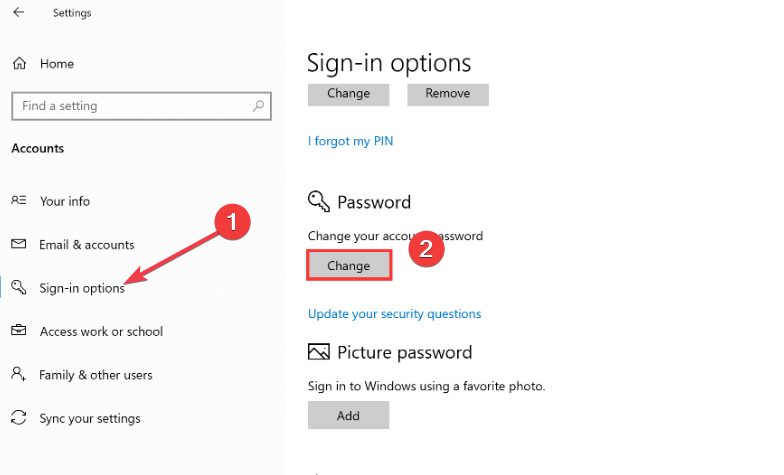
- Click on Accounts and select Sign in options from the left pane.
- Click on Change under the Password section.
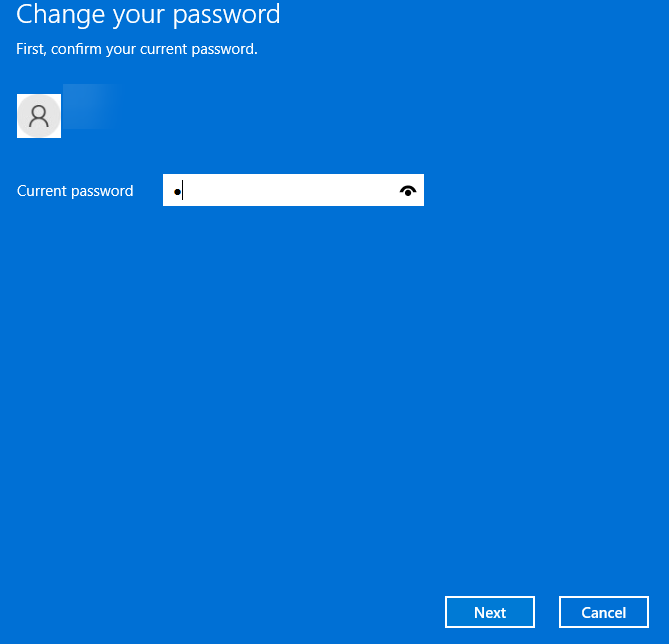
- Enter the current password and click Next.
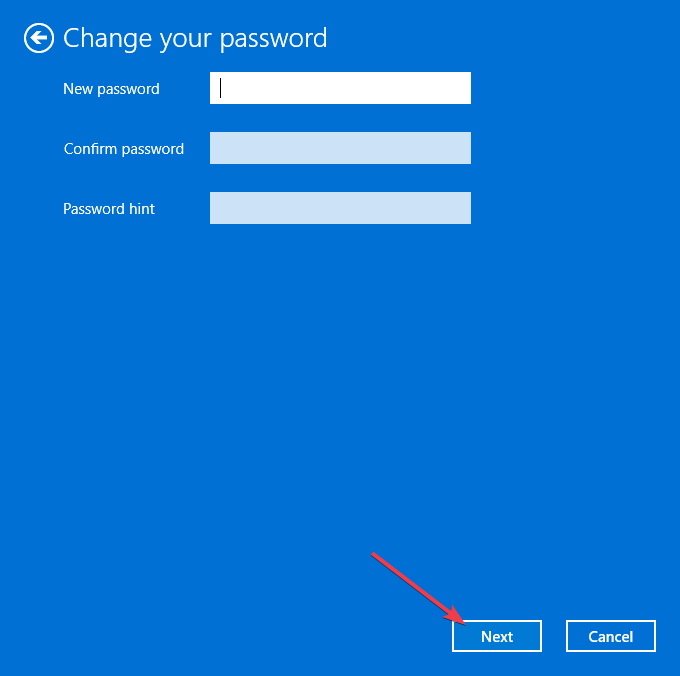
- On the new window to input new passwords, leave all the spaces empty and click Next.
This process will remove the passwords altogether.
3. Remove the password via the Control Panel
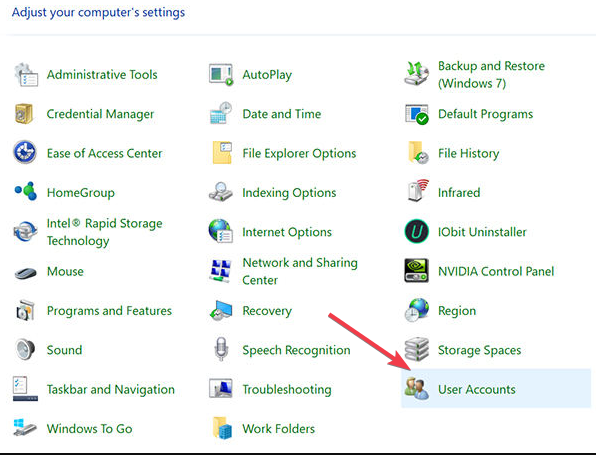
- Left-click the Start button, type control panel, and launch it.
- Select User Account.
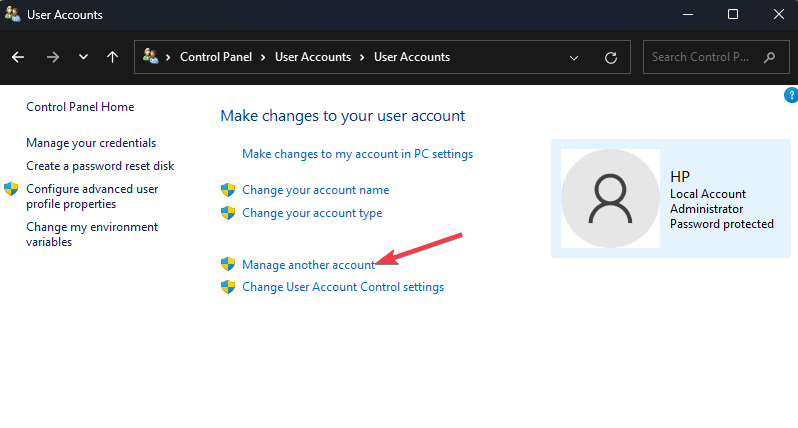
- Then, select Manage another account.
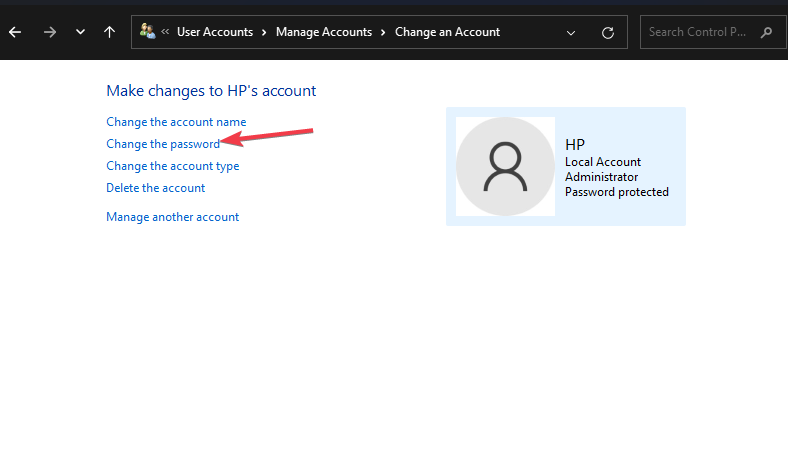
- Now, select the account whose user will be removed from this window.
- Click on the Change the password link.
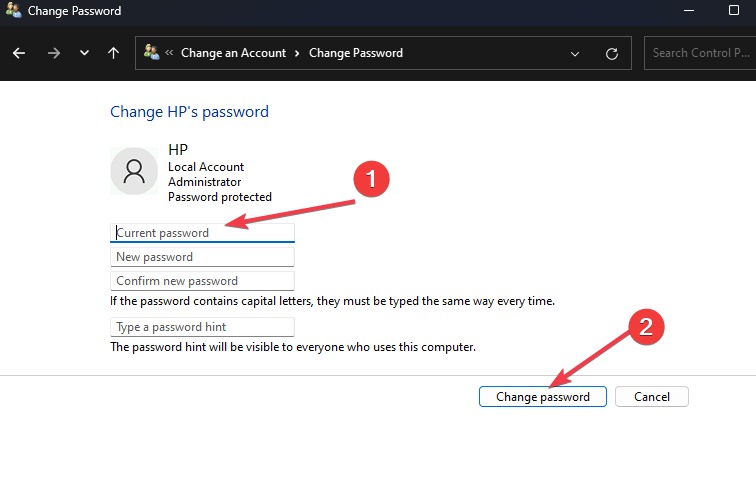
- Input your current password and leave other boxes empty. Then click on Change password.
Similar to the Windows settings, this is an alternative to removing the passwords on a user account.
4. Use the Command Prompt
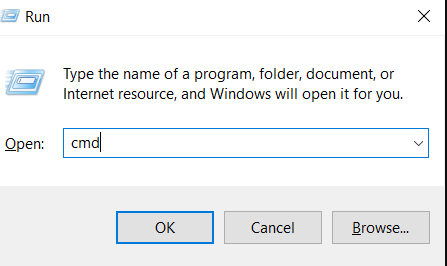
- Press Windows + R keys to open the Run dialog box, type in cmd, and hit Enter.
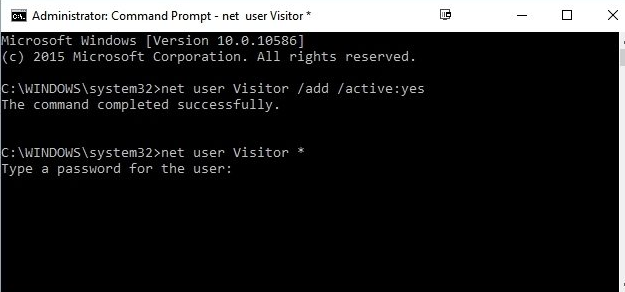
- When the command prompt window opens, type in the following command and press Enter:
net user Administrator * - The system will ask you to provide a new password. Don’t enter anything, and press the Enter key twice.
This process will remove the administrator’s password.
5. Remove using Local Users and Groups
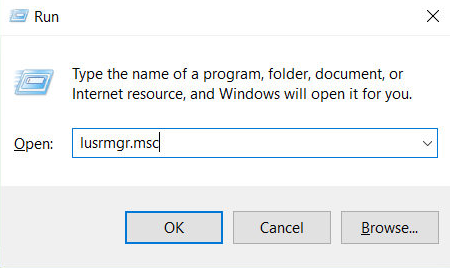
- Press Windows + R keys to open the Run dialog box, type in lusrmgr.msc, and hit Enter.
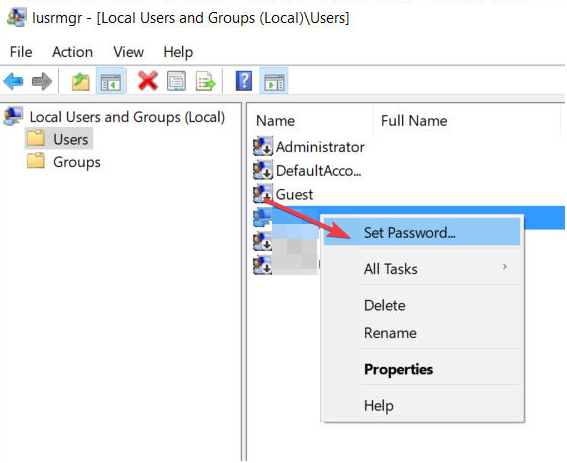
- Now, click on Users, right-click on your user account, and select Set Password.
- Then, select Proceed on the following screen.
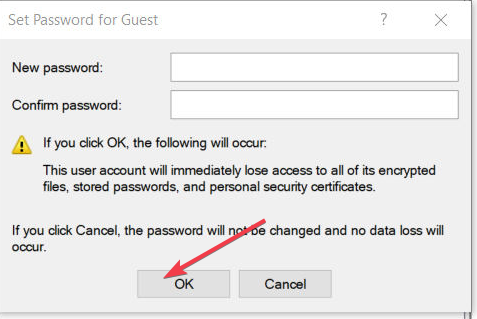
- Leave the fields empty on the following screen and click on OK.
Local Users and Groups is another utility that lets you change your system. Using it will enable you to change or remove your password easily.
This process is the last resort because it will disable the sign-in option altogether. Hence, no need to even set or remove the password.
Alternatively, our readers can check our article on fixing the no login screen issue on Windows PCs.
Also, you may be interested in our comprehensive guide on resolving the Microsoft accounts don’t exist error on your computer.
For further questions or suggestions, kindly drop them in the comments section.





User forum
0 messages