No Login Screen on Windows 11: 6 Solutions to Get it Back
Fix things in no time with our verified solutions
7 min. read
Updated on
Read our disclosure page to find out how can you help Windows Report sustain the editorial team. Read more
Key notes
- After upgrading to Windows 11, several users reported no login screen when turning on the computer.
- It could be due to a bug in the current version, a Windows update kicking in, or a corrupt user account.
- To fix things, update Windows 11 to the latest version, disconnect peripherals, or disable login passwords, amongst other solutions.
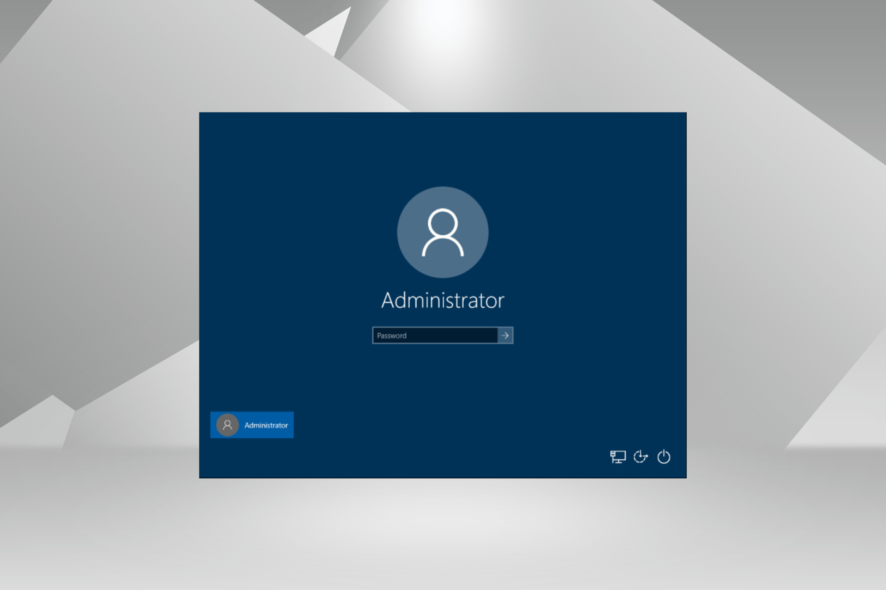
Windows 11 is the latest iteration from Microsoft and one of the most refined. It offers a complete revamp for most aspects, exciting features, and a user-friendly interface. But, many users reported no login screen in Windows 11.
This could be after you power on the computer from sleep/hibernation or after a complete shutdown. So, let’s find out all about why the Windows login screen is not showing and the solutions for it.
Why does my computer not show the login screen?
Here are some of the reasons Windows won’t show a login screen:
- A bug in the OS – In most cases, it was a bug in the installed version of Windows 11. Since the iteration is relatively new, there might be such issues.
- Windows Update in process – Some users reported that Windows ran updates as soon as the computer was turned on, and as a result, Windows starts but there’s no login screen. Instead, users see a black screen for a few minutes.
- Fast startup – The feature, though meant to reduce the boot time, can sometimes conflict with the boot process. Due to this, you can’t login in Windows 11.
- Corrupt user profile – If a Windows 11 local account is not showing on the login screen, the user profile could be corrupt.
How do I fix the no login screen error on Windows 11?
 NOTE
NOTE
Before we head to the slightly complex solutions, here are a few quick ones you can try:
- Press Ctrl + Alt + Del on the login screen in Windows 11 to refresh the interface.
- Hold the power button to turn off the computer and then turn it on.
- Check for any available Windows updates and install them.
- Disconnect all non-critical devices and peripherals from the PC—for instance, the printer, speaker, and headphones, amongst others.
If these don’t work, the fixes listed below surely would:
1. Disable Login Password
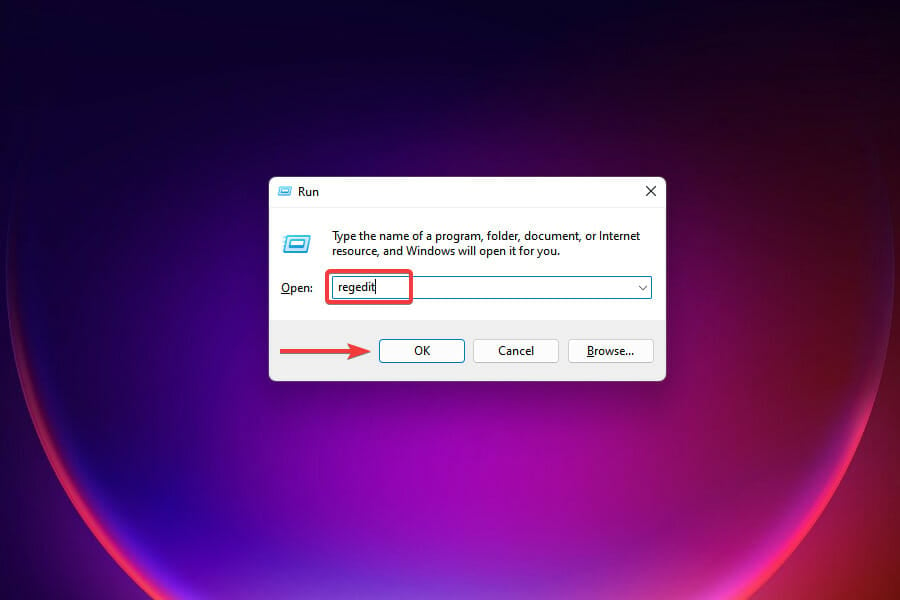
- Press Windows + R to open Run, enter regedit in the text field, and then click OK.
- Click Yes on the UAC prompt that appears.
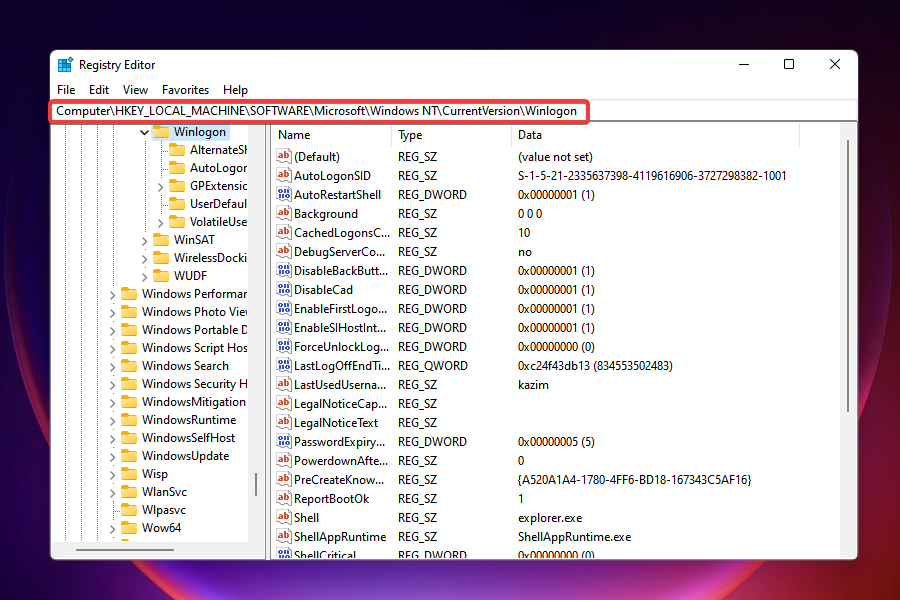
- Next, navigate to the following path or paste it into the address bar at the top and hit Enter.
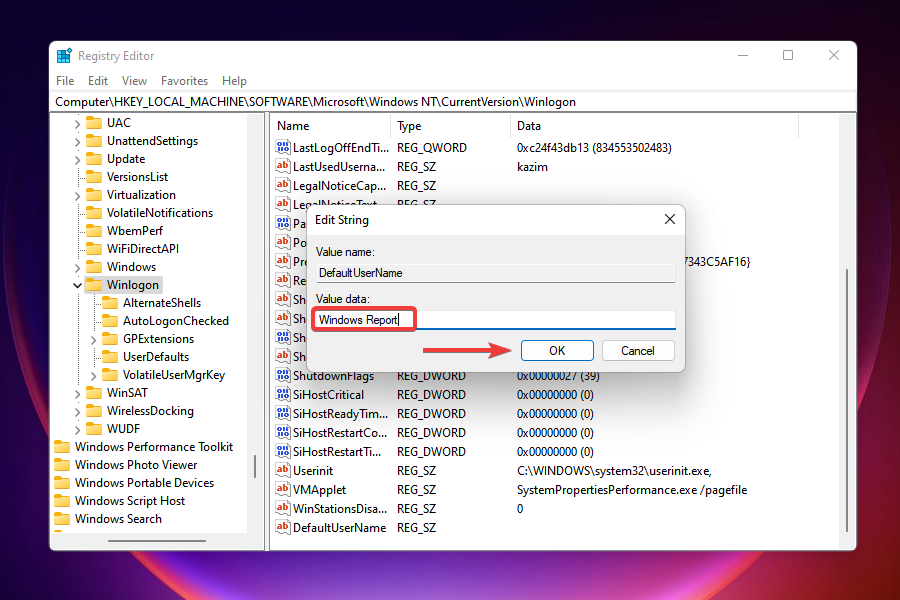
Computer\HKEY_LOCAL_MACHINE\SOFTWARE\Microsoft\Windows NT\CurrentVersion\Winlogon - Check if there is a DefaultUserName string present.
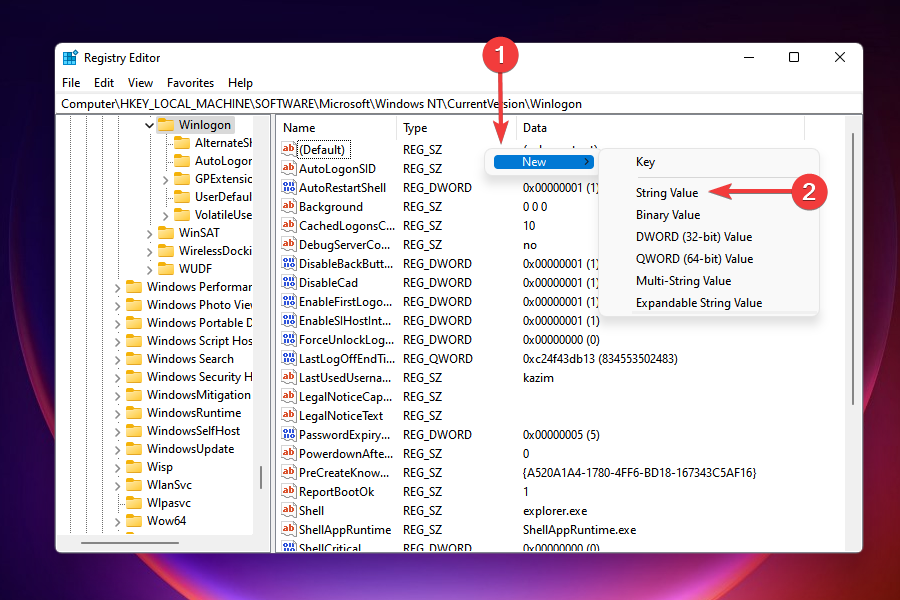
- If you can’t find one, right-click on the empty space, hover the cursor over New, select String Value from the context menu, and name it DefaultUserName.
- Double-click on the string, enter your account username under Value data, and click on OK to save the changes.
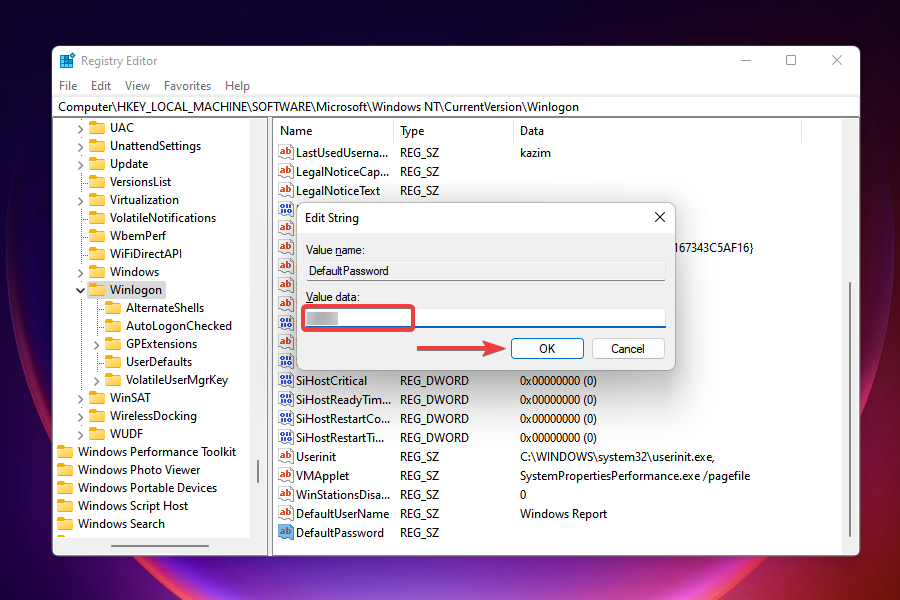
- Create another string value and name it DefaultPassword.
- Double-click on it, enter your account password under Value data, and click on OK to save the changes.
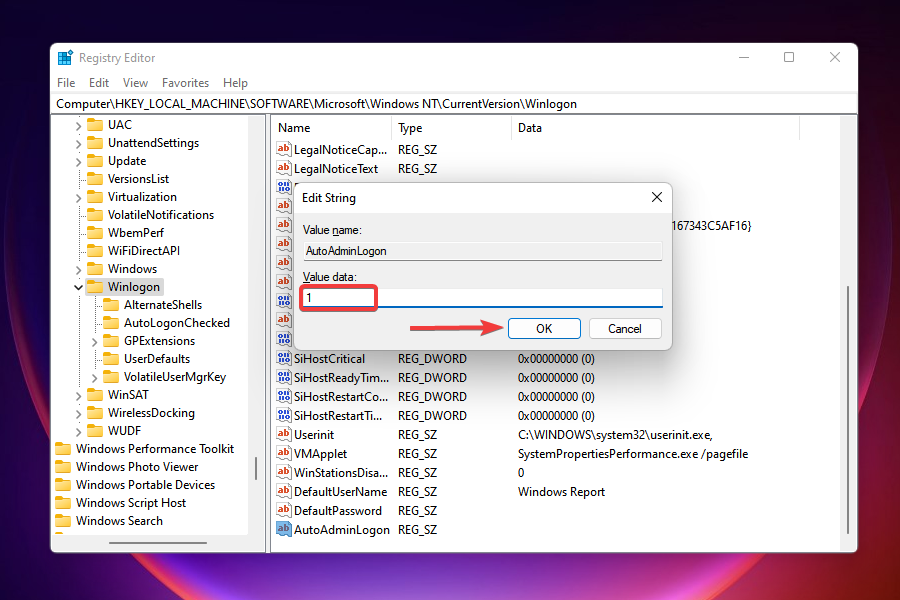
- Check if there is a AutoAdminLogon string present. In case there isn’t one, create it as discussed earlier.
- Double-click on the string and enter 1 under Value data.
- Close the Registry Editor.
You aren’t required to enter the password every time the computer is turned on. Instead, the sign-in will be automatic. This will fix things when you can’t login with a password in Windows 11.
Also, you can permanently delete the three strings if you want Windows 11 to ask for the password when signing in. Just in case, check out our guide on removing the login password in Windows 11.
2. Modify the registry
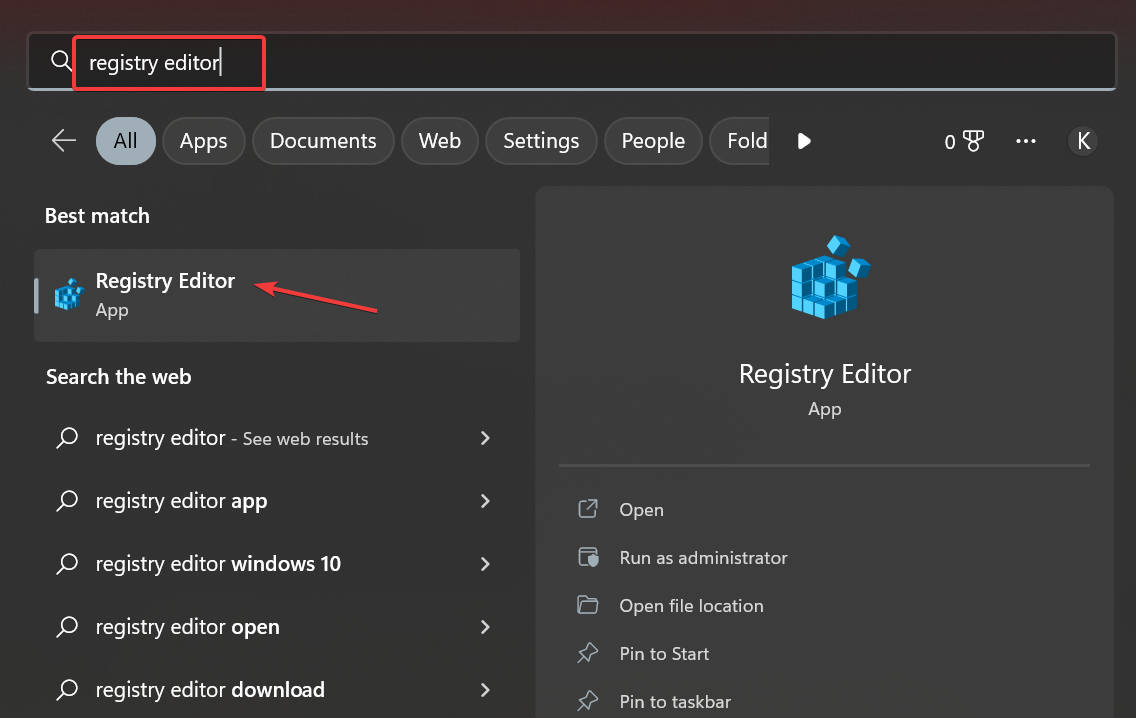
- Press Windows + S to open Search, type Registry Editor in the text field, and click on the relevant search result.
- Click Yes in the UAC prompt that appears.
- Now, paste the following path in the address bar and hit Enter:
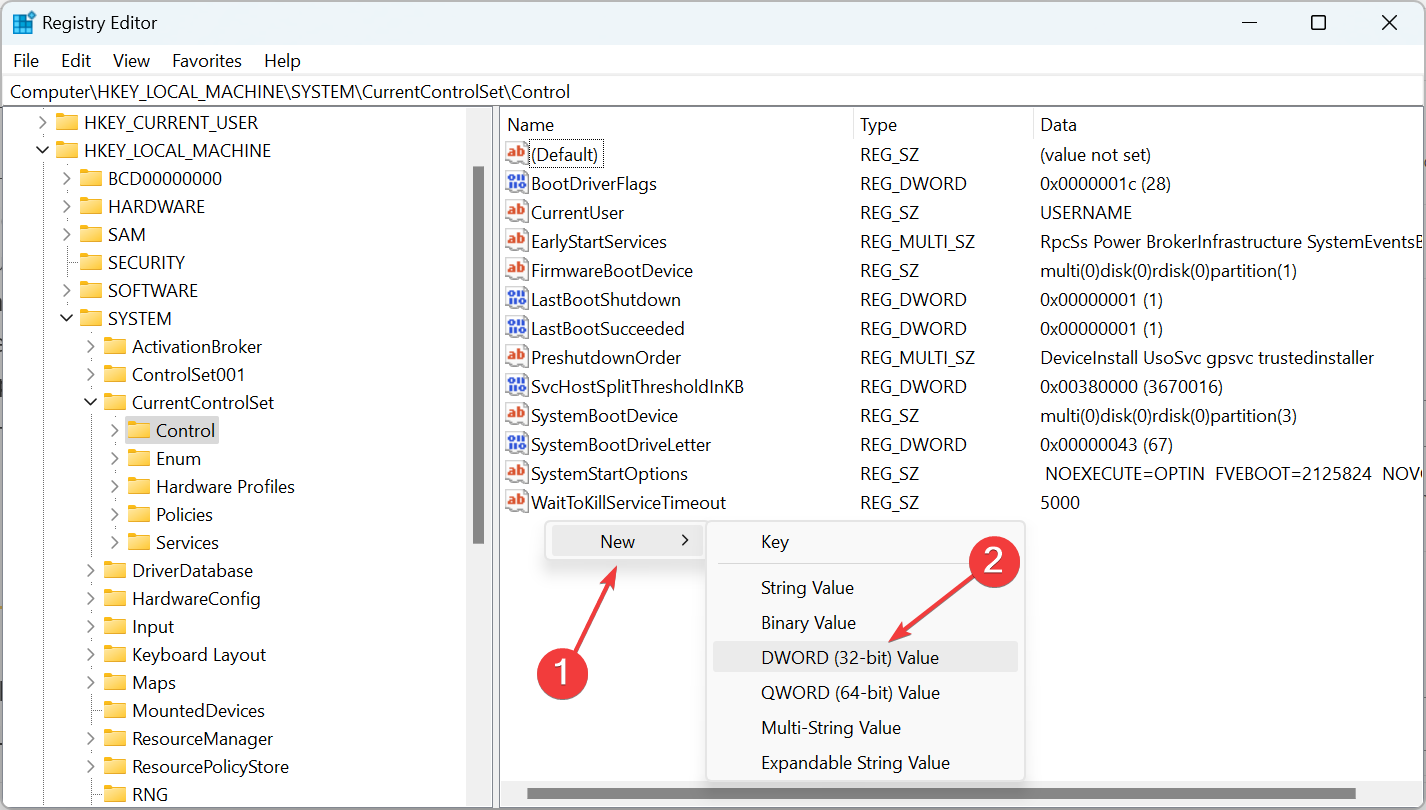
Computer\HKEY_LOCAL_MACHINE\SYSTEM\CurrentControlSet\Control - Now, right-click on the empty portion, hover the cursor over New, select DWORD (32-bit) Value, and then name it AutoStartDelay.
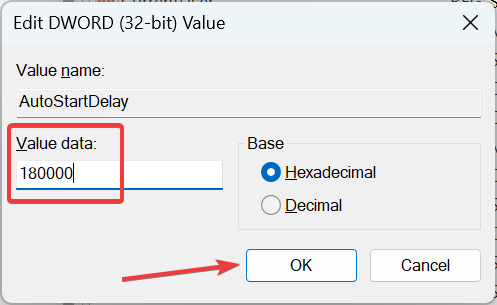
- Enter 180000 under Value data, and click OK to save the changes.
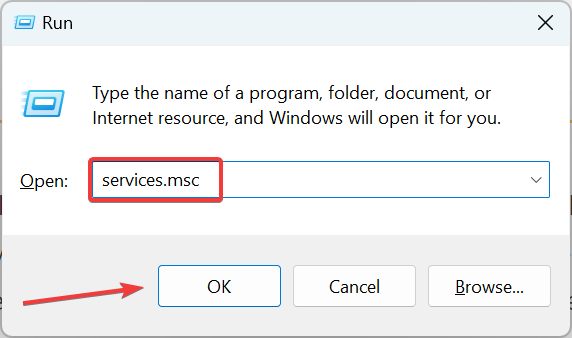
- Now, press Windows + R to open Run, type services.msc, and click OK.
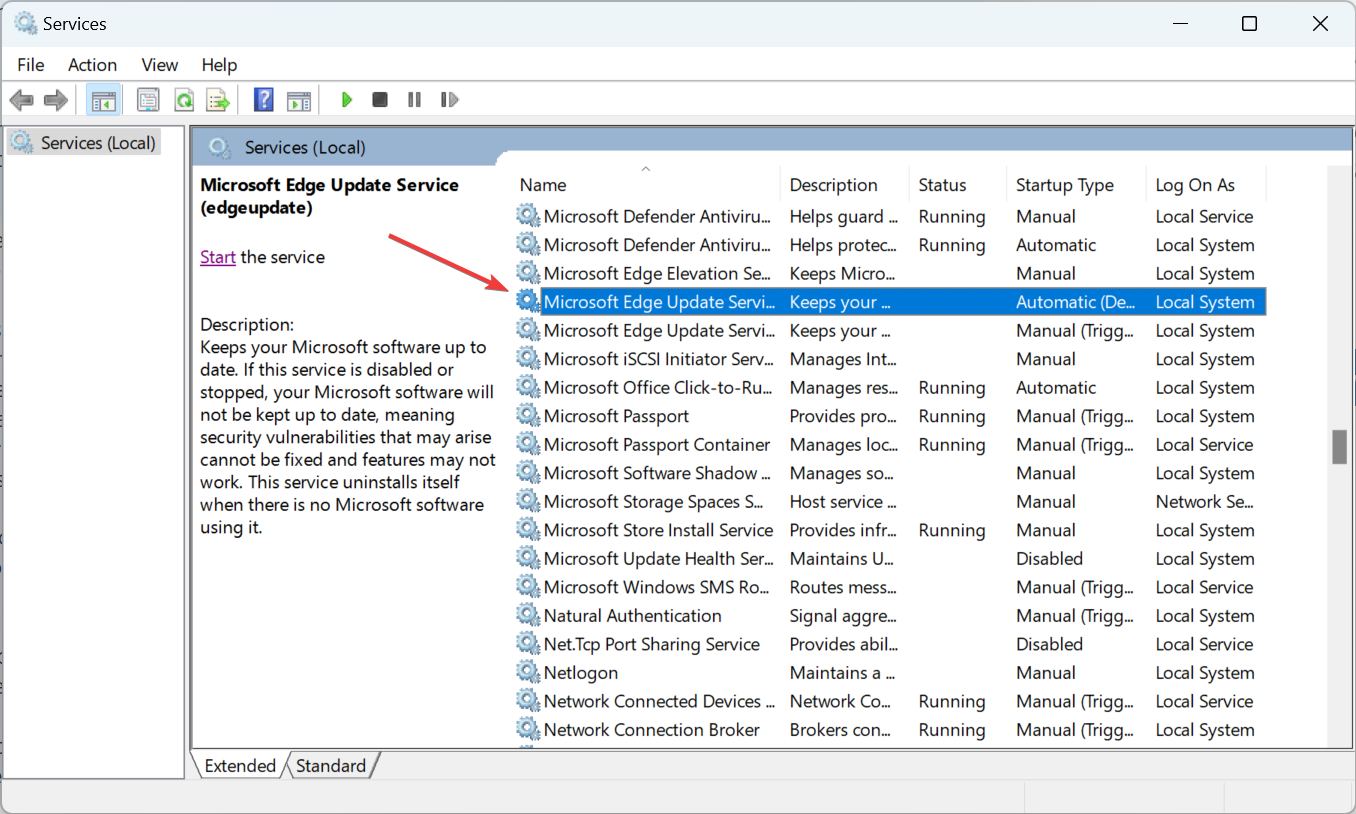
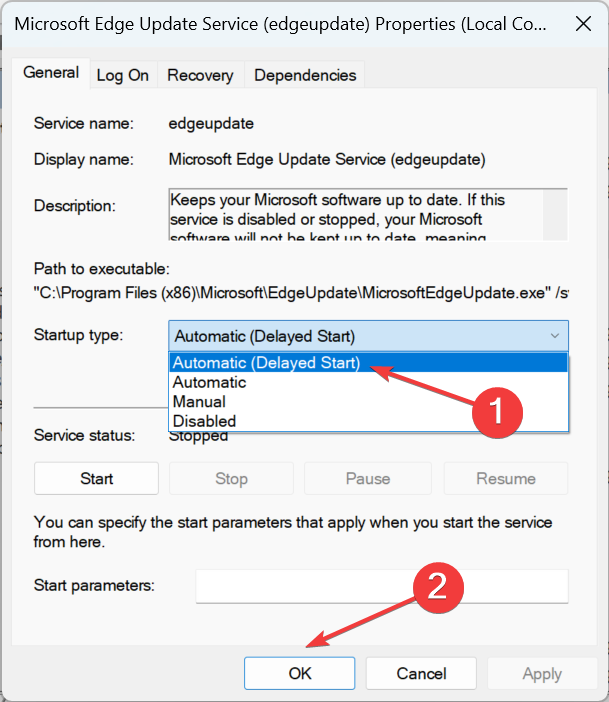
- Double-click on the Microsoft Edge Update Service to open its properties.
- Choose Automatic (Delayed Start) or Manual from the Startup type dropdown menu, and click OK to save the changes.
- Once done, restart the computer for the changes to come into effect.
3. Perform a Startup Repair
 NOTE
NOTE
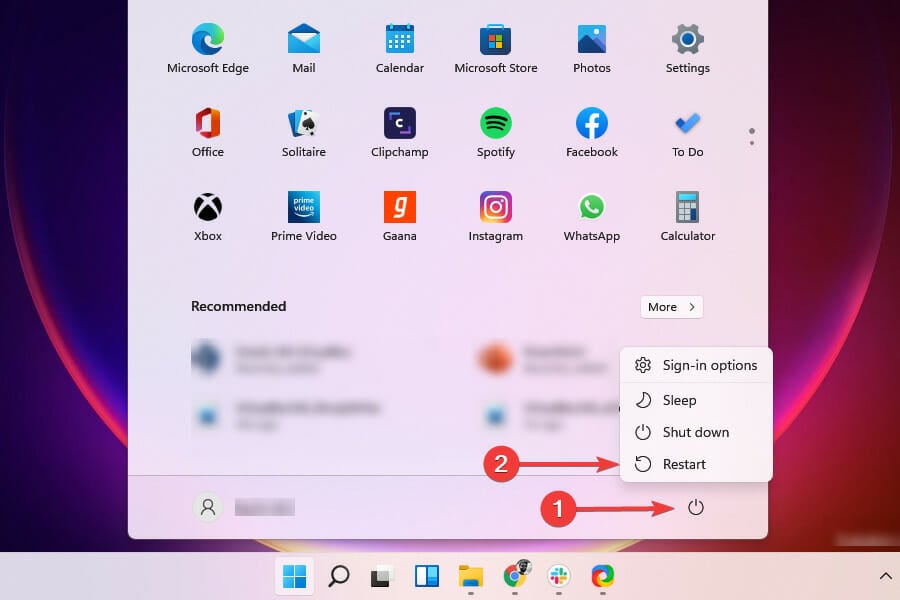
- Press Windows to launch the Start menu, click on the Power button, press and hold the Shift key, and choose Restart.
- Your system will now enter the Windows RE (Recovery Environment).
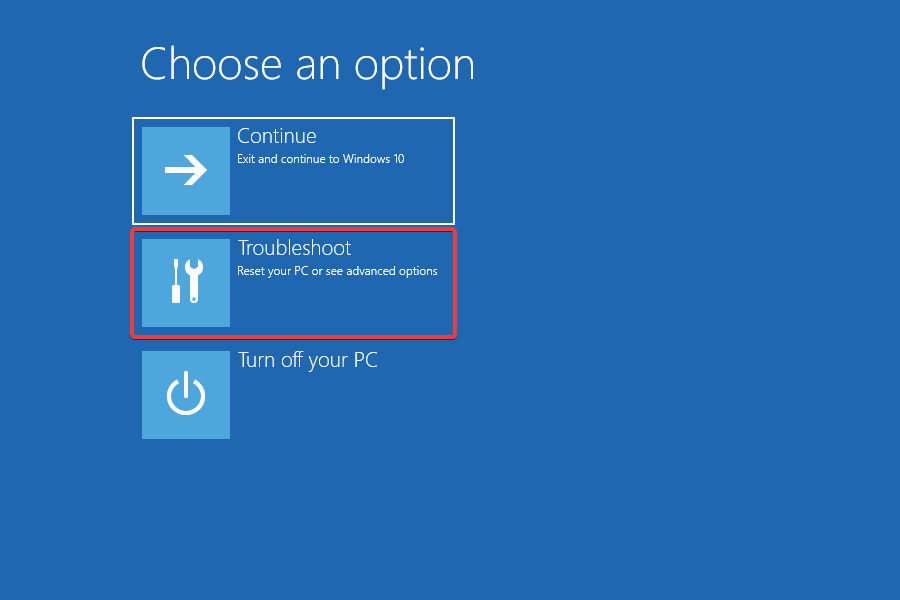
- Click on Troubleshoot.
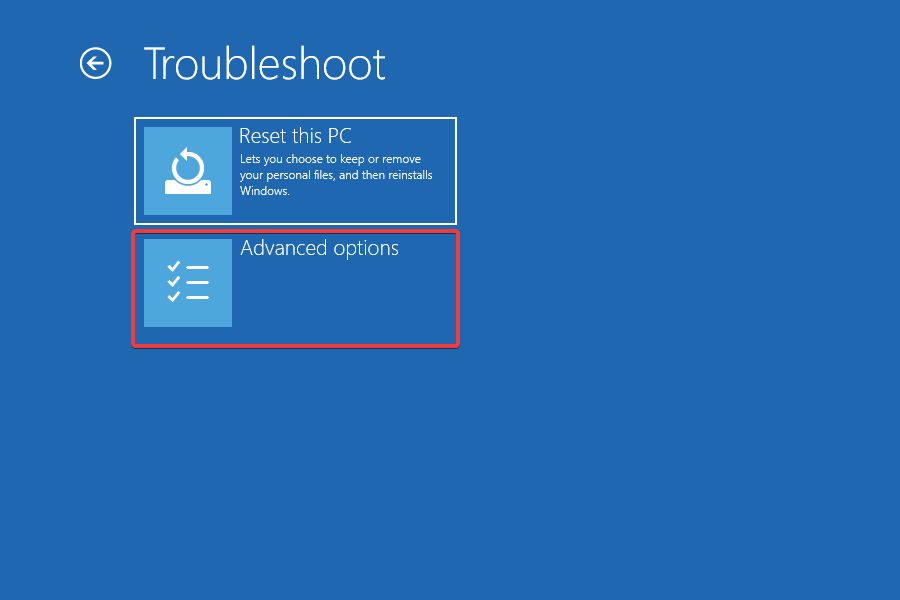
- Select Advanced options.
- Click on Startup Repair.
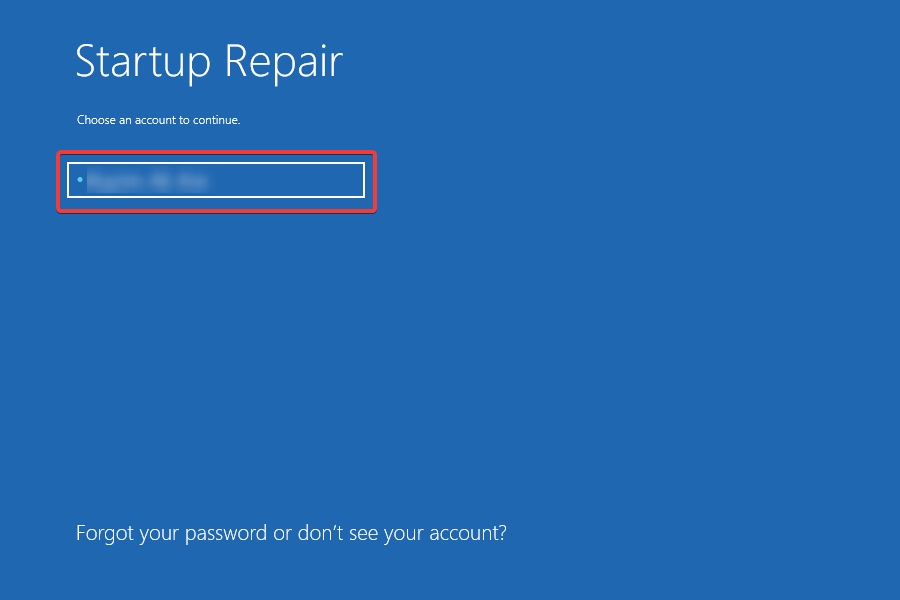
- Choose an account to proceed.
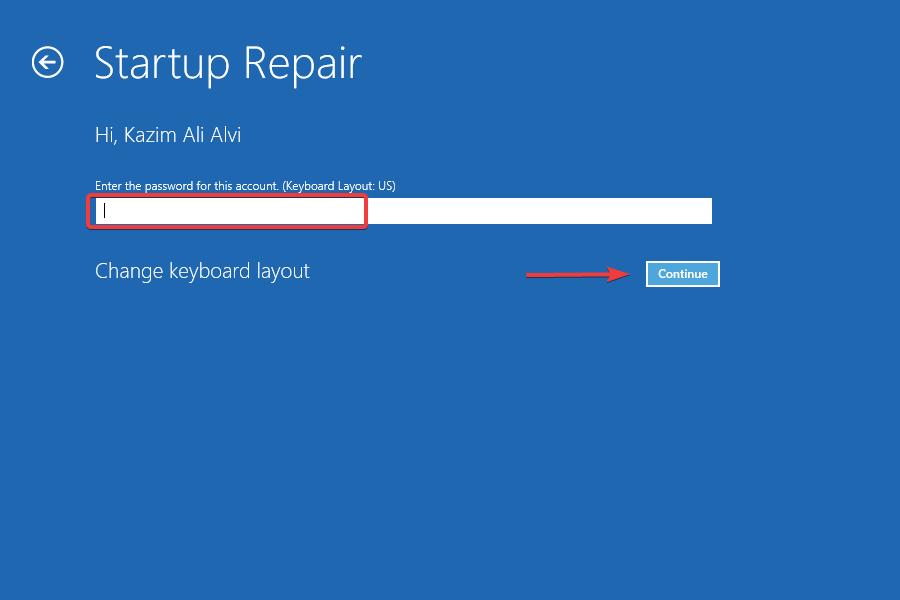
- Enter the password and click on Continue to initiate the Startup Repair.
- The repair process should begin in a few moments.
Startup repair is a built-in utility that allows users to run a scan and fix the problems preventing Windows from booting, and this should fix things if there’s no login screen in Windows 11.
4. Reinstall Windows 11
If nothing has worked, the only option that worked for others is to reinstall Windows 11. All you have to do is create a bootable drive and choose it when turning on the computer.
This primarily works when there are issues with the computer but can’t be fixed by either Startup Repair or an SFC scan. By the time you have successfully reinstalled Windows 11, the login screen should appear, if it did not earlier.
5. Create a new user account
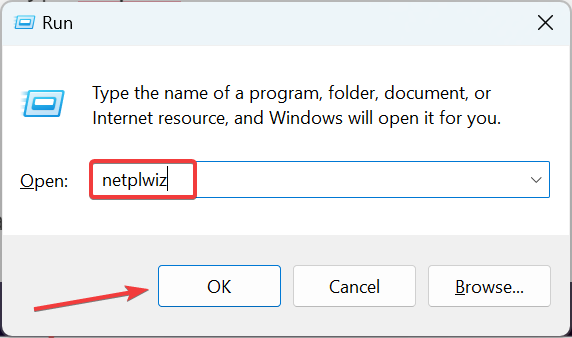
- Press Windows + R to open Run, type netplwiz, and hit Enter.
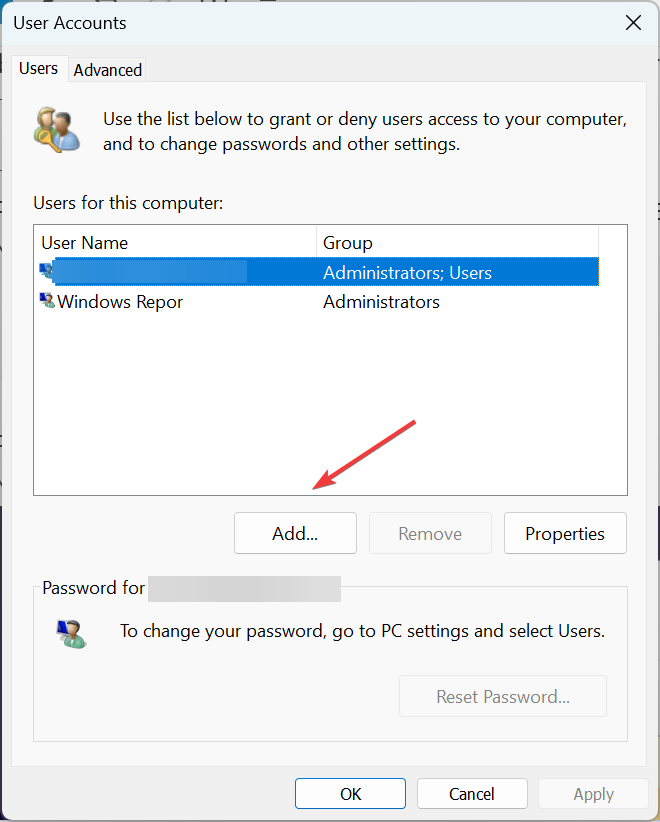
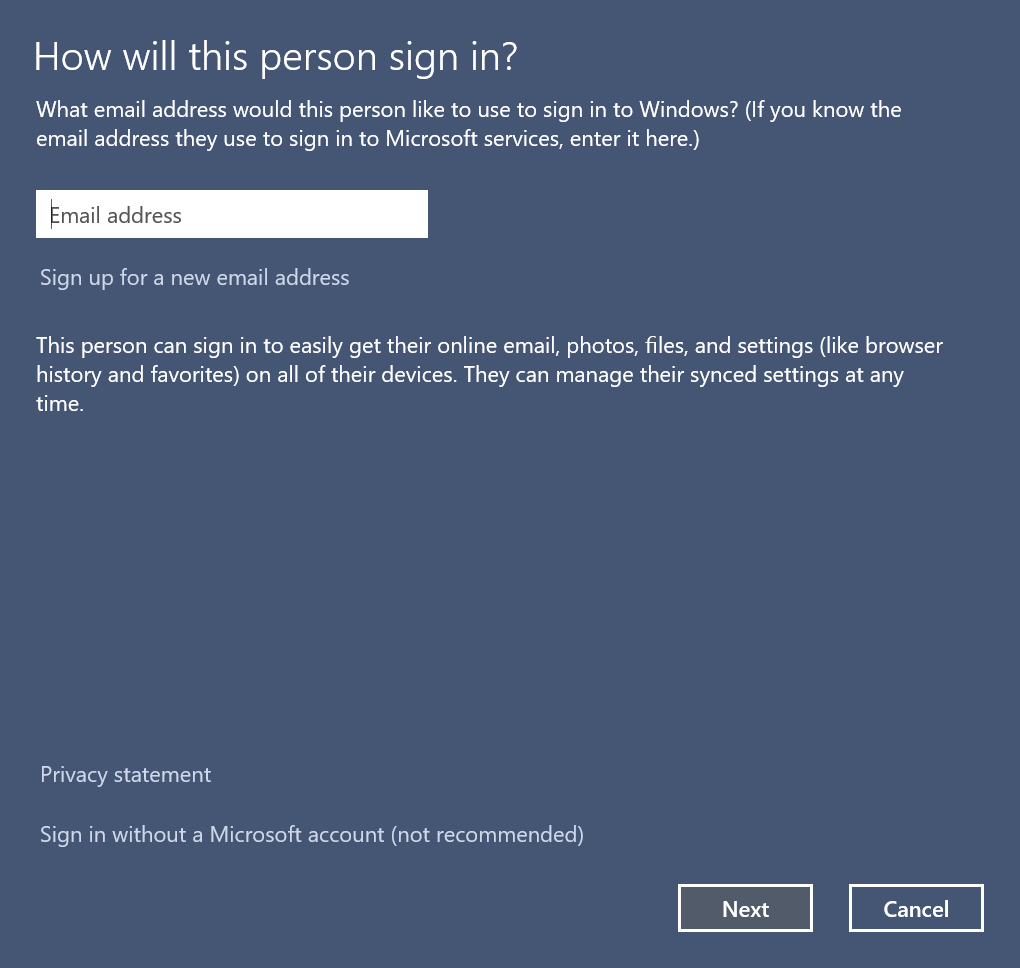
- Now, click on the Add button.
- Enter a Microsoft-linked address in the text field, and proceed with the on-screen instructions.
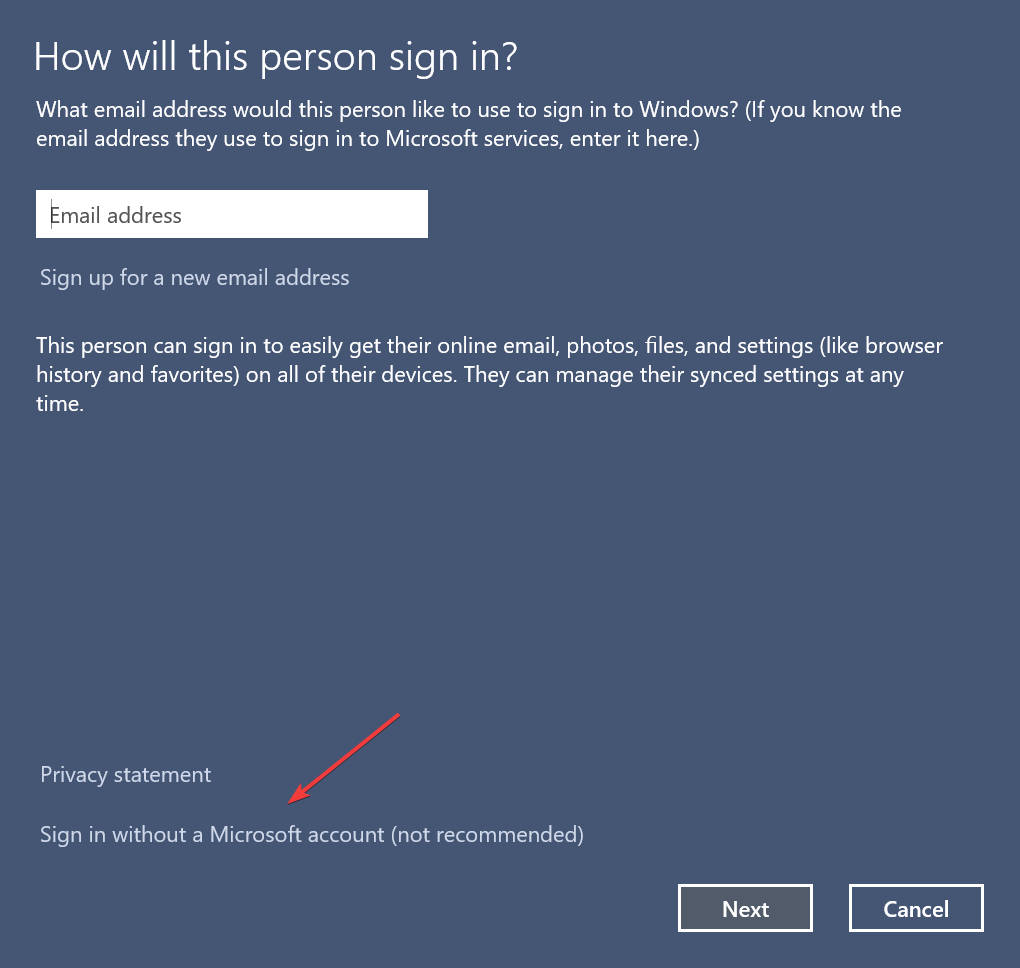
- You can create a local account by clicking on Sign in without a Microsoft account (not recommended).
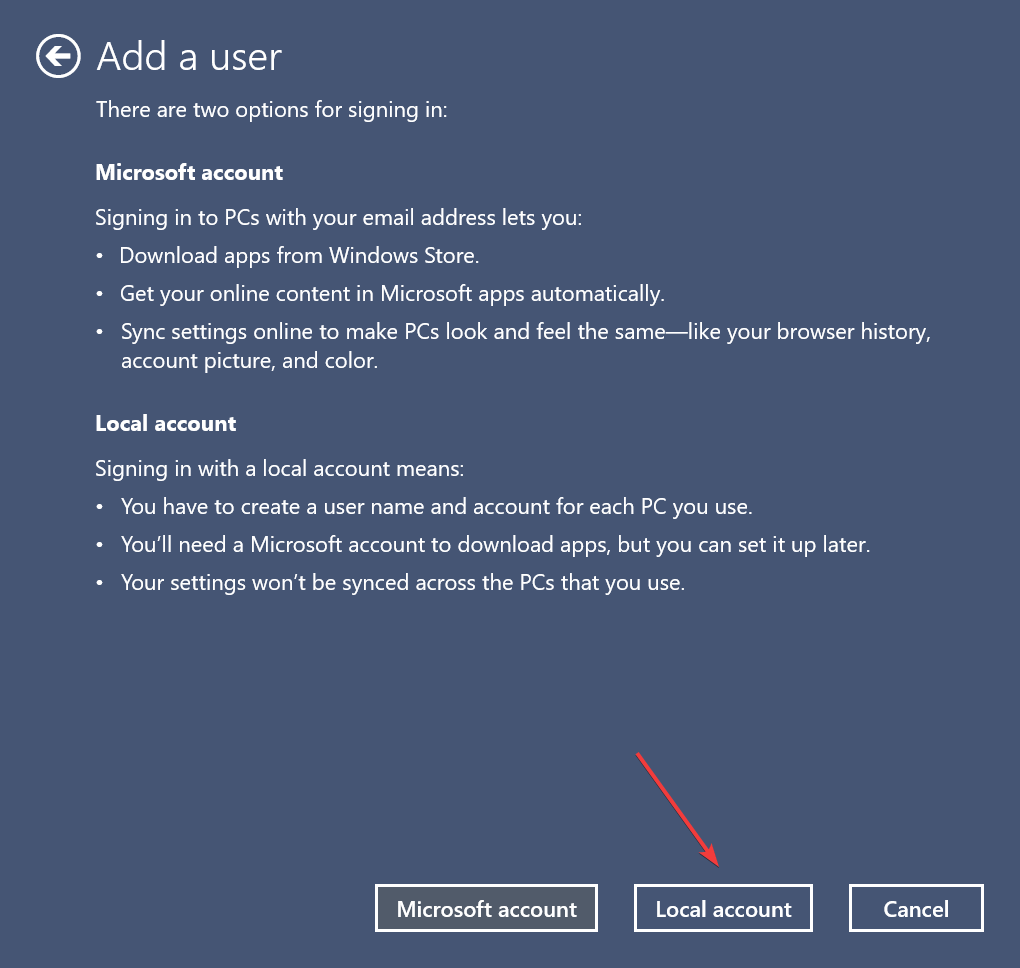
- Next, click on Local Account.
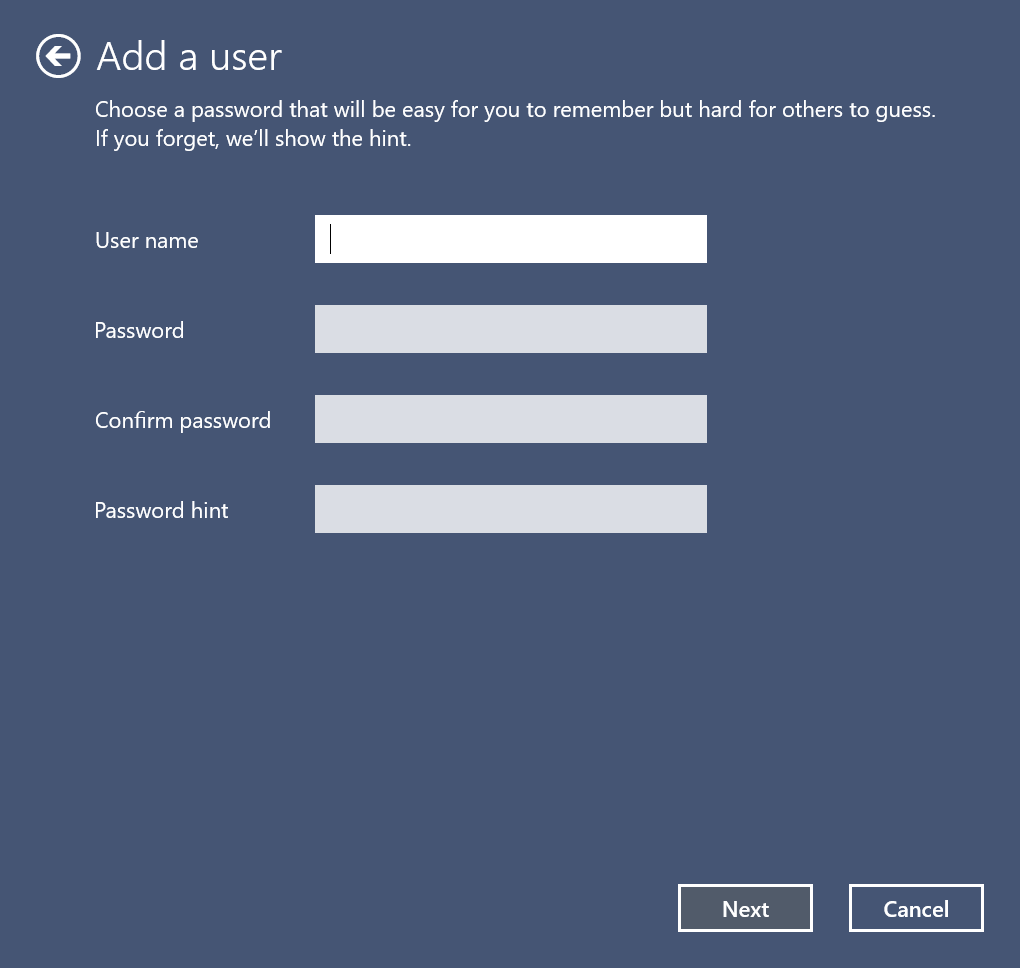
- Fill out the various fields here, and proceed with the account creation process.
If a particular account is not showing up on the login screen in Windows 11, it could be corrupt. To verify the same, create a local account, and check if it’s listed. If this works, move the data from the problematic account to the new one, if possible.
6. Perform a system restore
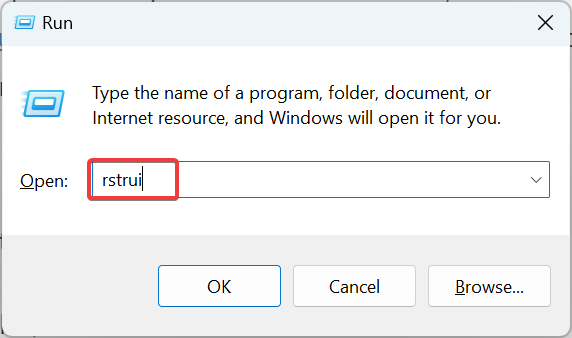
- Press Windows + R to open Run, type rstrui, and hit Enter.
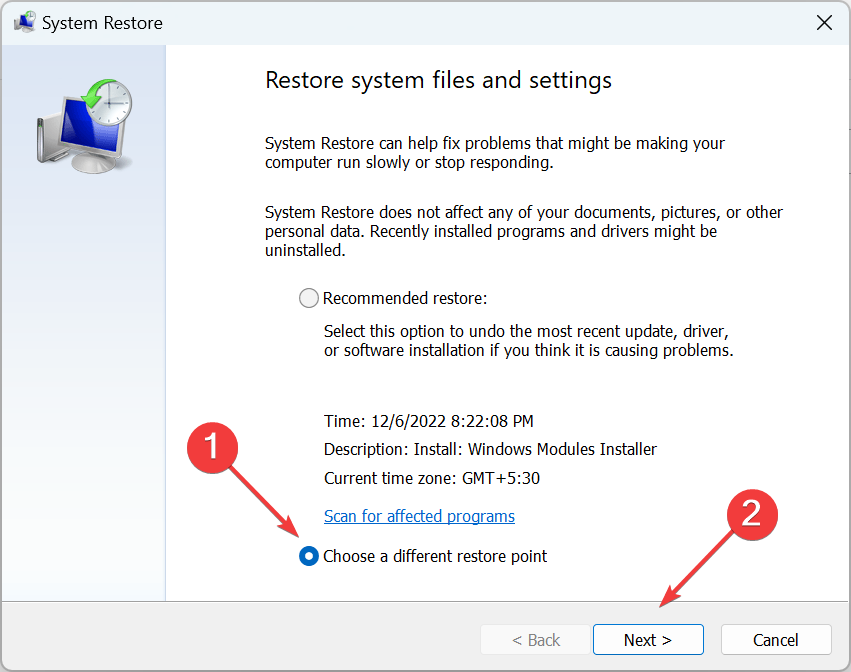
- Select Choose a different restore point, and click on Next to proceed.
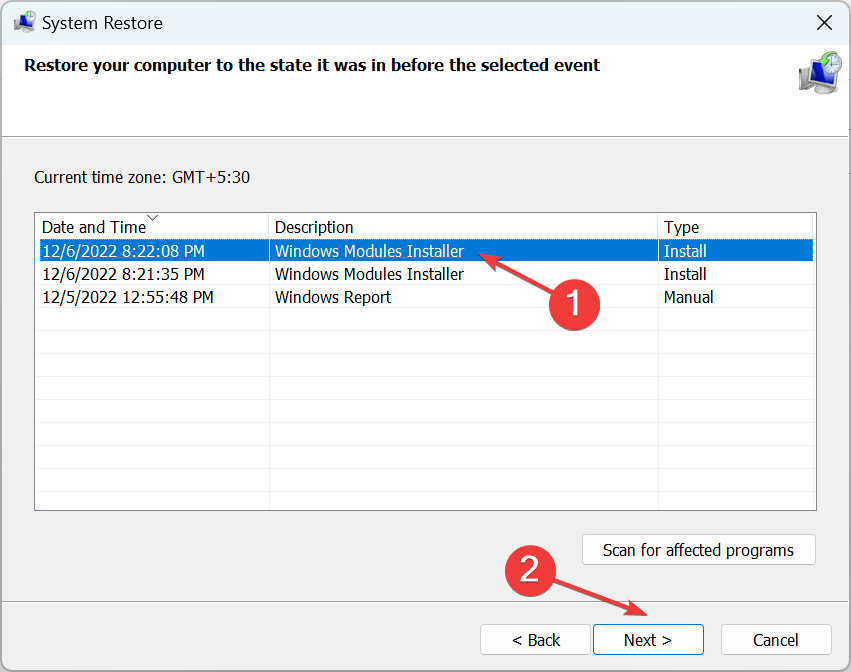
- Choose a restore point from the list, and click on Next.
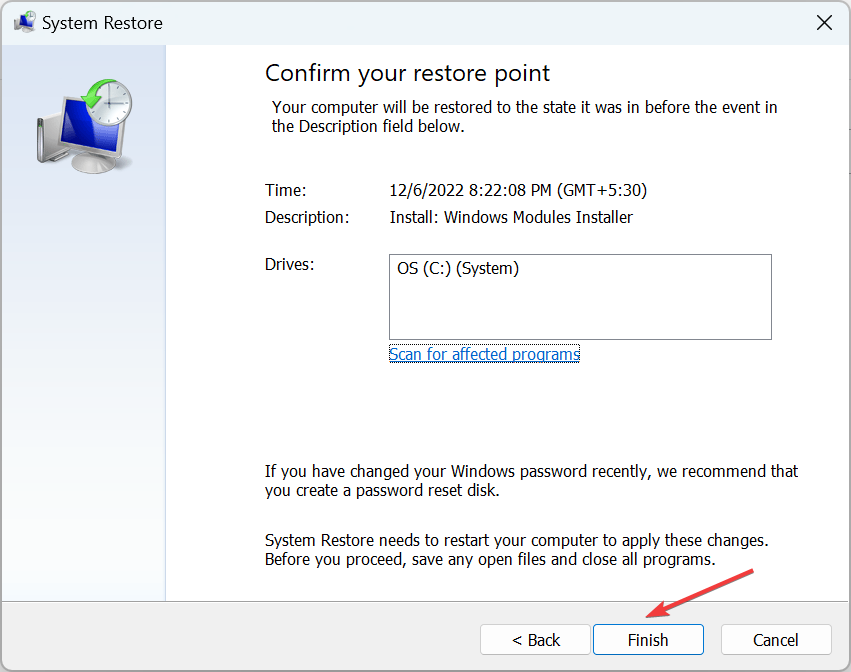
- Now, click on Finish to start the restore process.
Whenever you encounter an error on Windows, and the fixes don’t seem to work, a simple trick is to perform a system restore, and it should fix things where there’s no login screen in Windows 11.
You can also perform a system restore by using a specialized tool as it can complete this process in a simpler and safer way.
How can I prevent the no login screen error from reoccurring?
You can employ specific measures that will prevent the no login screen error and boost your computer’s performance.
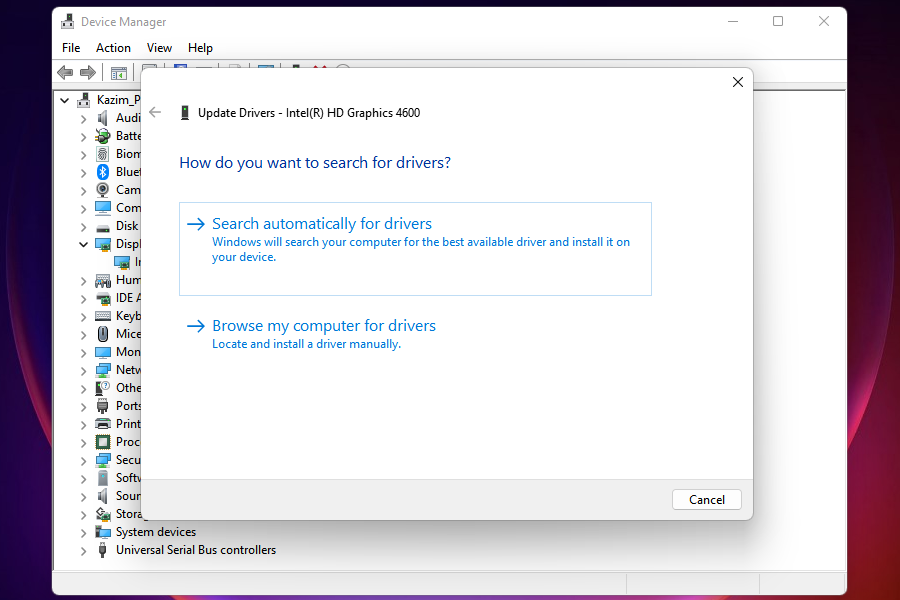
You must first update the drivers on Windows 11. Outdated drivers are likely to cause a bunch of issues. We recommend using Outbyte Driver Updater, a reliable tool that scans for updates and keeps the installed drivers up-to-date.
Another rule you must follow is to shut down your computer after each session. When you shut down the computer, it gives a break to the various components, and they start fresh when you turn on the PC.
Malware disguised as applications and tools is also known to cause many errors. So, using an excellent antivirus to secure your system would be best.
Before you leave, find out how to configure auto-login in Windows 11 and eliminate such errors.
Let us know your experience in the comments section below.



User forum
0 messages