How to Reset The TCP/IP Stack on Windows 11
You can use commands via PowerShell or CMD to reset TCP/IP
Key notes
- TCP/IP (Transmission Control Protocol/Internet Protocol) on Windows 11 deals with the interconnecting process between network devices on the internet.
- Resetting the TCP/IP Stack rewrites the registry and resets your computer’s Internet Protocol to default.
- You may reset the TCP/IP Stack on Windows 11 via the Command Prompt and PowerShell.

Many protocols and services are responsible for the communication between your computer and other destinations or devices on the internet. The TCP/IP (Transmission Control Protocol/Internet Protocol) is one of the essential elements.
However, it can get corrupted or encounter other network issues, causing you to reset TCP/IP Stack on Windows 11.
What does Reset TCP/IP Stack mean?
TCP/IP (Transmission Control Protocol/Internet Protocol) is a suite of communication protocols that controls how digital information is broken into packets. It is responsible for interconnecting network devices on the internet.
Also, it ensures packets are properly routed between your computer and its destinations. Furthermore, the Stack lodges these TCP/IP protocols.
The TCP/IP Stack processes data through layers and defines the interconnection between the Internet & other networks functions.
Sometimes, you may run into problems with the network connection on your PC if your packet size is larger than required. A quick change in your MTU size or resetting TCP/IP Stack will refactor the network configuration on your PC.
Also, it resets your computer’s Internet Protocol to default and fixes network issues on Windows 11.
Once your TCP/IP Stack is restored, you can further enhance network stability and speed by using the TCP Optimizer tool. It automatically refines your Internet settings for better connection quality and lower latency on Windows 11.
How can I reset TCP/IP Stack on Windows 11?
1. Use Windows PowerShell
- Left-click the Start button, type powershell, and click Run as administrator.
- Click Yes on the User Account Control prompt.
- Then, copy and paste the following lines and press Enter:
netsh int ip reset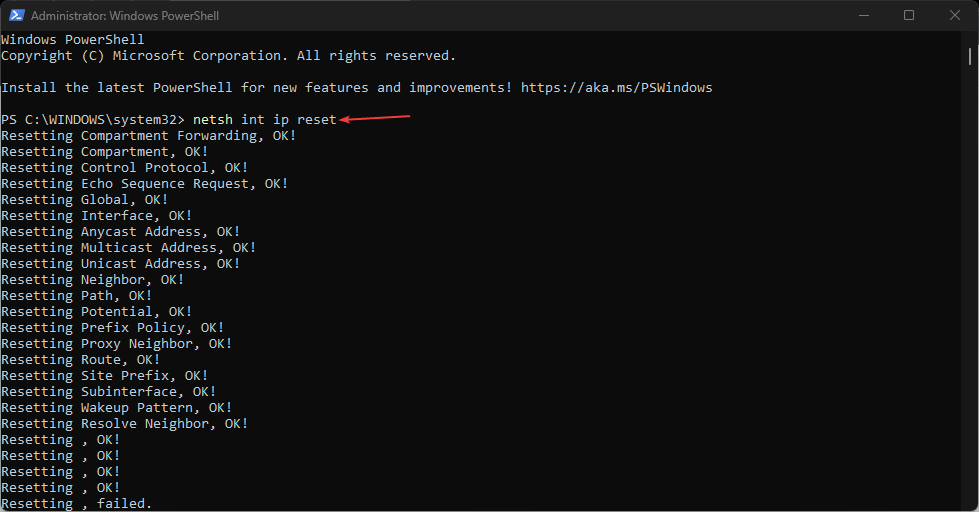
- If you’re using IPv4, type the following command and press the Enter key:
NETSH INT IPV4 RESET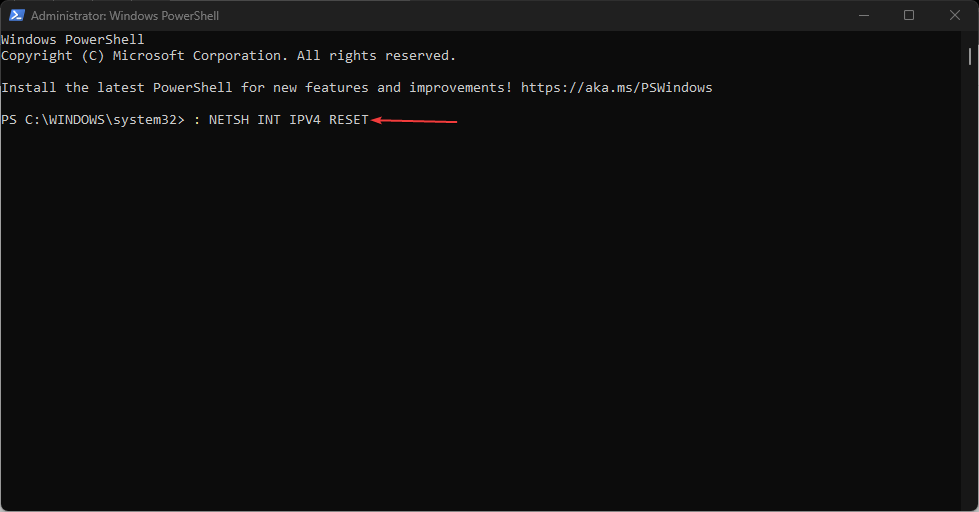
- For IPv6 users, type this command and press the Enter key:
NETSH INT IPV6 RESET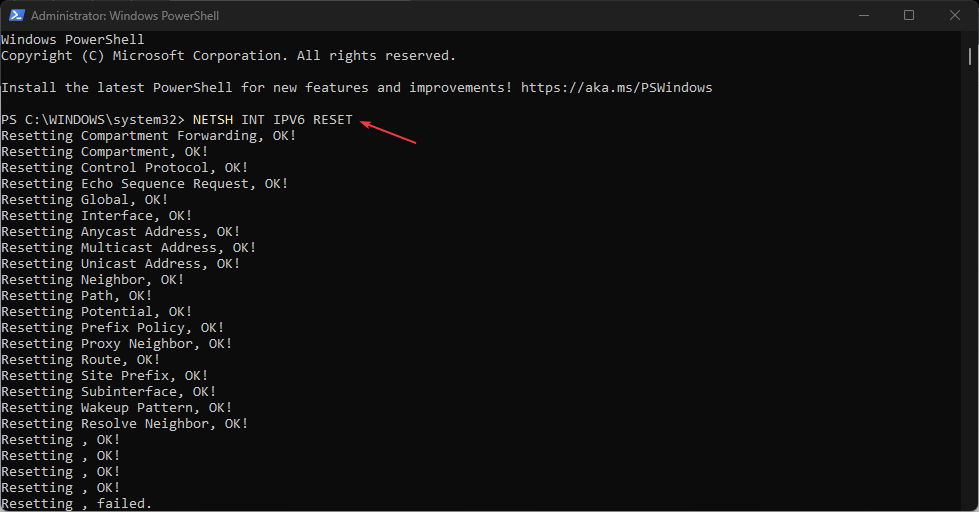
- If the command executes successfully, you should see a repeated result on your screen saying Resetting, OK!
- Then, restart your computer to sync the reset process with your network settings.
The above steps will reset the TCP/IP Stacks on your PC.
2. Reset the TCP/IP Stack via Command Prompt
- Left-click the Start button, type command prompt, and click the Run as administrator option.
- Click Yes on the User Account Control prompt.
- Then, type the following commands and press Enter:
cd\netsh int ip reset c:\resetlog.txt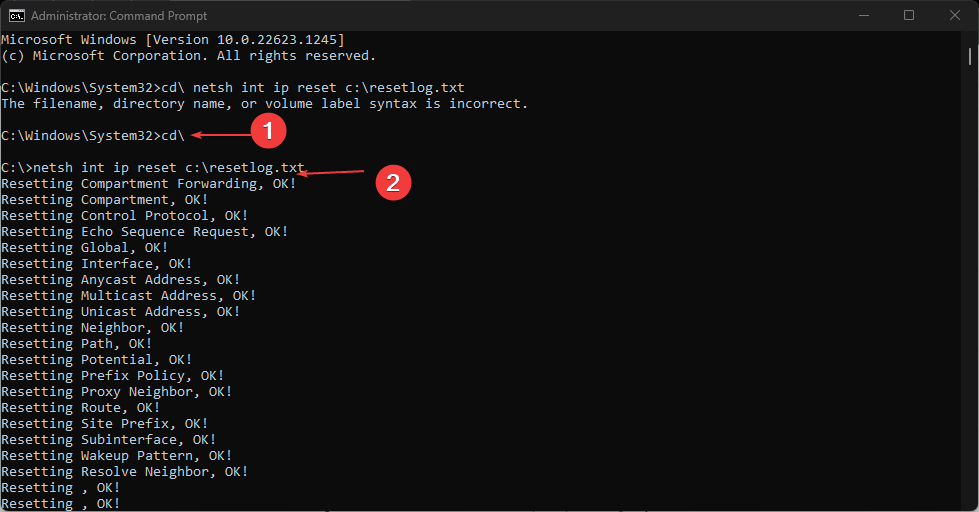
- If you’re using IPv4, type the following command and press the Enter key:
NETSH INT IPV4 RESET
- IPv6 users, type this command and press the Enter key:
NETSH INT IPV6 RESET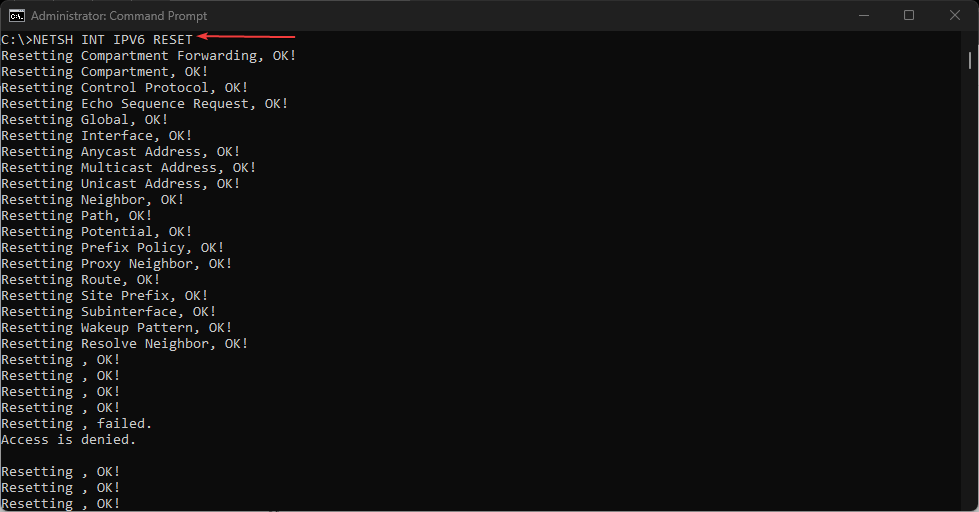
- Close the Command Prompt and restart your PC.
Check our guide on what to do if Command Prompt keeps crashing on your PC.
Our readers may be interested in how to fix the Ethernet doesn’t have a Valid IP Configuration error on Windows 11.
Alternatively, you can check out methods to change the IP address of a domain controller on Windows 11.
Also, we have a detailed guide about slow internet on one computer but fast on another and how to fix it.
In conclusion, this guide should help you easily reset TCP/IP Stack on Windows 11. If you have further questions or suggestions concerning this guide, kindly leave them in the comments section.
Read our disclosure page to find out how can you help Windows Report sustain the editorial team. Read more


Improve this guide


User forum
0 messages