Scanpst.exe: How to Use it for PST File Repair
Everything you need to take advantage of this excellent repair tool
4 min. read
Updated on
Read our disclosure page to find out how can you help Windows Report sustain the editorial team Read more
Key notes
- The Scanpst.exe tool is also known as the Inbox Repair tool for repairing Personal Folders (.pst) files on Outlook.
- This tool is usually located in the root folder of your Office installation.
- You might need to run this tool multiple times to fix issues with your .pst files.
At times, your personal folder on Outlook, which is in the .pst format, can sometimes get corrupted or become inaccessible. Fortunately, your Outlook installation comes with a Scanpst.exe file that can be used to rectify it.
However, you still need to know how to use this tool, and we will put you through the steps required in this detailed guide.
What is Scanpst exe used for?
Scanpst.exe, or the Inbox Repair tool, helps fix personal folder (.pst) related issues. In some cases, it can also help repair Outlook Data (.ost) files and can come in pretty handy if the file is over 5GB.
The tool should automatically come with your Microsoft Outlook installation options. The good thing about this repair tool is that you can run it multiple times in as much as you keep getting errors on your PST files.
So, it is a pretty effective and free tool that helps prevent data loss on Outlook.
Where is the Scanpst exe file?
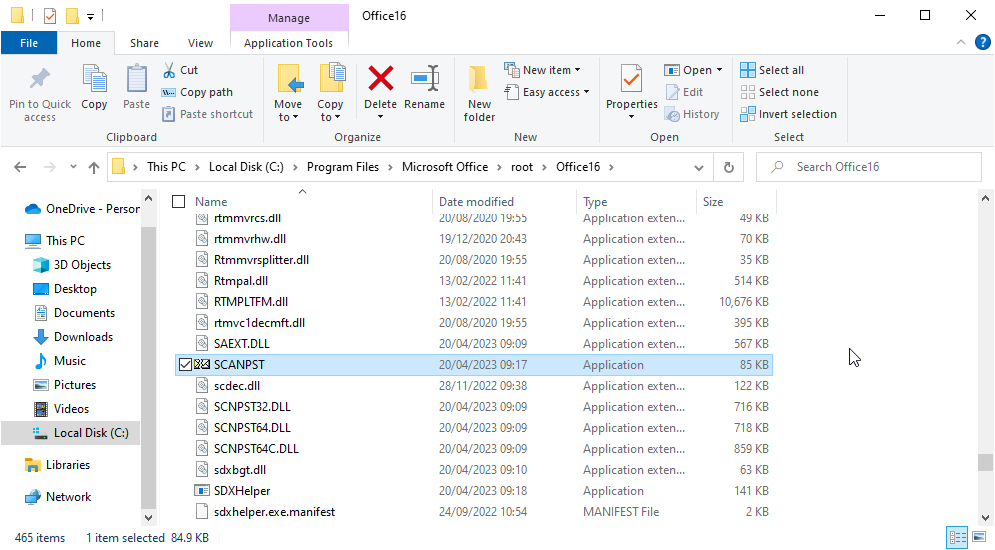
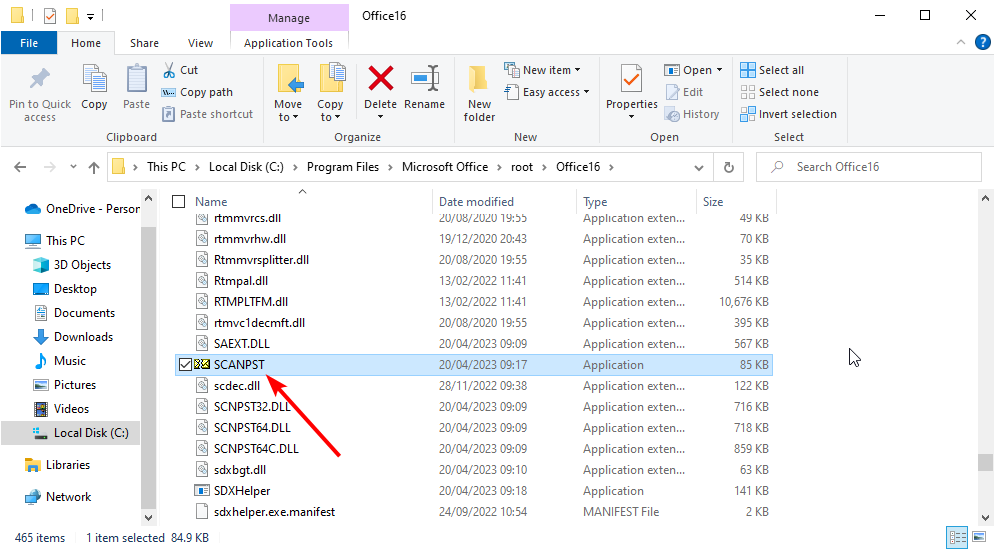
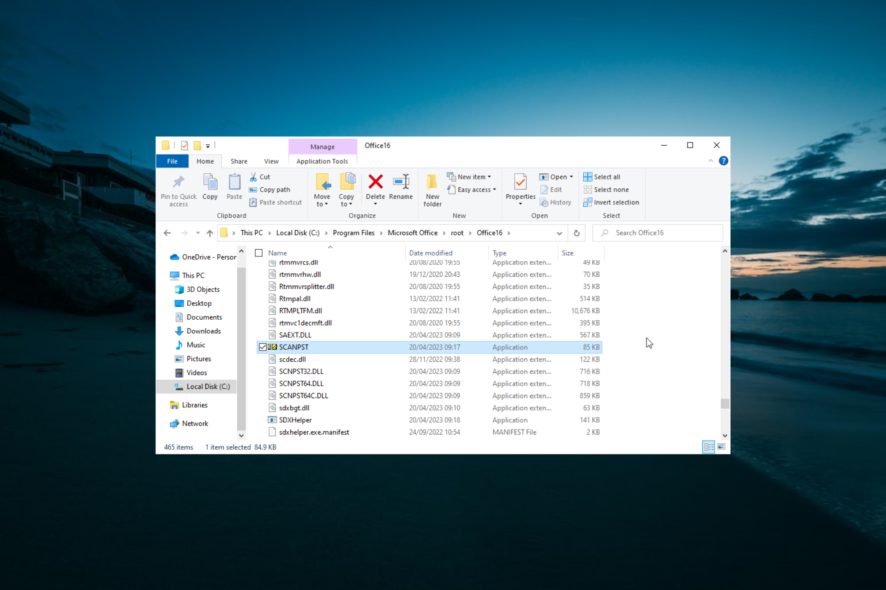
The location of Scanpst.exe on your PC depends on your operating system and Outlook installation. If you are using Outlook 2019 or 2016 on a 64-bit PC, the tool should be located in the path below: C:\Program Files\Microsoft Office\root\Office16
However, if you are on a 32-bit PC, you should find it in the path below: C:\Program Files(x86)\Microsoft Office\root\Office16
Note that Office16 in the path above only applies to Outlook 2019 and 2016. If you are using older versions of Outlook, you can check the Office15, Office14, or Office12 folders.
How do I fix a corrupt PST file using Scanpst.exe?
1. Running the repair tool
- Close Microsoft Outlook and launch File Explorer.
- Navigate to either of the paths below, depending on your PC architecture:
C:\Program Files\Microsoft Office\root\Office16C:\Program Files(x86)\Microsoft Office\root\Office16 - Double-click Scanpst.exe to run it.
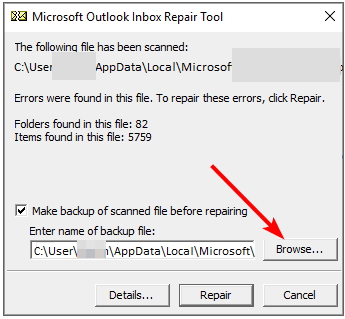
- Now, enter the path and the file name of the faulty personal folders (.pst) file. Alternatively, you can click the Browse button to locate the file.
- Next, click the Start button.
- Finally, if it finds errors, click the Repair button and wait for the recovery process to complete.
With this, the Scanpst.exe tool should now repair your personal folder file. It is important to note that there are times you might need to run this tool several times to repair all the issues with your .pst file.
Also, if the file is permanently deleted somehow, this repair tool will not be able to recover it. This is also true for files that are corrupt beyond possible repair.
After repairing the files, you need to recover them to a new folder, as shown in step 2 below.
2. Recover repaired .pst file to a new file
- Launch Outlook and select the profile containing the Personal Folders (.pst) file you repaired.
- Now, press the Ctrl key + 6 to change to the Folder List view. You should see some recovered files by Scanpst.exe, like Recovered Personal Folders, Calendar, Contacts, Deleted Items and a folder named Lost and Found.
- Next, follow the steps below to create a new Personal Folder on Outlook 2010 and later:
- Click the File tab at the top and select the Info option.
- Click the Account Settings button and choose Account Settings again.
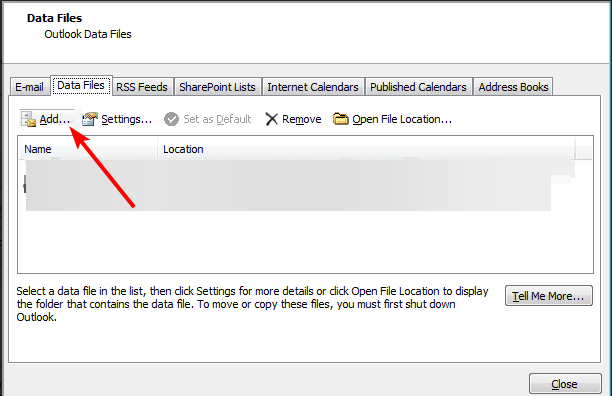
- Now, choose Data Files.
- Click the Add button.
- Next, type the file name for the Outlook Data (.pst) file.
- Lastly, click the OK button, and there should be a new .pst file in your profile.
- Click the File tab at the top and select the Info option.
- From here, drag all the recovered files from the Lost and Found folder to the .pst file you created.
- Finally, you can remove the Recovered Personal Folders (.pst) file from your profile, including the Lost and Found folder.
Note that the recovered items by the Scanpst.exe tool are usually located in the Lost and Found folder. Also, any item you can’t find in the Lost and Found folder might be corrupt beyond repair.
If you are not satisfied with the recovered files, you might be able to recover additional items by opening the Original Outlook Data file. This is because the Inbox Repair tool creates a backup file with the same name as the original file during the repair process.
However, this file will have a .bak extension. With this file, you should be able to open some files that the repair tool couldn’t.
We have reached the end of this detailed guide on repairing .pst files using the Scanpst.exe tool. If you can’t find the tool on your PC for some reason, you might need to repair your Office installation to get it.
Did you encounter any problems applying the steps in this guide? Feel free to let us know in the comments below.

