Fix: Secure Boot is Greyed Out on Windows 11
Outdated BIOS can cause Secure Boot option to be greyed out
Key notes
- Some systems require BIOS to have an administrative password in order to use Secure Boot.
- If you don’t have the default keys installed, you won’t be able to enable this feature properly.
If Secure Boot is grayed out on Windows 11, you won’t be able to enable it, and your PC will be more vulnerable to malicious code such as boot loaders.
In some cases, certain features might not work properly until you resolve this issue, so let’s see how can we address it.
How can I tell if Secure Boot is enabled on my computer?
- Press the Windows key + R and enter msinfo32.
- Locate Secure Boot State value.
- If it’s set to Enabled, it means that Secure Boot is activated.
How do I fix Windows 11’s Secure Boot if it’s greyed out in BIOS?
1. Set administrator password on BIOS
- Restart your PC and keep pressing F2 or Del to access BIOS. The key varies depending on the motherboard manufacturer.
- Next, navigate to the Security tab.
- Select the Administrator password option.
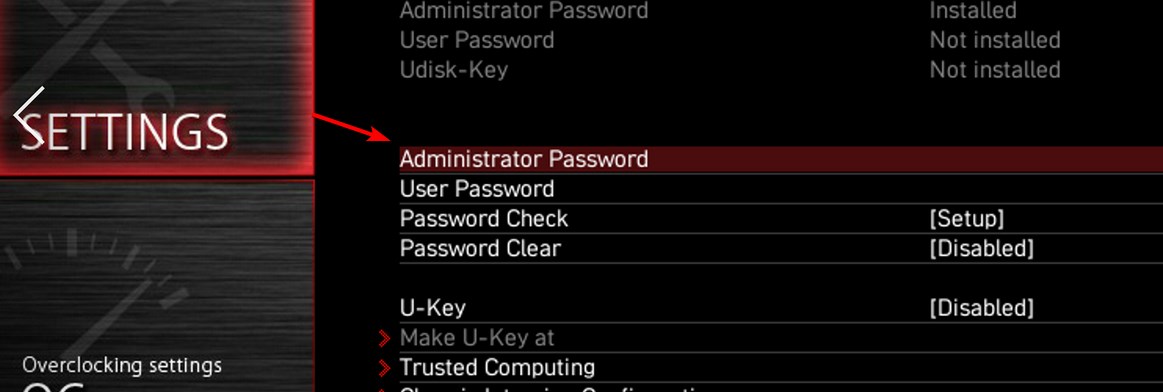
- Set the new BIOS password and repeat it again. Press Enter to save it.
- Exit BIOS and save changes.
 NOTE
NOTE
2. Disable Fastboot in BIOS
- Access BIOS to adjust your motherboard firmware settings.
- Next, navigate to Advanced Mode and select the Boot in BIOS.
- Locate the Fast Boot option and set it to Disabled.
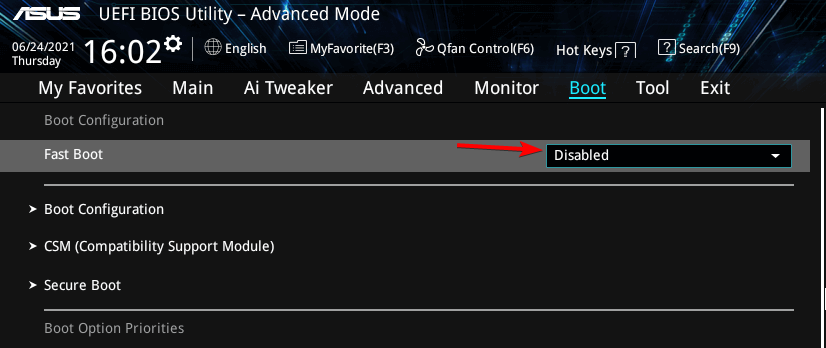
- Save changes and restart your PC.
Some users reported that it’s necessary to enable Secure Boot Control in order for this feature to work.
3. Install default keys
- Boot into BIOS and navigate to the Secure Boot option.
- Choose Install Factory Default Keys or Provision Factory Keys.
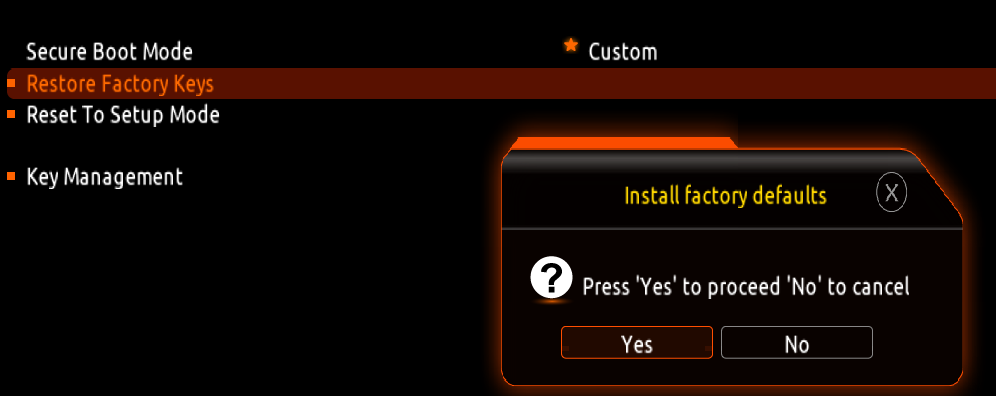
- Save changes and restart your PC.
A few users suggested that they needed to restore the factory key, update each key, and restore the keys again in order to fix the issue.
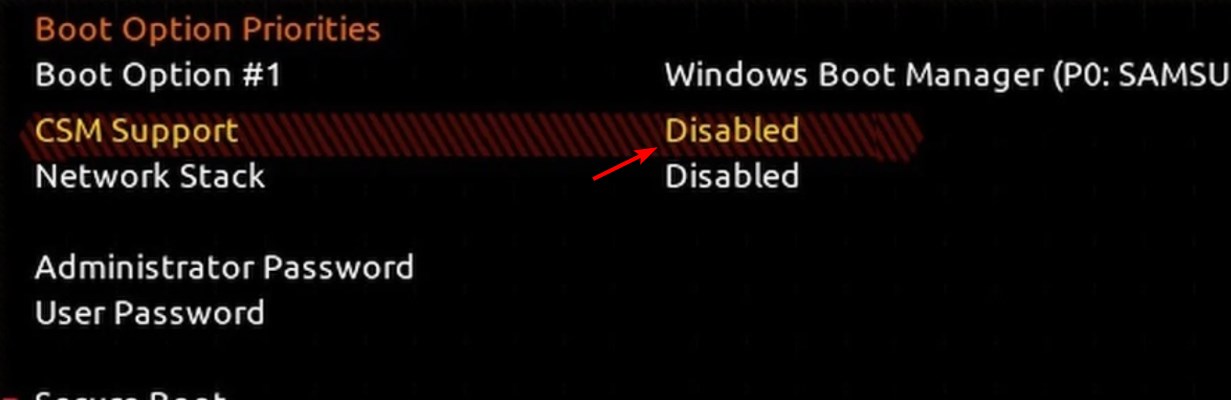
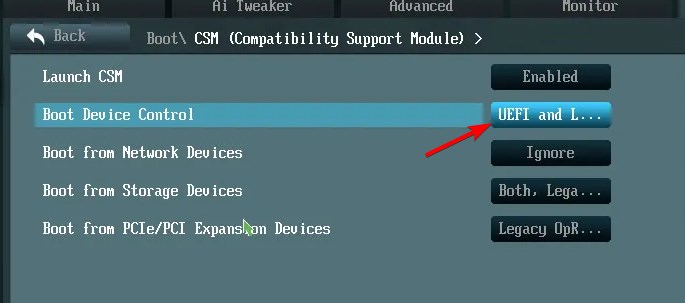
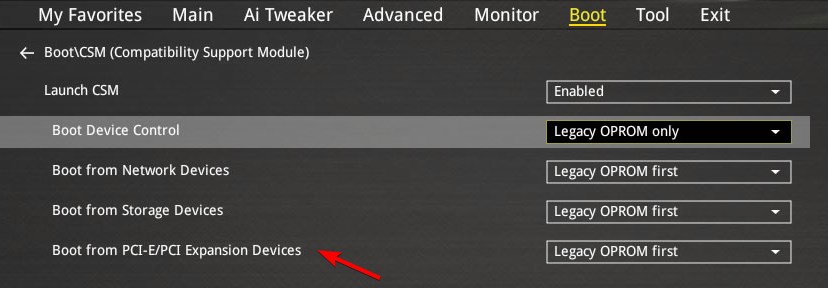
4. Adjust CSM settings and boot features
- Enter BIOS and enable CSM.
- Next, change the Boot Device Control to UEFI and Legacy.
- Change Boot from PCIe/PCI Expansion Devices to UEFI First.
Causes of Secure Boot greyed out on Windows 11?
- The lack of an administrator password can keep the Secure Boot setting disabled.
- Certain BIOS settings such as Fastboot or CSM can cause issues with Secure Boot.
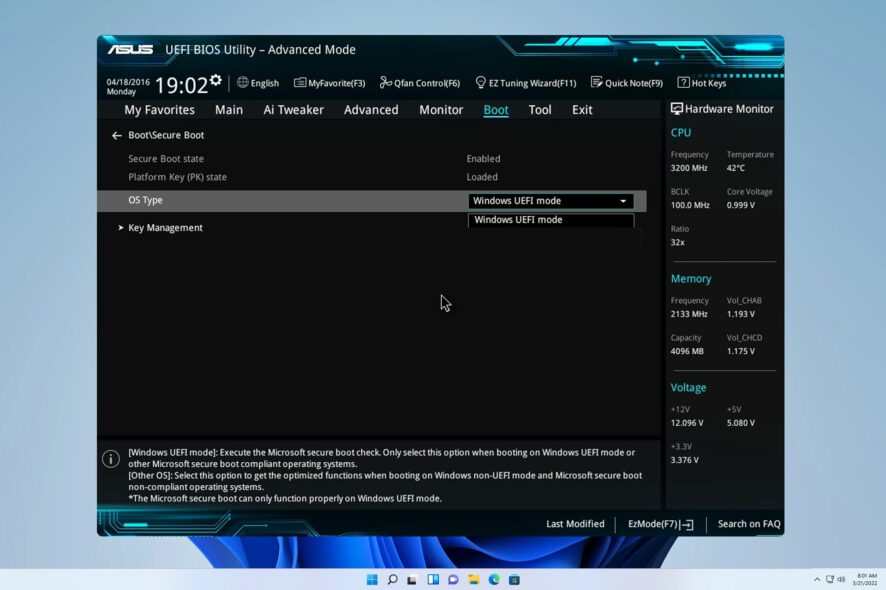
- The default keys aren’t installed or you’re using legacy boot mode and not the UEFI Boot Mode.
- BIOS firmware version is out of date or your drive has the wrong partition style and it’s not using the GPT partition table.
If Secure Boot in BIOS is greyed out on Windows 11 PC, it doesn’t mean that Secure Boot state is unsupported. In most cases, you just need to make a few adjustments in BIOS to fix this issue and protect your PC from malware attacks.
These aren’t the only issues, and many reported that Secure Boot is enabled but not active or that Encrypt contents to secure data is greyed out, but we already tackled those in separate guides.
Did you find a different solution for this issue? If so, don’t hesitate to share it with us!
Read our disclosure page to find out how can you help Windows Report sustain the editorial team. Read more


Improve this guide


User forum
0 messages