Steam Self Updater Keeps Popping Up: 5 Ways to Fix It
Get rid of the annoying Self updater pop-up
![]() 4 min. read
4 min. read
![]() Updated on
Updated on
Share this article

Improve this guide
Read our disclosure page to find out how can you help Windows Report sustain the editorial team Read more
Key notes
- Steam is one of the most popular PC gaming platforms, and it's constantly being improved and updated.
- That's great news for anyone who owns a PC, but it can be unpleasant if the self-updater keeps popping up.
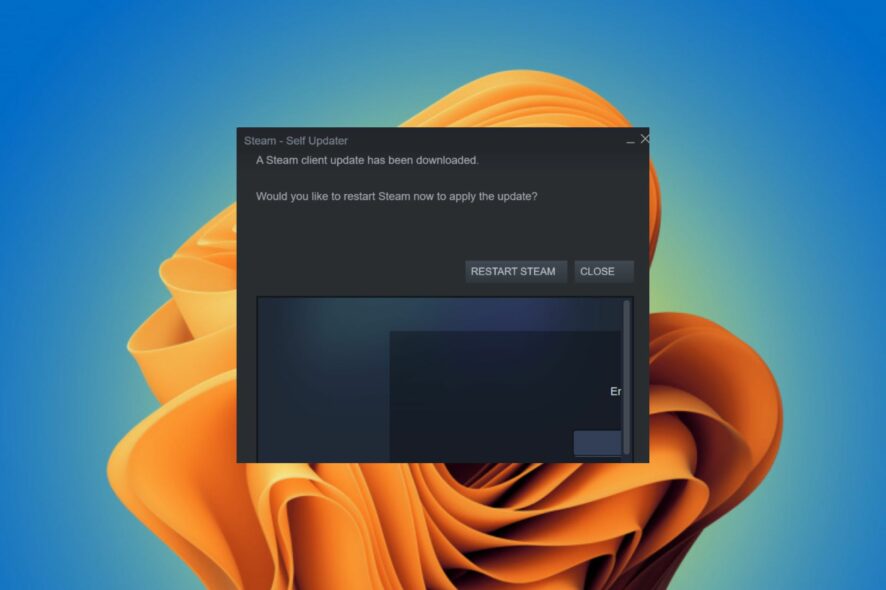
Steam‘s Self Updater is a handy feature that allows you to download and install the latest updates for your games automatically. It’s a handy tool, especially when you don’t have much time to waste.
Lately, users have noticed that the Self Updater keeps popping up an unusual amount of times. Updates are a way for developers to fix bugs and add new features to their games and software. However, it can be annoying because it causes interruptions when playing.
Why does Steam keep updating itself?
Here are a few of the most common reasons why Steam keeps updating itself:
- Problematic update – If Steam encounters an error while trying to write an update, then it may keep trying to write that same update over and over again. This can happen if the file being written is corrupted or otherwise damaged.
- Virus infection – If your computer has been infected by a virus, it’s possible that it is interfering with the Steam client trying to update itself. You should make sure you have a comprehensive antivirus program and that it is up-to-date.
- Corruption of game files – It’s possible that one or more of your Steam files got corrupted and Steam can’t verify the integrity of your game files. It will therefore try to download a new copy of all files every time.
How can I stop Steam’s Self Updater from constantly popping up?
Before moving on to the slightly technical steps, try the following first:
- Ensure you are running the latest version of the Steam client.
- If there are any Steam-related background processes, close them from the Task Manager and try again.
- Try restarting your Steam client.
- Finally, try restarting your PC and check if the issue persists.
1. Set Steam auto-update time restrictions
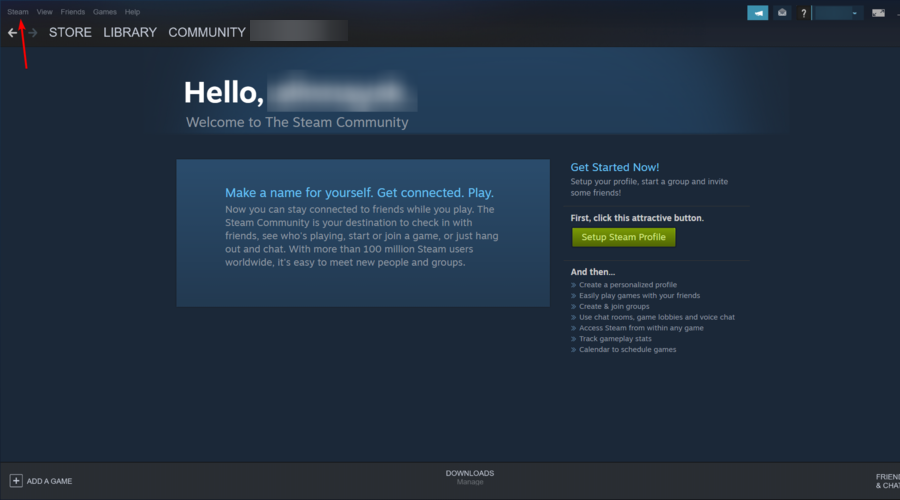
- Launch Steam.

- Click on Steam.
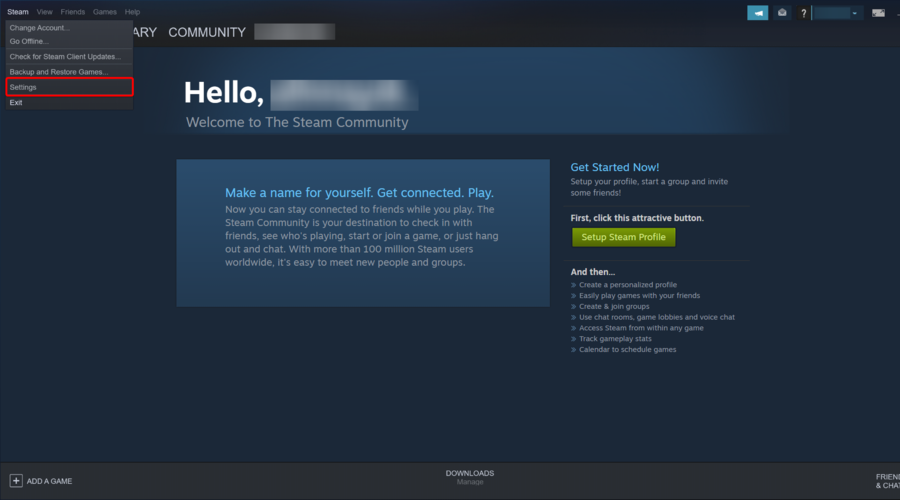
- Click and from the drop-down menu, select Settings.
- Select Downloads.
- Locate Download Restrictions and check Only auto-update games between checkboxes.
- Select a suitable time frame from the two drop-down time menus when Steam can auto-update to prevent disturbances while playing.
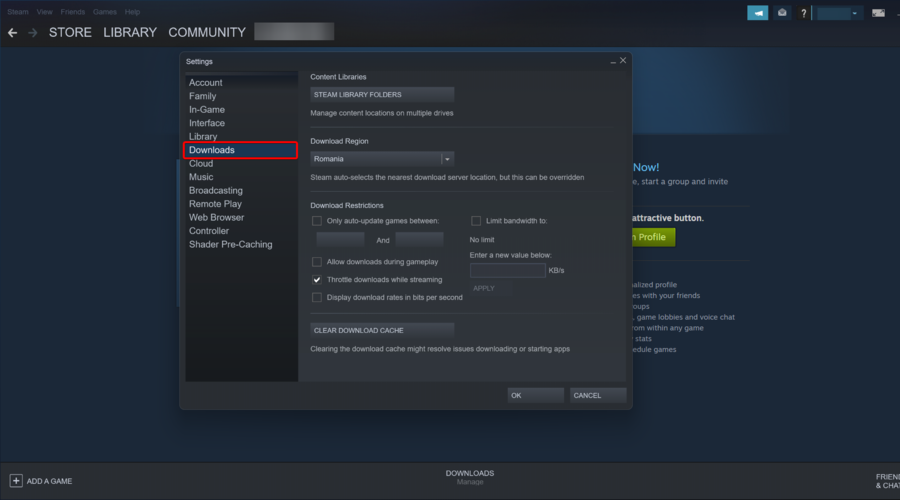


If you want to control when your games update to reduce the impact of Steam updates on your network and PC performance, you can restrict Steam’s auto-update feature to a specific schedule. This will bring the interruptions to a minimum.
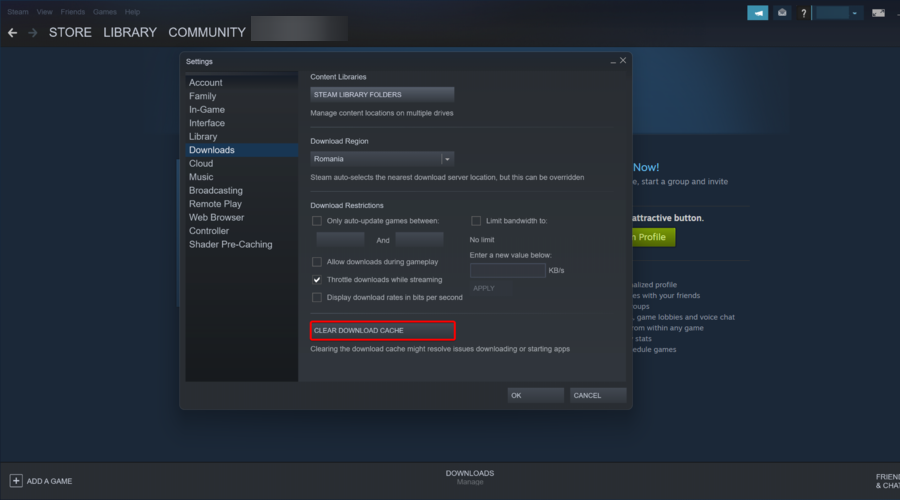
2. Clear Steam cache
- Right-click on your Steam desktop app, then choose to Run as administrator.
- Navigate to the Steam menu at the top left corner, and click on Settings from the drop-down menu.
- Click on the Downloads tab from the left side of the Settings window.
- Hit the Clear Download Cache button.
- A confirmation window will open. Click OK on that window to confirm.
- Select OK on the Settings window.
- Restart Steam after clearing the downloads cache.
3. Opt out of the Beta version
- Launch Steam, navigate its menu, and click on Settings from the drop-down menu.
- Next, under Settings, click on the Account tab on the left.
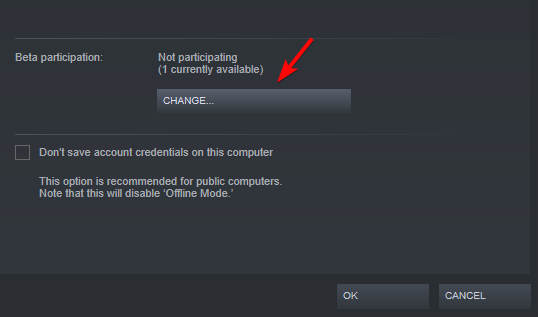
- On the right, go to Beta Participation and click on Change.

- Now, in the Beta participation dialog, select NONE – Opt-out of all beta programs from the Beta Participation drop-down and press OK to save the changes.

- Hit OK again to apply the changes and exit.
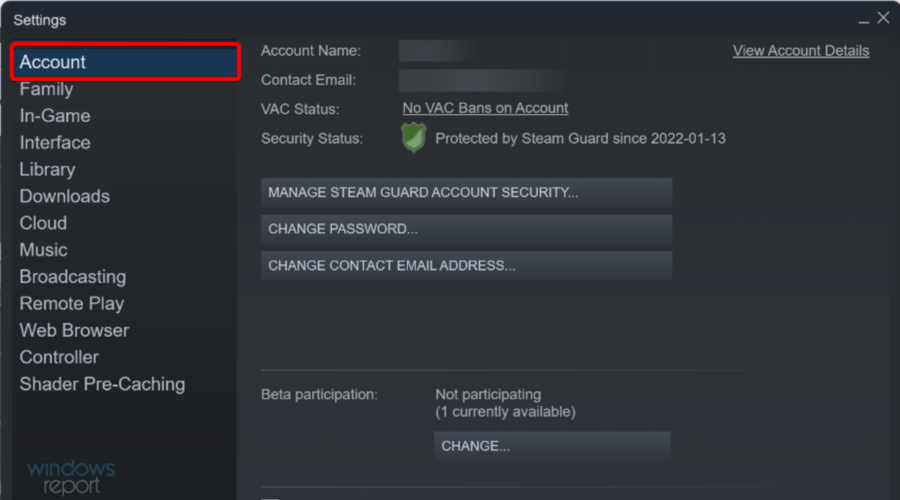
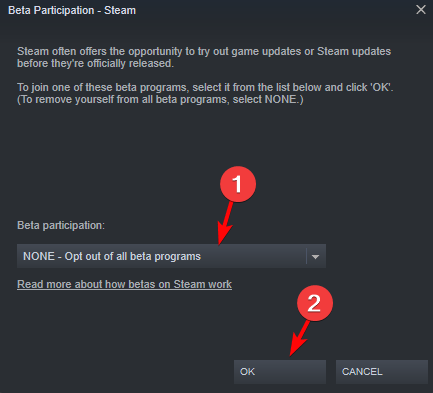
The Steam beta version is the testing version of Steam. It’s where all the new features and changes get tested before they’re released to everyone. The beta version of Steam should be used by advanced users only, as it may contain errors or crashes that can cause harm to your computer.
4. Rename the Client registry.blob file in the Steam folder
- Close Steam, and then go to the default location of Steam which is usually in the C: drive.
- Locate the Clientregistry.blob file in the Steam folder, copy this file, and paste it onto your desktop with a new name.

- Next, go back to the Steam folder, and delete the original ClientRegistry.blob file.

There’s no harm in deleting the ClientRegistry.blob file, as it is a cache file that may cause problems with Steam.
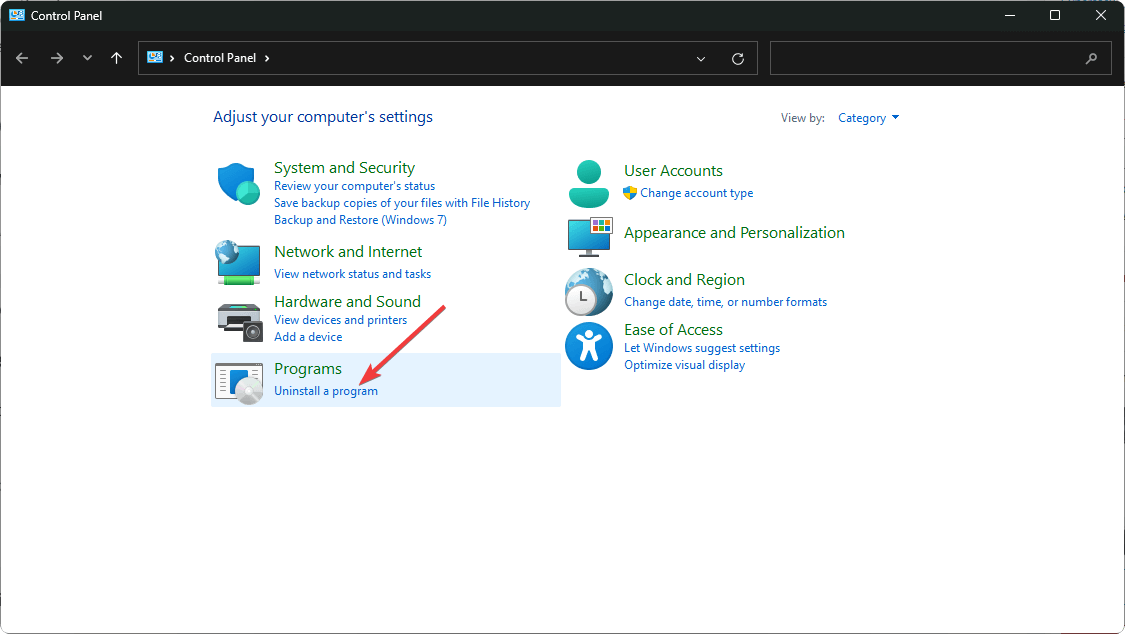
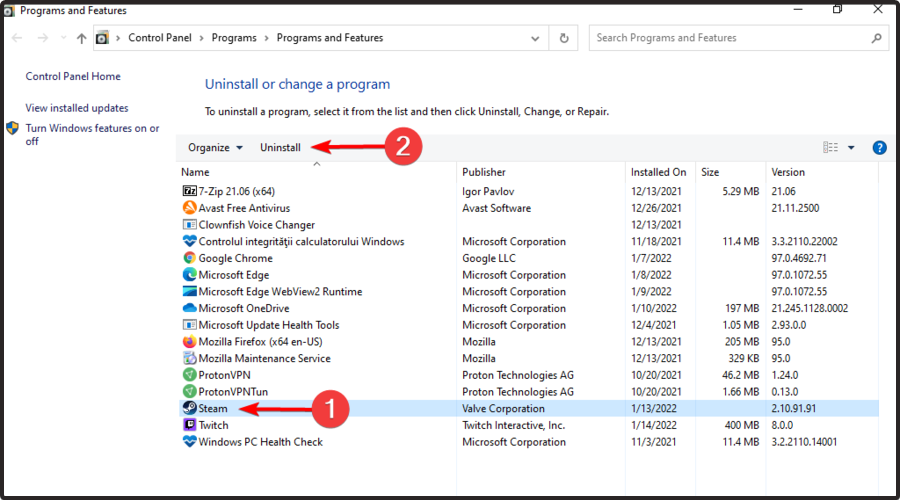
5. Uninstall and reinstall Steam
- Hit the Windows key, type Control Panel in the search bar and click Open.

- Select Uninstall a program under Programs.

- Navigate to Steam, right-click and select Uninstall.
- Reboot your PC.
- Download and install the Steam client from the official website.

In another instance, some users complained that Steam is constantly running, so don’t hesitate to check out our detailed guide on how to fix this issue.
You may also encounter an issue where Steam lags, but we have adequately covered various fixes.
Let us know if you can get rid of the Steam Self Updater that keeps popping up in the comment section below.