Fix: This Device Cannot Start. (Code 10) Error on Windows 11
Outdated or faulty drivers could trigger this error
4 min. read
Updated on
Read our disclosure page to find out how can you help Windows Report sustain the editorial team Read more
Key notes
- Code 10 error on Windows 11 may occur when Windows can’t run a piece of hardware.
- Updating your drivers and operating system often resolve the error, so refer to our detailed procedures.
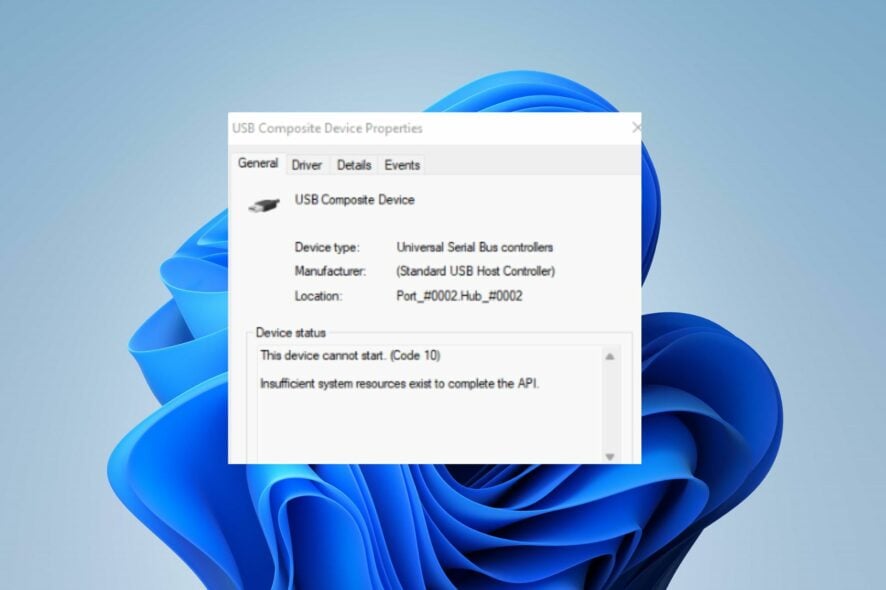
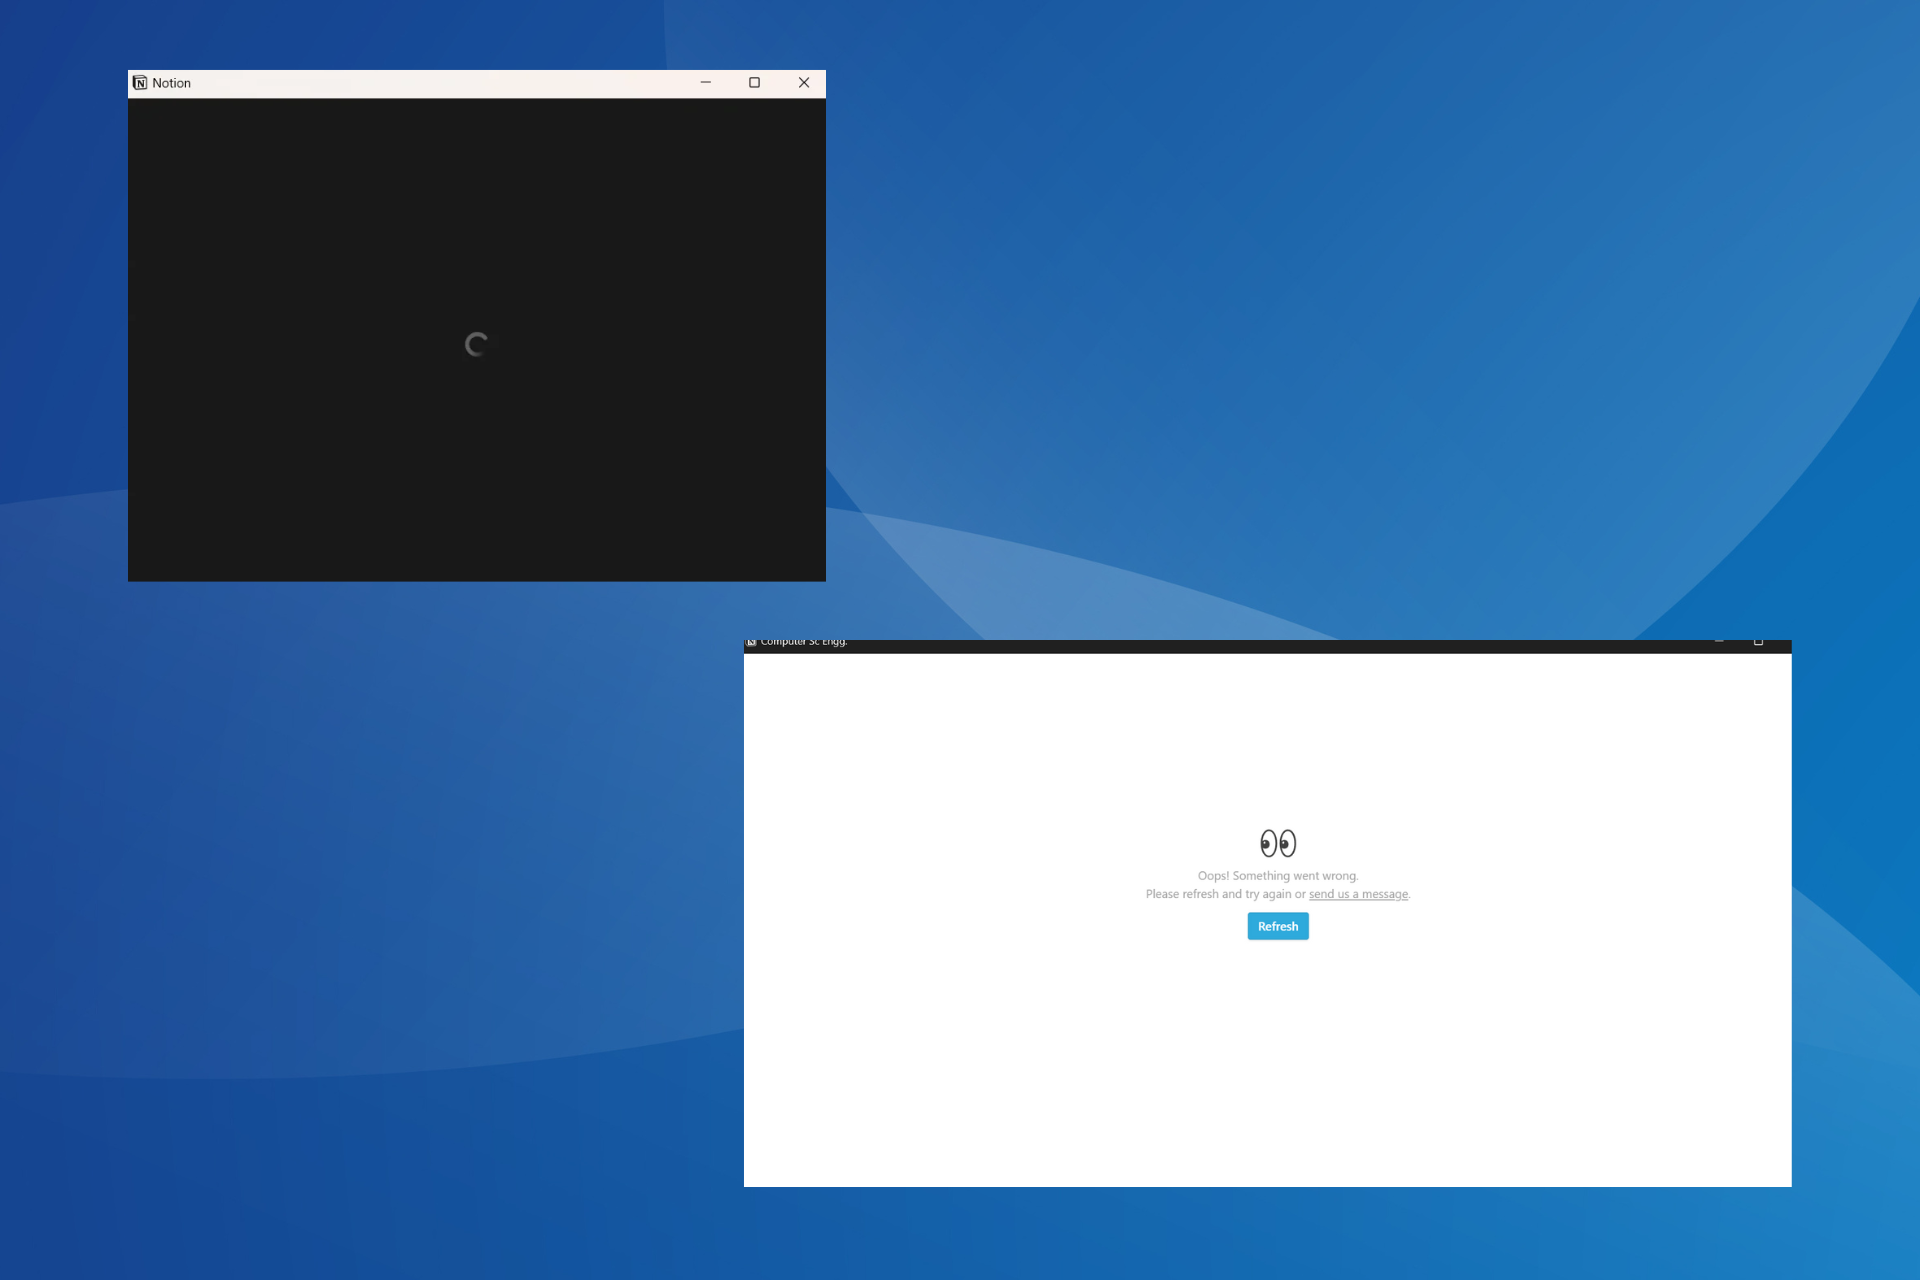
There are several errors users can run into on their Windows computers. Some of these errors can render the system inaccessible or prevent you from using its installed programs. This device cannot start. (code 10) error on Windows 11 pops up on the screen when Windows can’t run hardware.
What causes the error code 10, this device cannot start?
This device cannot start Code 10 appearing on your computer indicates that Windows can’t run a piece of hardware on your PC. So, if your PC can’t run the needed components, it can run into an error.
Some factors that can cause the error are:
- Outdated or faulty driver – If the drivers are outdated or inaccessible, Windows may not be able to start the devices, depending on their services.
- Hardware issues – Error code 10 may appear on your computer if there is an issue with any hardware connected to your PC.
- Outdated Windows OS – It is undisputed that Windows can run into several problems when it is not up-to-date.
- Incompatible hardware – If your hardware device is too old or freshly launched, you may encounter compatibility issues with Windows 11.
Some of our readers also identified the error stating that This device cannot start code 10 Wi-Fi on Windows 11. Don’t worry because our solutions will help you deal with all such issues.
How do I fix this device cannot start (Code 10) error on Windows 11?
Before proceeding with any advanced fixes, try the following:
- Turn off background apps on your PC.
- Unplug and reconnect external devices to your computer.
- Restart your PC and check if the error persists.
- Install all the latest Windows updates.
If you can’t fix the error, proceed with the following solutions:
1. Update the drivers
- Press Windows + R key to prompt the Run dialog box, type devmgmt.msc, and open the Device Manager.
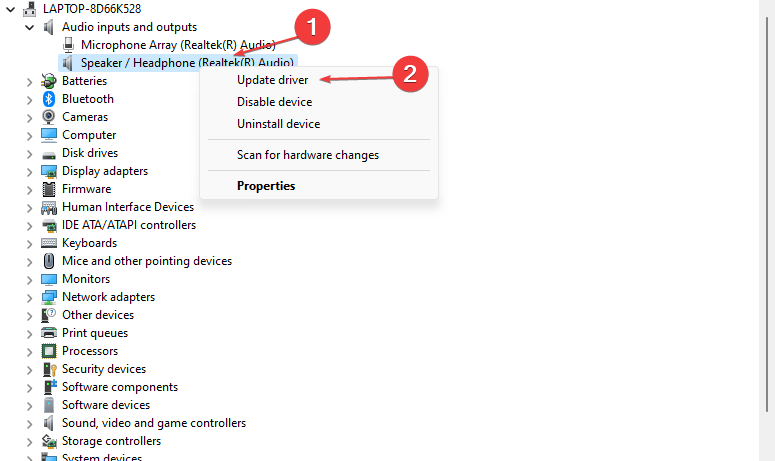
- Look in the list of devices and see if any of them has an exclamation mark on its right. Right-click on the device you want to update and click the Update driver option from the drop-down.
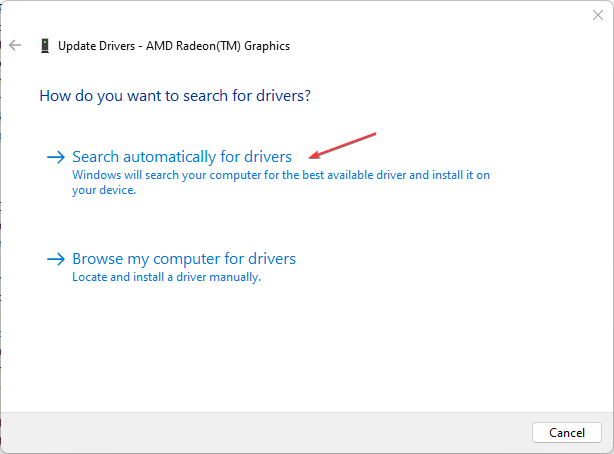
- Then select Search automatically for drivers.
- Restart your PC and check if the error persists.
Updating the drivers on your computer will help their devices run properly and fix bugs affecting them. Check our guide on how to update drivers on Windows 11 for other methods to use.
1.1 Update the drivers automatically
Updating your device drivers can spare you from various system errors or even prevent them from happening in the first place.
That’s why we usually recommend third-party software because it saves time and effort and it makes sure your drivers have the correct versions.
- Download and install Outbyte Driver Updater.
- Launch the software.
- Wait for the app to detect all faulty drivers.
- Now, it will show you all the malfunctioning drivers listed to select the ones to Update or Ignore.
- Click on Update & Apply Selected to download and install the newest versions.
- Restart your PC to ensure the applied changes.

Outbyte Driver Updater
Secure your Windows PC with Outbyte from various errors caused by problematic drivers.2. Modify your Registry
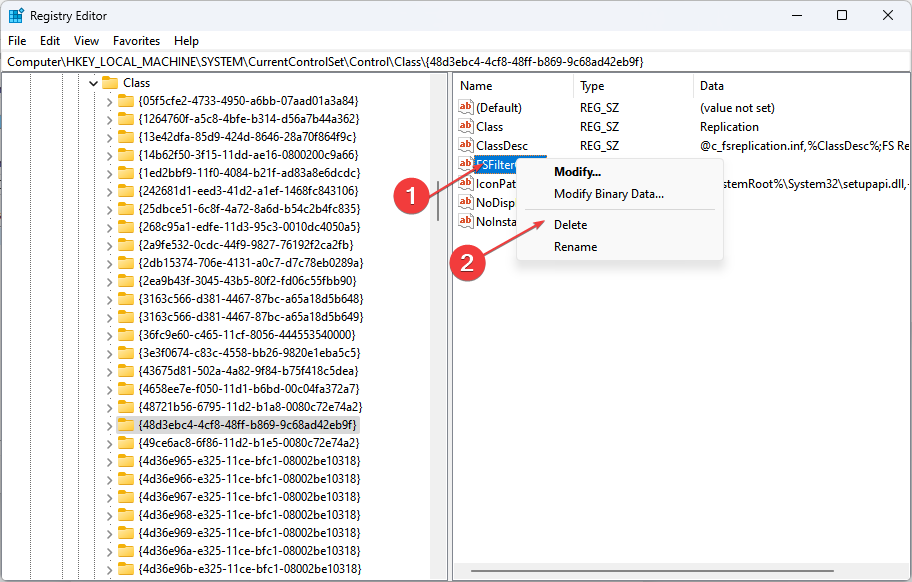
- Press Windows + R key to open the Run dialog box, type regedit, then press OK to open the Registry Editor.
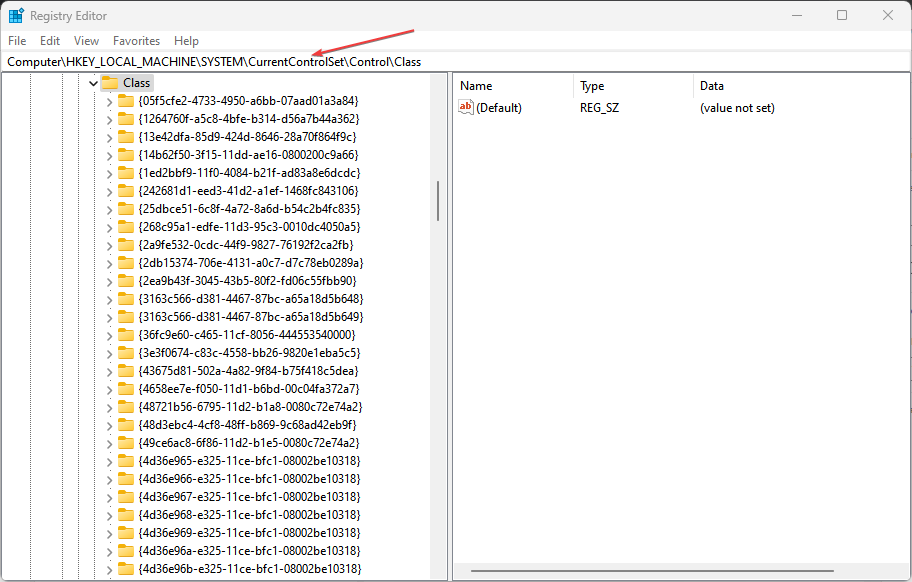
- Navigate to the following Registry key:
HKEY_LOCAL_MACHINE\SYSTEM\CurrentControlSet\Control\Class - Press Windows + R key to prompt the Run dialog box, type devmgmt.msc, and open the Device Manager.
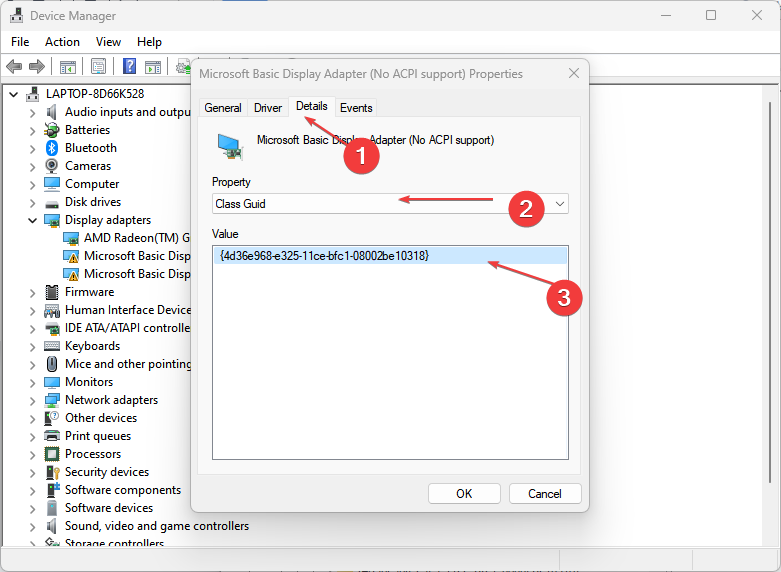
- Find the device causing the error and double-click on it.
- Click on the Details tab, change the Property dropdown box to Class Guid, then go to Value to note the strings of characters it contains.
- Go back to the Registry Editor window and click the characters’ string that matches the device on the left pane.
- Find the UpperFilters and LowerFilters, right-click on them, and select Delete from the drop-down.
- Restart your PC and check if the error appears.
Clearing the filter driver values can fix the issue with the device and Windows.
3. Run System Restore
- Left-click the Start button, type Restore, and choose Create a Restore Point.
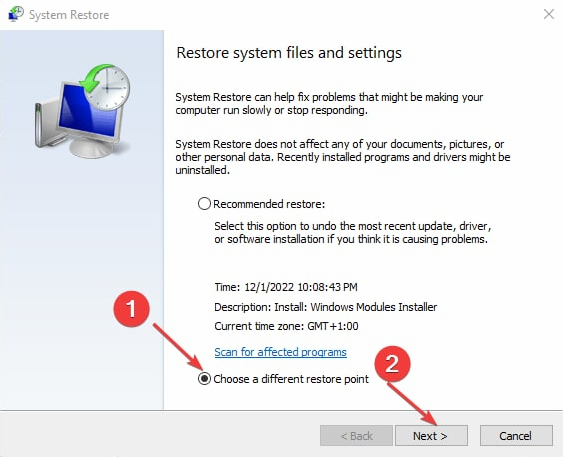
- Click the System Protection tab and select System Restore.
- Choose a different system restore and click Next to select a specific Restore Point.
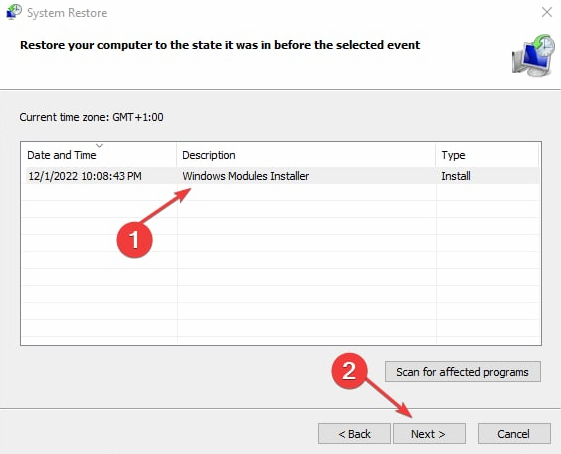
- Select a recovery point before this problem started to manifest and click Next.
- Click the Finish button.
System Restore reverts your system to the selected restore point when it works properly. Check how to fix Restore Point if it’s not working and if you have any issues running it.
Also, our readers reported that Windows failed to start after a hardware or software change error on Windows 11.
Further, you may check our article on fixing the inability to activate Windows after a hardware change on your PC.
Conclusively, this guide should help you troubleshoot This device cannot start. (code 10) error on Windows 11. If you have further questions or suggestions, kindly drop them in the comments section.

