Best Ways to Fix This PC Must Support Secure Boot Message
You can either activate Safe Boot or bypass its verification
Key notes
- If you encounter the error saying This PC must support Secure Boot, you won't be able to go ahead with the Windows 11 installation.
- Microsoft made Secure Boot and TPM support mandatory for running Windows 11 and claims that this is crucial for the device's security.
- Secure Boot ensures that the computer boots using only the OS trusted by the manufacturer.

Windows 11 is officially available for download, so it comes as no surprise that you want to install it right away. Microsoft introduced a new set of system requirements, and Secure Boot is one of them. On some machines, it isn’t enabled by default.
This feature is part of the newest Unified Extensible Firmware Interface (UEFI) specification, and it basically defines a new interface between the OS and the firmware or BIOS.
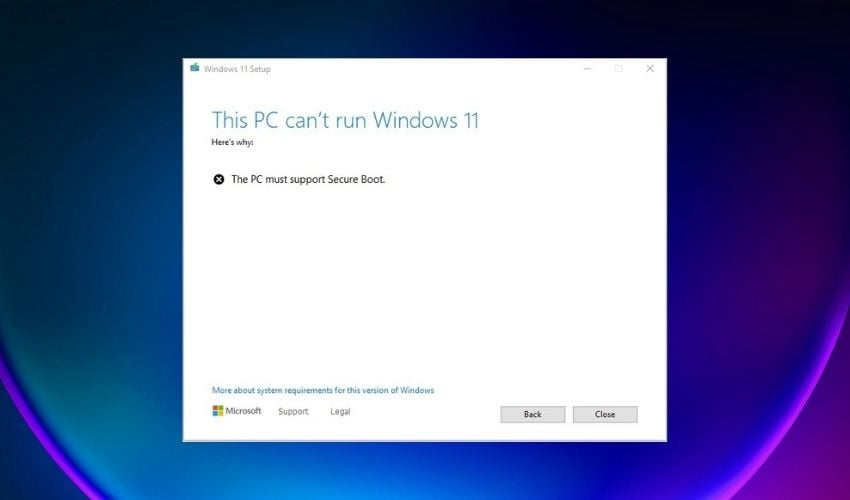
If you don’t have this feature enabled, during the Windows 11 setup you will see the message This PC can’t run Windows 11 followed by This PC must support Secure Boot.
If your PC meets Windows 11’s hardware requirements but Secure Boot is disabled, enabling it in BIOS is not so complicated. Before that, here’s what you need to know about the Secure Boot feature.
What does This PC must support secure boot mean?
The most recent Unified Extensible Firmware Interface (UEFI) specification, version 2.3.1, includes Secure Boot as one of its features. This feature defines a completely new interface between the operating system and any firmware or BIOS that may be present.
A machine is better able to withstand malicious software attacks and infections when the Secure Boot feature has been activated. And all of its settings have been specified.
Windows 11 requires the UEFI Secure Boot feature in order to install it. Even if you have this feature, it might be turned off, hence the error messages:
- GigaByte This PC must support Secure Boot – Dell computers are no exception from Windows 11’s check for the Secure Boot feature.
- ASRock This PC must support Secure Boot – Follow the steps below in order to activate your UEFI Secure Boot feature.
- Lenovo This PC must Support Secure Boot – In case your Lenovo PC does not have the feature, you can try to bypass it by following the steps in our last section.
- This PC must support Secure Boot bypass – This is the general message that appears on users’ screen when they try to install Windows 11 but they don’t meet the requirements.
Follow along as we will show you how to turn on Secure Boot or how to bypass this check as well as the TPM 2.0 one.
Why should I enable Secure Boot?
When enabled, Secure Boot helps your computer to resist malware attacks that may not be detected by antivirus software. It identifies any unwanted modifications of the boot loaders and the system files by validating their digital signatures.
Practically, if such a trespassing action is detected, it will be blocked from running before it attacks or infects the system.
You can see the Secure Boot like a security gate. When you access it with a valid code, it will pass through the gate and will be executed. If not, Secure Boot blocks the code at the entry point.
Should you be worried if it is disabled? Clearly no. If you use your machine for basic tasks, you will still be safe.
However, you may see it as an important element in your computer’s security. That’s why enabling it is recommended as it helps you ensure better defense against all kinds of threats.
How do I fix This PC must support Secure Boot on Windows 11?
1. Check if Secure Boot is enabled without entering BIOS
- Press the Windows + R shortcut to open the Run application then type msinfo32 and click Yes or press Enter.

- Under System Summary, you will find an option called Secure Boot State. If it’s On it means that Secure Boot is enabled and if it’s Off, Secure Boot is disabled.

- If it’s disabled, follow the instructions from the next step to enable it.
One of the best things about Windows is that it’s very flexible. And easy to use and the same reflects in this scenario. To check if Secure Boot is enabled you don’t need to boot into BIOS and waste your time.
Instead, you can use msinfo32 just like we described in the steps above to check this information quickly.
2. How to enable Secure Boot for Windows 11 (from BIOS)
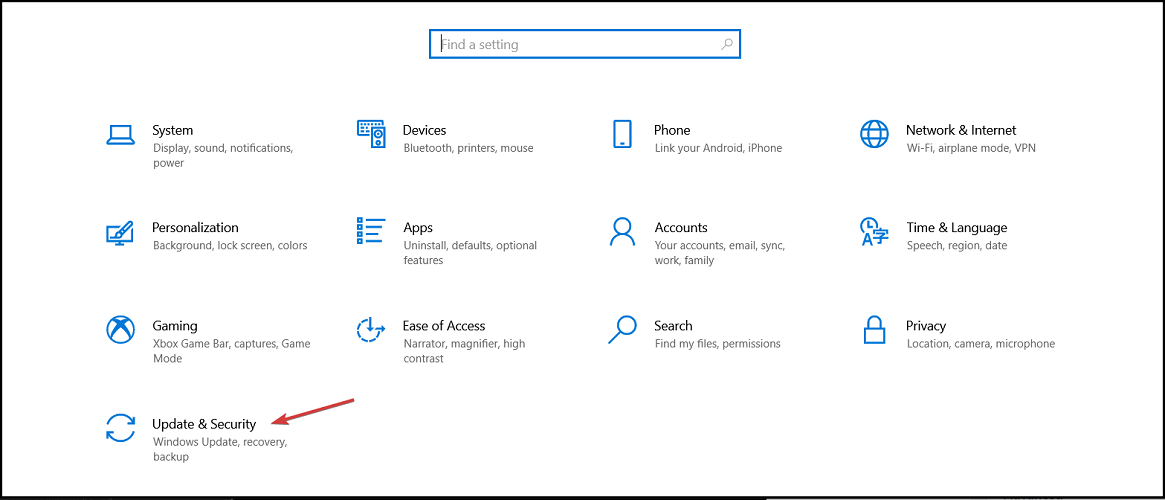
- Click on the Start button and select Settings.

- Then click on Update and Security.
- In the left tab, find and click on the Recovery option, then select the Restart now button.

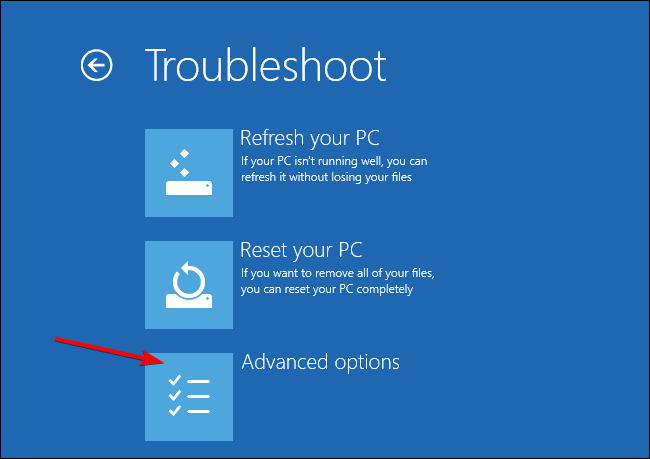
- When you get to the boot options, select Troubleshoot.

- Now click on Advanced options.
- Select the UEFI Firmware settings option.

- Your PC will then reboot into BIOS click on the Security, then select the Secure Boot option.
- Now enable the Secure Boot by toggling the option to On and accept the changes.
- Press F10 on your keyboard to save the changes and exit BIOS.
- After the system reboots, restart the Windows 11 installation process.
Remember, for this solution to work, you also need to have a UEFI boot system and not the Legacy BIOS. It’s another Windows 11 requirement that you need to comply with.
If you have to make extra changes, we have an article on how to switch from UEFI to Legacy BIOS but the guide can go both ways.
How do I enable TPM 2.0 and Secure Boot?
TPM is a security component and a prerequisite for Windows 11 that has been the focus of controversy due to the fact that it is required in order to install the most recent version of the operating system.
A lot of different manufacturers use the integrated version that is attached to other chips. The firmware-based versions are also quite common. And they operate within a reliable execution environment on your central processing unit (CPU).
Check out our post on how to enable TPM 2.0 in different versions of BIOS in order to be able to upgrade to Windows 11.
Can you install Windows 11 without Secure Boot?
It is no longer a secret that in order to install Windows 11, you will require TPM 2.0 and Secure Boot, but it is also no longer a secret that you may enable these features using the UEFI BIOS Mode.
On the other hand, we have a solution that will assist you in installing Windows 11 on Legacy BIOS without TPM 2.0 and Secure Boot checks being performed.
Make sure that you have a backup copy of all the crucial data on your drive before beginning the procedure, then take a look at how to install Windows 11 without Secure Boot.
How to bypass the Secure Boot requirement? (Insider account needed)
- Log into your Insider account, then head over Microsoft’s dedicated webpage, and download the Windows 11 Preview Build. You have to log into your Insider account and set into the Dev Channel.
- Choose Windows 11 under Select edition and click on Confirm.

- The download will start and you will get the Windows 11 ISO.
- Press the Windows + E combination from your keyboard to start File Explorer.
- Locate the Windows 11 ISO you just downloaded, right-click it, and select Mount.

- Go to the Windows 11 image, select all files, right-click and then copy all files or use the Ctrl + C shortcut.

- Create a new folder by right-clicking an empty space on one of your drives and selecting New, then Folder.

- We suggest naming the folder Windows 11.
- Now open the folder and paste the contents by right-clicking an empty space and selecting Paste or by using the Ctrl + V shortcut.

- Mount a Windows 10 ISO just like you did for the Windows 11 ISO in this solution. If you don’t have a Windows 10 ISO, you can download one by using step 1 from this solution and select a Windows 10 ISO instead of the Windows 11 one.

- Access the sources folder within the Windows 10 image.
- Locate the appraiserres.dll file, right-click on it, and select Copy.

- Now go back to the Windows 11 folder you created earlier, open the sources folder, and paste the appraiserres.dll file.

- Select Replace the file in the destination.

- Next, double-click the setup.exe file from the Windows 11 folder to start the installation.

This solution will enable you to bypass the Secure Boot check from the installation of Windows 11 so you won’t need to make any changes to your BIOS.
To download the Windows 11 ISO, you will need a Windows Insider account and you need to be listed in the Dev Channel. On the other hand, you can download the Windows 10 ISO without it.
So, the Secure Boot feature is not absolutely necessary but when it comes to your PC, nowadays you shouldn’t spare any efforts to protect your data and privacy.
Of course, you can also get an extra layer of defense with the best antiviruses with unlimited license that will help you forget all about activation headaches. Check out the updated list of antivirus programs for Windows 11 as well.
Did this article help you enable Secure Boot and solve the error This PC Must Support Secure Boot To Run Windows 11? Share your feedback in the comments section below.
Read our disclosure page to find out how can you help Windows Report sustain the editorial team. Read more


Improve this guide


User forum
0 messages