Microsoft Word Margins are not Working? 3 Ways to Fix them
Everything you need to restore the margins to your document
4 min. read
Updated on
Read our disclosure page to find out how can you help Windows Report sustain the editorial team Read more
Key notes
- If Microsoft Word margins are not working, it might be because of the wrong settings.
- You can fix this issue by changing the white default space settings.
- Another surefire solution is to set your custom margin settings as default.
Margins in Microsoft Word are the white spaces between the edges of the page and the document content. By default, the margins on Word are set to 1-inch on all sides of the page.
However, some users are complaining that Microsoft Word margins are not working for some reason, especially from top to bottom.
If you are dealing with this issue, rest assured that the foxes in this guide will help you solve it.
What are the common margin issues?
Below are some of the major margin issues you can encounter on Microsoft Word:
- Word’s Compatibility with Printers – You can sometimes encounter margin issues on Word because of the compatibility with printers. Most printers will have issues if you set the top margin to zero.
- Headers and Footers – The top and bottom Margin sizes remain the same irrespective of the header and footer styles because they are both considered part of the margin. But you still need to know how to manage headers, footers, and sections in Word to use them correctly.
- Issues with Imported Files – If you copy or move a docx file, for example, with different formatting (say custom margins) to another document, it will take the current margins of the destination document. So, your preset margins and other formatting might change when you import a file.
- Use of Sections -While the white space defaults are usually uniform throughout a document, you can still have different section-specific settings. For example, if you change the value of the bottom margin in a section of a multi-section file, the value will not change in the remaining sections.
What are the reasons behind missing margins?
Listed below are some of the reasons your margins might not be working on Microsoft Word:
- Margin settings – The first thing to check if you experiencing margin-related issues is the margin settings. If the top margin is set to zero, you will not have any margins. But you can always adjust Word’s margin settings for each side and set them to the default 1-inch margin sizes.
- Viewing modes – The only viewing mode that shows margins is the Print Layout view, and it is the default. This mode presents your document layout the way it will look when you print it out. But other modes like Web, Read, and Draft do not show margins.
- Multiple sections with varying settings – As mentioned above, you can have a multi-section document with different margin settings and formatting. This makes the margin differ throughout the entire document.
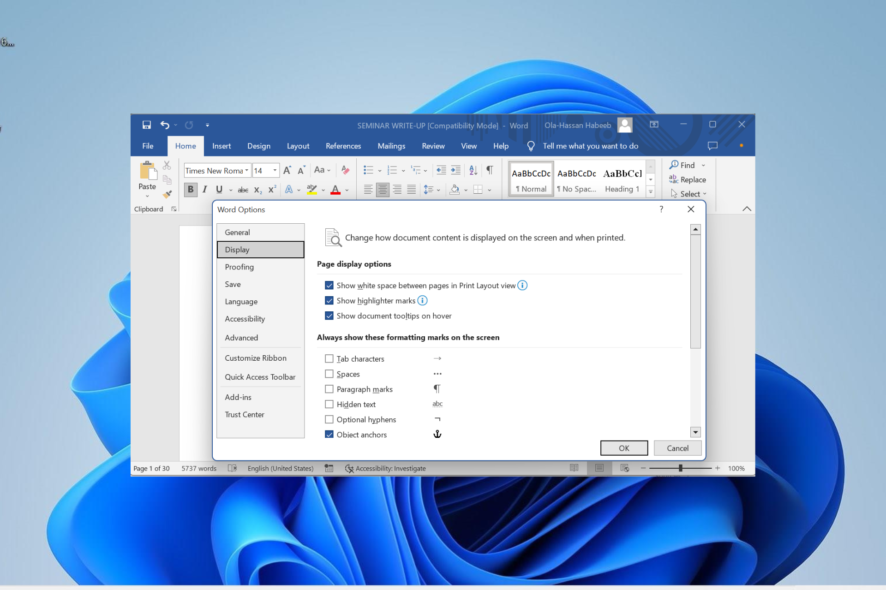
- White space defaults – While the Print Layout view shows margins and the horizontal and vertical ruler, the top and bottom margins can disappear because of the white space default settings. To restore the margin, you need to change the white space preference settings in your Display options.
How can I fix the Microsoft Word margins if they are not working properly?
1. Use the special cursor
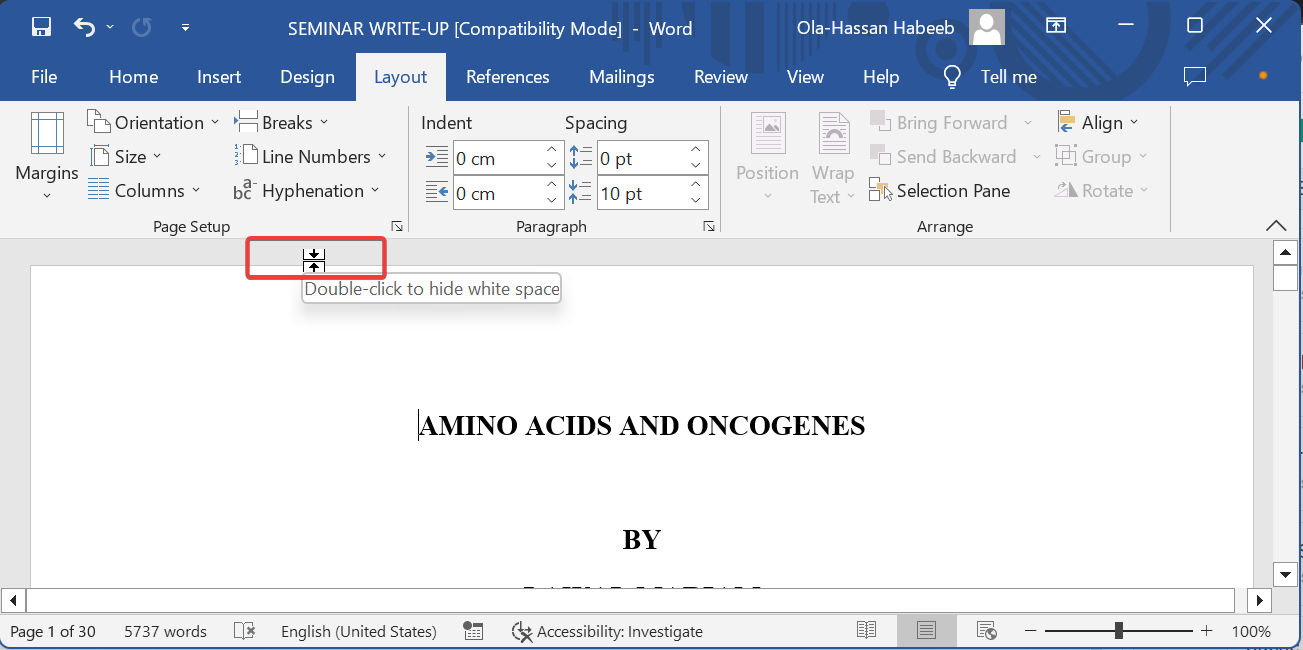
- Launch Microsoft Word and click the icon for Print Layout in the bottom right corner.
- Now, move your mouse cursor to the top of the page till it turns into a double-edged arrow.
- Finally, double-click this special cursor, and the margin should appear.
2. Use the Display Options menu
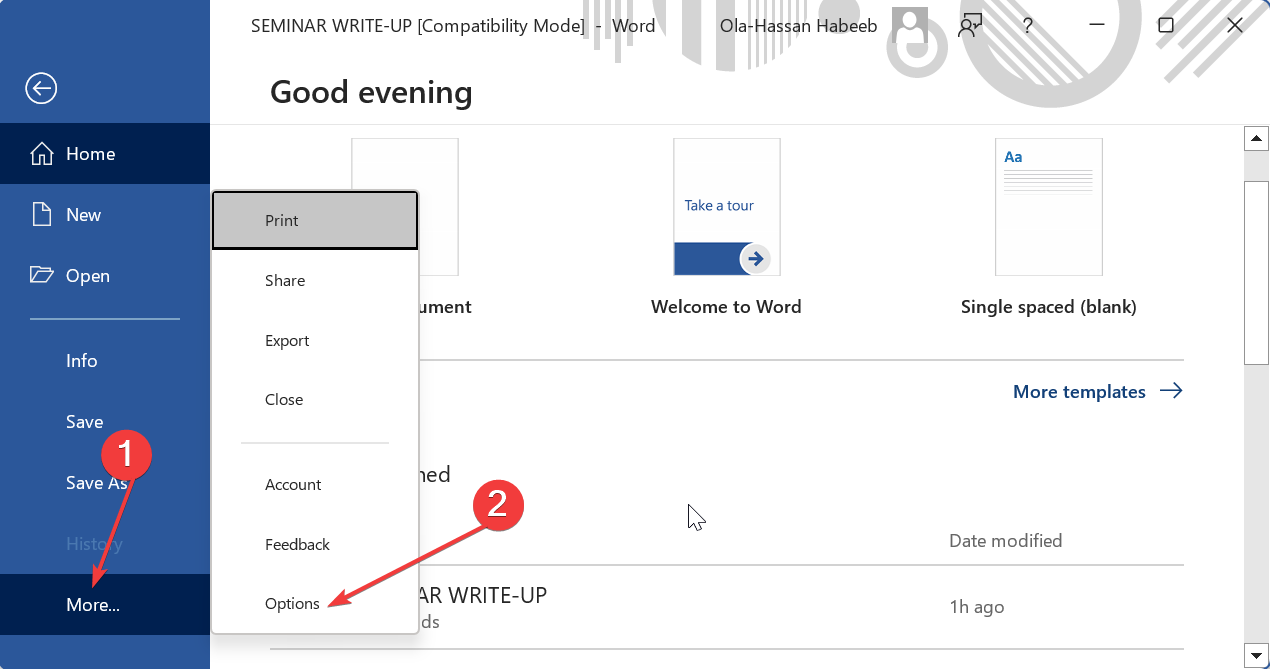
- Click the File tab in the Ribbon.
- Select More, and choose Options in the left pane.
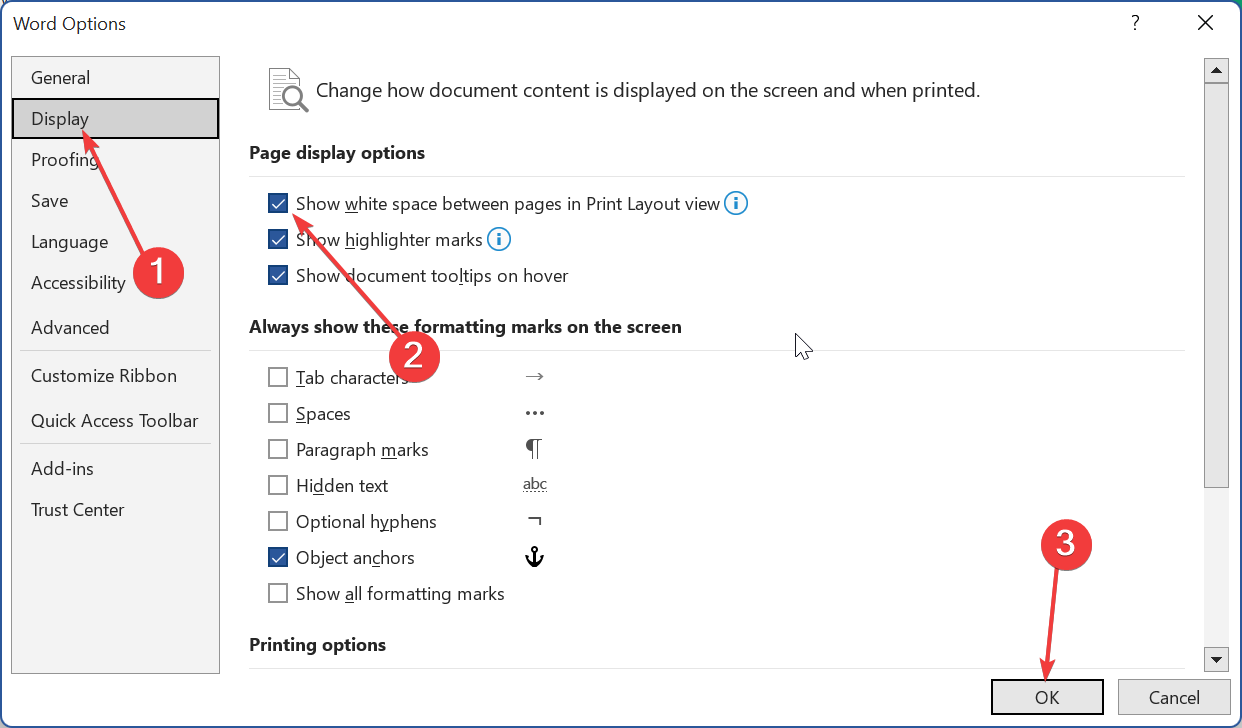
- Now, choose the Display option.
- Finally, check the checkbox for Show white space between pages in Print Layout view and click OK.
This should get the Microsoft Word margins working again.
3. Set custom margins as default
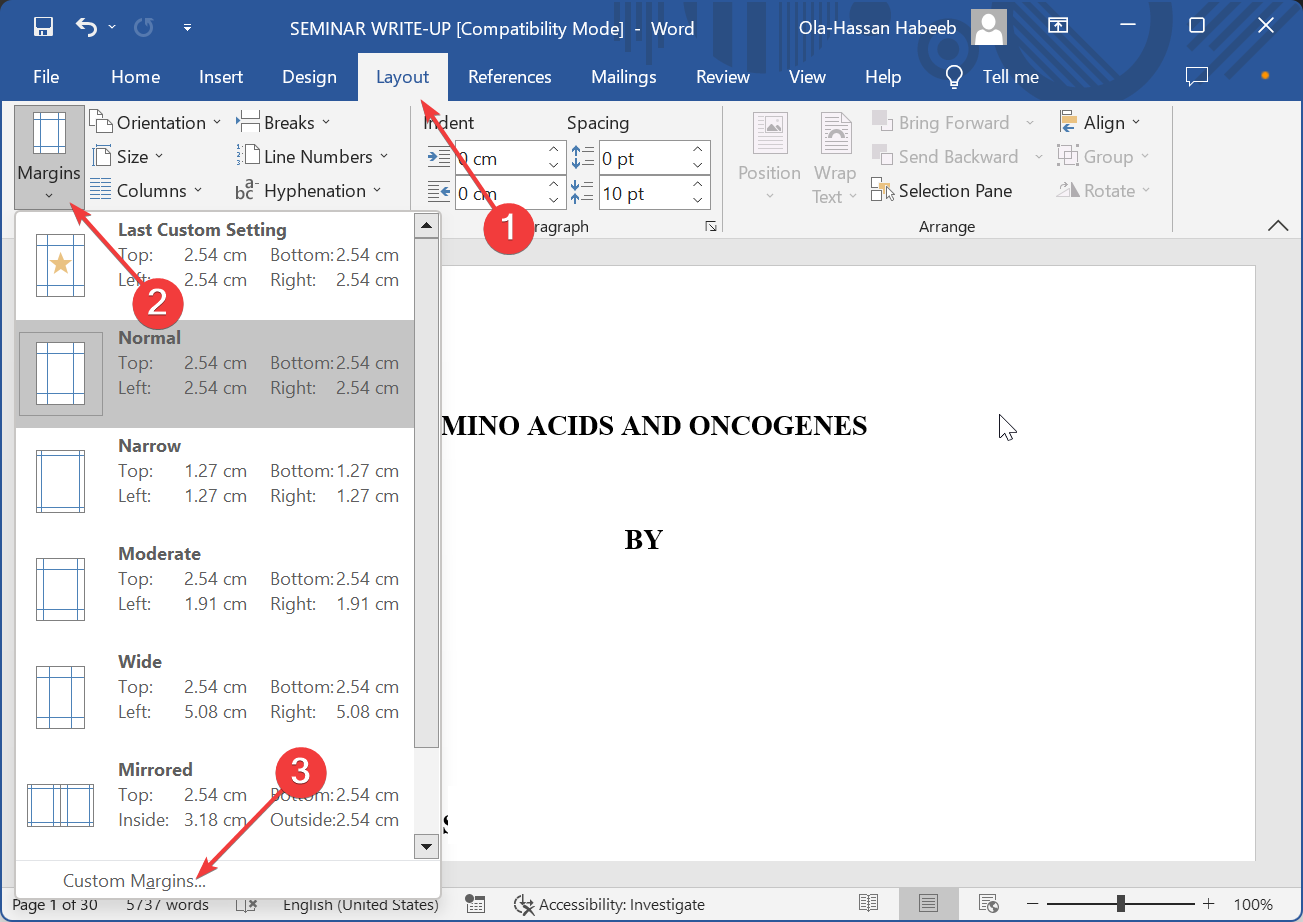
- Click the Layout tab at the top.
- Select Margins to open the preset margins drop-down menu.
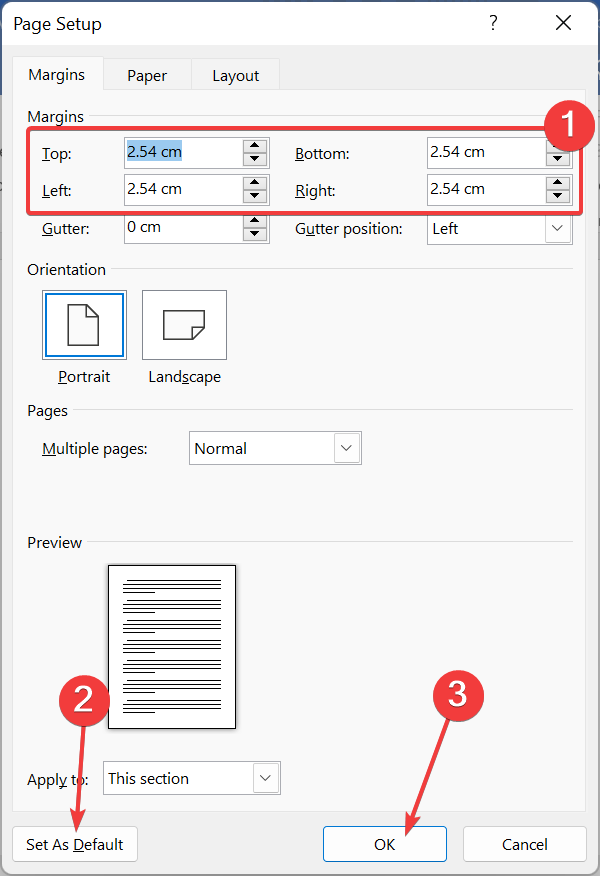
- Now, click the Custom Margins option.
- Finally, set your margins accordingly in the Page Setup window and click the Set As Default button, followed by OK.
If you have different margins on different sections of the file, using this method will make it uniform on the entire document.
We have reached the end of this guide on how to fix Microsoft Word margins if it is not working. This article touches the important aspects like the causes of the issue and the surefire ways to fix it.
Similarly, if you want to know how to resolve common margin errors in Word, our detailed guide will help you.
Were you able to fix this issue? Let us know in the comments below.

