Windows 11 Auto HDR: How to Enable & Use it
The HDR feature greatly improves the visuals on your monitor
5 min. read
Updated on
Read our disclosure page to find out how can you help Windows Report sustain the editorial team. Read more
Key notes
- Microsoft officially announced that there will be Auto HDR in Windows 11.
- During the announcement, the company showcased the feature in a game.
- Enabling HDR in Windows 11 is easy, and similar to the procedure applied in the previous OS.
- There are many other gaming-oriented additions to this new operating system.
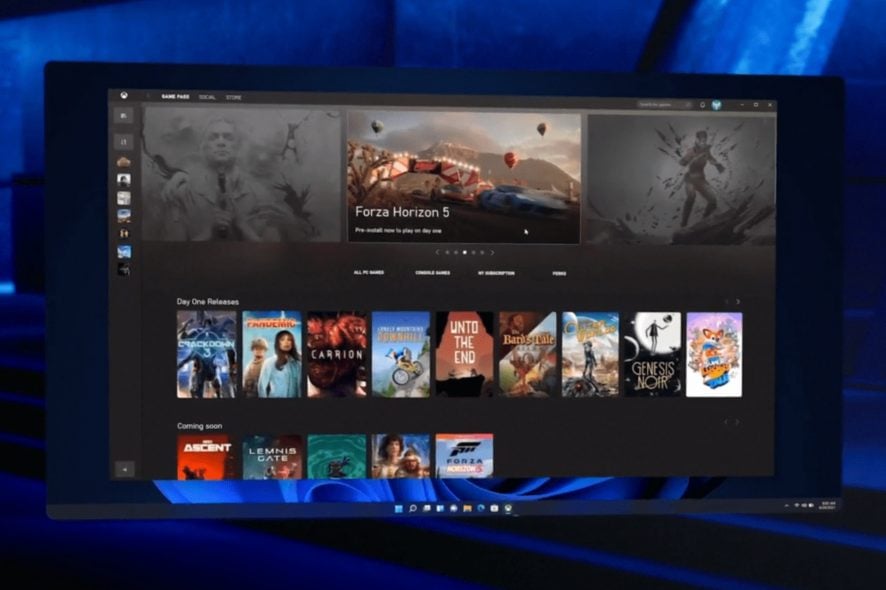
Every gamer has heard about one of the newest features and trends, High-Dynamic-Range imaging, also known as HDR. This system can reproduce a greater range of lighting levels in games.
HDR heavily outclasses the standard photographic techniques used to light games in the past. This feature is really useful when recording real-world scenes or playing games.
An Auto HDR feature was first introduced in Microsoft’s 9th generation of gaming consoles, the Xbox Series X and S.
Xbox’s game creator experience & ecosystem, Sarah Bond, officially announced Windows 11 includes built-in Auto-HDR.
However, this is only one of the many new features that make the operating system the best gaming OS ever made at the moment.
Should I use Auto HDR?
HDR automatically updates the lighting and color of your screen which will result in better and more realistic graphics.
This is just one of the many improvements that are going to change our gaming experience on Windows 11, which is actually branded as being a game-oriented operating system.
More so, Skyrim isn’t the only game that will benefit from Auto HDR! The feature will work with over 1000 games!
Some Windows Auto HDR-supported games such as DayZ, Rocket League, Age of Empires: Definite Edition, and even Doom 64 are included in the list as well.
If you are curious to see which games support Auto HDR, you should know that most of the games on the Windows Store are eligible.
We have a dedicated list of Xbox one games that support HDR.
What are the advantages of HDR in gaming?
We all know too well that the purpose of every game is to offer you an immersive experience.
Graphics do the most part, along with performance and of course the actual story of it all, but perfection is found in the small details, and with HDR you’ll get the full package.

The High Dynamic Range imaging offers a more true-to-life experience as it can almost replicate what the human eye is capable of seeing.
This feature not only gives you deeper saturation, more diverse contrast, and darker shadows, but it also captures you in the story and offers you the amazing experience you are searching for.
How do I turn on Auto HDR in Windows 11?
1. Make sure you have the required hardware
Here are the official requirements for external displays:
- An HDR display supporting HDR10
- DisplayPort 1.4 or HDMI 2.0 or higher
- Integrated or dedicated GPU with PlayReady 3.0 support such as:
- Intel UHD Graphics 600 series or higher
- Nvidia GeForce 1000 series or higher
- AMD Radeon RX 400 series or higher
The first thing required to enjoy these new graphic effects is hardware capable of HDR, more precisely an HDR-ready Monitor.
If you don’t have an HDR-ready monitor, visit our great list of the best gaming monitors and browse its products. There are lots of monitors there that support it.
Yes, unfortunately not every display out there supports this feature. Obviously, this is because it is quite new and it needs specific hardware to work.
Additionally, you need to make sure you have the best connection quality. Check your monitor for the available ports, and if you have an HDMI or Display port, connect it through those.
Ideally, DisplayPort 1.4 will yield the best results, both in terms of connectivity and graphics. HDMI and USB-C will also suffice. You should also buy a premium cable.
2. Enable Auto HDR on Windows 11
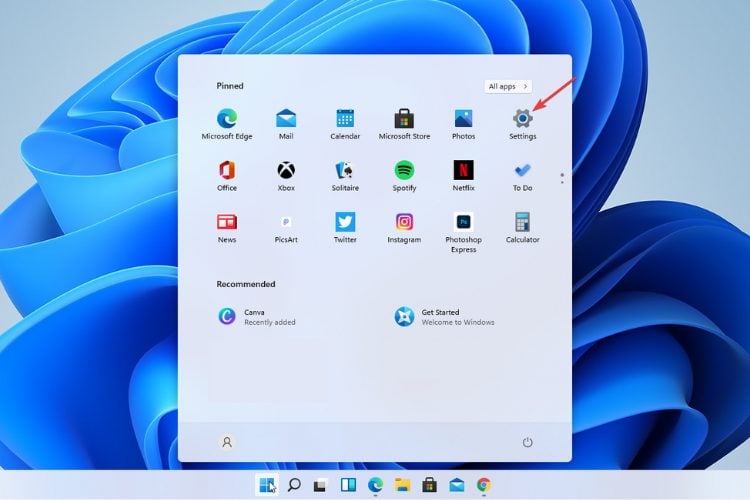
1. Press the Windows Key + S or click on the Start Menu icon located in the middle of the taskbar.
2. Click on the Settings icon.
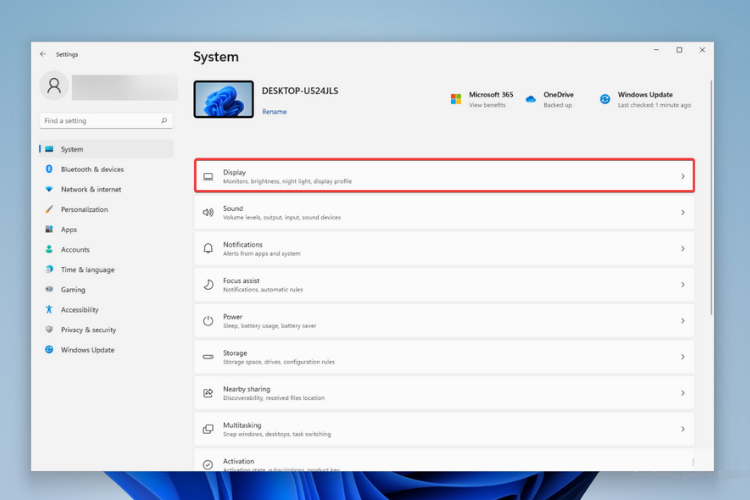
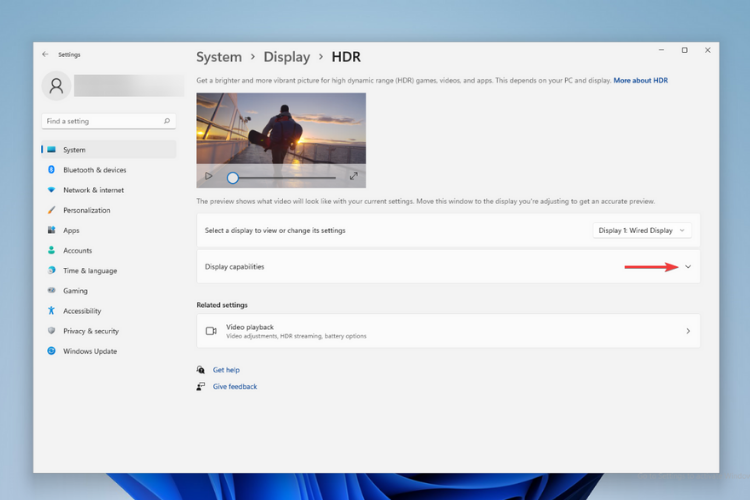
3. Once the Settings window opens, go to System.
4. Then, go to Display from the right-hand pane.
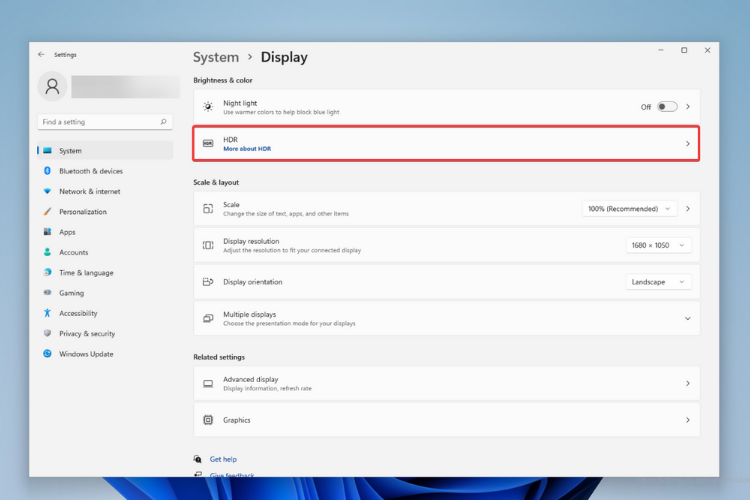
5. Click on HDR.
6. Expand the Display capabilities menu.
7. Now enable all the HDR settings you need, and you are good to go.
You can easily turn on auto HDR on your device via Settings. Also, there are different options for displaying HDR. You can use it to play games, or you can watch movies that have the option available.
Thankfully, the new Windows didn’t change the settings that much. You can enable Auto-HDR in a similar way to Windows 10, as showcased in the preview build.
You can enable or disable this setting separately on different displays from the display settings window if you have multiple Monitors.
Are there any other gaming improvements in Windows 11?
Interestingly enough, Auto HDR is not the first Xbox feature that Microsoft decided to incorporate into Windows. Another great addition is DirectStorage.
What does it do? Well, if your PC has a compatible NVME SSD of 1TB or more, it will redirect I/O calls for 3D graphical assets directly to the GPU.
This will not only reduce loading times, but will also improve other graphical elements such as draw distances, instant asset introduction, and texture variety.
As Microsoft declared in a blog post:
With DirectStorage, which will only be available with Windows 11, games can quickly load assets to the graphics card without bogging down the CPU. This means you’ll get to experience incredibly detailed game worlds rendered at lightning speeds, without long load times.
Let’s just say that if you’re a PC gamer, you’ll want to upgrade your OS and take advantage of these new features to get the best gaming experience.
We hope we answered your question about the HDR feature on Windows 11. If you have anything interesting to add regarding the subject, feel free to tell us in the comments section below.



User forum
0 messages