How to Turn on Spell Check in Outlook
Explore the step-by-step instructions to enable the feature
![]() 5 min. read
5 min. read
![]() Updated on
Updated on
Share this article
Improve this guide
Read our disclosure page to find out how can you help Windows Report sustain the editorial team. Read more
Key notes
- Enabling spell check on Outlook will ensure you send emails without grammatical errors.
- To do that, go to File, select Options, then go to Mail, & click the Spelling and Autocorrect button to select Check Spelling as you type.
If you are worried about grammatical and spelling errors while sending professional emails, you must turn on spell check in Outlook.
Once enabled, Outlook checks spelling automatically and spots the mistakes in the entire email when you click Send.
In this guide, we will explore step-by-step instructions to enable the feature to ensure your emails are free from grammatical errors.
How do I turn on auto spell check in Outlook?
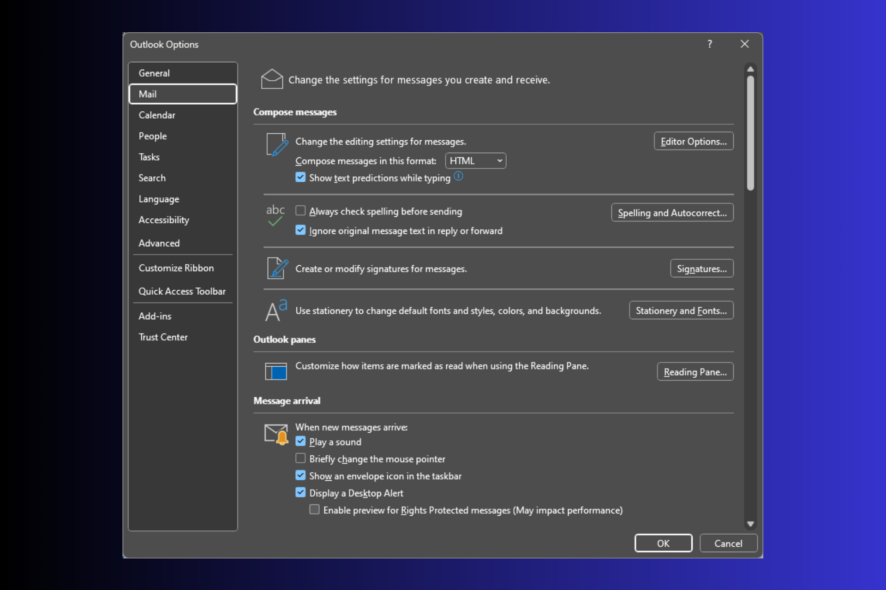
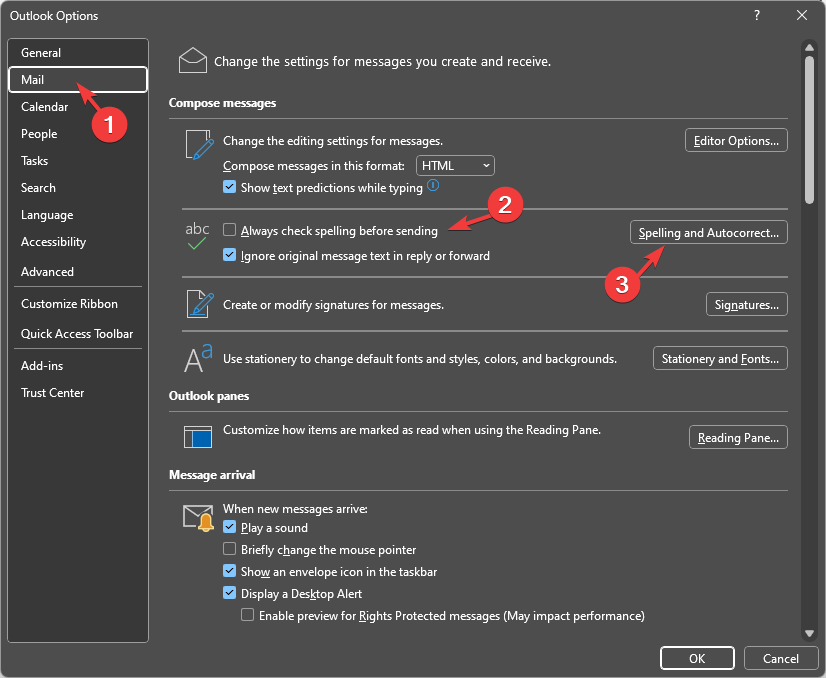
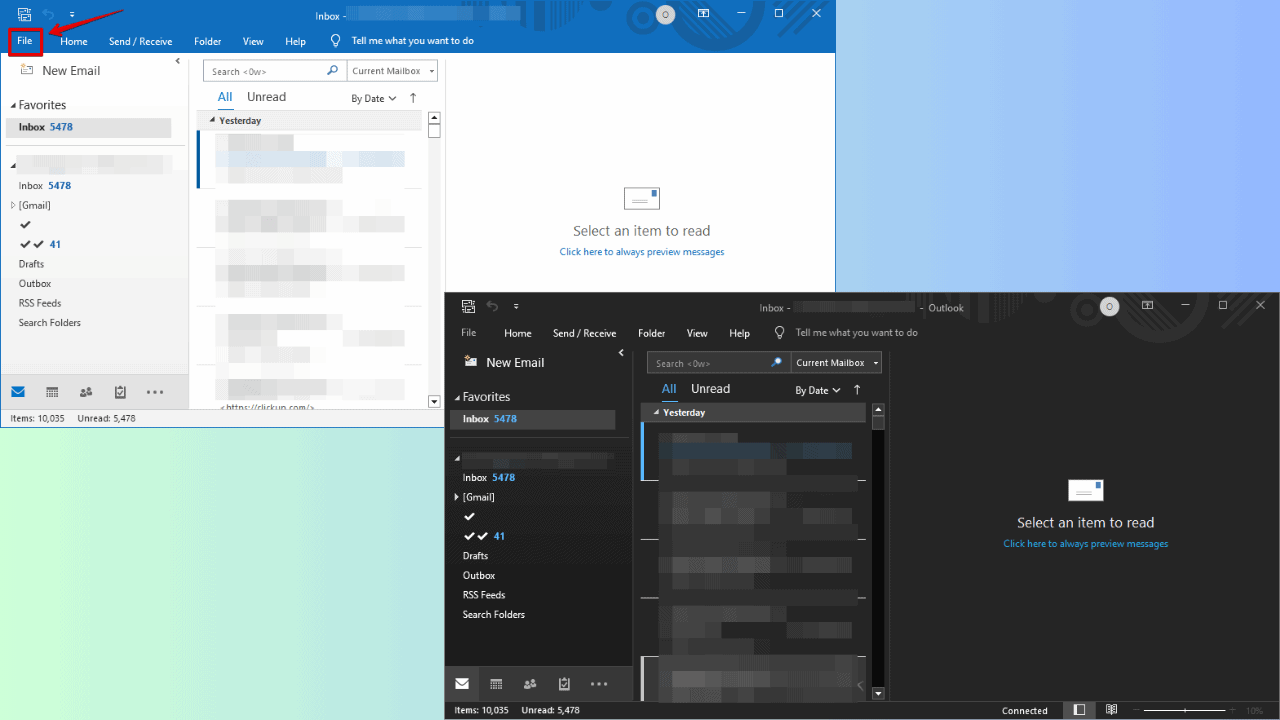
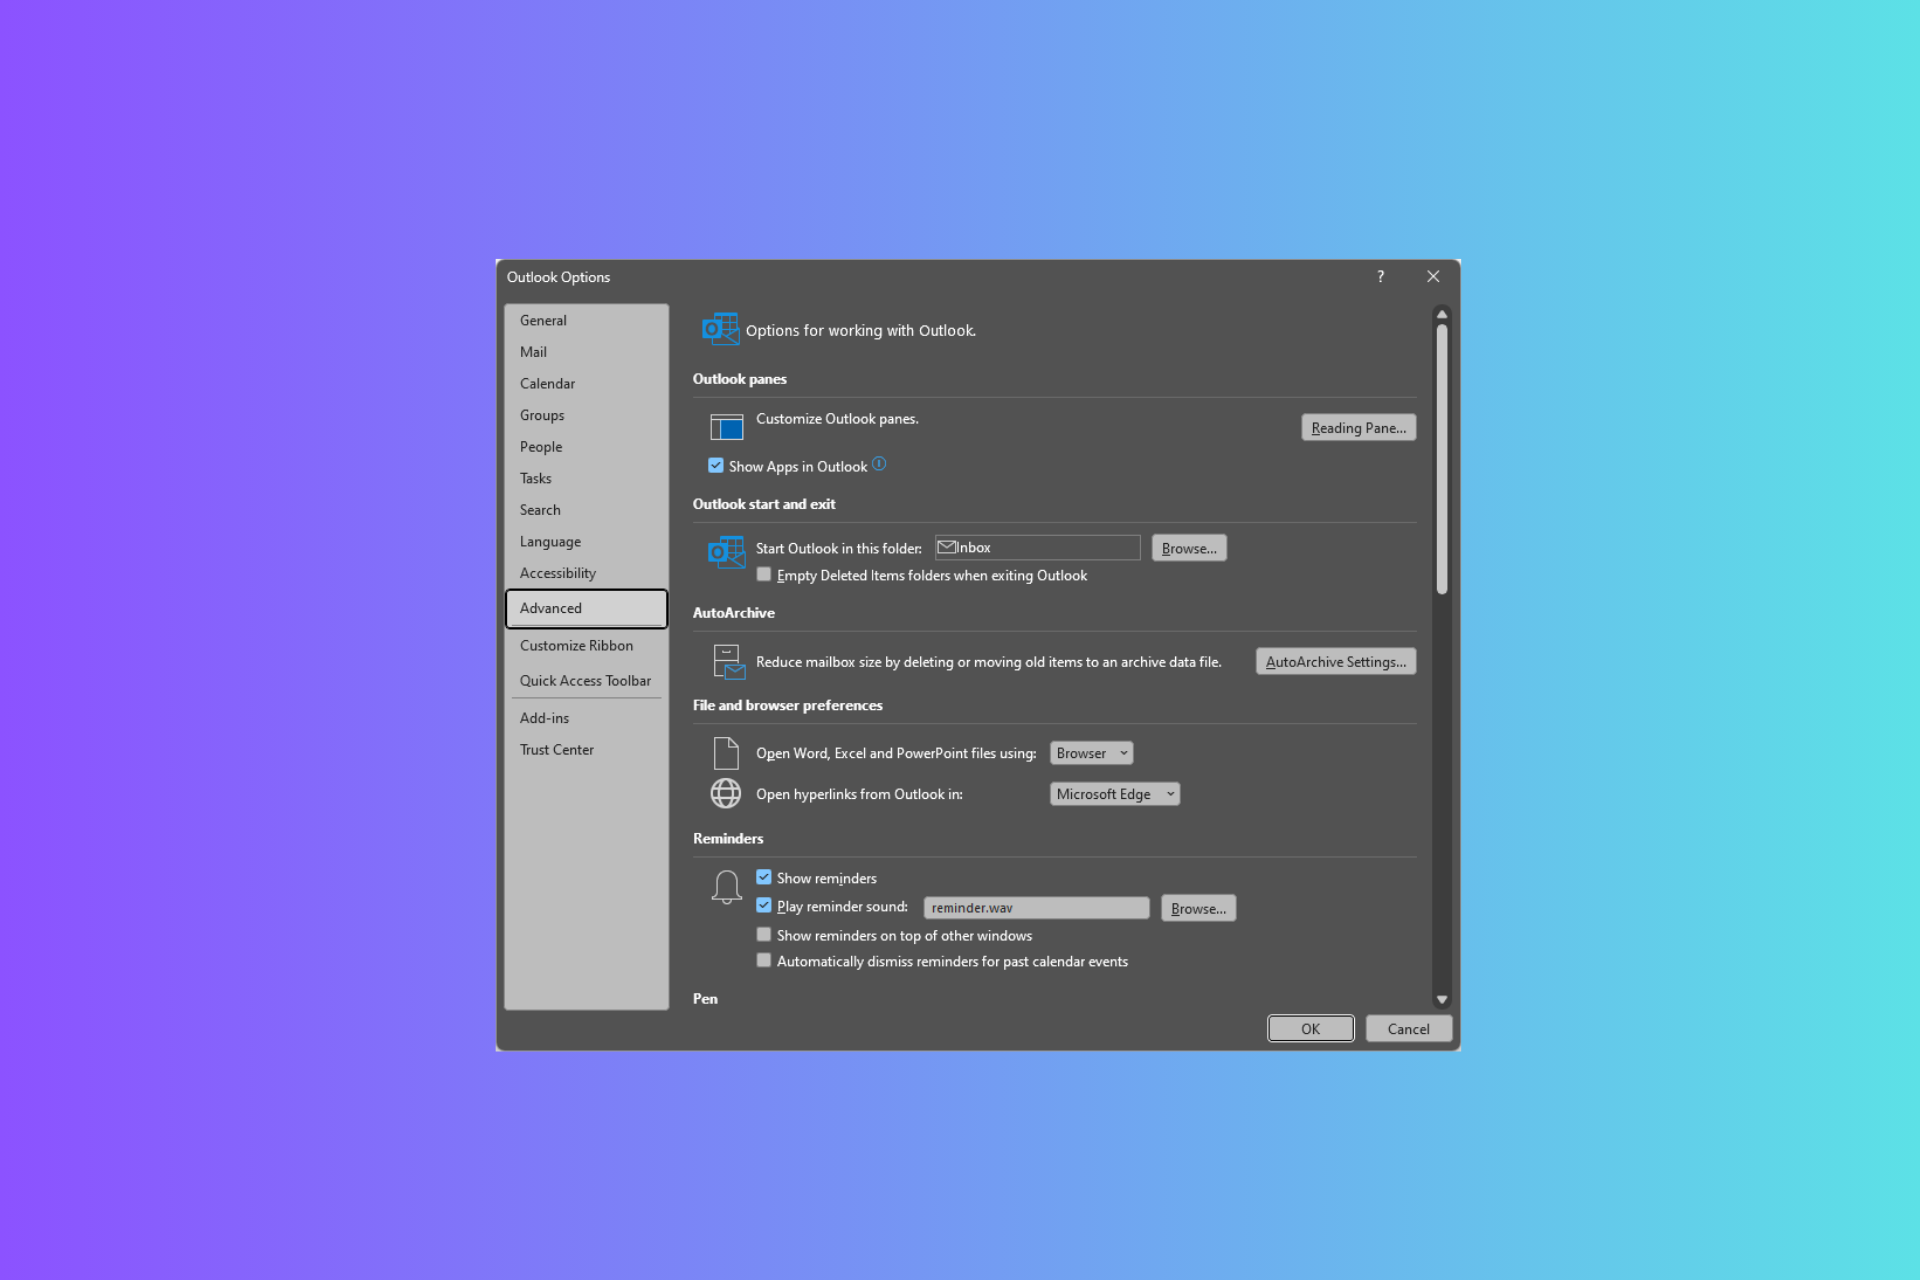
- On the Outlook window, go to the File tab.

- Select Options to open Outlook Options.

- Select Mail from the left pane, locate Compose Messages, and place a checkmark next to Always check spelling before sending.

- Next, click the Spelling and Autocorrect button.
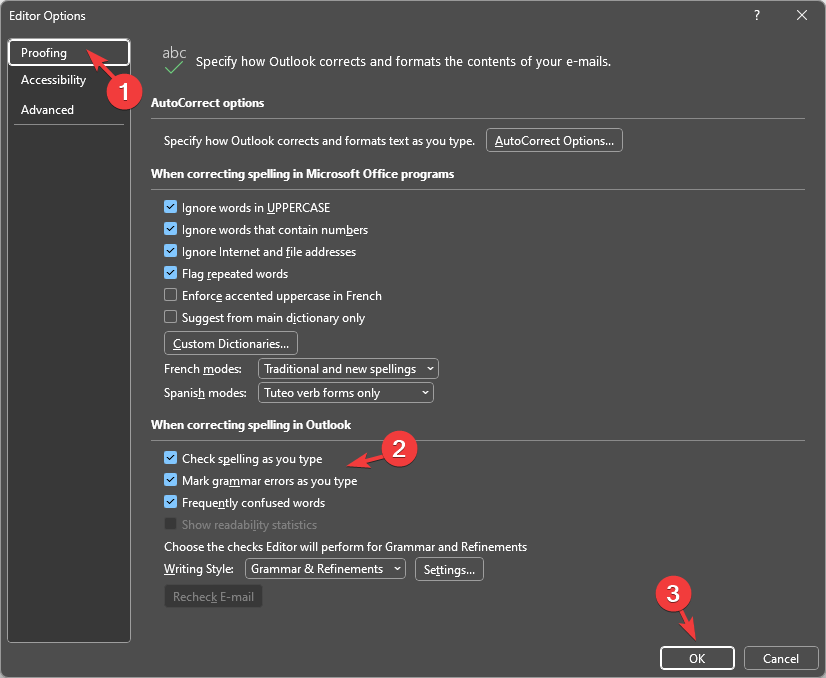
- On the Editor Options window, select Proofing from the left pane.
- Under When correcting spelling in Outlook, place a checkmark next to Check Spelling as you type, and Mark grammar errors as you type in the Spelling tab.
- Click OK to save the changes.


This is how you can quickly enable spell check on the Outlook desktop app. However, if you are using the Outlook web app, you must ensure the spell check for your browser and OS is enabled.
If Chrome spell check is not working for you, we advise you to read this guide to find easy solutions.
Why is my spell check not working on Outlook?
There could be various reasons why the feature may not be working on Outlook; some of the common ones are:
- Incorrect language – If the grammar checker on Outlook does not support the language of the email, the spell check will not work. Check the proofing language.
- Feature is disabled – Spell check might not work or respond if the feature is disabled. Check the Outlook options to confirm if it is working.
- Outlook app corrupted – If the Outlook app files are damaged, you might face many issues, including this one.
- Outdated app – An outdated version of the app could be the reason for many problems, such as this. Check for app updates to ensure that’s not the case.
Now that you know the causes of the issue, let us check the common solutions to the problem.
How can I fix spell check not working on Outlook?
Before engaging in advanced troubleshooting steps, you should consider performing the following checks:
- Restart the Outlook app.
- Check if Outlook Spelling and Grammar tool is enabled.
If you still can’t see the spell check, move to the solutions mentioned below.
1. Verify proofing language selected is correct
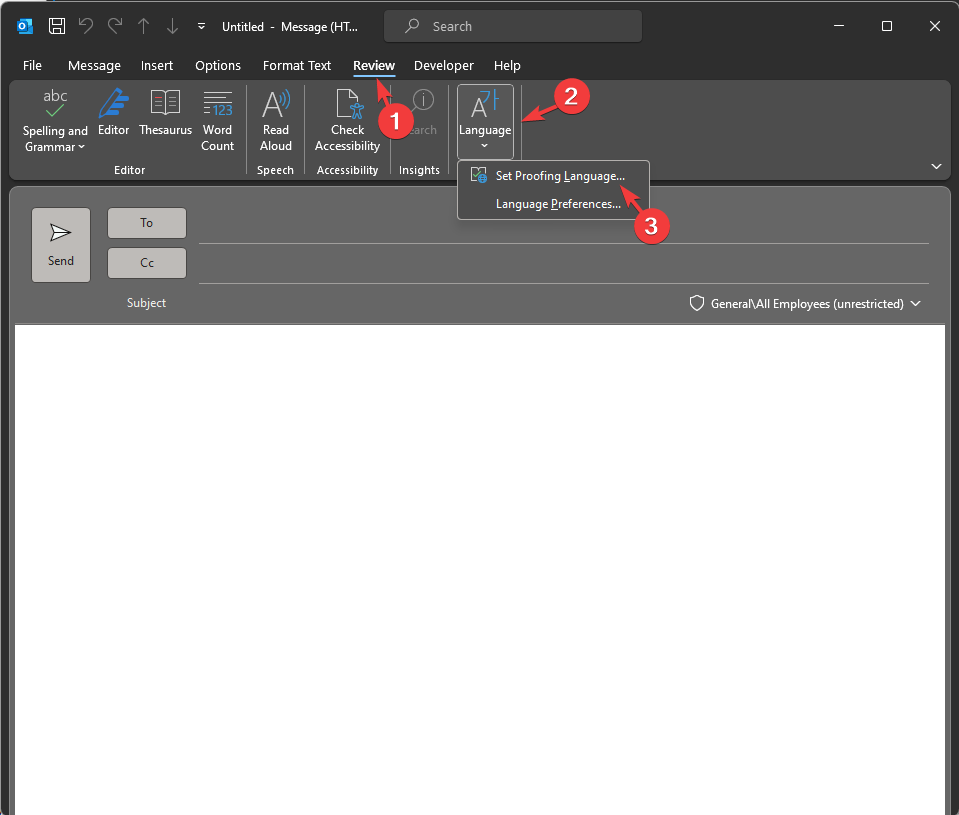
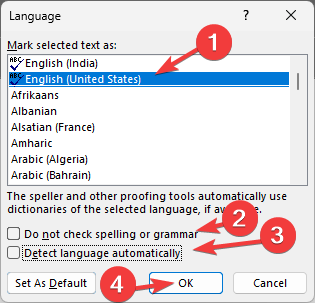
- On Outlook, go to the email message you are trying to send.
- Click the Review tab, then the Language button, and choose Set Proofing Language.

- From the Language dialog box, select the preferred language and remove the checkmark next to Do not check spelling and grammar.
- Also, remove the checkmark next to Detect language automatically.

- Click OK.
Check if the automatic spell check works; move to the next method.
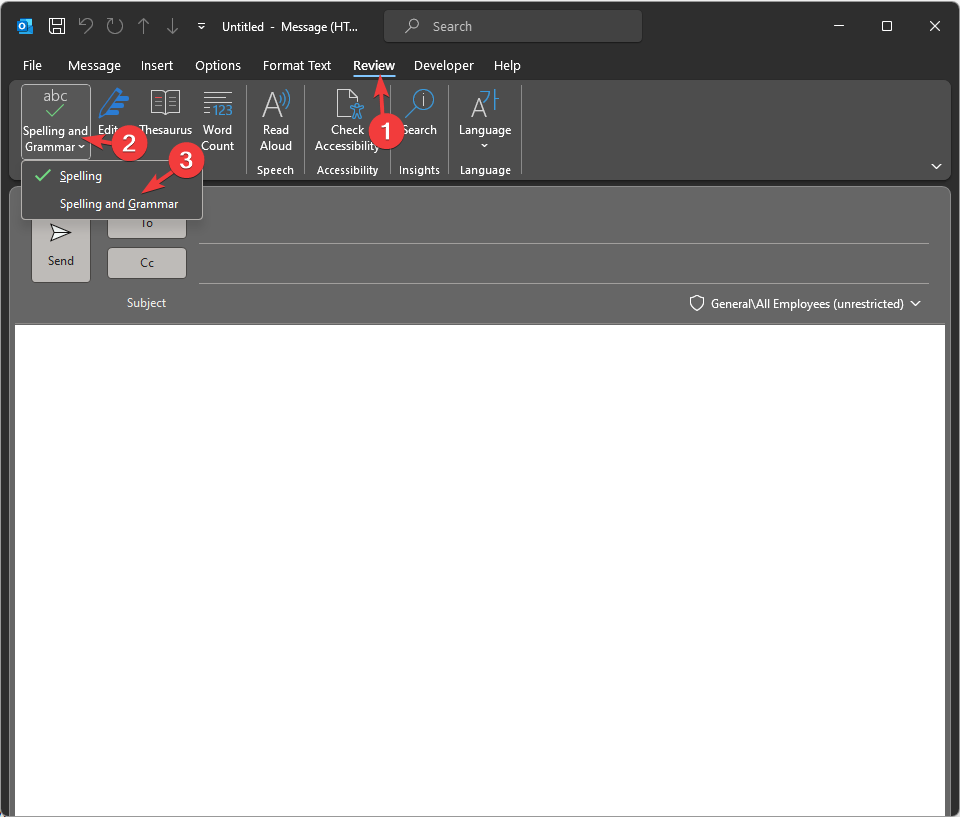
2. Run the Spell check manually
- Go to the email that you are trying to review on Outlook.
- Select the Review tab from the menu bar, then select Spelling and Grammar; choose Spelling or Spelling and Grammar from the drop-down list.

- It will spot spelling mistakes and suggest corrections. If found, apply the suggestions to remove the errors.
If you face similar issues like Outlook spell check not working with signature, we recommend you check out this guide for easy solutions.
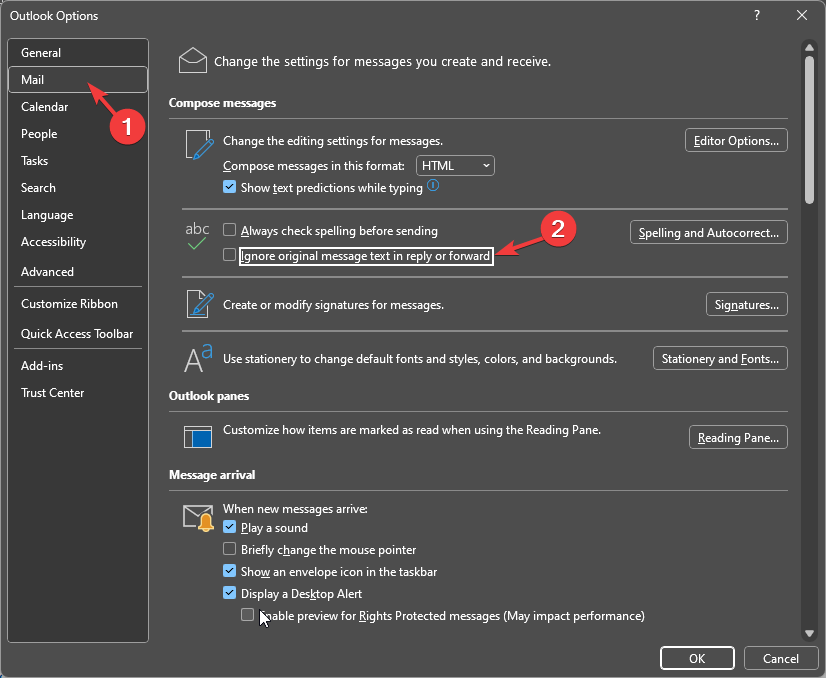
3. Disable Ignore original messages text in reply or forward option
- On the Outlook main window, go to the File tab.
- Select Options to open the Outlook Options window.
- Click Mail from the left pane, locate Compose Messages, and remove the checkmark next to Ignore original messages text in reply or forward option.
- Click OK to confirm the action.

Check if you can use the automatic spelling checks feature now.
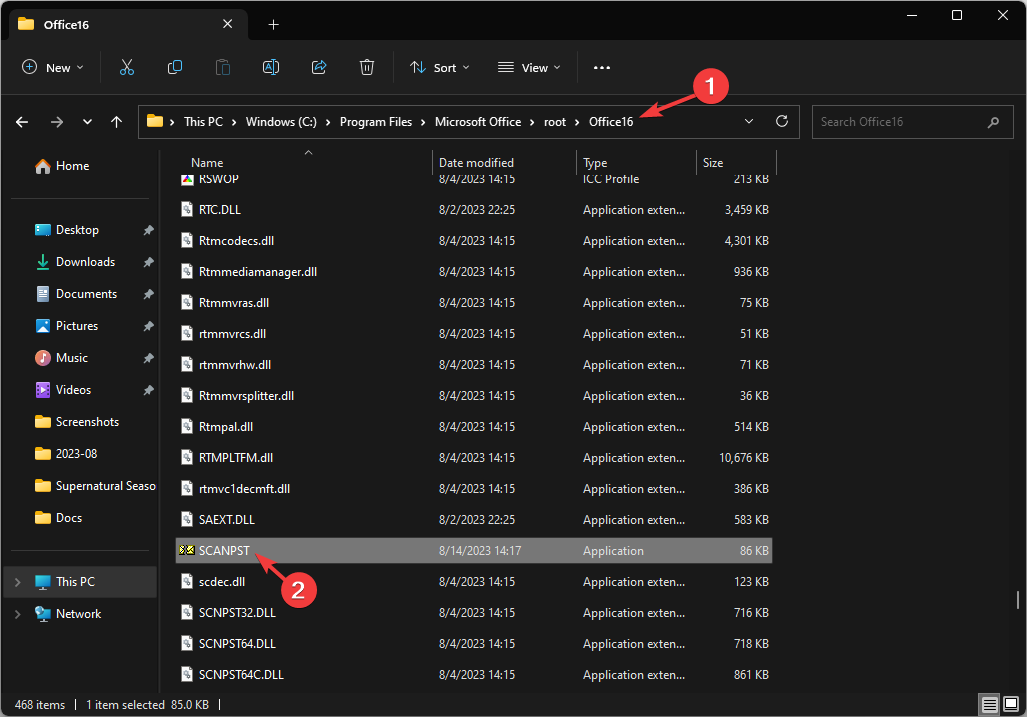
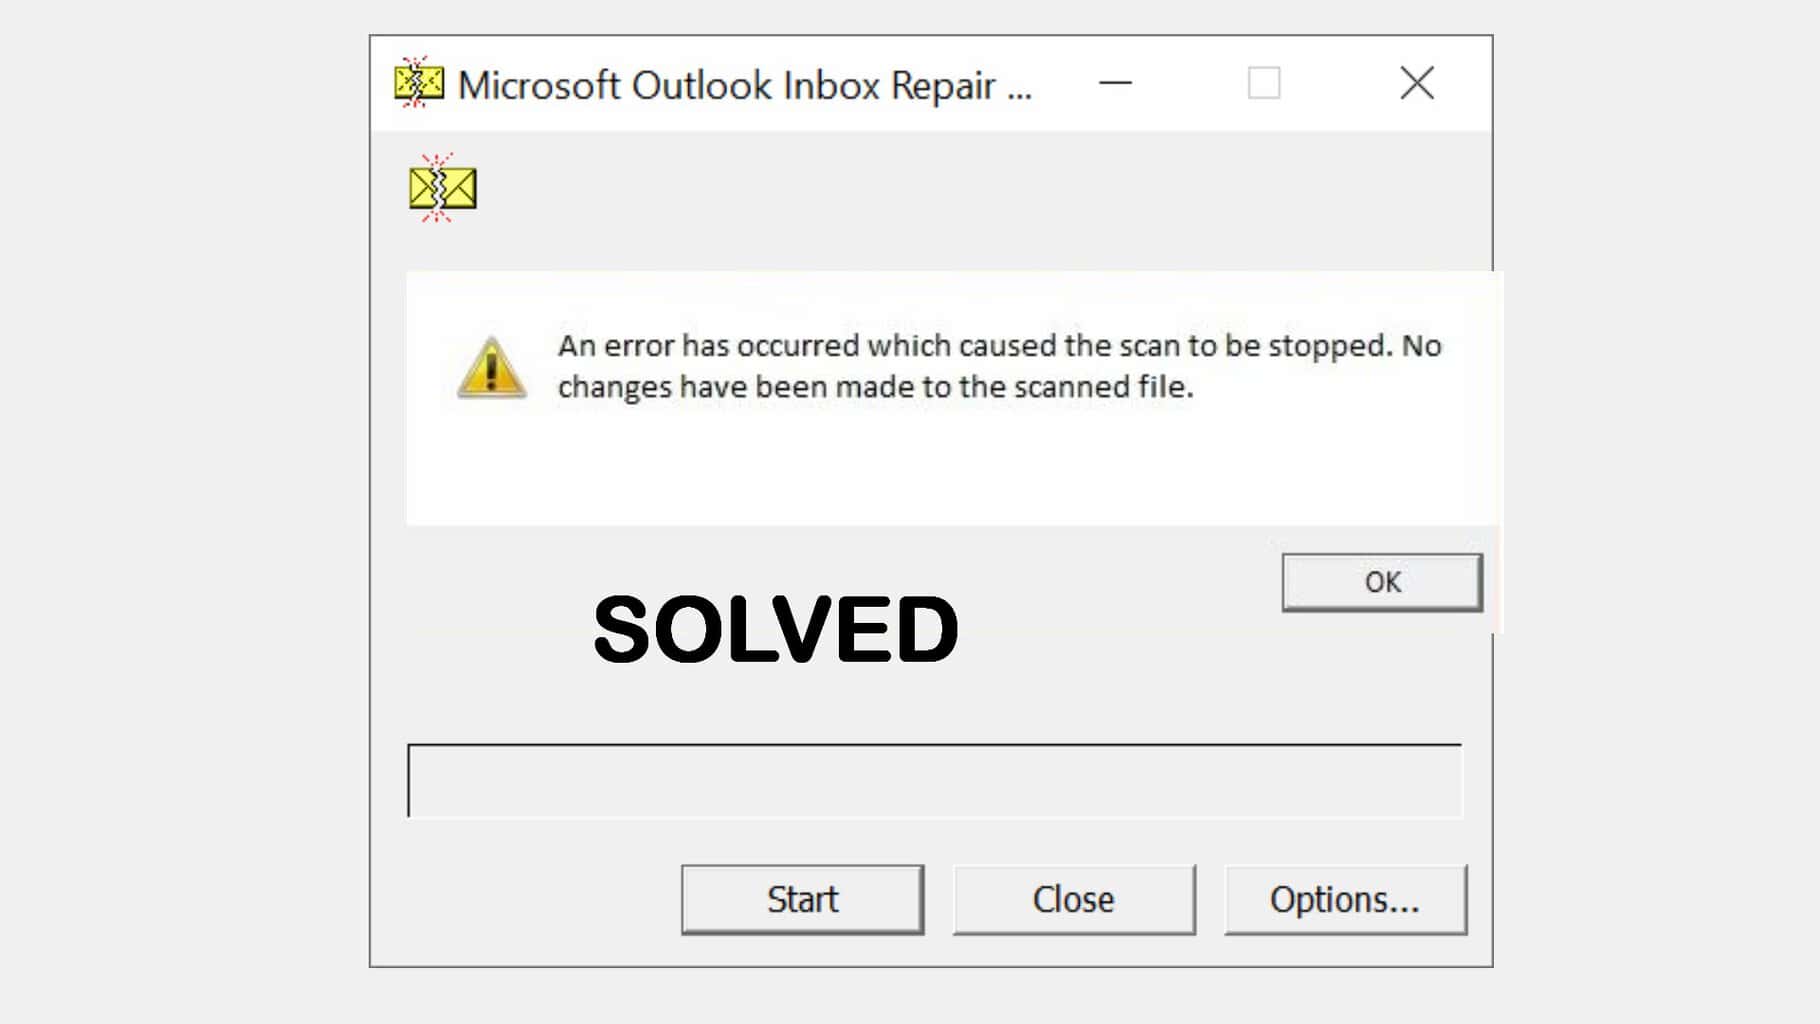
4. Repair the Outlook .PST file
- Close Outlook completely and navigate to the following file paths according to the Outlook version you have:
- 2007:
C:\Program Files (x86)\Microsoft Office\Office12 - 2010:
C:\Program Files (x86)\Microsoft Office\Office14 - 2013:
C:\Program Files (x86)\Microsoft Office\Office15 - 2016 & 2019:
C:\Program Files (x86)\Microsoft Office\root\Office16
- Microsoft 365:
C:\Program Files\Microsoft Office\root\Office16
- 2007:
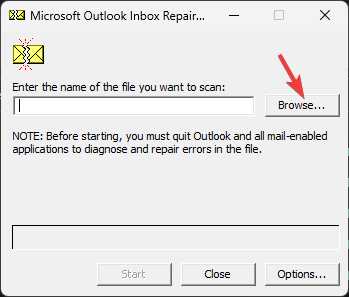
- Locate SCANPST.EXE and double-click it to open the Microsoft Inbox Repair tool.

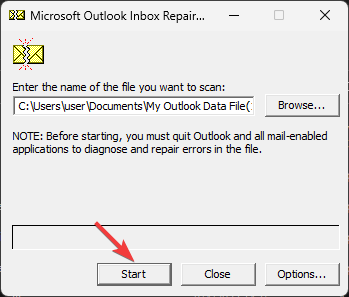
- Click Browse to select the .PST file from your computer.

- Now click Start.
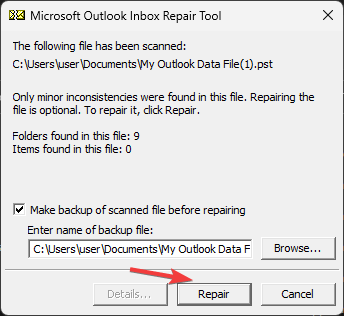
- Once scanned, click Repair if the scan shows errors.

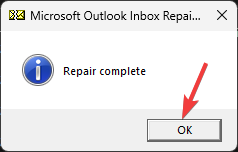
- You will get the Repair complete window, click OK, and relaunch Outlook.

So, this is how you can turn on spell check on Outlook and deal with the issues if the feature is not working. You can also make this change system-wide by enabling the autocorrect feature in your Windows 11.
If the spell check is not working on Word, we suggest you check out this guide to find the expert-recommended solutions.
Please feel free to give us any information, tips, and your experience with the subject in the comments section below.


User forum
0 messages