How to Lock or Unlock a Keyboard on Windows 10 & 11
Use a third-party tool to unlock the keyboard

Whether you want to temporarily disable the keyboard to prevent accidental input or re-enable it after a period of inactivity or after you accidentally disabled it, this guide can help!
We will walk you through simple methods to lock or unlock your keyboard on Windows 10 and 11 computers.
How can I lock or unlock a keyboard on Windows 10/11?
First, reconnect the keyboard to ensure it is properly connected, ensure the Num Lock key is disabled, and press Windows + L to lock the keyboard instantly.
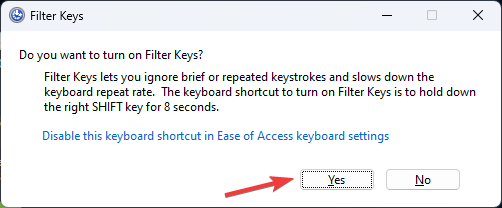
1. Use the Shift key
- Press the Shift key for 8 seconds till you see the Filter keys prompt.
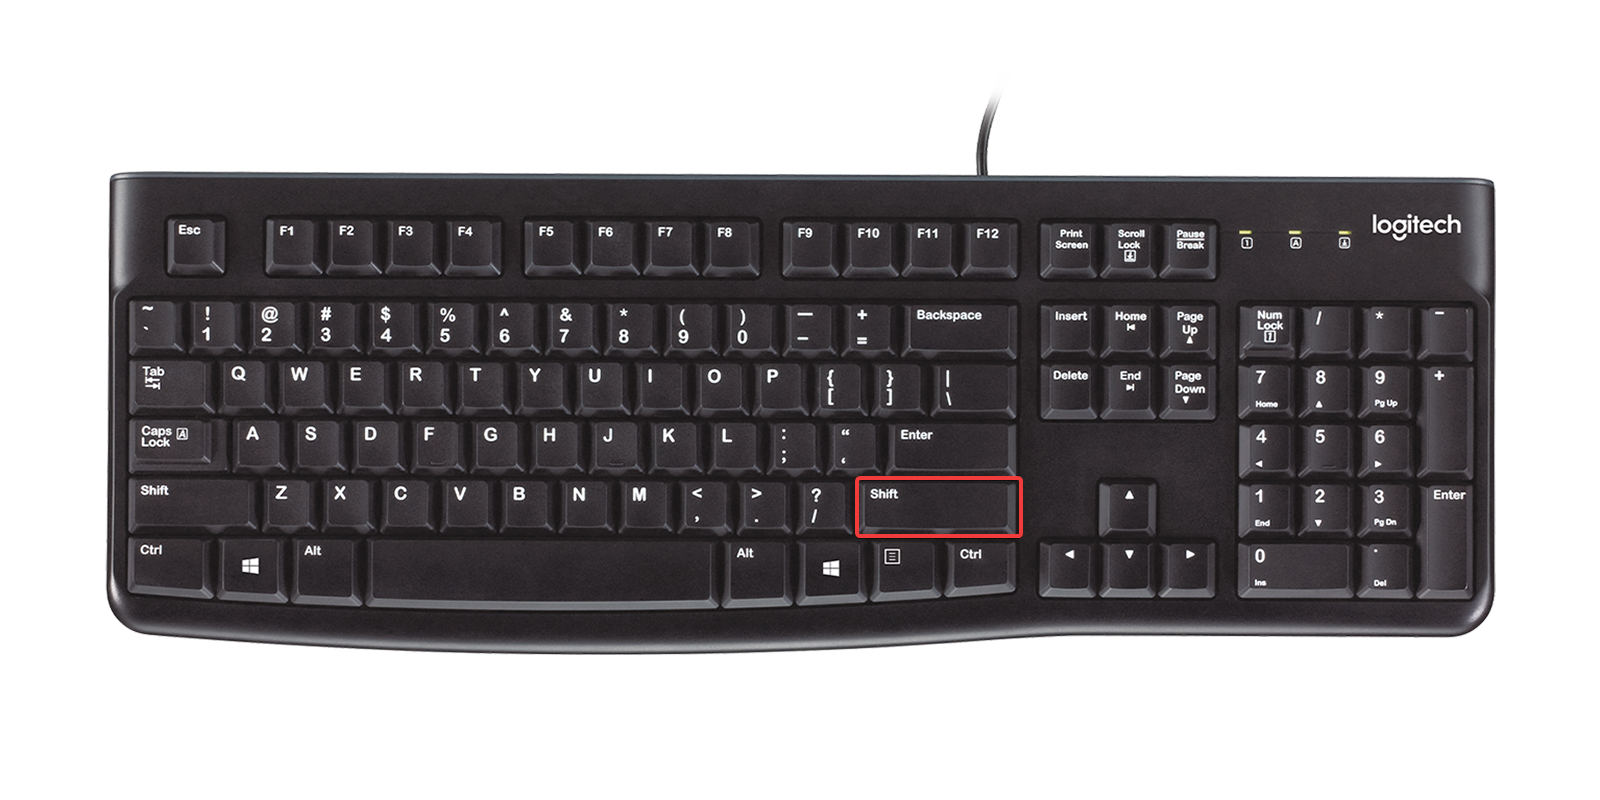
- Click Yes to lock the keyboard.
- Again, press the Shift key for 8 seconds to unlock the keyboard.
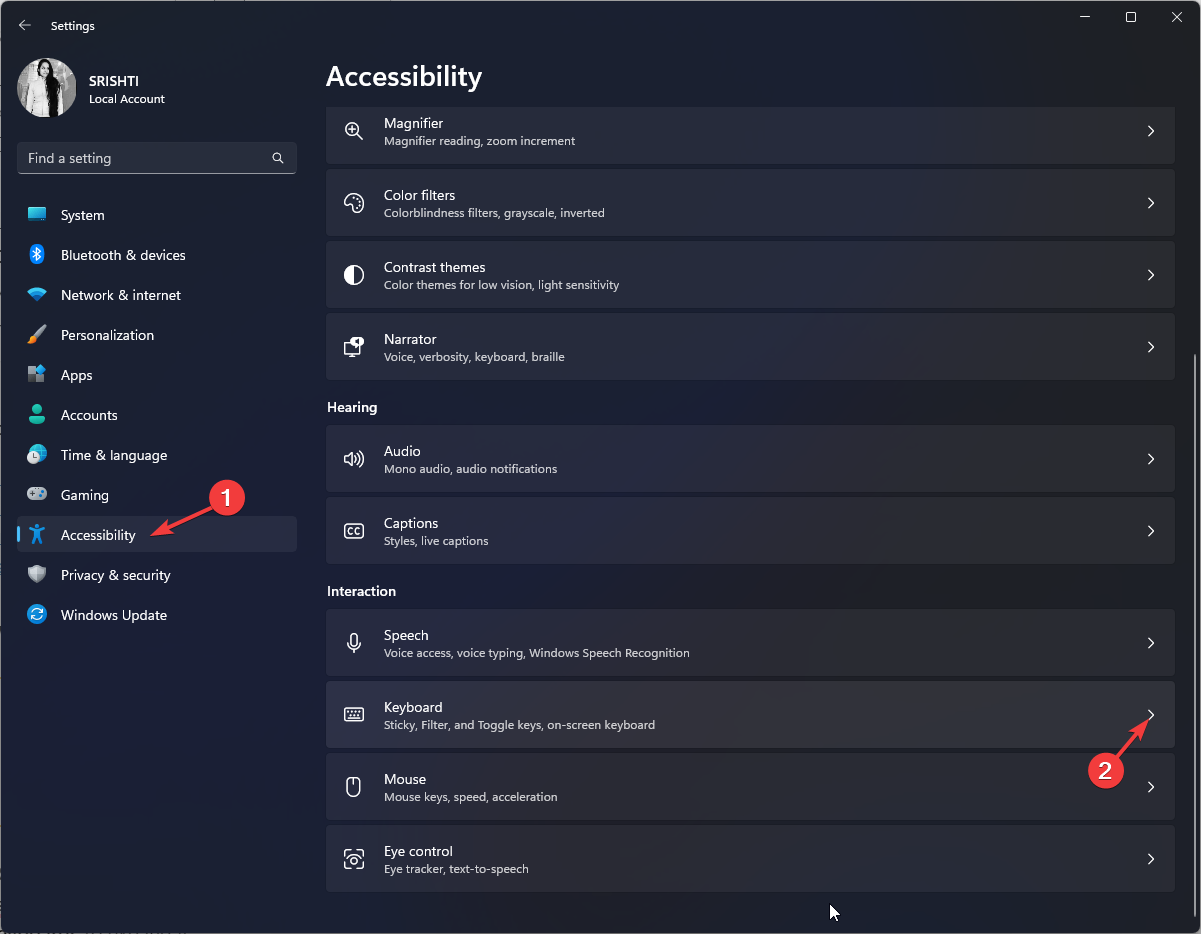
2. Use the Settings app
- Press Windows + I to open the Settings app.
- Go to Accessibility, then select Keyboard.
- Toggle on the switch for Sticky Keys and Filter Keys to lock the keyboard.
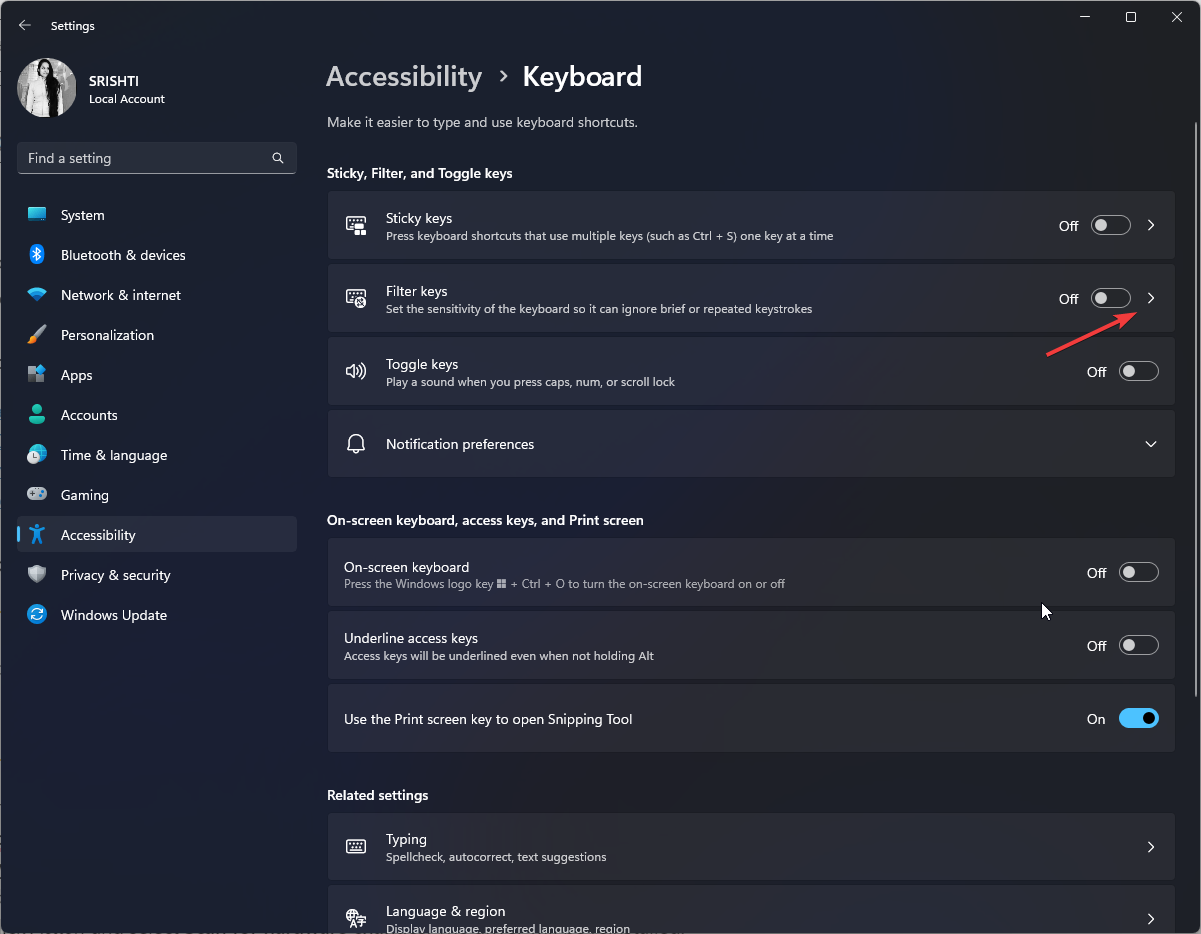
- Toggle off the switch for both to unlock the keyboard.
3. Reinstall the Keyboard driver
 NOTE
NOTE
- Press Windows + R to open the Run dialog box.
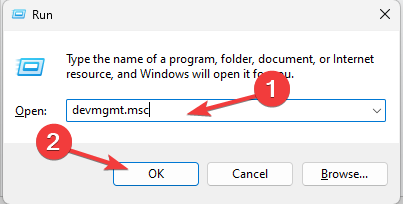
- Type devmgmt.msc and click OK to open Device Manager.
- Locate and click Keyboards to expand it.
- Right the relevant driver and select Uninstall device.
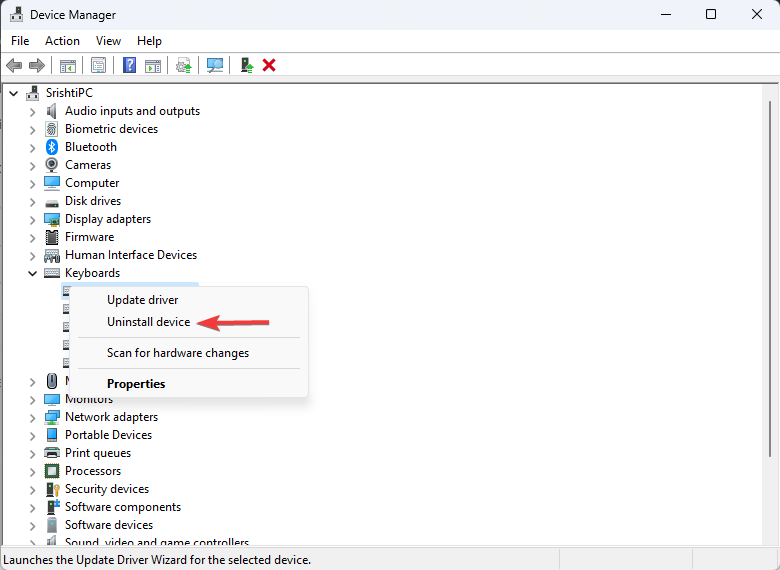
- Once uninstalled, click Action and select Scan for hardware changes. The driver will be reinstalled.

- Restart your computer to confirm the changes.
You can also try a handy driver updater to scan your device for corrupted or missing drivers, and find the latest versions from a large database.
That’s why a dependable updater can help you find and update your drivers automatically. We strongly suggest the Fortect Driver Updater, and here’s how to do it:
- Download and install the Fortect app.
- Launch Fortect and wait for the app to perform the initial scan.
- Navigate to the Driver Updater section and start the scanning process.
- Check the scanning result and select which drivers to update, or click the update all button

- Restart your PC to ensure the applied changes.
Disclaimer: In order to perform some operations, this software must be updated to the premium plan.
4. Use the Control Panel
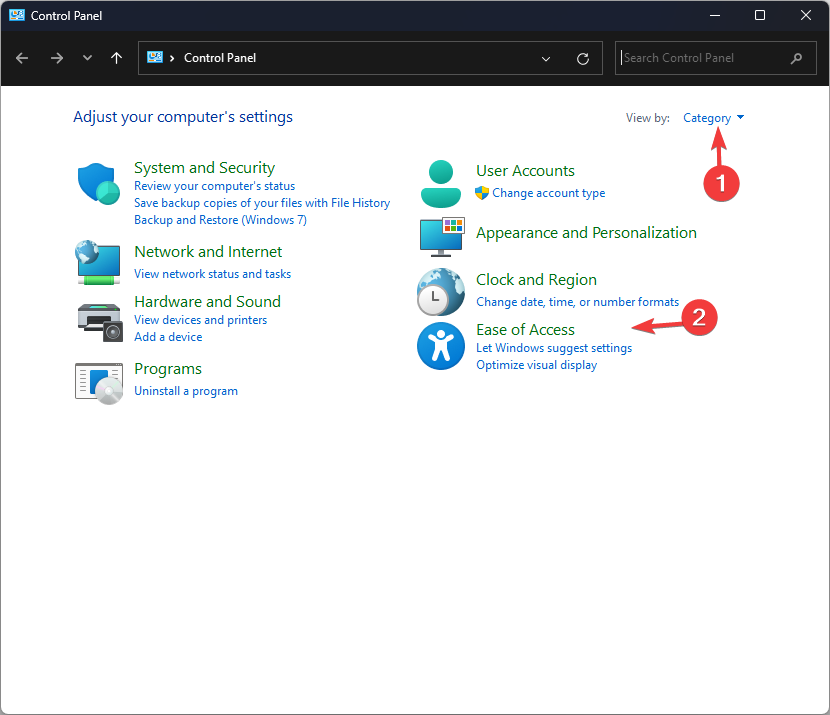
- Press the Windows key, type control panel, and click Open.

- Select View by as Category and click Ease of Access.
- Click Change how your keyboard works.
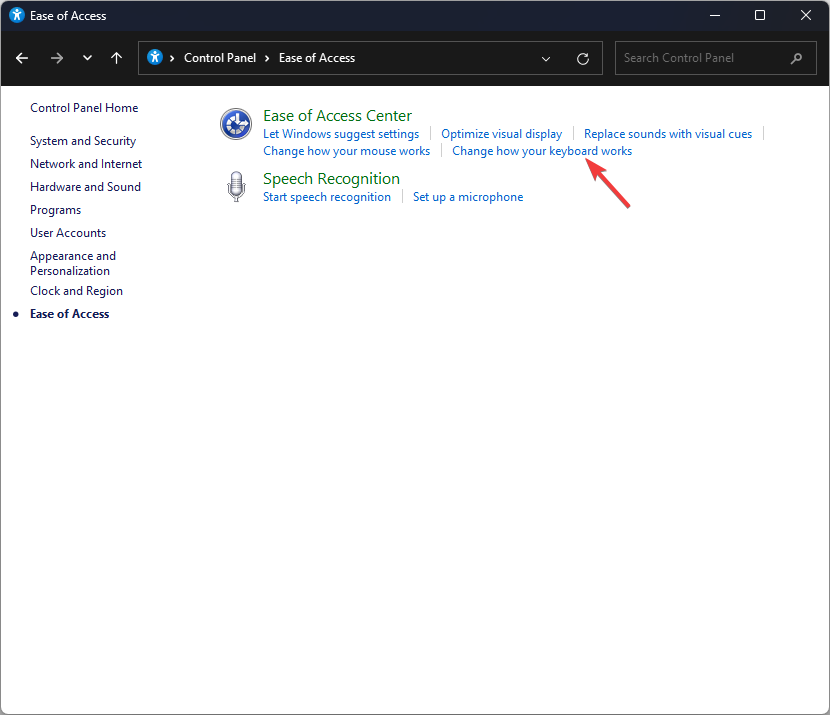
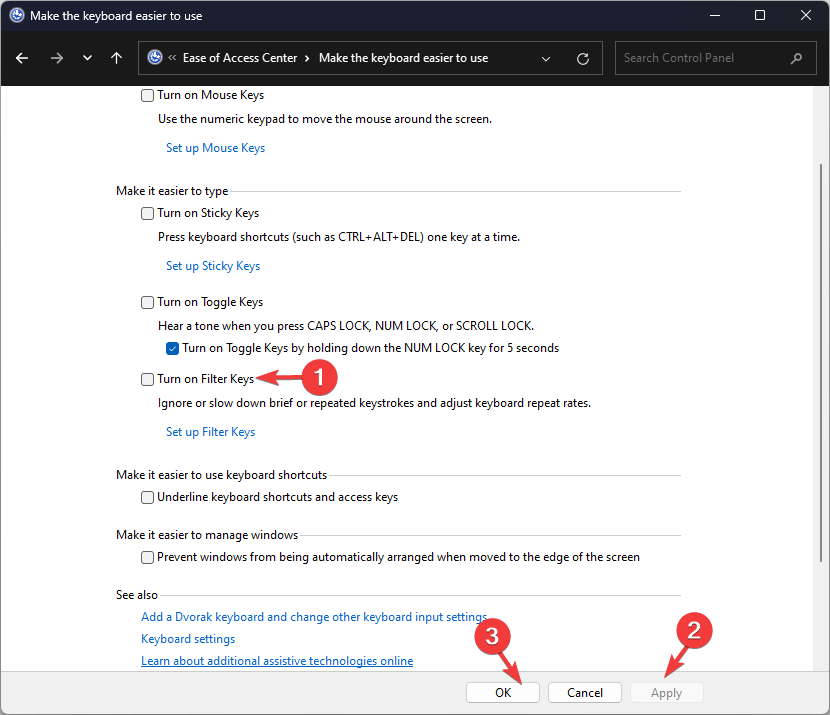
- Go to Turn on the Filter Keys & place a checkmark next to it to lock the keyboard, and click OK.
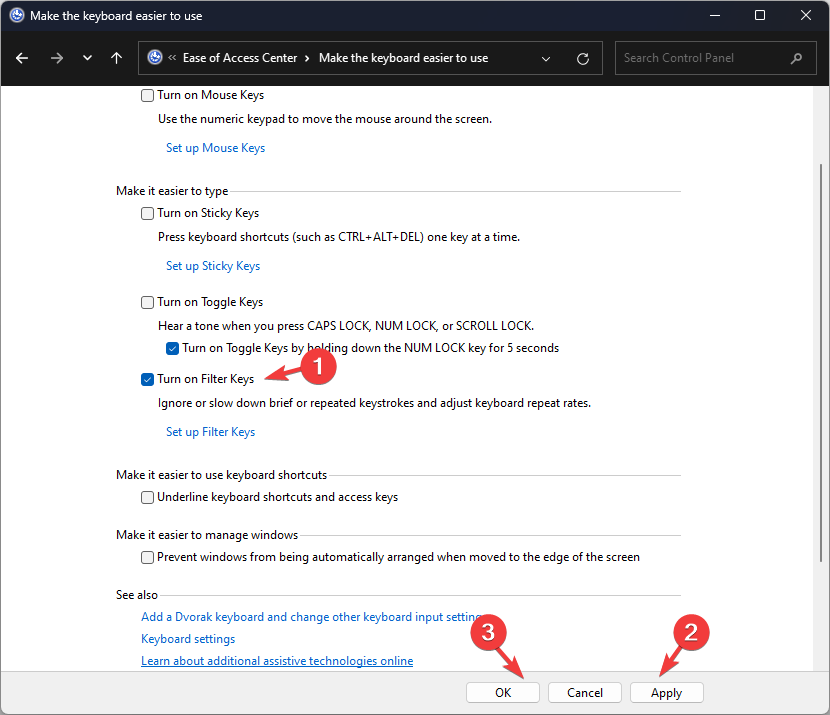
- To unlock the keyboard, remove the checkmark next to Turn on the Filter Keys and click OK to save the changes.
5. Use the third-party app
- Download the Keyboard Locker app for Windows computers.
- Locate the KeyboardLocker.zip file, double-click it, and select Extract all to extract the file.
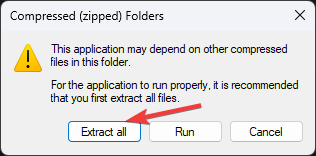
- Now click Extract. The folder with Keyboard Locker will open.

- Open it and double-click the KeyboardLocker.exe file; you will see a little keyboard symbol in your notification area.

- To lock your keyboard, press Ctrl + Alt + L. The icon changes to indicate that the board is secured.
Your keyboard may be locked because Sticky Keys or Filter Keys are activated, a keyboard shortcut accidentally locks it, or drivers interfere. To fix it and similar issues, follow the steps above.
They also work if you want to enable the Filter Keys feature to prevent unintended keystrokes.
And if your keyboard is not working on Windows 11, reinstalling drivers would work. You can also learn how to easily restart your laptop using the keyboard.
Please feel free to share any information, tips, or your experience with the subject in the comments section below.
Read our disclosure page to find out how can you help Windows Report sustain the editorial team. Read more


Improve this guide


User forum
0 messages