UNSUPPORTED PROCESSOR error in Windows 10/11 [FULL FIX]
8 min. read
Updated on
Read our disclosure page to find out how can you help Windows Report sustain the editorial team. Read more
Key notes
- The unsupported processor Windows 10 BSoD happens due to compatibility problems between your components.
- If you get the bsod unsupported processor error, check if your system configuration is compatible with your CPU.
- Installing and using a specialized system restoration tool will also get rid of the unsupported processor type 0 coreinfo error.
- Your OS can also fix the unsupported processor boot loop if you use SFC and DISM scans, or the Windows troubleshooter.

Blue Screen of Death errors are troublesome since they restart your computer in order to prevent damage to your PC, and thus there’s the risk of losing work-related progress or school projects.
These types of errors can be caused by problematic software, or in a worst-case scenario, faulty hardware. It is important to keep track of your hardware and software to prevent such problems from occurring.
Since these types of errors are rather serious, today we’re going to show you how to fix the UNSUPPORTED_PROCESSOR BOsD error on Windows 10.
How can I fix UNSUPPORTED PROCESSOR BSoD error
1. Be sure that your processor meets the hardware requirements
Many users reported an UNSUPPORTED_PROCESSOR error while installing Windows 10, and in order to fix this error, you need to be sure that your processor supports PREFETCHW instruction.
According to users, in order to install 64-bit version of Windows 10, your processor needs to have support for PREFETCHW instruction.
If your processor doesn’t support PREFETCHW, you can always install the 32-bit version of Windows 10, and it should work without any problems.
2. Update Windows 10
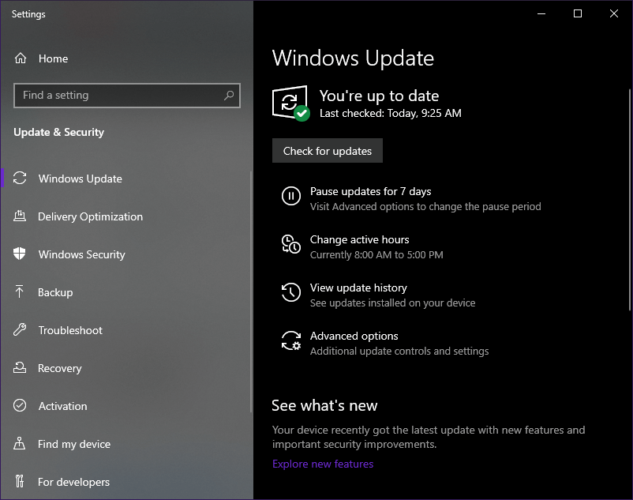
- Press Windows Key + S and type Settings.
- Go to the Update & Security section.
- Select Windows Update.
- On the right, click on Check for updates.
- That’s it. Wait for your windows to finish updating any new updates it finds.
As previously mentioned, BSoD errors such as UNSUPPORTED_PROCESSOR can be caused by hardware or software compatibility issues, therefore it’s crucial to run Windows Update frequently.
Many of these updates bring various improvements and fix issues with both hardware and software.
Therefore you can see why it’s important that you update Windows 10 as often as you can in order to avoid BSoD issues.
3. Update your drivers
- Press Windows Key + X to open the Power User Menu.
- Select Device Manager from the list.
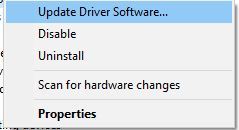
- When Device Manager opens, locate the driver you wish to update and right-click it.
- Choose Update Driver Software.
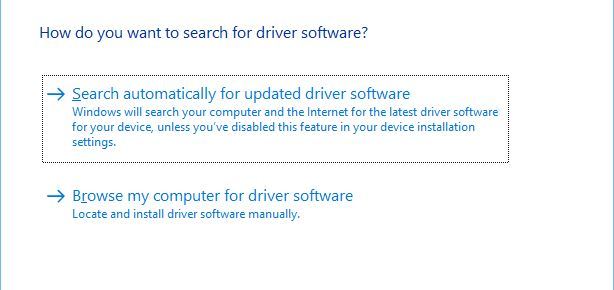
- Select Search automatically for updated driver software.
- Windows 10 will now locate and download the appropriate driver.
- Repeat these steps for all drivers that you wish to update.
Drivers are often the cause for BSoD errors since they are used by Windows in order to communicate with your hardware.
If a certain driver is out of date, Windows 10 won’t be able to work with specific hardware, and that will give you UNSUPPORTED_PROCESSOR or any other BSoD error.
In order to avoid these types of problems, it’s recommended to update your drivers.
Updating your drivers is simple, and all you need to do is to visit your hardware manufacturer’s website and download the latest drivers for your hardware.
Alternatively, you can use device Manager to update all the necessary drivers. To update drivers by using Device Manager you need to do the following:
4. Use a third-party restoration tool
One way to definitely get rid of any Blue Screen of Death errors is downloading a specialized tool that can do it for you.
5. Run the BSOD Troubleshooter
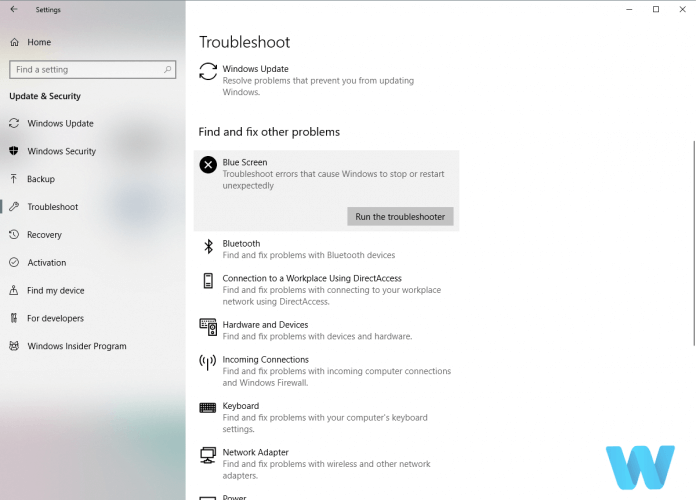
- Open the Settings app and go to Update & Security section.
- Select Troubleshoot from the menu on the left.
- Select BSOD from the right pane and click Run the troubleshooter.
- Follow the instructions on the screen to complete the troubleshooter.
If none of the previous solutions resolved the issue, let’s try a few troubleshooting tools. The first troubleshooter we’re going to try is Windows 10’s built-in BSOD troubleshooter.
As you can probably tell, this tool can address all sorts of BSOD problems. Hopefully, the UNSUPPORTED_PROCESSOR error is one of them.
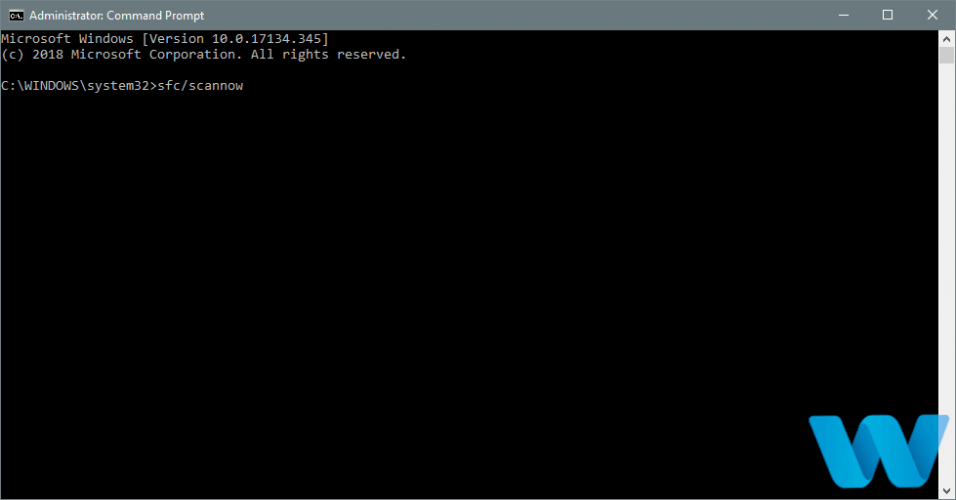
6. Run the SFC scan
- Right-click on the Start Menu button, and open Command Prompt (Admin).
- Enter the following line and press Enter:
sfc/scannow - Wait until the process is done (it may take a while).
- If the solution is found, it will automatically be applied.
- Now, close the Command Prompt and restart your computer.
The next troubleshooting tool we’re going to try is the System File Checker. This tool scans your computer for potential issues and resolves them automatically (if possible).
So, if the UNSUPPORTED_PROCESSOR error is caused by a corrupt system file, the SFC scan will deal with it.
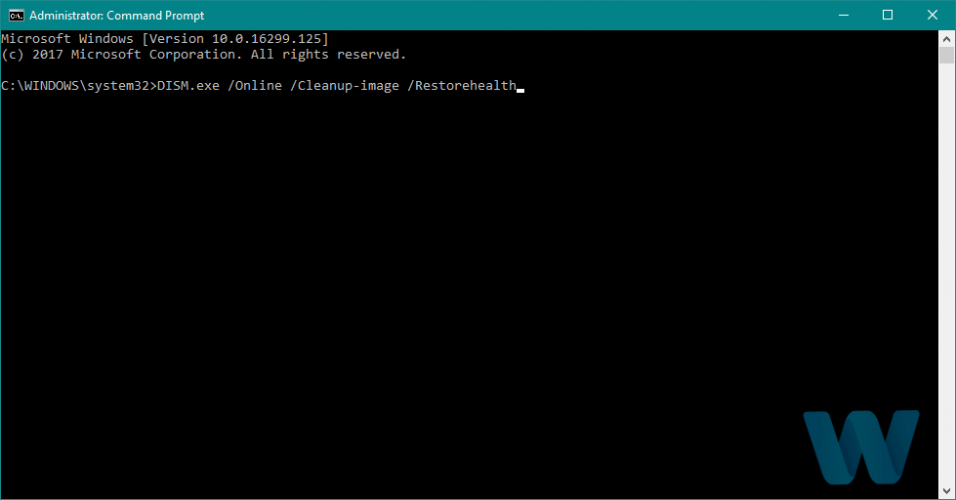
7. Run DISM
- Right-click Start and open Command Prompt (Admin).
- Paste the following command and press Enter:
DISM/Online/Cleanup-Image/RestoreHealth - Wait until the scan is finished.
- Restart your computer and try updating again.
And the third troubleshooting tool we’re going to try is DISM. Deployment Image Servicing and Management (DISM), as its name says, re-deploys the system image, and resolves potential issues along the way.
So, it could also resolve the UNSUPPORTED_PROCESSOR error. We’ll walk you through both standard version, shown above, and the procedure that utilizes the installation media below.
7.1 With the Windows installation media
- Insert your Windows installation media.
- Right-click the Start menu and, from the menu, choose the Command Prompt (Admin).
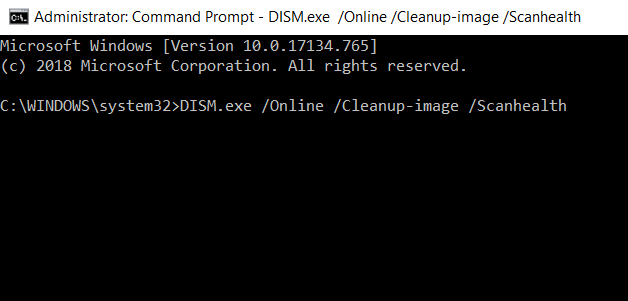
- In the command line, type the following commands and press Enter after each:
dism/online/cleanup-image/scanhealthdism/online/cleanup-image/restorehealth - Now, type the following command and press Enter:
DISM/Online/Cleanup-Image/RestoreHealth/source:WIM:X:SourcesInstall.wim:1/LimitAccess - Make sure to change an X value with the letter of the mounted drive with Windows 10 installation.
- After the procedure is finished, restart your computer.
8. Check the hard drive
- Enter the Advanced Startup (Restart your computer while holding the Shift key).
- Choose Troubleshoot > Advanced Options.
- Select Command Prompt from the list of options.
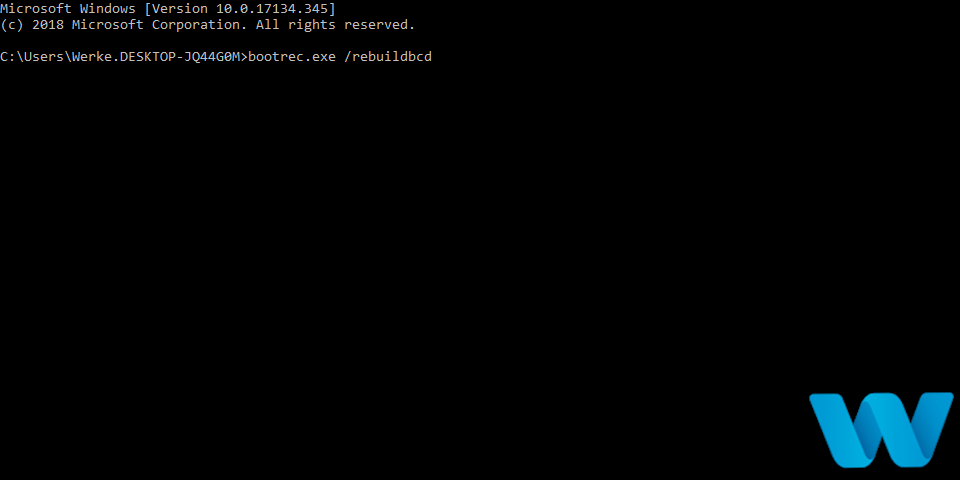
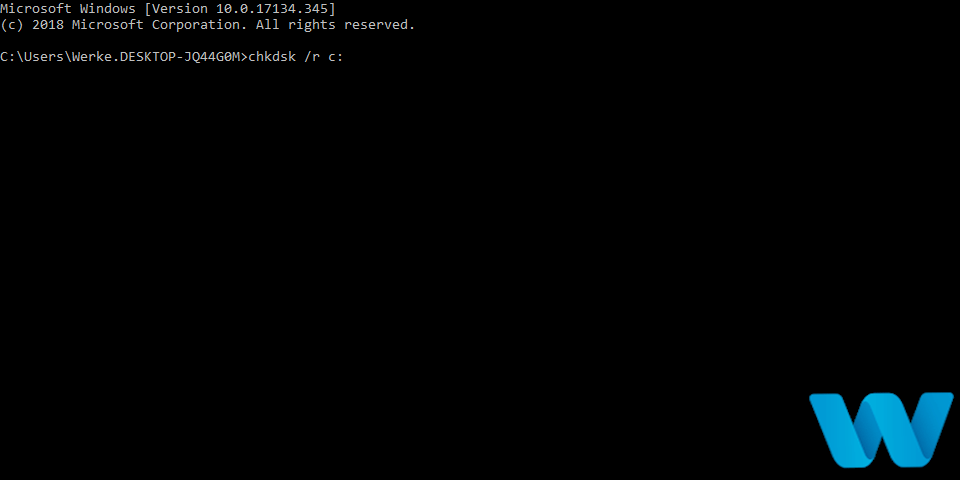
- When Command Prompt appears, enter the following lines and press Enter after each line in order to run it:
bootrec.exe /rebuildbcdbootrec.exe/fixmbrbootrec.exe /fixboot - Some users are also suggesting that you need to run additional chkdsk commands as well.
- To perform these commands, you need to know drive letters for all your hard drive partitions.
- In Command Prompt you should enter the following (but remember to use the letters that match your hard drive partitions on your PC):
chkdsk/r c:chkdsk/r d:- This is just our example, so keep in mind that you have to perform chkdsk command for every hard drive partition that you have.
- Restart your computer afterward.
If your hard drive is damaged, BSOD issues are more than possible. To eliminate the doubt, you should run the chkdsk, which scans all your partitions and resolves potential problems (if possible).
So if the culprit of the UNSUPPORTED_PROCESSOR is a corrupt hard drive, this tool will likely resolve the problem.
9. Check for problematic software
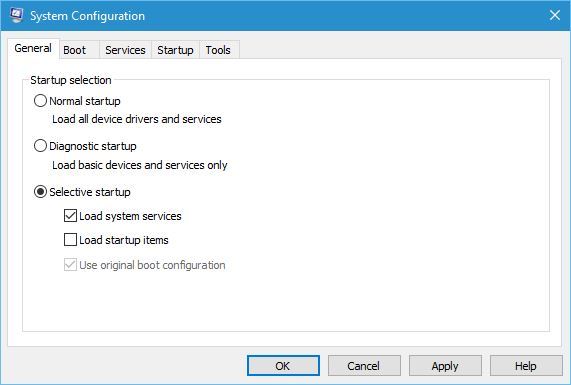
- Press Windows Key + R and enter msconfig.
- Press Enter or click OK.
- Once the System Configuration window opens, select Selective startup and uncheck Load startup items.
- Navigate to Services tab.
- Check Hide all Microsoft Services and then click on Disable all.
- Click Apply and OK to save changes.
- If you get a window asking you to restart your PC, choose Exit without restart.
- Press Ctrl + Shift + Esc to open Task Manager.
- Go to Startup tab and right click each item and choose Disable from the menu.
- After disabling all applications, close Task Manager and restart your computer.
- Check if your PC is working properly.
- If the error message doesn’t appear, it means that it’s caused by a third-party application.
- Now you can enable all applications and services one by one until you find the one that is causing you trouble.
Often incompatible software can cause UNSUPPORTED_PROCESSOR error and this is why it’s necessary to find the problematic software and uninstall it.
If you installed any new software before this error started appearing be sure to uninstall it. In addition, you can also disable all startup applications in order to find the problematic app.
It’s also worth to note that your antivirus can be the common cause for all sorts of BSoD errors, so be sure to uninstall any third-party antivirus software that you have installed.
Uninstalling antivirus software might not be enough, so you’ll have to download and use a dedicated removal tool such as CCleaner to make sure you wont let any leftover after cleaning uninstalling.
If you are looking for some antivirus software for low-end PCs, look no further. We’ve got an awesome list of the best choices for you.
10. Check for hardware problems
UNSUPPORTED_PROCESSOR error along with many other BSoD errors can be caused by hardware problems.
If you installed any new hardware recently be sure to remove it or replace it and check if the problem is fixed.
If you didn’t install any new hardware, be sure to check your processor, motherboard, and RAM.
To perform this step, you might need some spare components, and possibly some expert help, so you might want to take your PC to the repair shop.
UNSUPPORTED_PROCESSOR BSoD error usually appears when your processor doesn’t support the necessary instructions required for Windows 10 run properly.
So be sure to check if your processor meets the hardware requirements and if it works properly.
We also suggest checking all of your fans for dust and cleaning them accordingly. Overheating is also a cause for system failure, so you need to watch out for clogged fans.
That’s about it for our article today. We strongly encourage you to leave any kind of feedback regarding the subject in the comment section below.







User forum
4 messages