Microsoft Teams Organization Chart: How to Set Up & Use
Introduce your organization's hierarchical structure in Teams
3 min. read
Updated on
Read our disclosure page to find out how can you help Windows Report sustain the editorial team. Read more
Key notes
- Having a hierarchy of your employees is one way to ensure an organization's efficient running because everyone's role is clearly outlined.
- While you can have third-party apps draw up the structure, Teams allows you to integrate this feature so you don't have to switch from app to app.
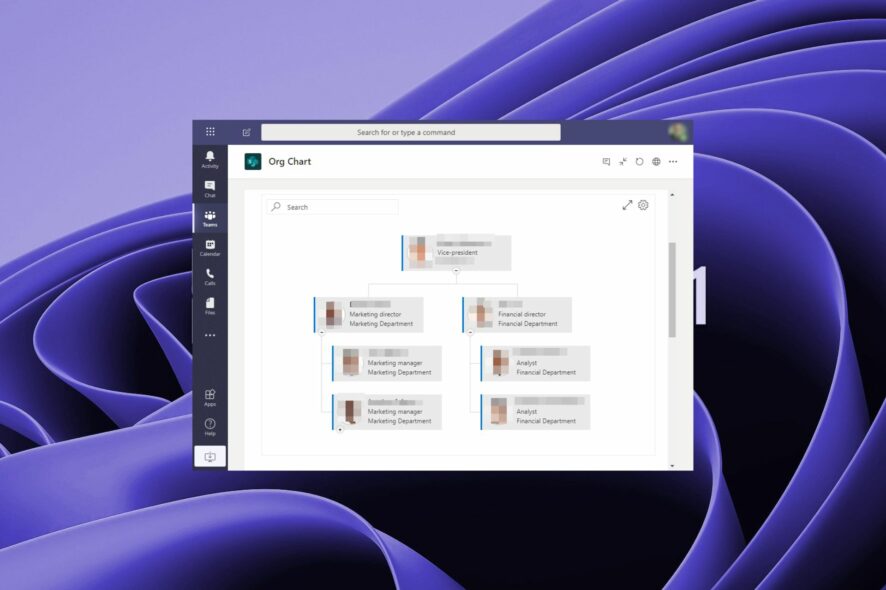
An organization chart can help you visualize your organization and its structure. It can also give you an overview of who works in different teams, the hierarchy, and other information such as job titles or locations.
Microsoft Teams has enabled you to integrate an organization chart, and we show you how to set it up in this article.
Can I export an organization chart from Microsoft Teams?
Yes. Microsoft Teams has a built-in organization chart tool that can help you create a team structure, assign tasks and projects, and visually organize your employees.
The tool is mainly used to visualize a hierarchy within your organization, but it can also be used for other purposes, such as delegation or resource allocation.
Some of the main purposes it aims to serve include:
- Define roles and responsibilities – It helps people to understand who does what in a company or team and how they relate to one another. This is especially useful for new hires to get acquainted with the team and ask for help from appropriate persons.
- Keep track of duties/deadlines – By organizing information by project or department, you make sure everyone knows who to contact when certain reports or tasks need to be completed.
- Assign tasks efficiently – By creating an organization chart in Microsoft Teams, you can easily assign tasks to different members of your team based on their skills and experience levels.
- Identify gaps in reporting relationships – You also get a sense of your team’s structure and identify any gaps that may require your intervention in restructuring.
How do I create an organizational chart in Microsoft Teams?
1. Create an organizational chart
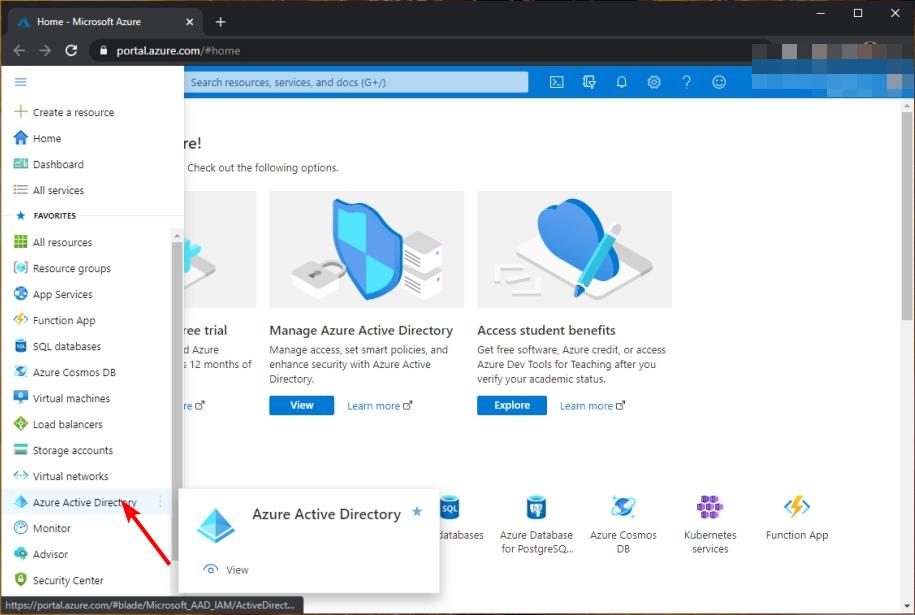
- Launch your Azure Active Directory portal and sign in as admin.
- Click on Azure Active Directory to edit your AD settings.
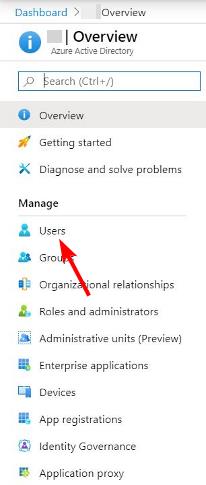
- On the left pane, click on Users under the Manage section.
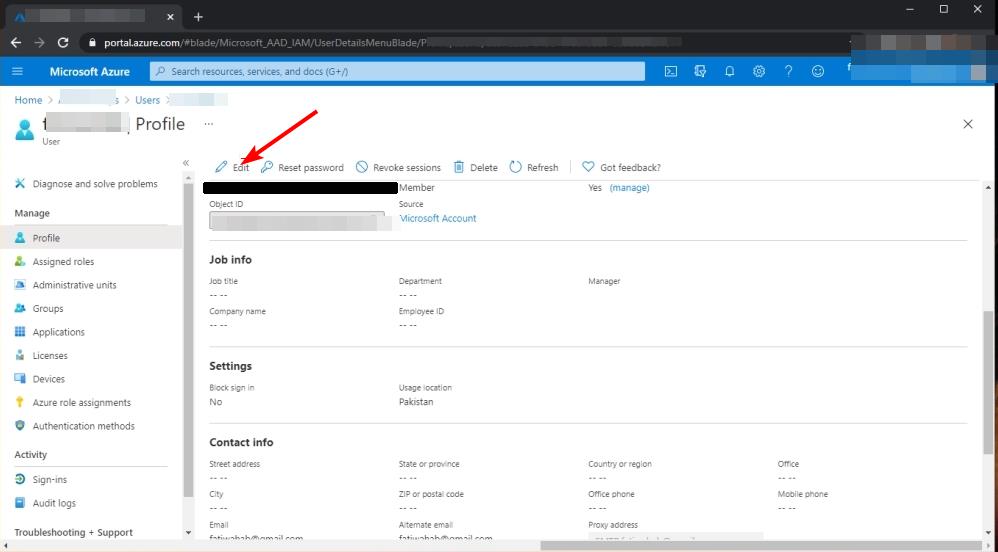
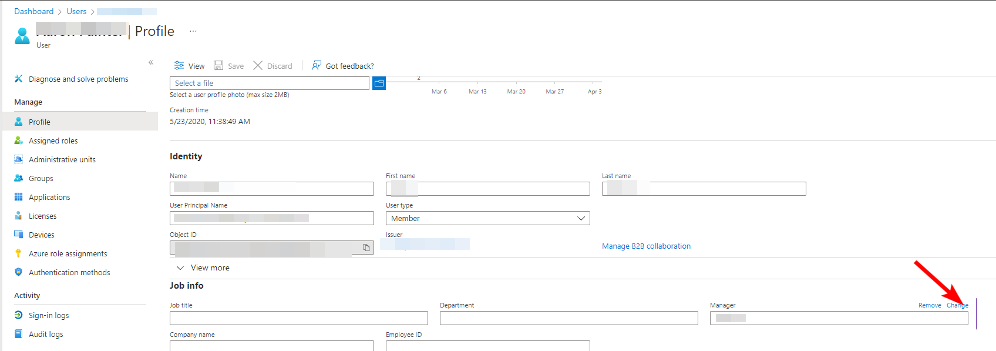
- Now, select a user whose profile you’d like to add to the chart by assigning them a title.
- Click on Edit.
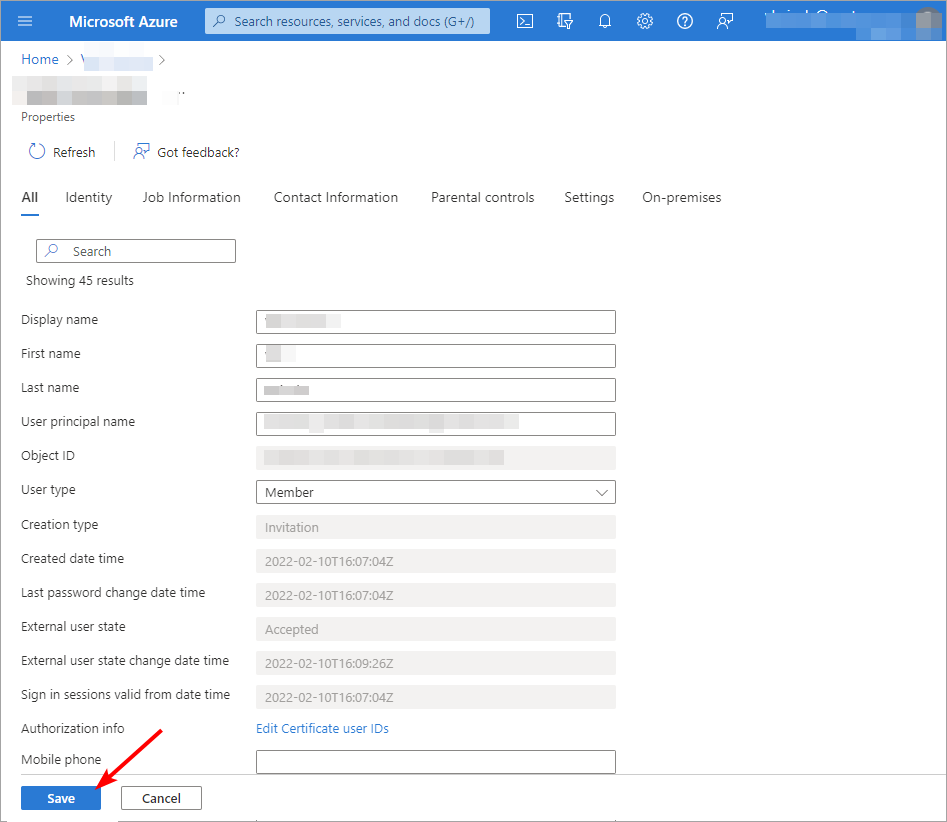
- Scroll to the Job information section and fill out the necessary information required. In the Manager section, select the corresponding user with that title, and add their name.
- Hit Save.
- Repeat these steps for all users who belong to that organizational chart until you have covered everyone.
Since you can’t create job titles in Teams, you need first to do it in the AD and then integrate it with Teams to display it.
2. View the org chart
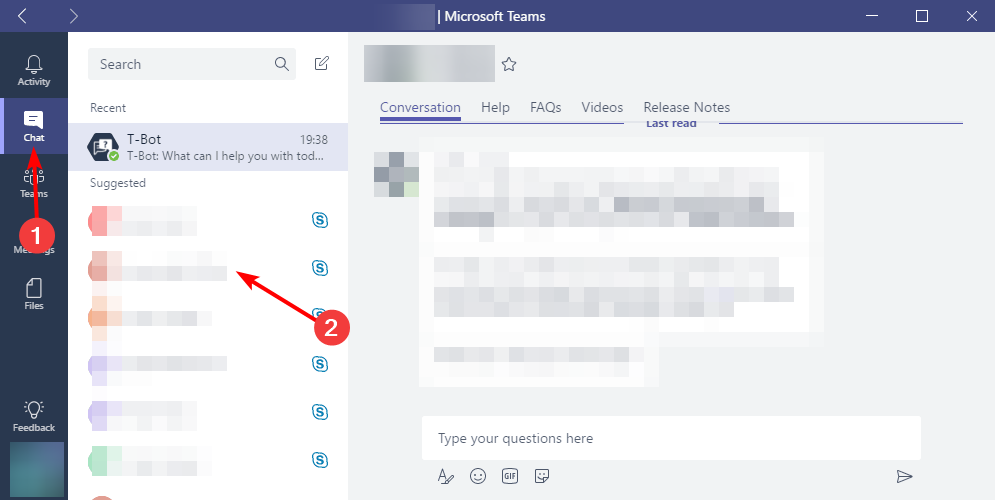
- Login to your Microsoft Teams account and navigate to the Chat tab.
- Now, select a chat thread containing a user you added to be part of the organizational chart when you were creating it.
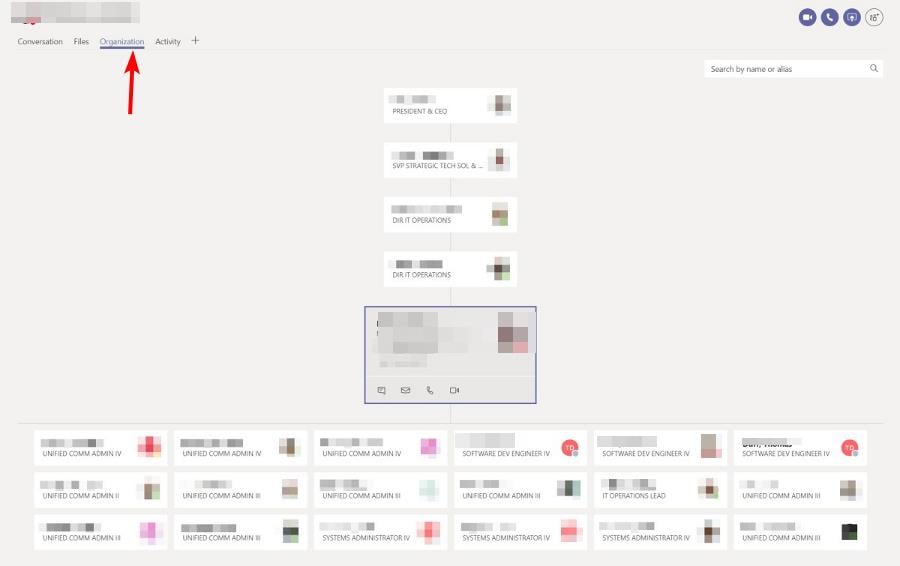
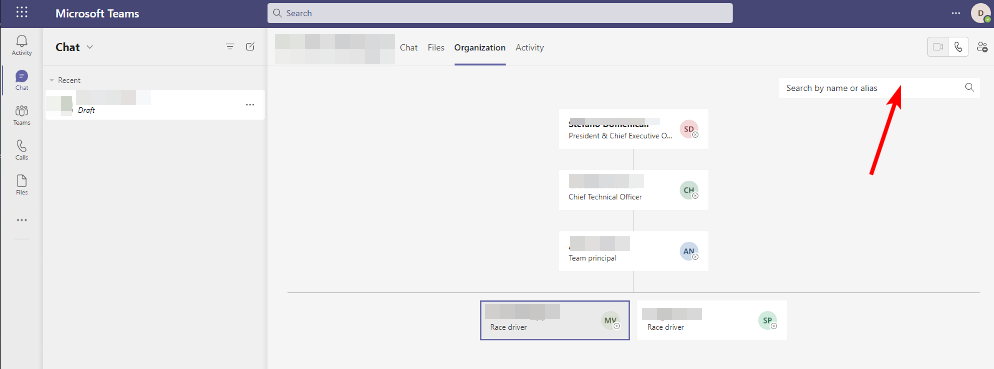
- Go to the Organization tab.
- A pictorial diagram will show up displaying the user you just selected and who they report to. Their job profile can also be seen just below their name.
- To find out more about other users in the chart, click on their names. To find other users, try searching for their names.
Now that you know how to use the Microsoft Teams Organization chart, you can create yours.
We also have an interesting article on how to create and customize organizational charts in Visio, so be sure to check that out too.
Speaking of staying organized, we explore some of the best productivity apps to help you stay efficient while working.
Have you created an organizational chart in Teams? What was your experience like, and how easy is it to use? We’d love your feedback on this, so drop us a comment below.



User forum
0 messages