VMware is Not Working on Windows 10/11? Use This Simple Fix
3 min. read
Updated on
Read our disclosure page to find out how can you help Windows Report sustain the editorial team. Read more

VMware is a virtualization software solution that enables users to create a virtual environment on their PC. This, in turn, provides several benefits that range from the ability to run different operating systems on the same PC to fault isolation or even running a program for debugging before its final installation.
However, as is applicable to just about anything, the VMware isn’t immune to errors, and a common one is that of VMware not working on Windows 10.
However, the same can also be rectified easily and effectively. Hang on!.
Easy fix when VMware is not working on Windows 10
1. Disable Hyper-V listing
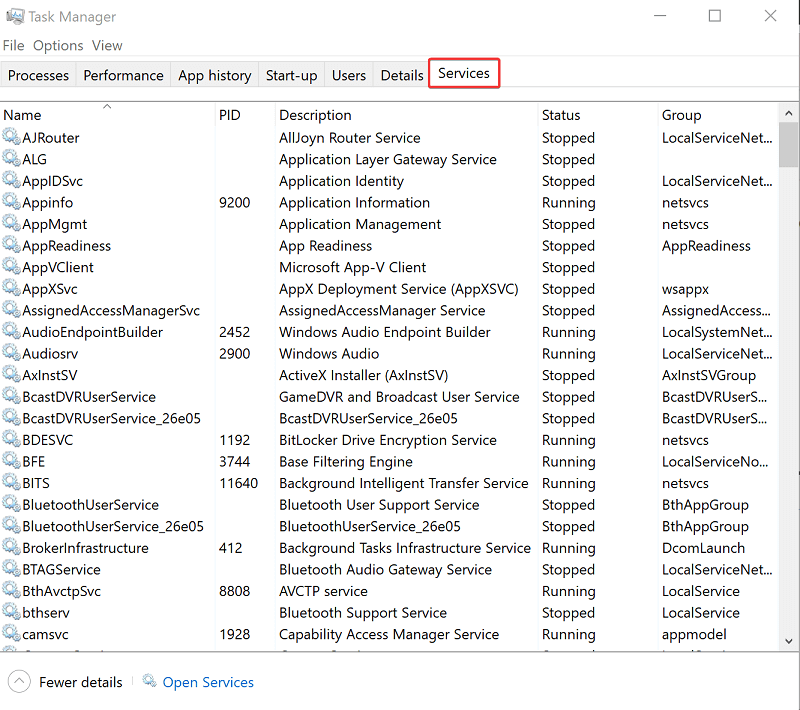
- Launch Task Manager. You can do this by typing Task Manager in the Cortana search box and selecting from the results shown. Alternately, right click on the taskbar. From the shortcut menu that shows, select Task Manager.
- In the Task Manager window that opens, select the Services
- Under Services, locate Hyper-V listing, if it’s there.
- Once you have found Hyper-V listing, see if its Status is shown to be as Running.
- If its running, right click on the same and select Stop.
- Close Task Manager.
2. Stop Hyper-V services
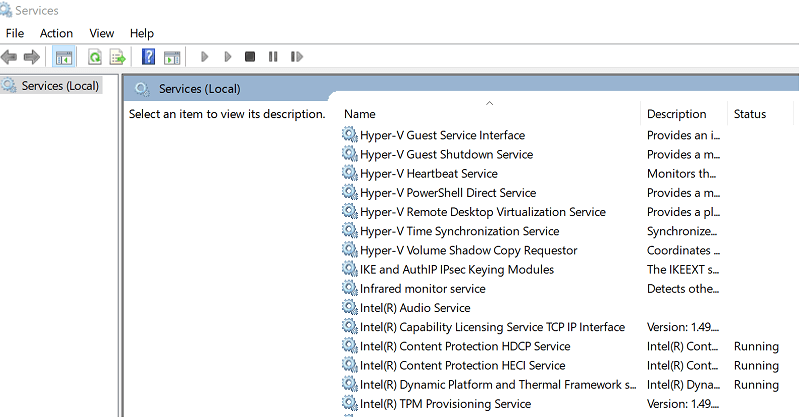
- Open the Services The simplest way to do that is to type Services in the Cortana search box and selecting from the search result shown.
- In the Services window, there likely are several listings for Hyper-V.
- Check if their Status is shown as Stopped.
- If not, right click on each and select Stop.
3. Stop Hypervisor
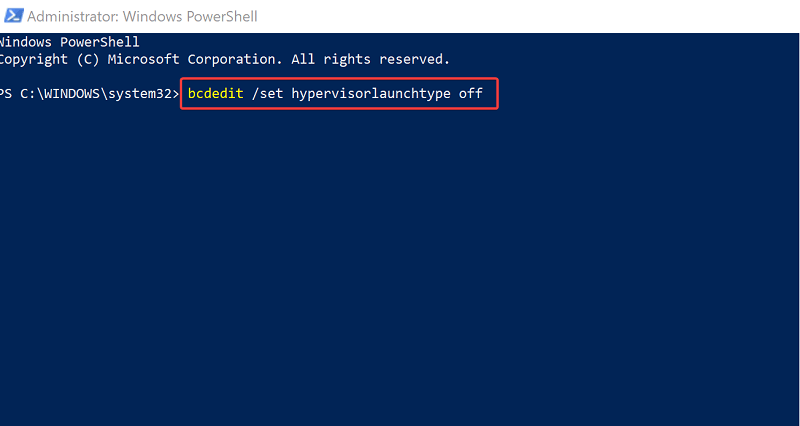
- Launch PowerShell. Again, this can be done by typing PowerShell in the Cortana box and selecting from the results. Or, right click on Start and select PowerShell(Admin) from the menu that opens up.
- In the PowerShell window, type the following command: bcdedit /set hypervisorlaunchtype off
- Press Enter.
- Reboot your PC.
- Just in case Hypervisor is needed for any other application, you can always re-enable the same. For re-enabling Hypervisor, launch PowerShell
- In the PowerShell window, type the following command: bcdedit /set hypervisorlaunchtype auto
- Press Enter.
- Reboot your PC.
4. Turn off Memory Integrity
-
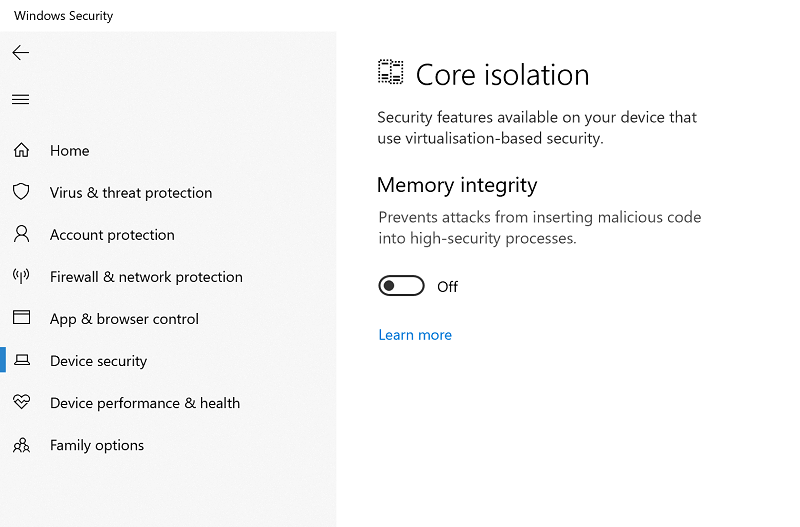
- Launch Windows Security. The shortcut to this should already be in the Taskbar or you can just type Windows Security in the Cortana box and select from the results shows.
- In Windows Security, choose Device Security from the options on the left.
- Under Device Security, click on Core isolation details under Core isolation.
- You should get to see the Memory integrity toggle switch. Ensure it is turned off.
- If the option is grayed out, you will have to make necessary modifications in the registry to turn it off.
- Launch Registry Editor by typing regedit in the Cortana Search box and selecting from the search results shown.
- From the options on the left, select:
Computer\HKEY_LOCAL_MACHINE\SYSTEM\CurrentControlSet\ControlDevice\GuardScenarios\Hypervisor\EnforcedCodeIntegrity
Change value of Enabled REG_DWORD to 0 if it is set to 1, which should be the case if Memory integrity is set to On. Close Registry Editor.
The above steps should be all you need to do if VMware is not working on Windows 10.
Meanwhile, here are some additional resources for your reading.


User forum
0 messages