How to Fix Volsnap.sys GSOD Boot Errors [Fixed by Experts]
Rest assured that our tested solutions won't disappoint you
2 min. read
Updated on
Read our disclosure page to find out how can you help Windows Report sustain the editorial team. Read more
Key notes
- The so-called Screens of Death represent a critical error encountered by the operating system, which prevents it from functioning normally or from booting up properly. Common issues involve bad updates, disk issues, or corrupt system files.
- If you encounter a boot error that complains about volsnap.sys, the best thing to do is to run the recovery process or, in case of an update, copy the volsnap.sys file from the backup and replace the current one. Other tips are included in the article.

Error volsnap.sys rarely occurs on Windows 10 computers. But when it does, it wreaks havoc.
Nowadays, these kinds of error are known as GSODs or Green Screen of Death errors. But the fact is that fixing the issues of Volsnap.sys errors on Windows 10 is relatively easy if you have the right tools.
How can I fix Volsnap.sys errors on Windows 10?
1. Disconnect all external devices
- Turn off your computer.
- Remove all external devices.
- Restart your computer. (If the PC starts normally, then the issue was caused by one of the devices attached through USB).
- In order to identify which of these devices caused the issue, you can connect the removed devices one by one and note the difference.
- Please follow the next methods if this method doesn’t solve your issue.
2. Run System File Checker (SFC) command
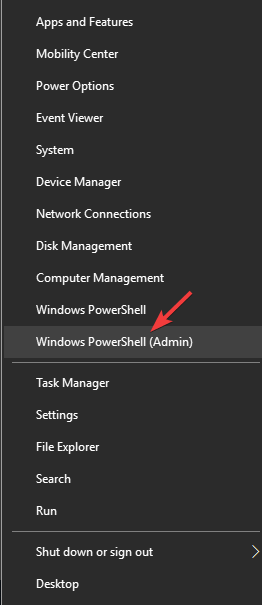
- Press Win+X keys on your keyboard -> select PowerShell (Admin).
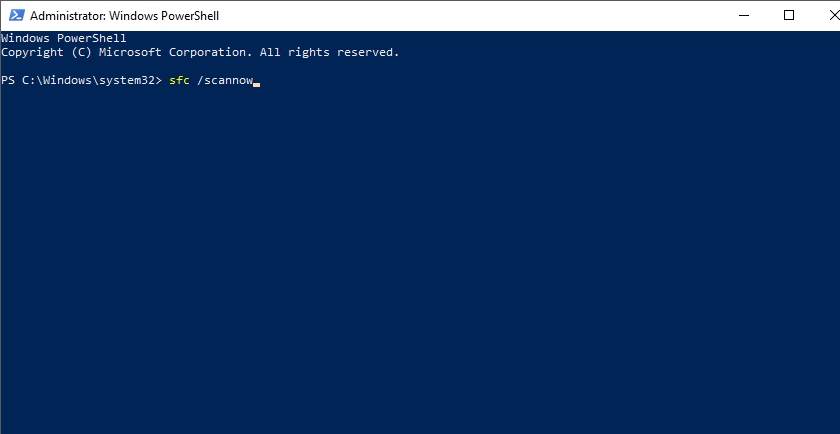
- Inside the PowerShell window, type sfc /scannow -> press Enter.
- After this process is completed, you can close the PowerShell window and restart your PC.
- If this method doesn’t solve your issue, run Windows in Safe Mode again and follow the next method.
If you have issues with your system files it is always recommended to use a professional tool to fix them.
3. Update the drivers on your PC
- Press Win + X keys on your keyboard -> select Device Manager.
- Inside the Device Manager window -> select a device -> Right-click on it -> select Update driver -> Search automatically for updated driver software. (repeat these steps for each of the devices in the list).
- Restart your PC, and check to see if the issue is resolved.
4. Install the latest Windows Updates
- Press Win+X keys on your keyboard -> select Settings.
- Scroll down and select the option Update & Security.
- Click on the Check for updates button, and wait for Windows to install any files needed.
- After the update process is completed, restart your PC.
- Check to see if the issue is resolved.
This article explored some of the best troubleshooting methods to fix the dreaded volsnap.sys error. Please follow the steps presented in this article closely to avoid any other complications.
We would love to know if this guide helped you solve your GSOD problem. Please feel free to let us know by using the comment section below.


User forum
0 messages