How to fix Wi-Fi adapter error code 52 on Windows 10/11
4 min. read
Updated on
Read our disclosure page to find out how can you help Windows Report sustain the editorial team Read more
Wi-Fi adapters are essential for setting up your Wi-Fi connection. However, sometimes things may go wrong and Wi-Fi adapter error 52 rears its ugly head.
This error code occurs when Windows is unable to verify the digital signature for the Wi-Fi adapter and reads as follows:
Windows cannot verify the digital signature for the drivers required for this device. A recent hardware or software change might have installed a file that is signed incorrectly or damaged, or that might be malicious software from an unknown source.
Fixing Wi-Fi error 52 is not that straightforward. To help you get your Wi-Fi connection back on track, we compiled a series of solutions to help you fix this annoying error in no time.
Fix Wi-Fi adapter error 52 with these quick workarounds
1. Run the built-in troubleshooter
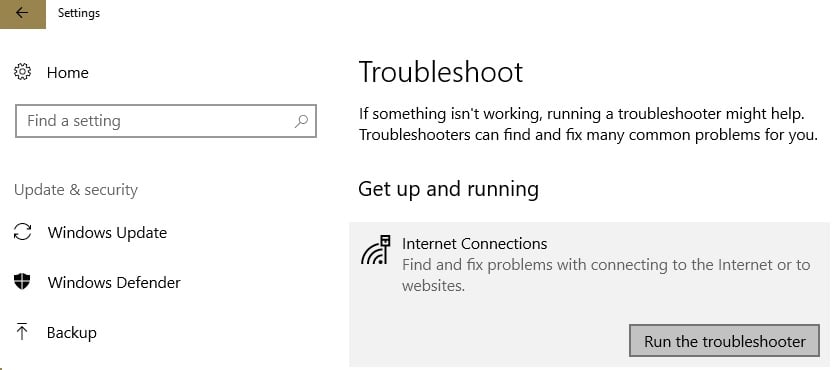
Windows 10 features a series of troubleshooters that you can use to automatically fix particular technical issues. So, if you’re getting error 52, try running the Internet troubleshooting tool. If you’re lucky, the troubleshooter will identify and fix the issue triggering error 52 and you’ll be able to connect to the Internet in less than 3 minutes.
Go to Settings > Update & Security > select Troubleshoot > go to Internet Connections > run the troubleshooter
2. Install the latest OS/ driver updates
Another quick way to fix error 52 is by installing the latest Windows updates, as well as the newest driver versions.
Running outdated OS versions can cause various technical issues, including Internet connection problems. Installing the latest updates helps you to eliminate this possible root-cause off the list and make sure that your computer uses the latest patches and system improvements rolled out by Microsoft.
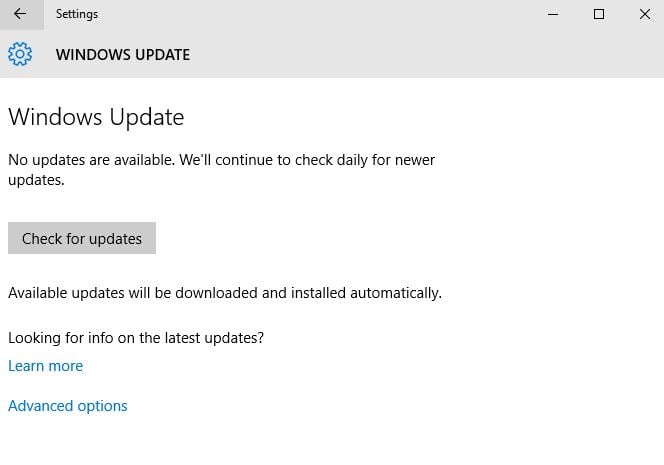
Go to Settings > Update & Security > click on the “Check for updates” button and install the available updates.
Restart your computer and check if the issue persists.
3. Reset your network using Command Prompt
Open Command Prompt as an administrator and run the following commands, hitting Enter after each one:
- netsh winsock reset
- netsh int ipv4 reset reset.log
- netsh int ip reset
- ipconfig /release
- ipconfig /renew
- ipconfig /flushdns
These commands allow you to reset the Winsock protocol (reset the Network Adapter), as well as the IP address of your computer.
- ALSO READ: Fix: Wi-Fi icon missing on Windows 10
4. Turn off your antivirus/ firewall
If error 52 occurs immediately after you try to connect to your Wi-Fi network, try disabling your antivirus and firewall tools.
Sometimes, conflict issues between your antivirus solutions and computer drivers may arise and trigger various error codes, including the error that we’re focusing on in this article.
Don’t forget to enable antivirus and firewall protection afterwards.
5. Disable driver signature enforcement
Since error 52 comes with a description message reading that the digital signature could not be verified, maybe disabling it helps.
Here are the steps to follow:
- Go to Start > open the shutdown menu and keep your mouse cursor on it
- Press and hold the Shift key > click on the Restart option
- Your Windows 10 computer will restart now displaying the Advanced Startup Options screen
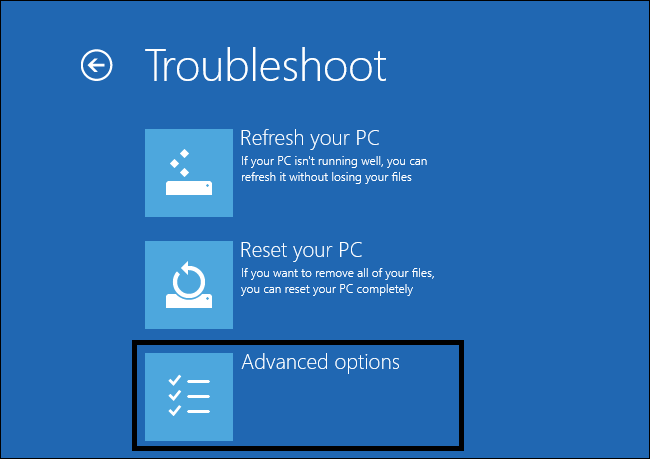
- Go to Troubleshoot > Advanced Options
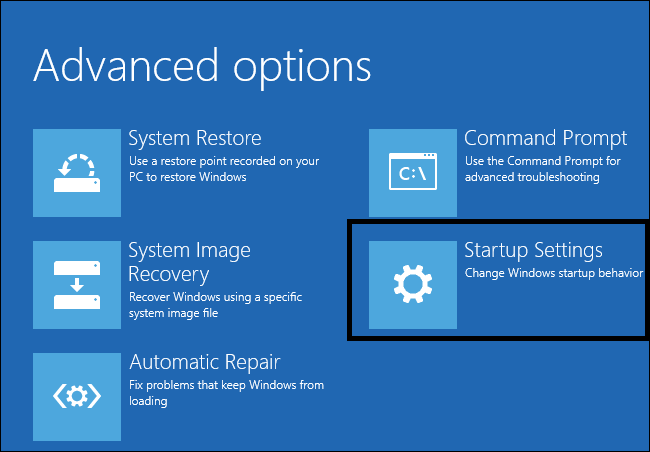
- Go to Startup Settings
- Hit the Restart button
- Windows 10 will restart > the Startup Settings screen should now be available
- Press F7 to disable driver signature enforcement
- Windows 10 will then boot to desktop.
Keep in mind that this solution allows you to disable driver signature enforcement only until the next reboot.
6. Delete the upper/lower filters from the Registry Editor
Before tweaking your Registry, don’t forget to first back it up. In this manner, you’ll be able to restore a working version of Windows in case anything goes wrong.
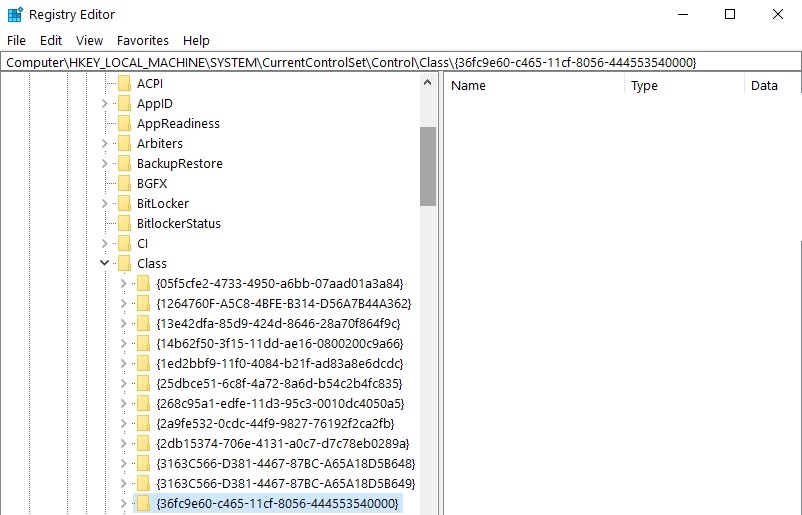
- Go to Start > type “regedit” > hit Enter to open the Registry Editor
- Locate the UpperFilters value under the following key: HKEY_LOCAL_MACHINE\SYSTEM\CurrentControlSet\Control\Class\{36FC9E60-C465-11CF-8056-444553540000}
- Go to the Edit menu > Delete > OK
- Now locate the LowerFilters value under the same key
- Go to the Edit menu and delete this value as well
- Quit the Registry Editor > restart your computer > check if the issue persists.
There you go, we hope that these quick workarounds helped you fix error code 52 and you can now connect to Wi-Fi.
If you came across other solutions to fix this error, you can list the troubleshooting steps in the comments below.
RELATED STORIES TO CHECK OUT:

