None of the Networks Previously Connected to Are in Range: Fix
Learn to boost your Wi-Fi signal and get rid of this error
Key notes
- Wi-Fi is a great way to connect online and is definitely worth using for its capabilities and keeping you away from wires.
- Users report having some issues with the Wi-Fi range, and in this article, we will explore some easy ways to fix it.
- If your PC says your Wi-Fi network is not in range, updating your network drivers is the first fix.
Wireless networks are great if you don’t want to deal with wires and you want to keep your workspace neat.
Unfortunately, a number of Windows users reported on forums receiving the following error messages in regards to Wi-Fi Ranges:
- None of the networks you have previously connected to are in range
- This computer is set to manually connect to ‘Device Name
Many users reported shorter Wi-Fi ranges after updating to Windows 10, and this can be a big problem, especially if you rely on a Wi-Fi network for internet access.
How can I fix the None of the networks you have previously connected to are in range error?
1. Update your network adapter drivers
In most cases, issues with Wi-Fi range are caused by an outdated driver, therefore it’s advised to update your network adapter drivers.
To do that, just visit your motherboard or network adapter manufacturer’s website and download the latest drivers.
Some users are also suggesting to uninstall your currently installed Wi-Fi drivers and use the default drivers instead. To do that, follow these instructions:
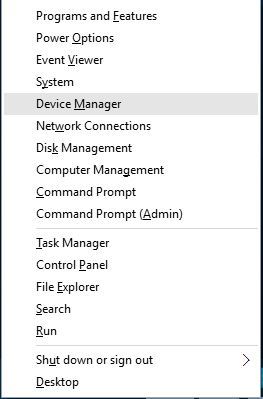
- Press Windows Key + X and select Device Manager.
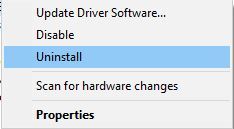
- Locate your wireless adapter in Device Manager, right click it and choose Uninstall.
- Once your driver has been uninstalled, restart your computer. This will install the default driver and your problem should be fixed
If you use wireless networks on regular basis, we advise you to have a look at our guide on how to protect your Windows 10 device on a public Wi-Fi network.
1.1 Use a dedicated tool
The easiest way to update your drivers in order to fix any Wi-Fi issues would be to use dedicated software.
By doing that you will avoid installing the wrong drivers and causing even more issues to your device.
We’ve tested most of the available tools, and we would like to recommend that you give Outbyte Driver Updater a try.
It’s a reliable and stable tool that will scan and update your drivers in just a few moments.
The built-in library that Outbyte Driver Updater has will ensure that all the downloaded and installed drivers are the last versions available.
Moreover, Outbyte Driver Updater comes with other useful features, such as a download manager and drive backup.
2. Set the wireless adapter to work in maximum performance mode
By default, wireless adapters are set to work in medium power saving mode on Windows 10, and this can sometimes cause issues with Wi-Fi range.
-In order to fix this problem, it’s advised that you change the Wi-Fi adapter power settings to Maximum performance. To do that, just follow these simple steps:
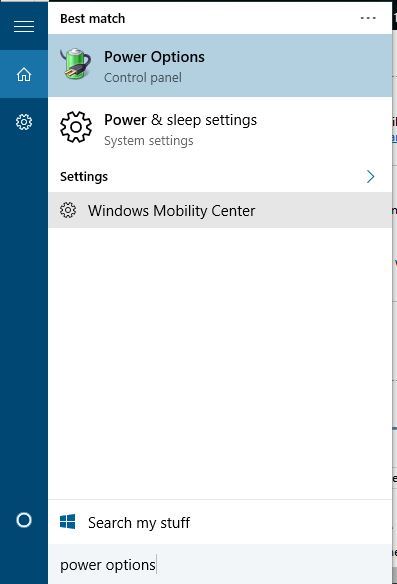
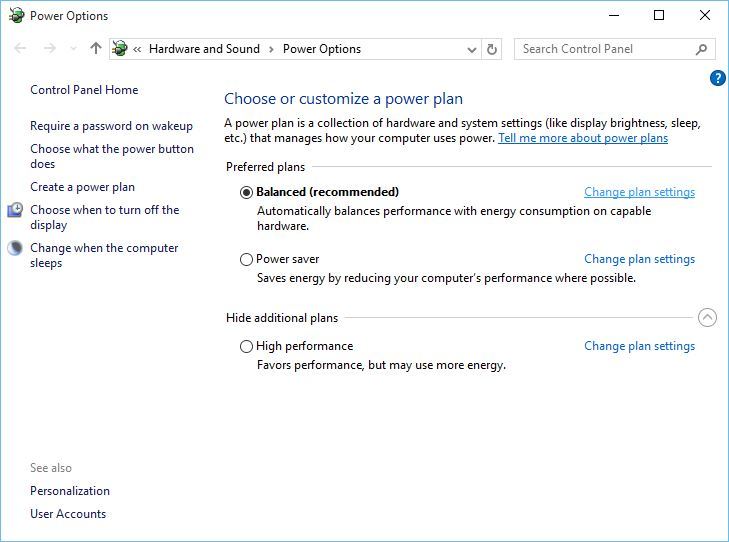
- Press Windows Key + S and enter Power Options.
- Select Power Options from the menu.
- Once the Power Options window opens, locate your current plan and click Change plan settings.
- Click on Change advanced power settings.
- Locate Wireless Adapter Settings and set the Power Saving Mode to Maximum Performance.

- Click Apply and OK to save changes.
Alternatively, you can just switch to High performance mode in Power Options and Power Saving Mode will be automatically set to Maximum Performance.
Bear in mind that using High Performance mode will drain your battery faster.
3. Check if your wireless card is working correctly
Sometimes there might be certain issues with Wi-Fi range if there’s a hardware problem with your wireless adapter.
Users reported that loose wire can sometimes create these sorts of issues, and if that’s the case you might want to replace your Wi-Fi card with a new one.
4. Change the Sensibility value
Some users are claiming that changing the Sensibility value can fix the Wi-Fi range issues on Windows 10. To change Sensibility value, you need to do the following:
- Press Windows Key + X and select Device Manager from the list.
- Once Device Manager opens locate your Wi-Fi adapter, right-click it and choose Properties.
- Go to the Advanced tab and locate Roaming Sensitivity Level, Roaming Aggressiveness or Roam Tendency to Highest or Aggressive.

- Set Transmit Power or Transmit Power Level to Highest.
- Select Antenna Diversity and set it to Auto.
- In Band Preference choose Prefer 802.11a if your wireless network is using 5GHz frequency or set it to Prefer 802.11g/b if your wireless network is using 2.4GHz frequency.
- Save changes and restart your device.
5. Disable Bluetooth
Few users are claiming that you can fix the Wi-Fi range issues by disabling your Bluetooth adapter. To do that, you need to follow these steps:
- Open Device Manager. You can do that by pressing Windows Key + X and choosing Device Manager from the menu.
- Once Device Manager starts, go to Bluetooth section and expand it.
- Locate your Bluetooth adapter, right click it and select Disable from the menu.
6. Set antenna diversity to Auxiliary
According to few users, setting antenna diversity to auxiliary fixes this issue. To do that, you need to do the following:
- Open Device Manager and locate your wireless adapter, right click it and choose Properties.
- Go to Advanced tab and set Antenna diversity to Auxiliary.
- Save changes and check if the issue is resolved.
7. Check if your card is properly installed
Sometimes your Wi-Fi card might not be properly installed, so check if it’s placed properly in the PCI slot. In addition, make sure that the screws are tight or else you might experience certain issues.
8. Update your router firmware
In certain cases updating your firmware can fix the problems with Wi-Fi range. Updating your router firmware isn’t the simplest procedure, so make sure to check your router manual for detailed instructions.
Bear in mind that if you don’t update your router firmware properly you can cause permanent damage to the router.
9. Change the router frequency
Modern routers use a 5GHz frequency, so if your router supports it, make sure that you use it. By using 5GHz frequency you’ll encounter less interference and thus a stronger signal.
In order to switch to 5GHz frequency, check your router manual for detailed instructions.
10. Change the router wireless channel
If there are multiple wireless networks available, sometimes there might be interference, especially if all of these networks are using the same channel.
To fix this issue, it’s important for you to set up your wireless channel manually. To see how to do that, check your router’s instruction manual.
11. Change your router or Wi-Fi adapter antenna
Many routers and Wi-Fi adapters come with a switchable antenna, therefore if you’re having any Wi-Fi range issues, you might want to consider replacing your Wi-Fi antenna with a stronger one.
If you’re buying a new Wi-Fi antenna, make sure you get the high-gain antenna for best performance and Wi-Fi range.
12. Use Wi-Fi repeater or Wireless Access Point
If you have range issues with your Wi-Fi connection, you might want to consider using Wi-Fi repeater or Wireless Access Point.
Wi-Fi repeater is a simpler and more straightforward solution which is perfect for your home while Wireless Access Point comes with more advanced features and it might be more suitable for your workspace.
13. Make sure nothing disrupts Wi-Fi signal
Your Wi-Fi range issues may also be caused by particular items or pieces of hardware that are interfering with the Wi-Fi signal.
For example, it is a well-known fact that microwave ovens disrupt Wi-Fi signal.
Remove any pieces of equipment such as baby monitors, garage door openers, kitchen appliance and so on that might be blocking or limiting your Wi-Fi signal range.
14. Buy a Wi-Fi extender

Well, if nothing worked, you can try using a Wi-Fi extender. Check out this list of the 21 best Wi-Fi extenders for your Windows 10 computer.
These devices will boost your Wi-Fi signal and hopefully solve the None of the networks you have previously connected to are in range error that you’re experiencing.
15. Replace your modem/router
Obsolete hardware may also cause Wi-Fi range issues. So, if you are using an old modem or router, maybe it’s time to replace it with a new one.
Wireless networks have their advantages, but they can experience issues with range. If you encounter the None of the networks you have previously connected to are in range error message, let us know which solution helped solve your issue.
Read our disclosure page to find out how can you help Windows Report sustain the editorial team. Read more


Improve this guide


User forum
0 messages