Windows 10/11 can’t find Wi-Fi adapter: 7 quick fixes to use

A Wi-Fi adapter is a device that adds wireless connectivity to your laptop or PC, and can be available as an external USB, PCI or PCI express card, which you plug into a USB port or empty slot on your computer’s motherboard.
The adapter lets you connect to a wireless network whether you’re at home, at the office, or in a public place.
You can use the connection from a Wi-Fi adapter for fast and high quality internet connections, or to access shared files on a network, devices, and documents.
Here are the solutions you can use when Windows 10 can’t find Wi-Fi adapter.
FIX: Windows 10 can’t find Wi-Fi adapter
- Troubleshoot network adapter
- Update network adapter driver
- Roll back the network adapter driver
- Temporarily turn off firewalls and any antivirus or malware prevention software
- Uninstall the network adapter driver then restart
- Reinstall network devices
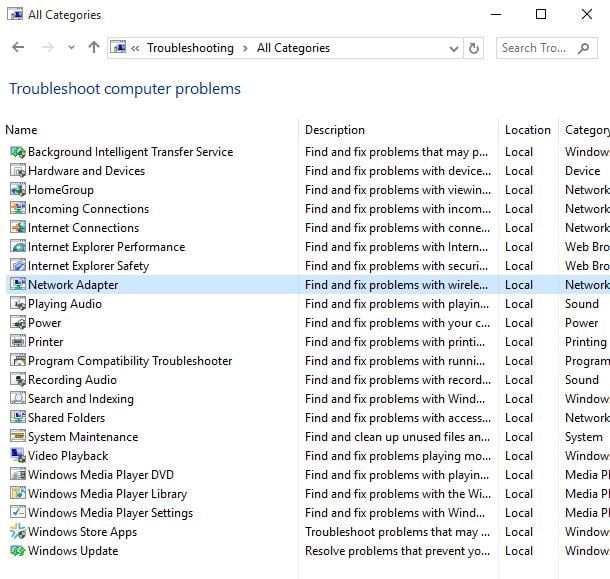
1. Troubleshoot Network Adapter
This is an automated, built-in Windows tool that finds and fixes common Network Adapter settings issues on your computer. It also checks if adapter’s drivers are updated or not, and give clues on the hardware failures related to it.
Take these steps to run the troubleshooting on Network Adapter and see if it identifies the issue:
- Click Start
- Go to the search field box and type Troubleshooting
- Select Troubleshooting from the search results
- Click View all on the left pane
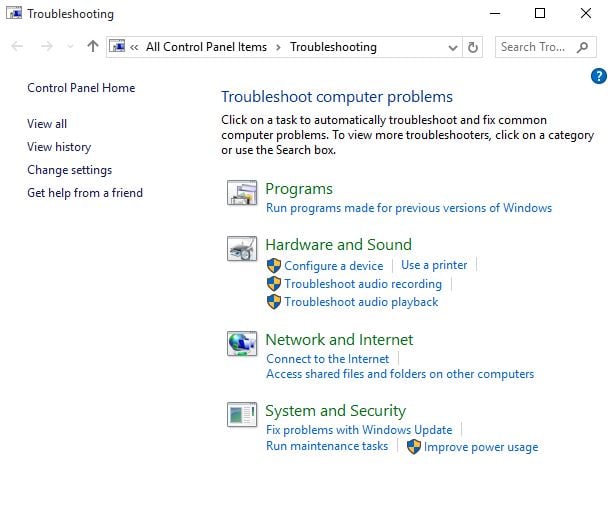
- Click Network Adapter
- Click Next
- The detection process to identify any issues will begin
- Select the network adapter to diagnose
If that didn’t work, try the next solution.
2. Update network adapter driver
When your network adapter driver is incompatible or outdated, then Windows 10 cannot find Wi-Fi adapter. A recent Windows 10 upgrade driver could have been designed for a previous version of Windows.
Update the adapter driver using these steps:
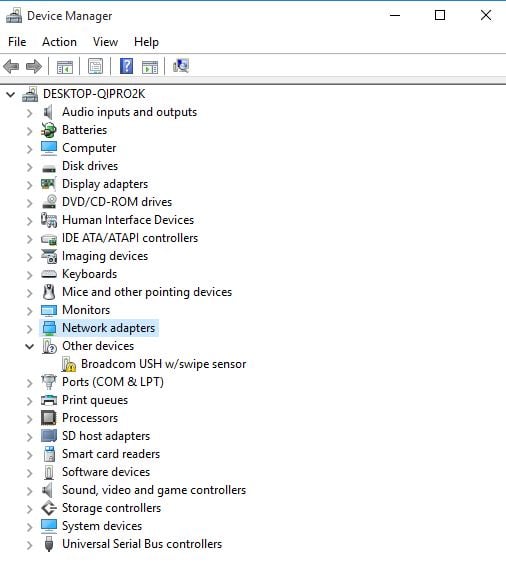
- Right click Start
- Select Device Manager

- Select Network Adapters
- Click on the network adapter name
- Right click the network adapter
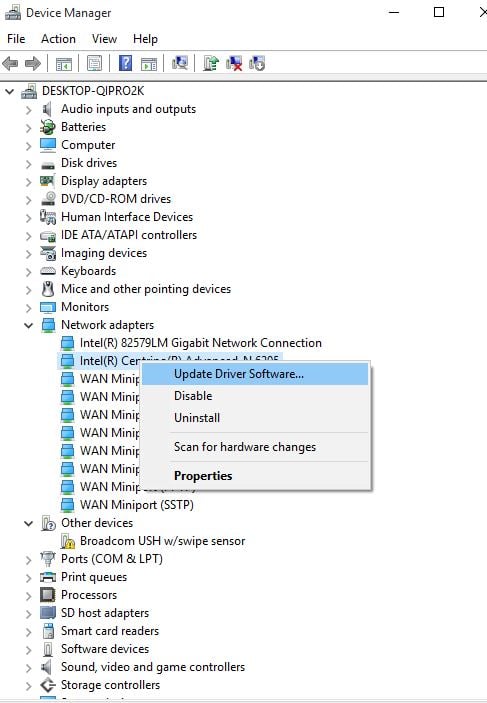
- Select Update driver
- Click Search automatically for updated driver software
- Once the steps are complete, click Close
- After installing the updated driver, click Start>Power>Restart
 NOTE
NOTE
If your computer cannot connect to the internet, download a driver from a different computer, save it to a USB flash drive, then manually install it on your own computer.
How to manually install the network adapter driver
Depending on the file you downloaded from the manufacturer’s website, do the following:
- For a .exe (executable) file, double click on it to run the file then install the drivers
- For individual files, check a file with .inf extension and another with .sys extension then do the following:
- Go to the search box and type Device Manager
- Click Device Manager from the search results
- Select Network adapters and go to the network adapter name (you can also check under Other Devices if yours isn’t listed here)
- Right click the network adapter and select Update driver software
- Click Browse my computer for driver software
- Select Browse then the location where the driver files are stored
- Click Ok
- Click Next
- Once installation is complete, click Close
After installing the updated driver, click Start>Power>Restart
3. Roll back the network adapter driver
If you were previously connected to the internet and installed a new network adapter driver, try to roll it back to a previous version and check if it helps.
Here’s how to do this:
- Right click Start
- Select Device Manager
- Select Network Adapters then click on the network adapter name
- Right click on the network adapter
- Select Properties
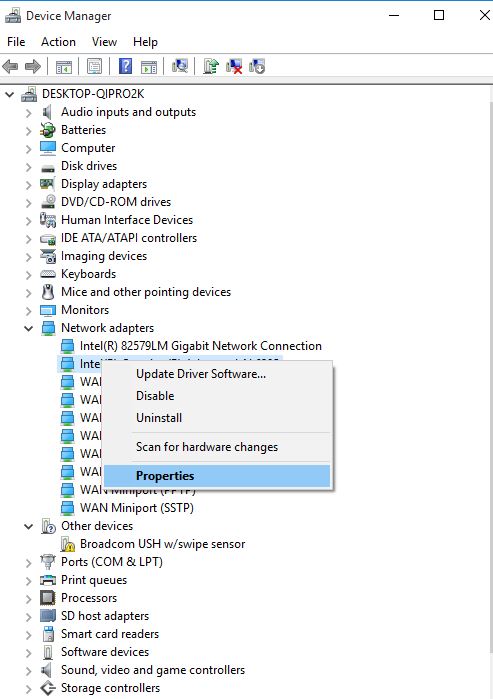
- Select Driver tab
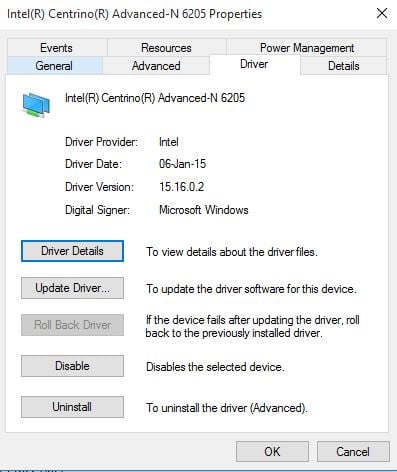
- Select Roll Back Driver. If the button is unavailable, then there’s no driver to roll back to.
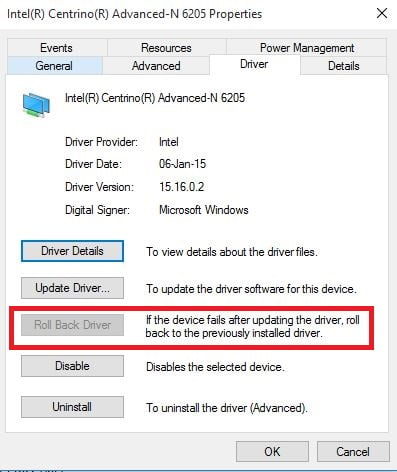
- After rolling back to the previous version of the driver, select Start>Power>Restart
NOTE
If your computer cannot connect to the internet, download a driver from a different computer, save it to a USB flash drive, then manually install it on your own computer.
4. Temporarily turn off firewalls and any antivirus or malware prevention software
A firewall, antivirus or anti-malware program, may at times prevent you from finding your Wi-Fi adapter. If this is the cause of the issue, turn either of the three off temporarily then try to connect again.
Ensure you turn these programs back on immediately after you’re done to prevent hackers, viruses and worms from damaging your system.
5. Uninstall the network adapter driver then restart
This approach works if your connection was interfered with after a recent update or upgrade. Before uninstalling, ensure you have drivers available as a backup, then visit your PC manufacturer’s website for the latest driver. You need to know the manufacturer, and model name or number to do this.
Here are the steps to take:
- Right click Start
- Select Device Manager
- Click Network adapters then the adapter name
- Right click on the network adapter
- Click Uninstall device>Delete the driver software for this device check box>Uninstall
- Once you uninstall the driver, click Start>Power>Restart
After your computer restarts, Windows will automatically search for and install the network adapter driver. If it doesn’t, try installing the backup driver you saved prior to uninstalling.
6. Reinstall network devices
This should be used as a final resort, and can help solve connection problems after an upgrade to Windows 10, plus fix issues where you can connect to the internet but not to shared network drives.
Do the following to use network reset and reinstall network devices:
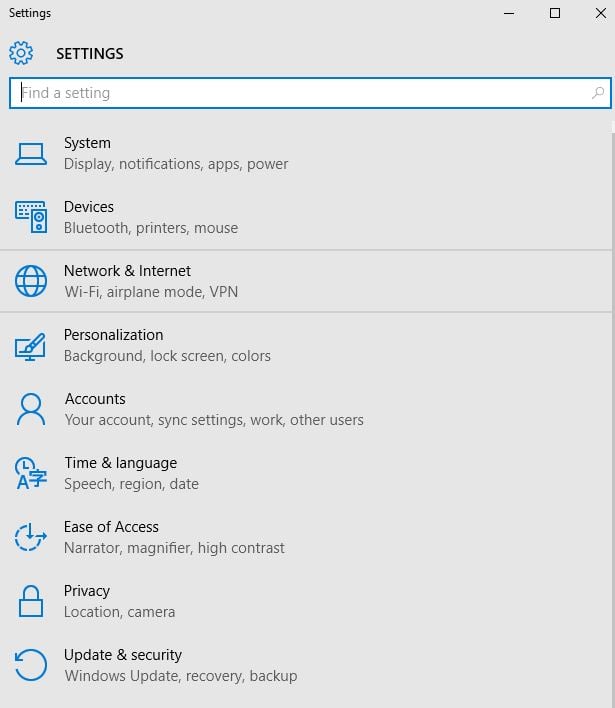
- Click Start
- Select Settings
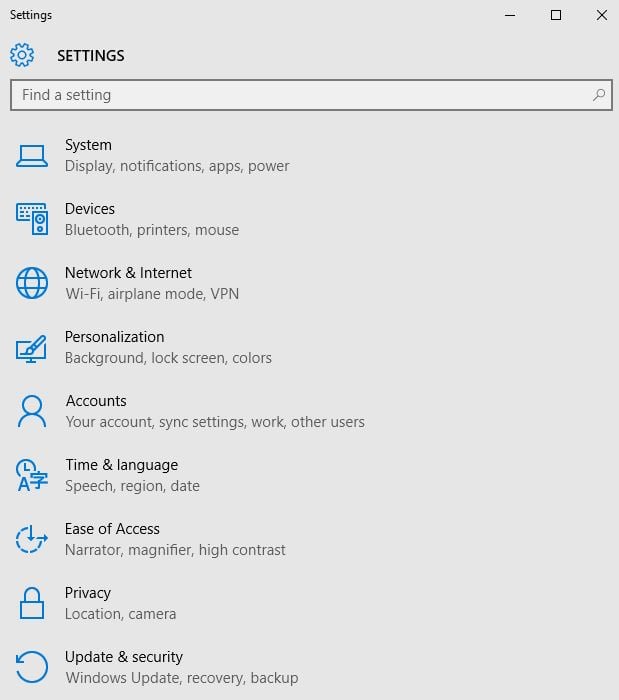
- Click Network & Internet
- Select Status
- Click Network Reset
- In the network reset screen, select Reset Now then click Yes to confirm
Wait for your computer to restart and check if it fixes the problem.
Let us know if any of the solutions we shared worked for you.
Read our disclosure page to find out how can you help Windows Report sustain the editorial team. Read more


Improve this guide


User forum
0 messages