Windows 10 Dropping Wi-Fi: 7 Ways to Stop Disconnecting
Wi-Fi drops in Windows 10 are caused by router issues
7 min. read
Updated on
Read our disclosure page to find out how can you help Windows Report sustain the editorial team. Read more
Key notes
- If you're facing a frequent loss of Wi-Fi connection, this is usually caused by a problem with the router.
- However, ensure that your device is close to the Wi-Fi hotspot and that there are no obstructions in the way.
- Updating the network adapter driver is a great way to fix this problem.
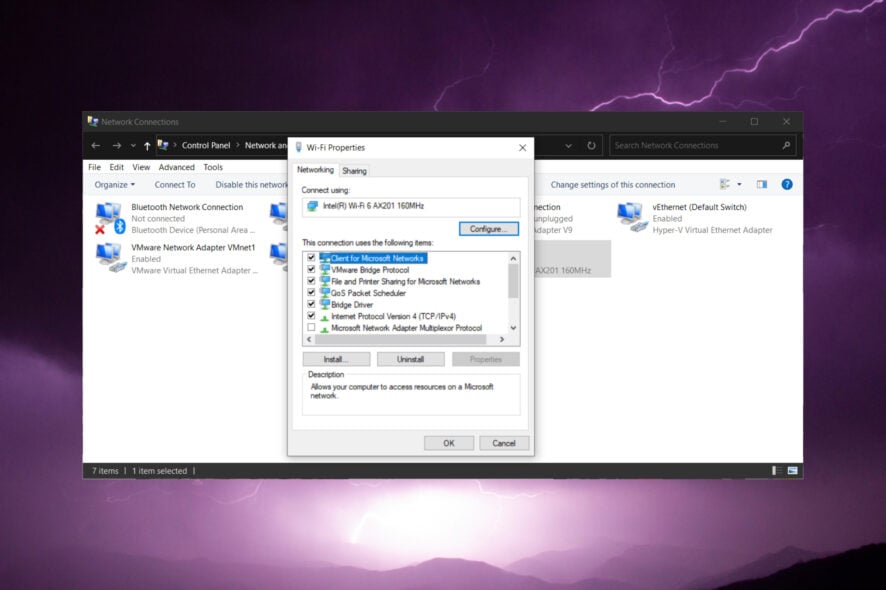
If your Wi-Fi connection is dropping constantly without any particular reason, we’re going to show you a few workarounds in order to solve this connection problem. We hope that at least one of the following solutions will be helpful.
Why is Windows 10 dropping Wi-Fi?
There are a lot of reasons why Windows 10 is dropping Wi-Fi connection, but we will highlight the most important:
- Router issues – If Wi-Fi keeps disconnecting and reconnecting, that’s a sign that your router has hardware problems or it’s not configured properly. Try to restart your router and reconfigure it with the instructions from your ISP.
- The adapter is malfunctioning – Like any hardware component on your PC, the wireless adapter may be damaged or malfunctioning. Some of the solutions below will help you with this problem.
- The adapter is disconnected to conserve power – If you have this issue on a laptop running out of battery, the system may be disconnecting the Wi-Fi to save power.
Now that we know why Windows 10 is dropping the Wi-Fi connection, let’s try to fix this issue.
What can I do if Windows 10 is dropping Wi-Fi?
Before getting into more complicated tweaks, let’s perform a few basic steps to fix or circumvent the problem:
- Restart your PC and see if that changes the situation.
- Make sure you are close to the Wi-Fi hotspot and that there are no major obstructions in the way.
- Try to install the latest firmware for your router. The highlighted link will bring you to our complete guide on how to perform that action.
- If possible, switch to a wired connection until you fix the Wi-Fi issue using the solutions below.
If the problem persists, let’s perform the solutions below, one by one.
1. Run the Windows Network troubleshooter
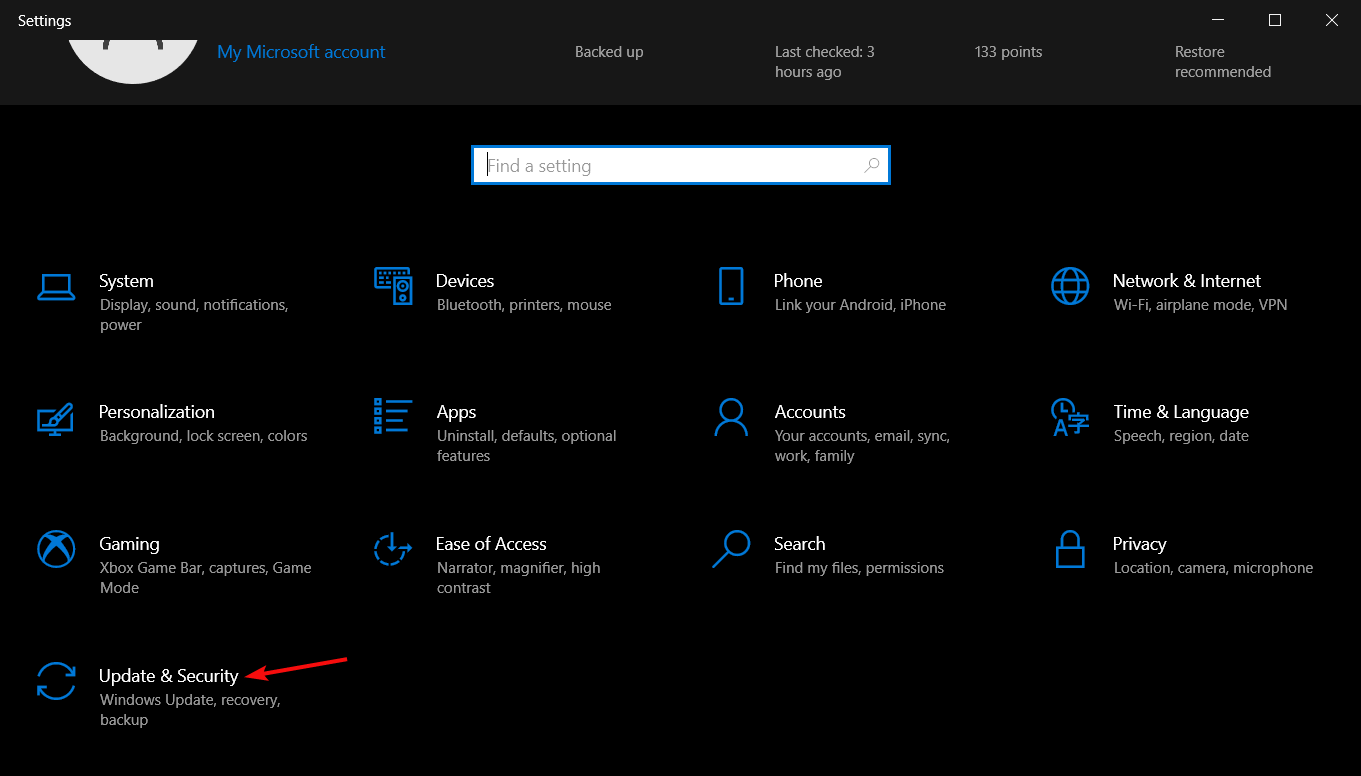
- Click the Start button and choose Settings.
- Now, pick Update & Security.
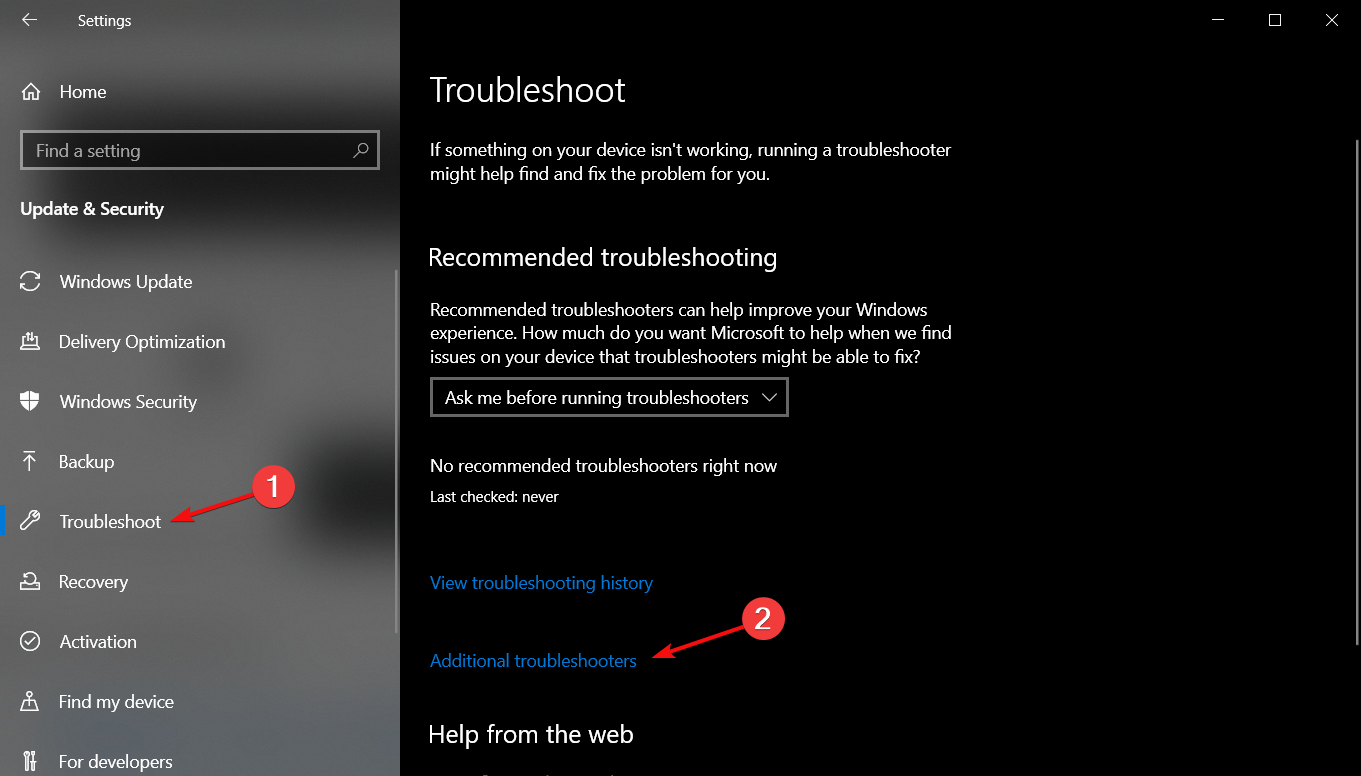
- Click on Troubleshoot from the left pane and select Additional troubleshooters from the right.
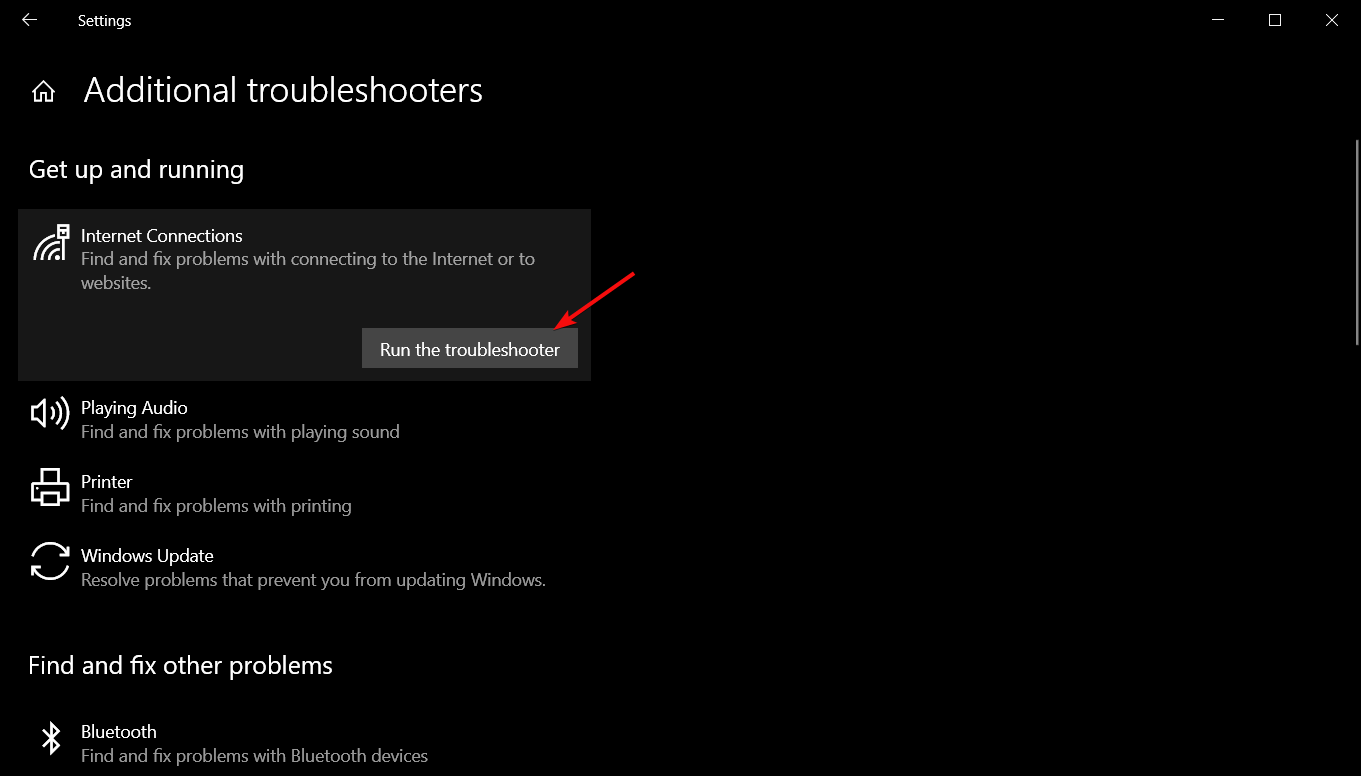
- Select the Internet Connections options to expand it and click on Run the troubleshooter.
- Follow the on-screen instructions to debug Internet connection problems.
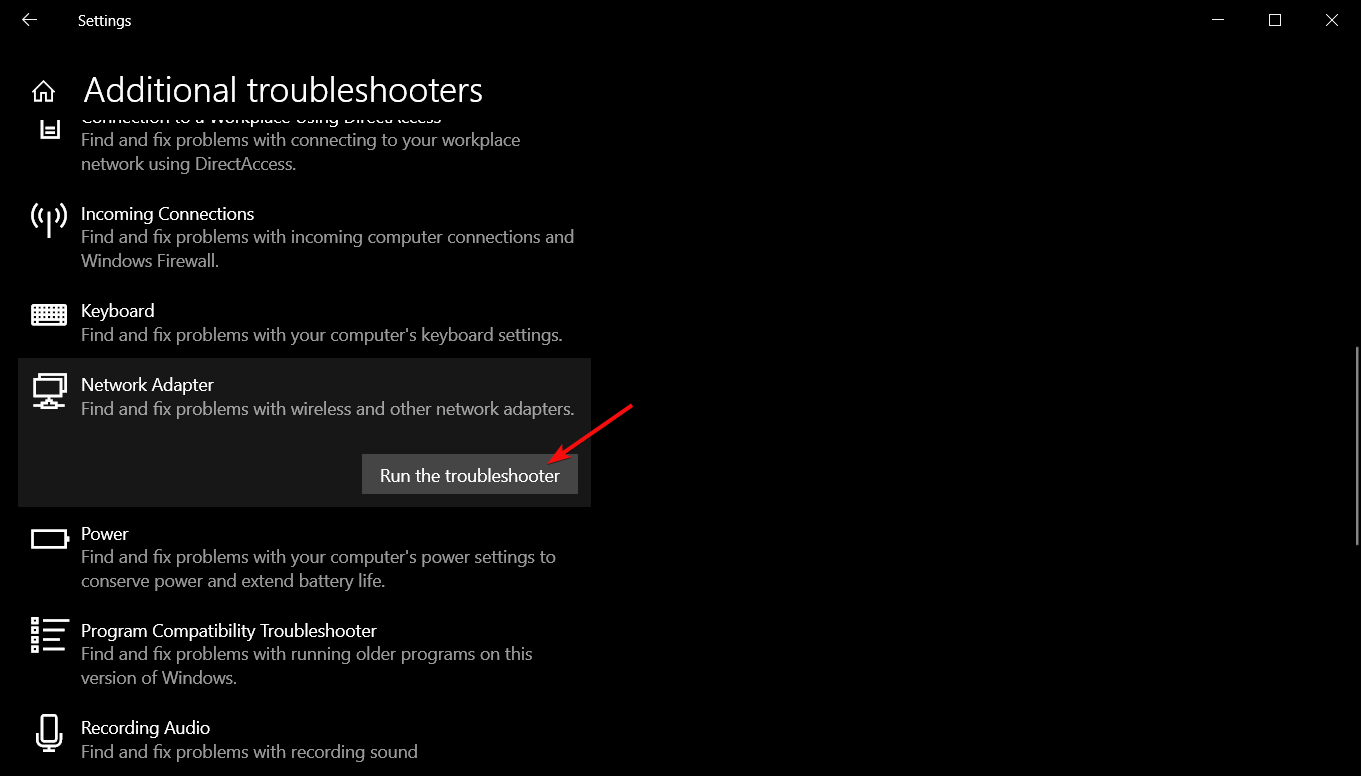
- Check for any changes. If there aren’t any, scroll down in the Additional troubleshooters list, click on Network adapter, and hit the Run the troubleshooter button.
The troubleshooters will scan your computer and will provide you with fixes if it finds anything wrong.
2. Update, uninstall, or roll back the network adapter driver
2.1 Update or uninstall the driver
- Right-click the Start button and select Device Manager from the list.
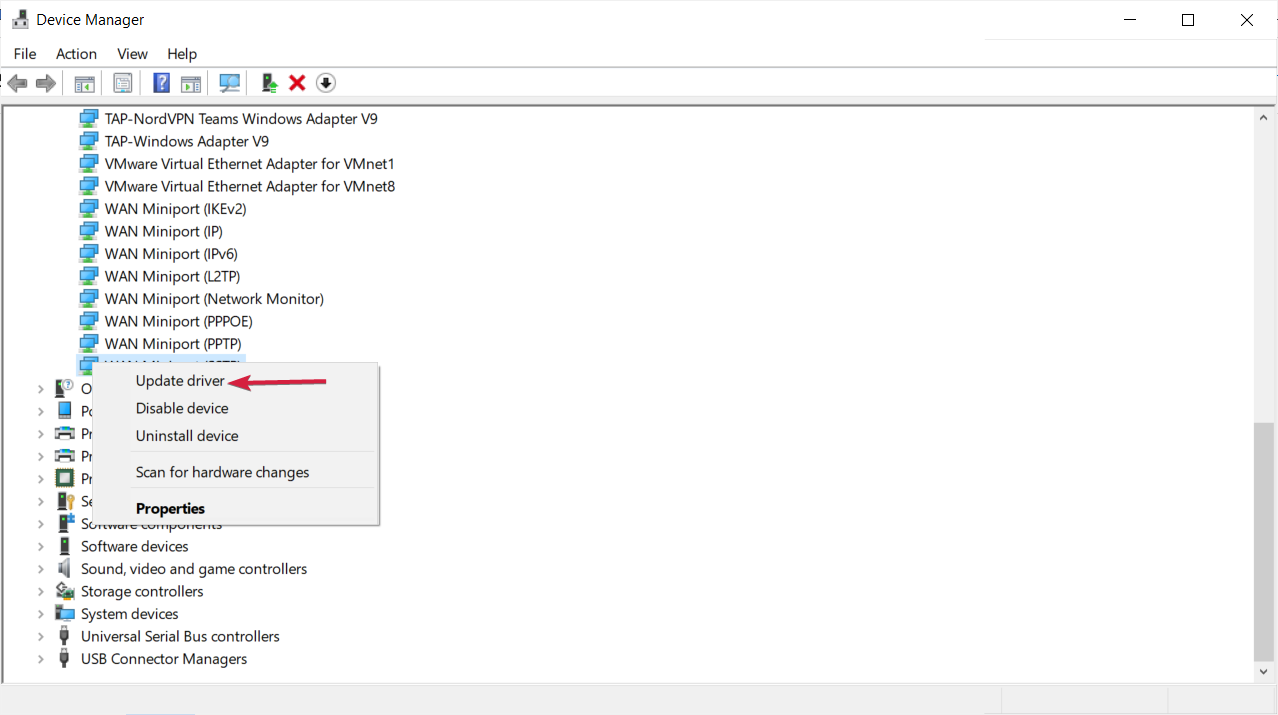
- Select the Network adapters section to expand it, right-click the Wi-Fi adapter, and select Update driver from the list of options.
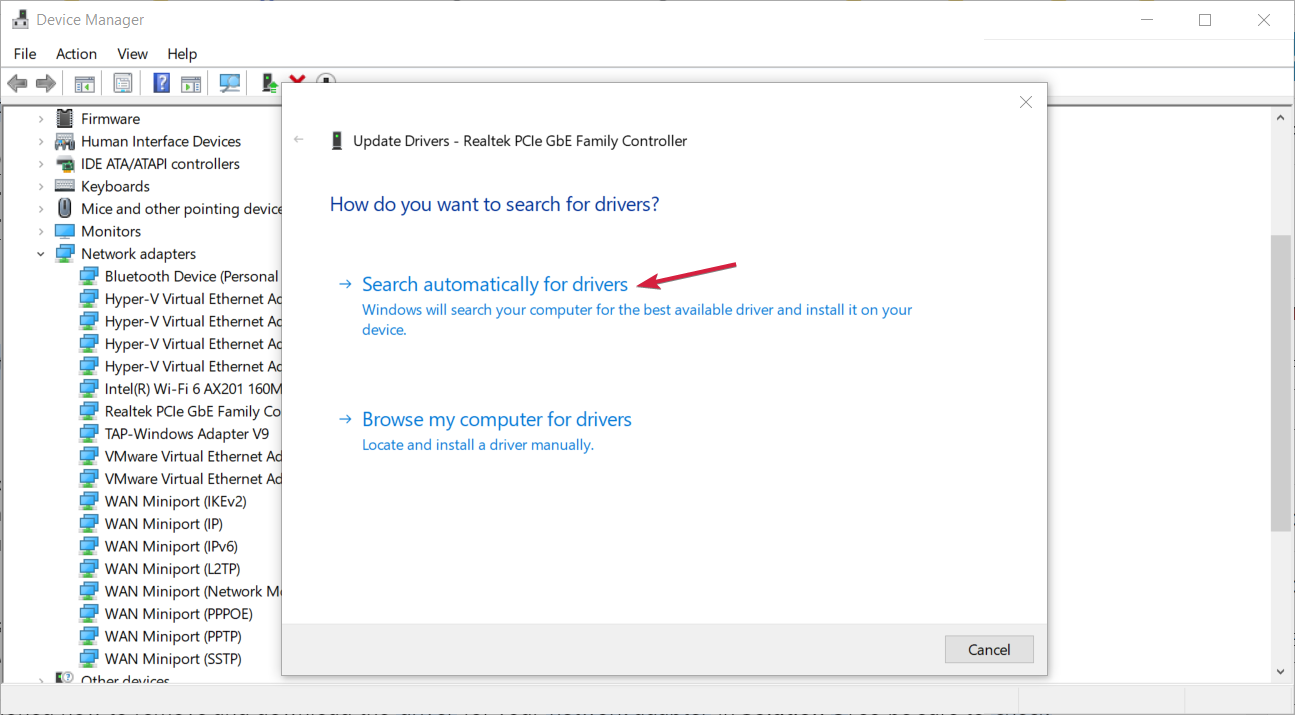
- Choose the Search automatically for drivers option.
- If the system finds any new drivers for your adapter, it will install it.
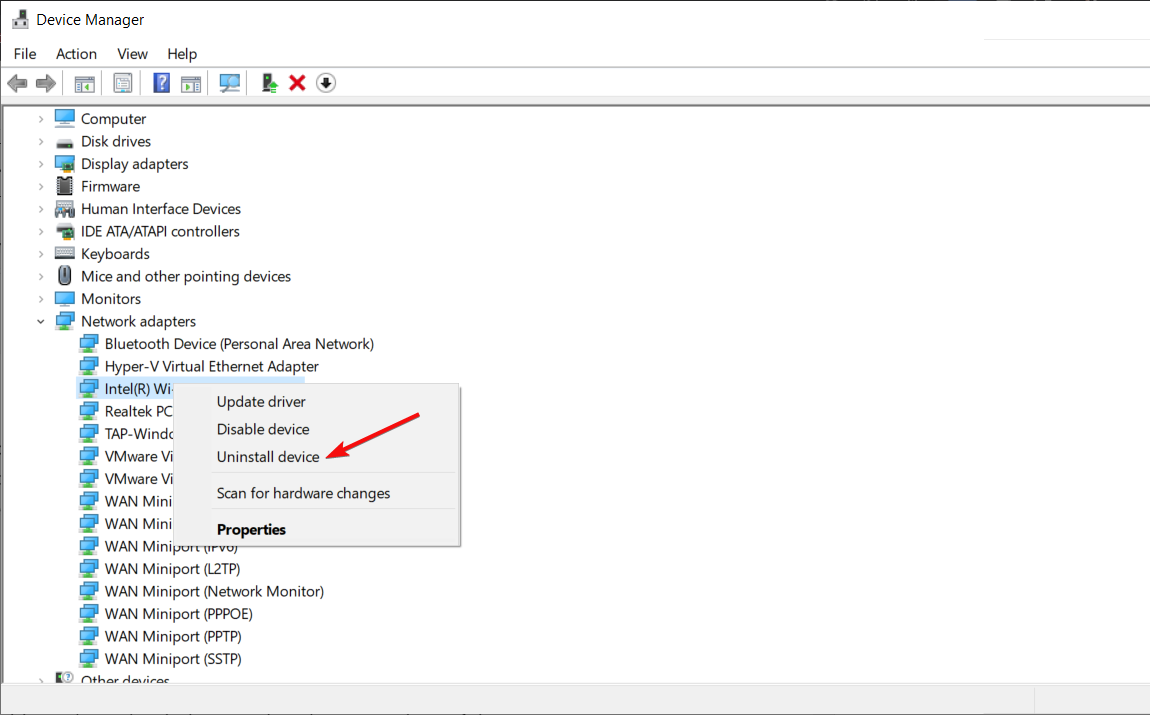
- Also, if you find more Wi-Fi adapters in the section, right-click the ones you don’t recognize and select Uninstall device.
- If you’re not sure which one is the right one, you may uninstall all of them and restart your PC because the system will automatically install a default driver for your adapter.
Updating your drivers is one of the most common solutions for almost any Windows-related problem, especially if you’re using Windows 10, because it’s still not compatible with a lot of drivers and other software.
You might also receive an update for your wireless drivers through Windows Update, because Microsoft is releasing new updates to its users every day, so just in case, check for Windows Updates once again.
2.2 Roll back the network driver
- Right-click the Start button and pick Device Manager from the list.
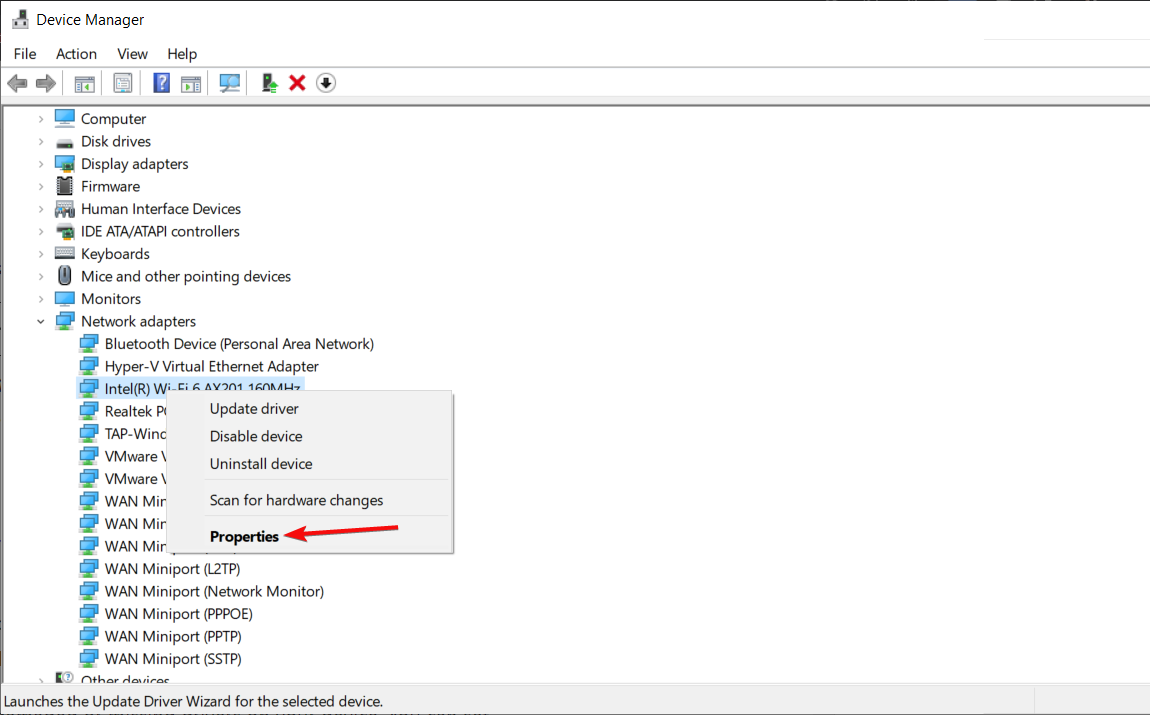
- Click on the Network adapters section to expand it, right-click on the Wi-Fi network adapter, and select Properties.
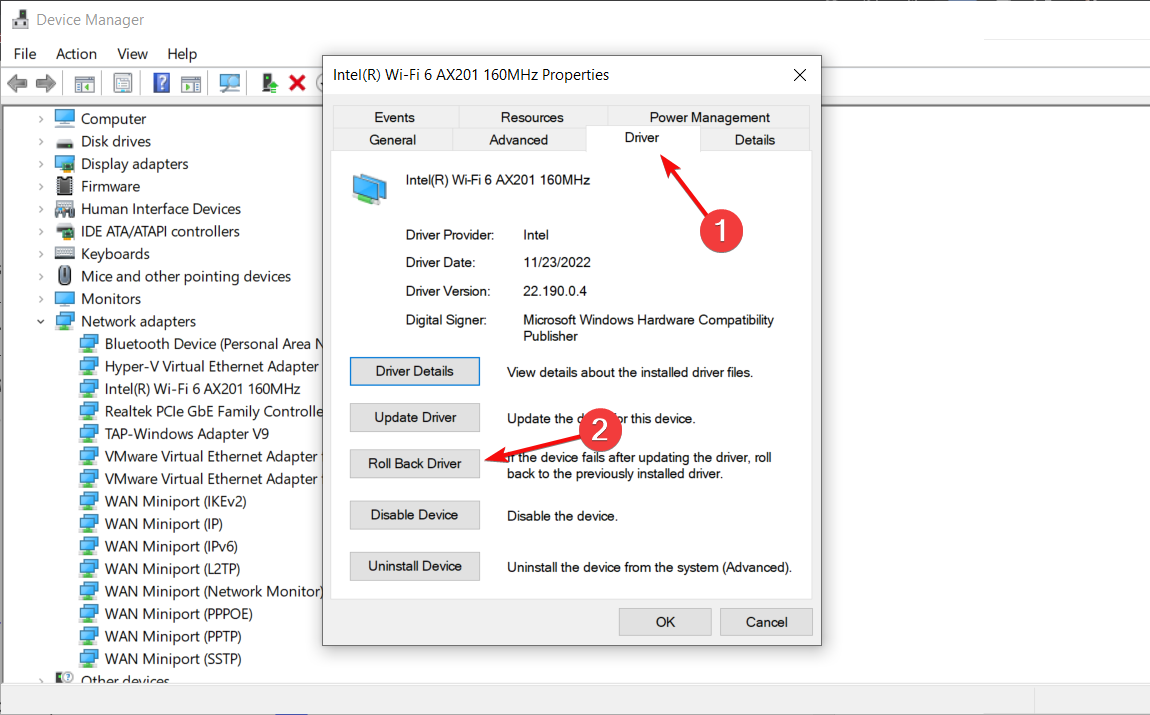
- Click on the Driver tab and hit the Roll Back Driver button from the options below.
- Restart your PC after the process is finished.
If Windows 10 starts dropping the Wi-Fi connection after an update, you may also roll back the previous driver as shown in the solution above.
We also recommend a third-party tool to automatically and safely download all the up-to-date drivers for your PC.
Not only will it save you a lot of time, but it will find the perfect driver version for your hardware. This eliminates the risk of permanent damage caused by a faulty driver.
The tool we suggest you try can also fix any damaged or missing drivers on your device. You can set it up to run in the background and regularly update your drivers whenever necessary.
3. Set your router to a specific channel
3.1 Find your Wi-Fi network channel
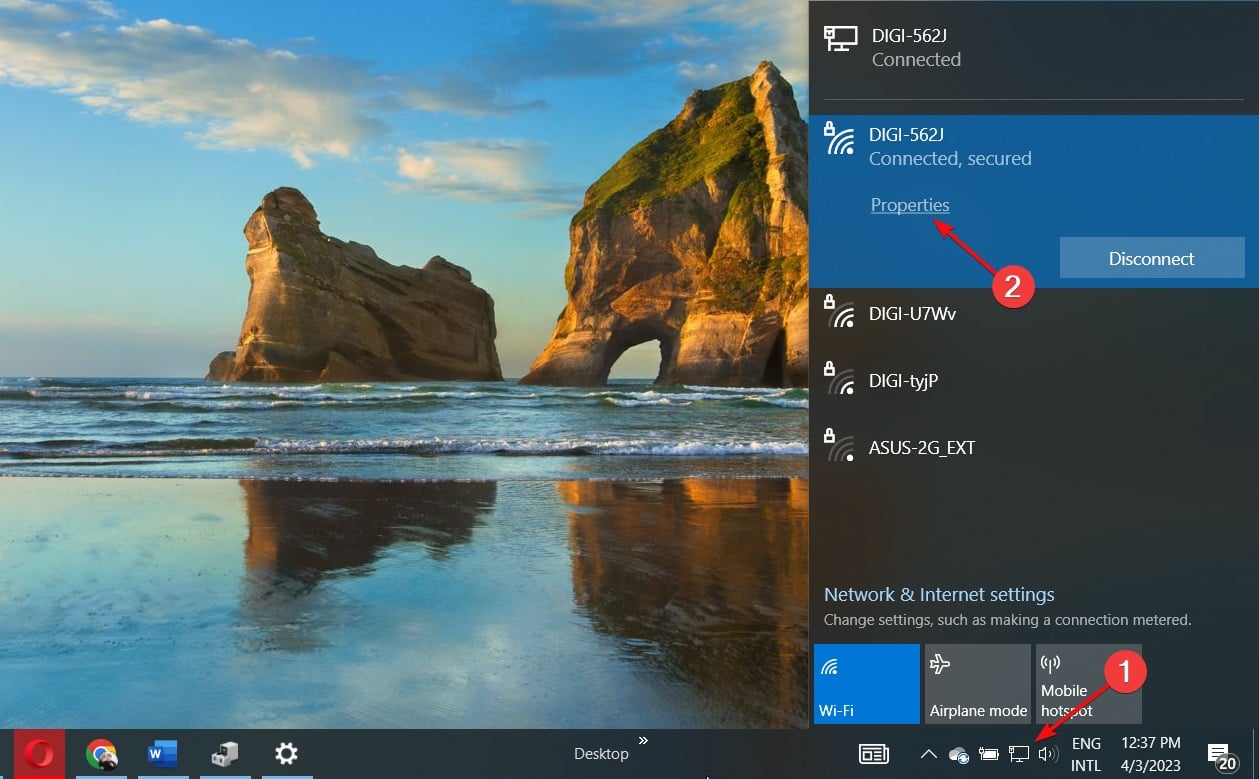
- Click on the Network icon on your taskbar, select your Wi-Fi connection, and click on Properties.
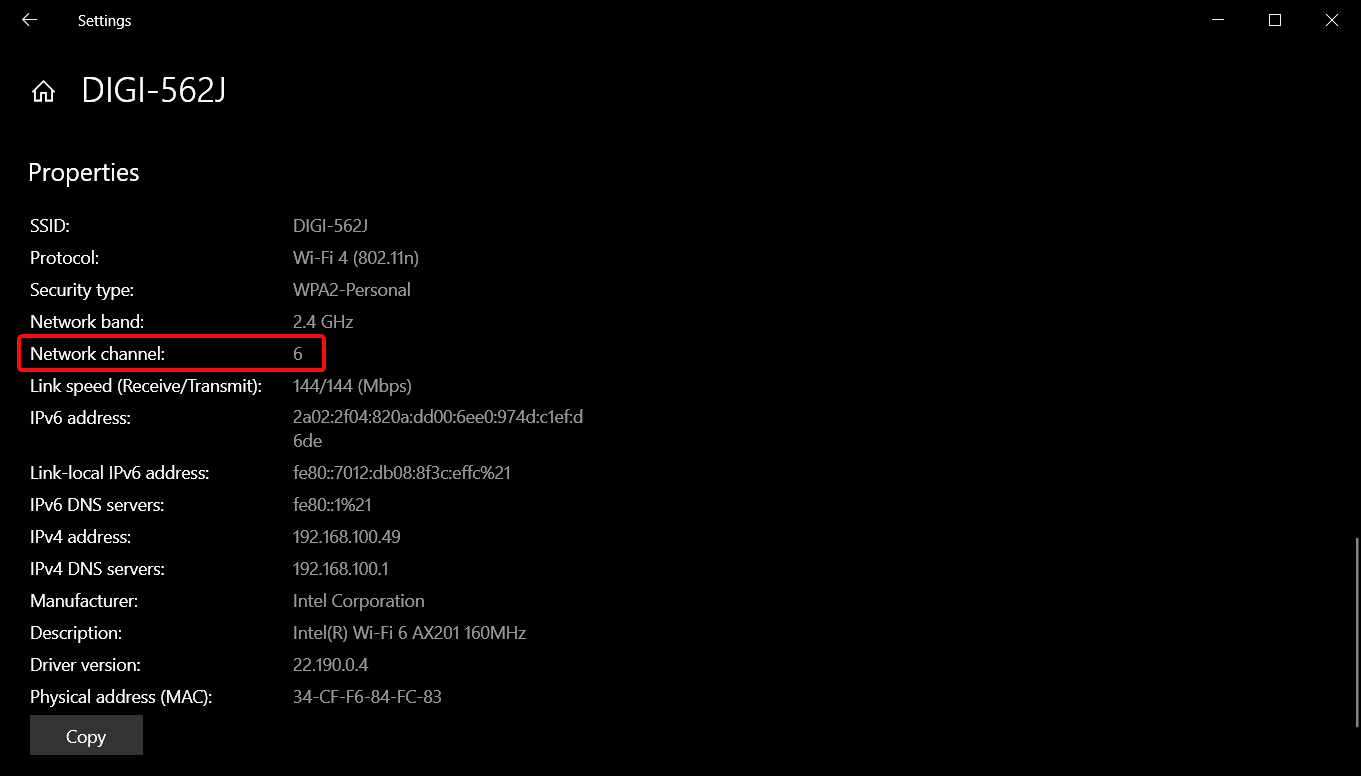
- Now, scroll down and you should see the Network channel for your Wi-Fi connection.
3.2 Change the channel in the router settings
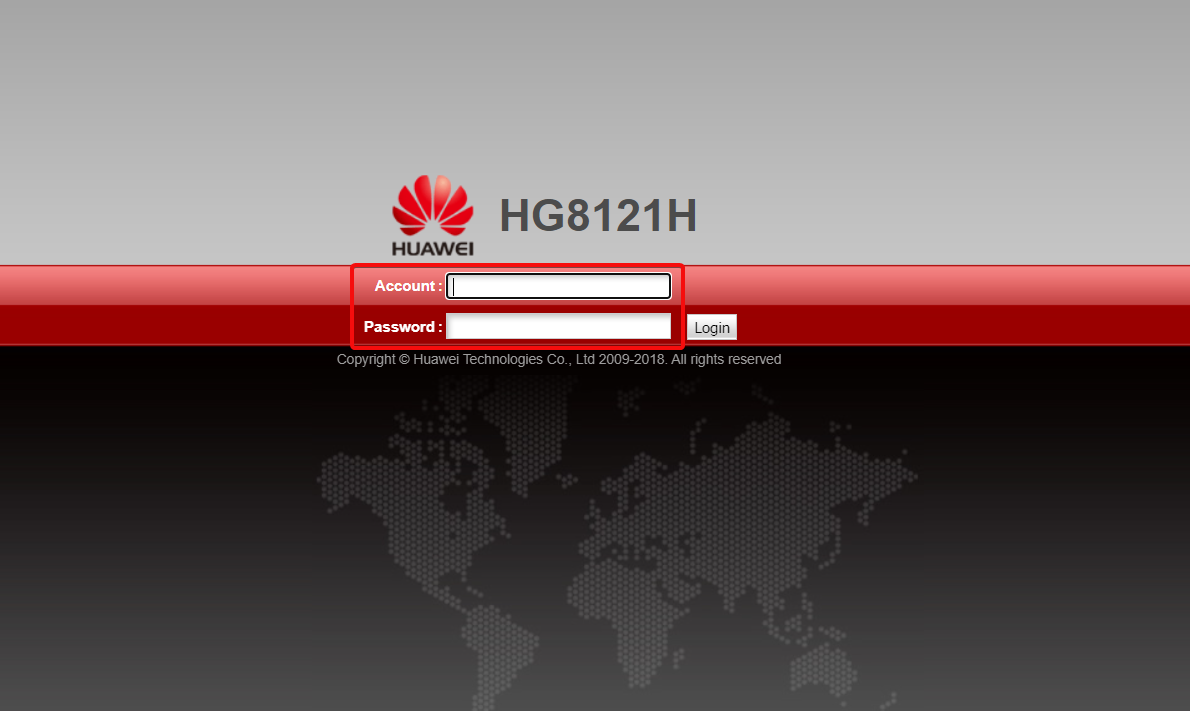
- Launch the browser of your choice and log into your router with the correct credentials. You can find that info on the router itself or on the manual of the router.
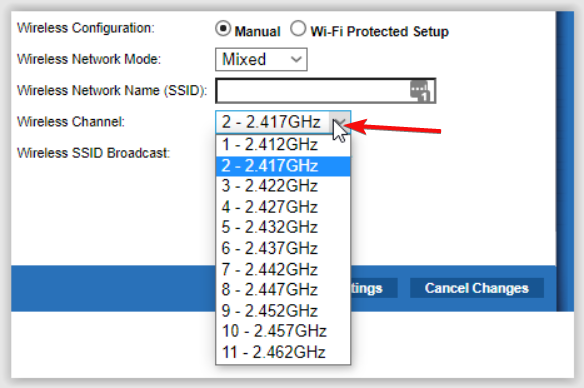
- Go to the Wireless settings of your router and change the channel to a different one from the default. If you’re using a dual-bound router, make this setting for both of your bands (2.4GHz and 5GHz).
4. Reset the DHCP server settings
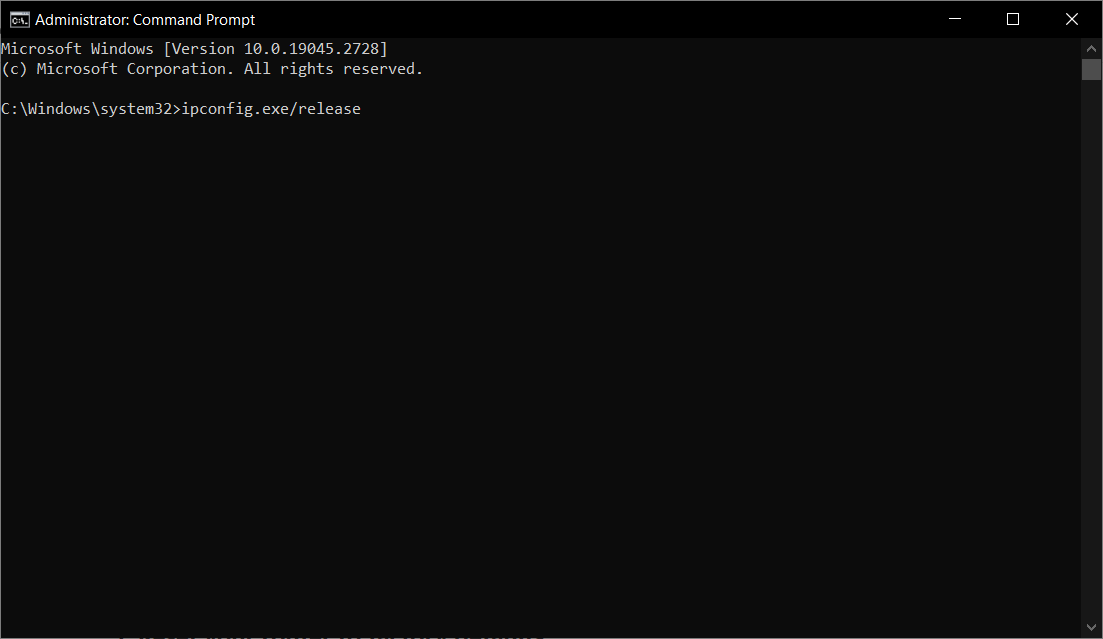
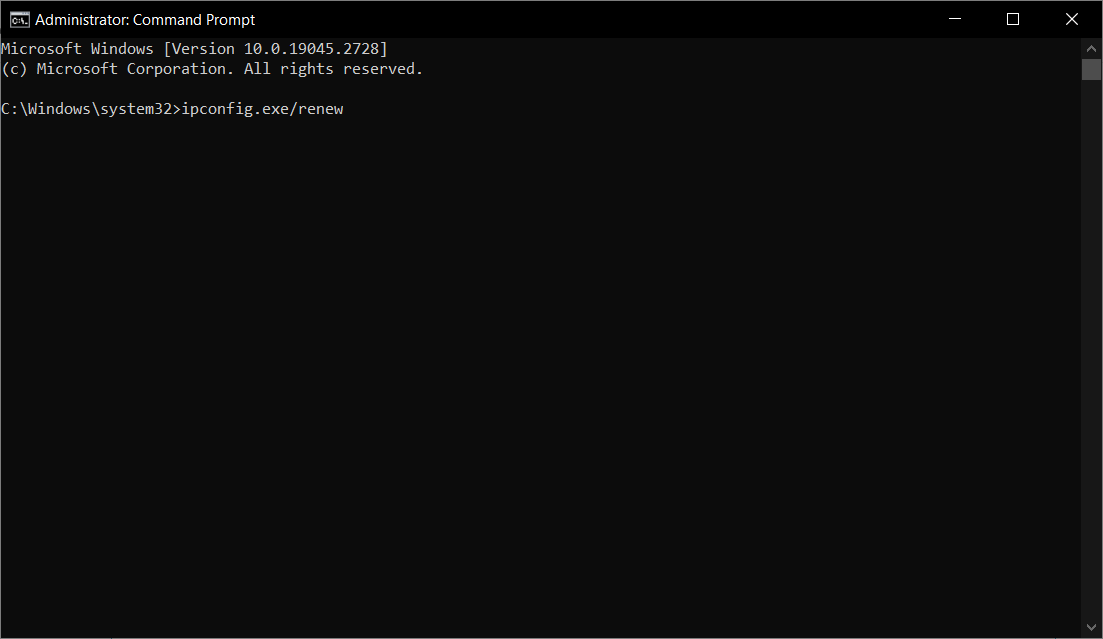
- Click the Start button, type cmd, and select Run as administrator to open Command Prompt with full privileges.
- Enter the following command and press Enter:
ipconfig.exe/release - After that, enter this command line and press Enter:
ipconfig.exe/renew
If your wireless connection connects, then disconnects, and connects again only for a few seconds, maybe your PC is trying to find an IP address, and DHCP server is not cooperating properly. The solution above helps you reset the network settings and fixes this problem.
5. Reset your router to factory defaults
If none of the previous solutions worked for you, try to reset your router to factory defaults. You can reset your router by pressing a miniature button on the back. But since this button is placed in the little hole, you’ll have to use some pin (like a toothpick or the end of a paper clip) to press the button.
Hold it down for 10 seconds, and your router will reset. After you reset your router, you’ll have to re-configure its settings and set a new password.
6. Change your Power Management settings
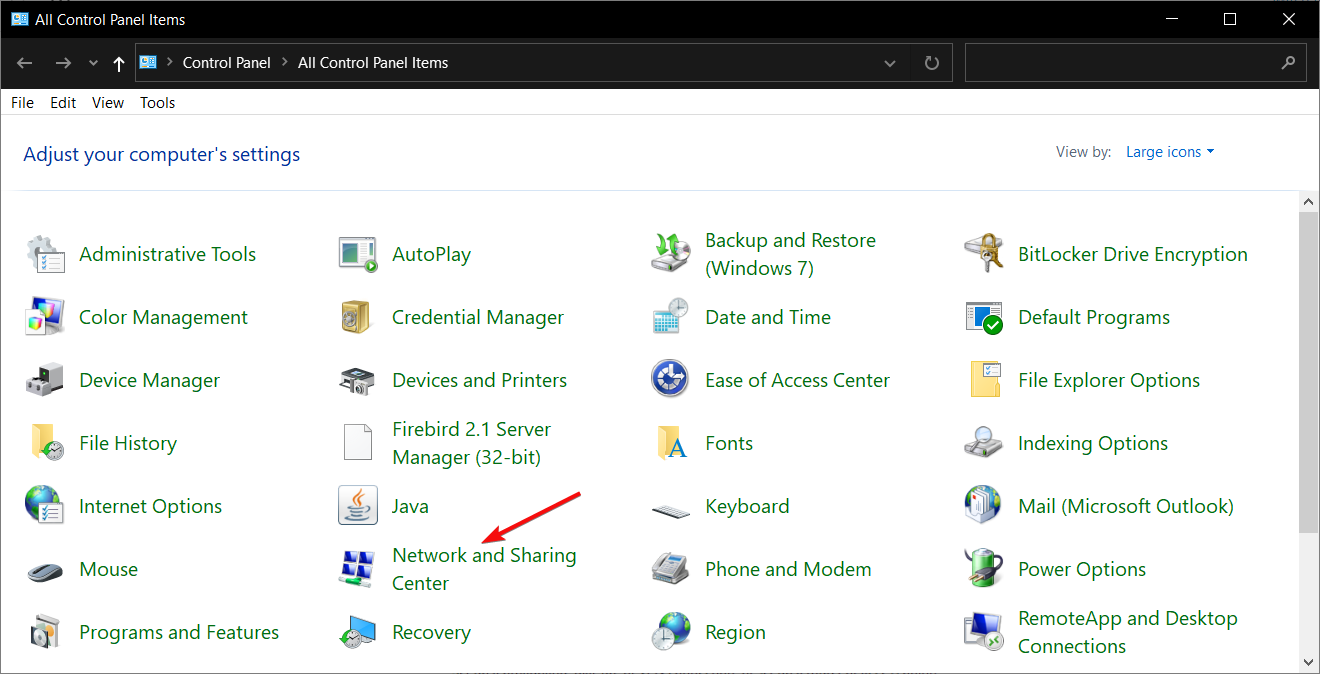
- Click the Start button, type control panel, and select Control Panel from the results.
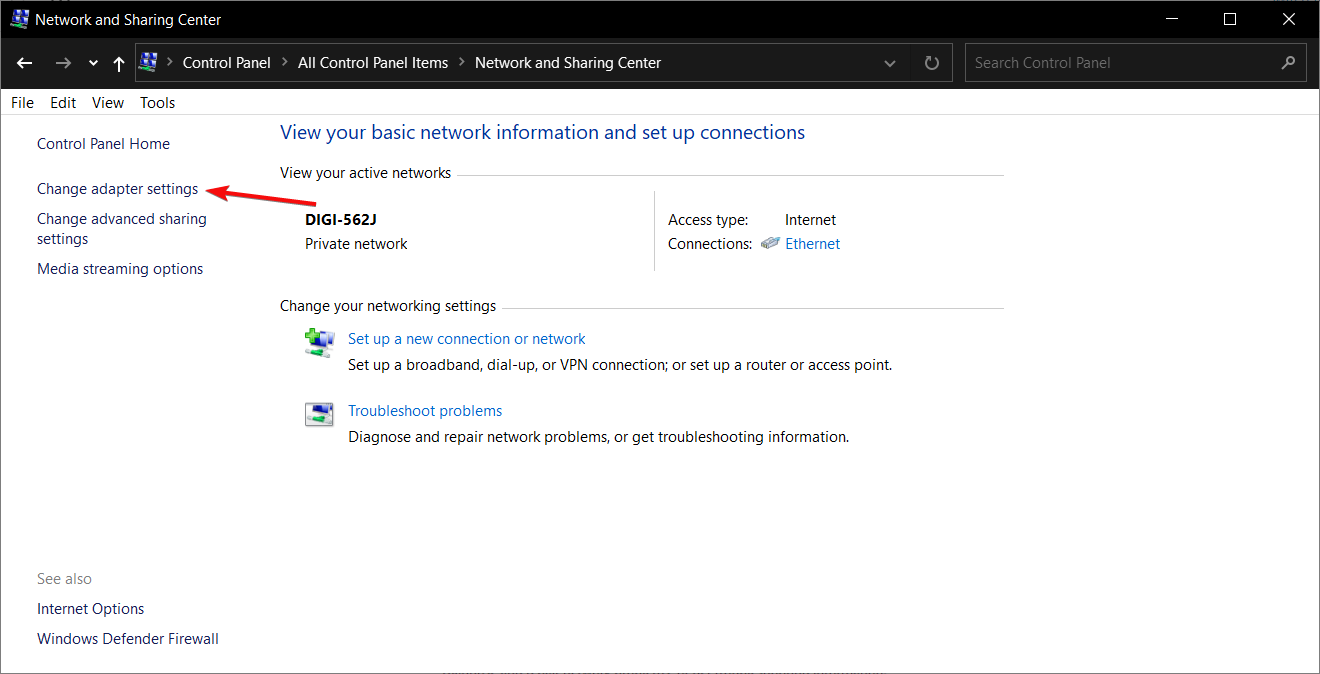
- Navigate to the Network and Sharing Center
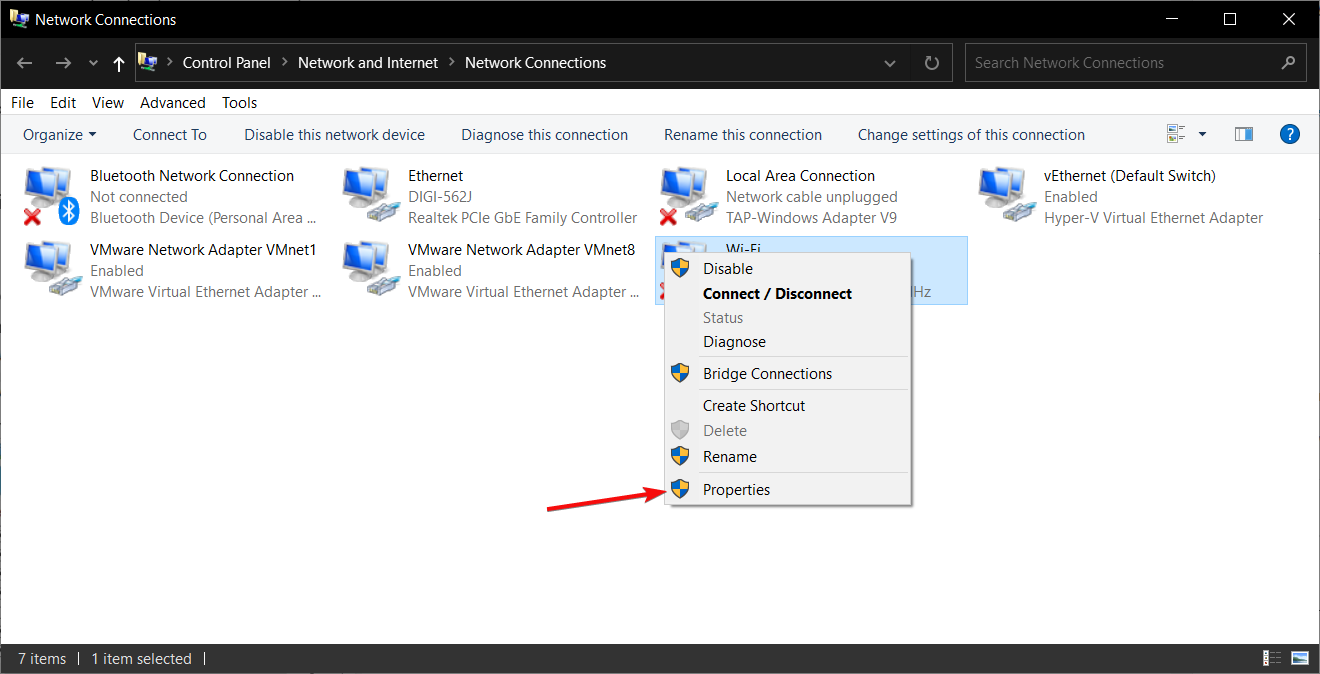
- Select Change adapter settings.
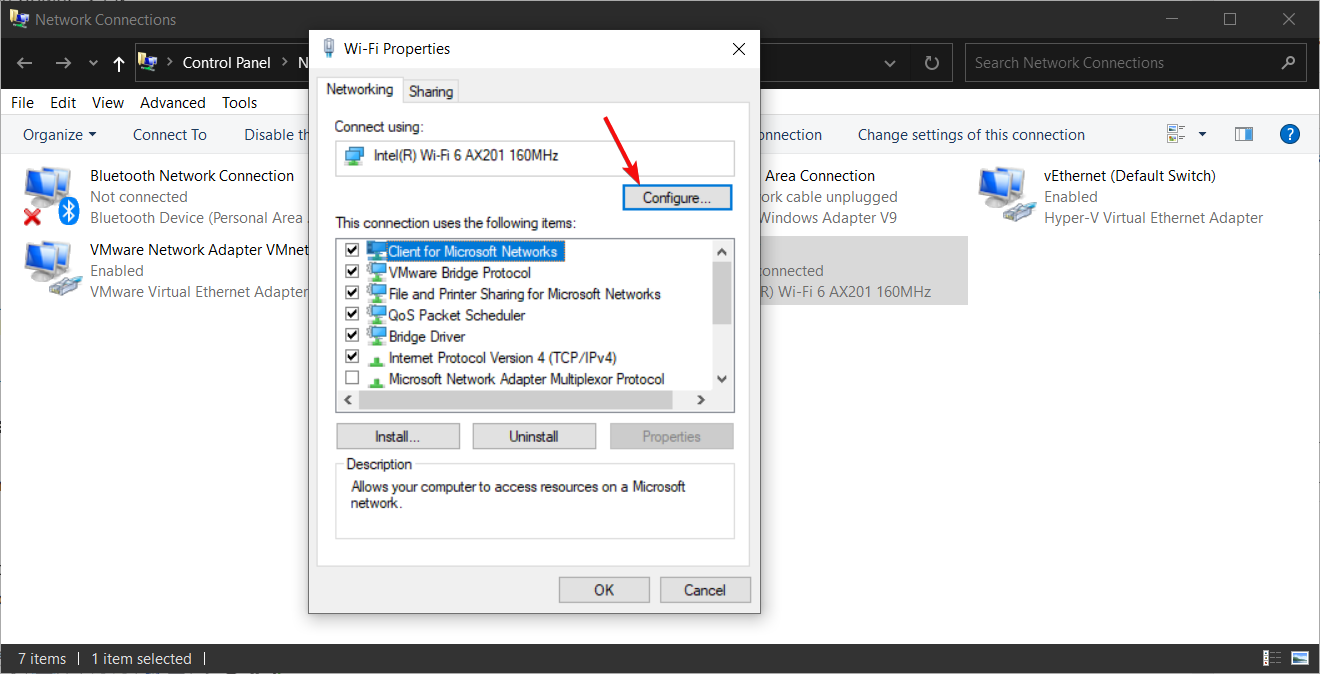
- Right-click your Wi-Fi adapter and go to Properties
- Select Configure.
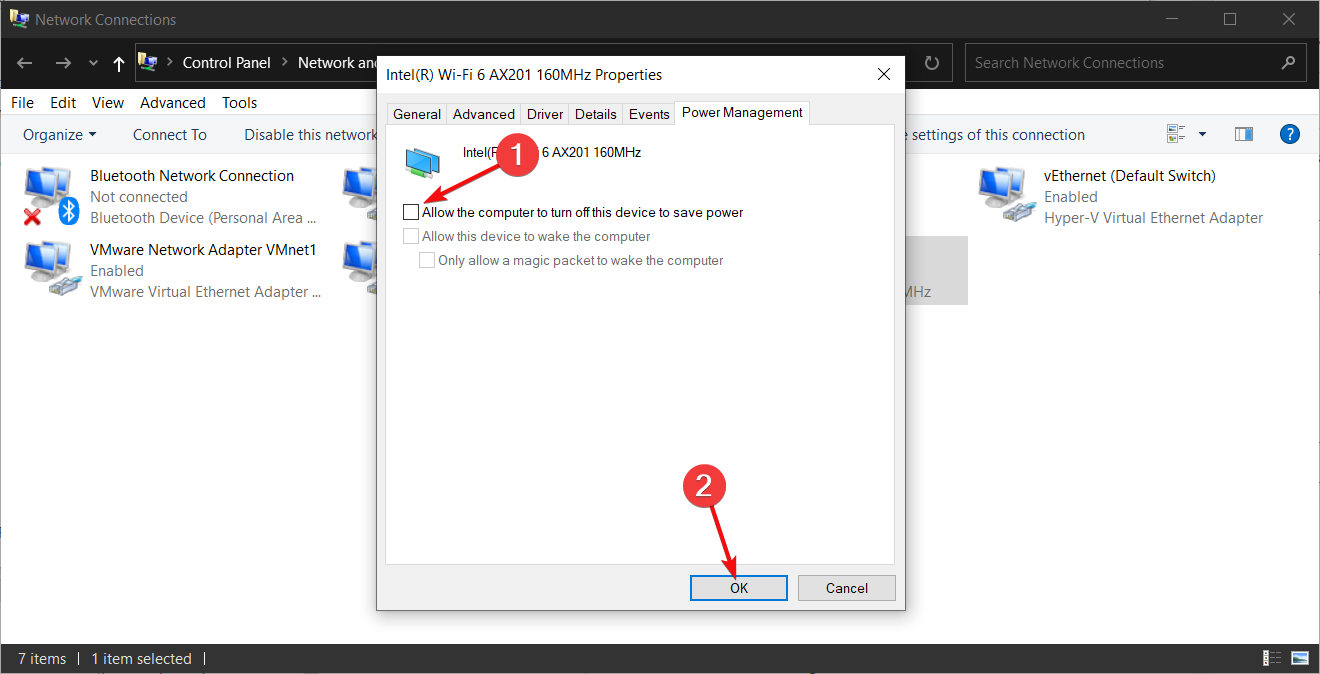
- Go to the Power Management tab, and uncheck the box Allow the computer to turn off this device to save power and click OK.
If you allowed your computer to turn off your Wi-Fi device in order to save power, this may explain why you’re having intermittent Wi-Fi connection issues.
7. Reset WLAN AutoConfig
- Press the Windows key + R to start the Run console, type services.msc, and hit Enter or click OK.
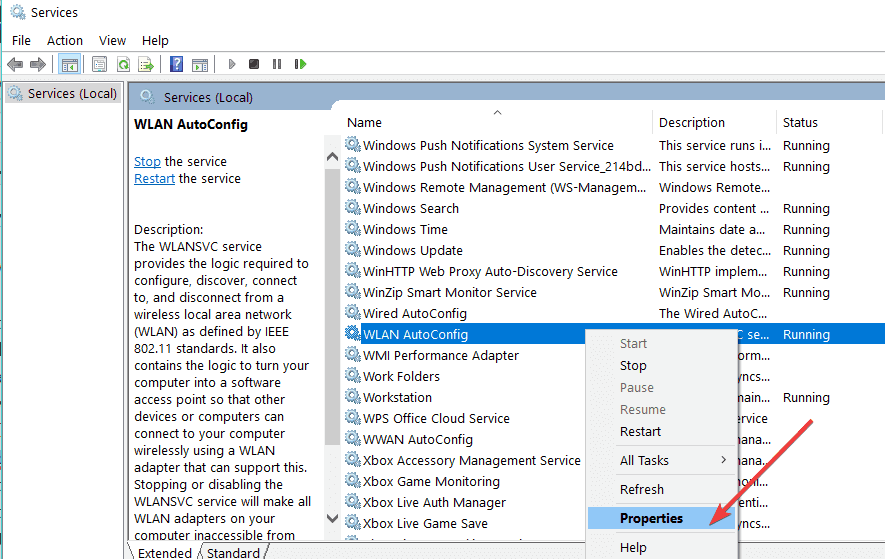
- Locate the WLAN AutoConfig feature, right-click on it select Properties.
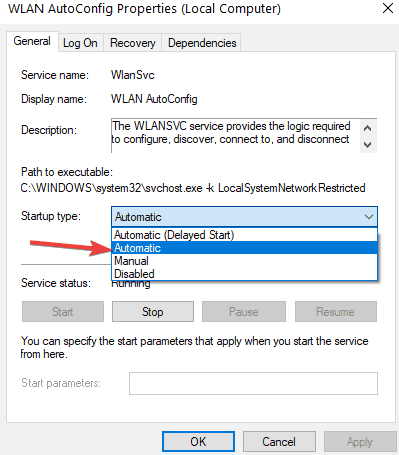
- Go to Startup type and change it to Automatic, then hit Apply and OK to make the changes.
- Restart your computer and check if your Wi-Fi connection is still dropping out.
There you go! We hope that at least one of these solutions solved your problem and that now, the Wi-Fi connection doesn’t drop on your Windows 10 device.
We also recommend consulting our complete guide on what to do if your PC can’t find a Wi-Fi hotspot.
Let us know if you’re still experiencing Wi-Fi issues or have any other suggestions on how to fix the issue.


User forum
0 messages