4K Resolution Not Showing on Windows 10: 3 Ways to Enable It
Find out what worked for other users
Key notes
- Display issues are common, especially when using an external monitor, and many users found that 4K resolution is not showing in Windows 10.
- The problem appears due to improper connections or outdated and buggy graphics drivers.
- To fix things, plug the cable into another port, check the in-app settings, or update the graphics driver.
Adding external displays has long been a common practice amongst users, and it does help to a great extent. But for some users, 4k resolution is not showing in Windows 10.
Using your 4K TV as a monitor for your Windows 10 PC allows you to view more items simultaneously if you’re working or to watch your favorite TV shows and movies online.
Getting this setup to work shouldn’t be too hard, but sometimes, a small glitch can make it seem like a never-ending problem. So, let’s find out why Windows 10 will not recognize 4k screen resolution.
Why is my monitor not displaying 4K?
Here are a few reasons your PC is not showing 4k resolution:
- Improper connection: An improper connection is the most common reason the 4K monitor is not showing 4K on your PC, be it a loose connection or using an improper port.
- Damaged HDMI cable: When it comes to connections, the cable plays a vital role, and a damaged one can trigger several problems.
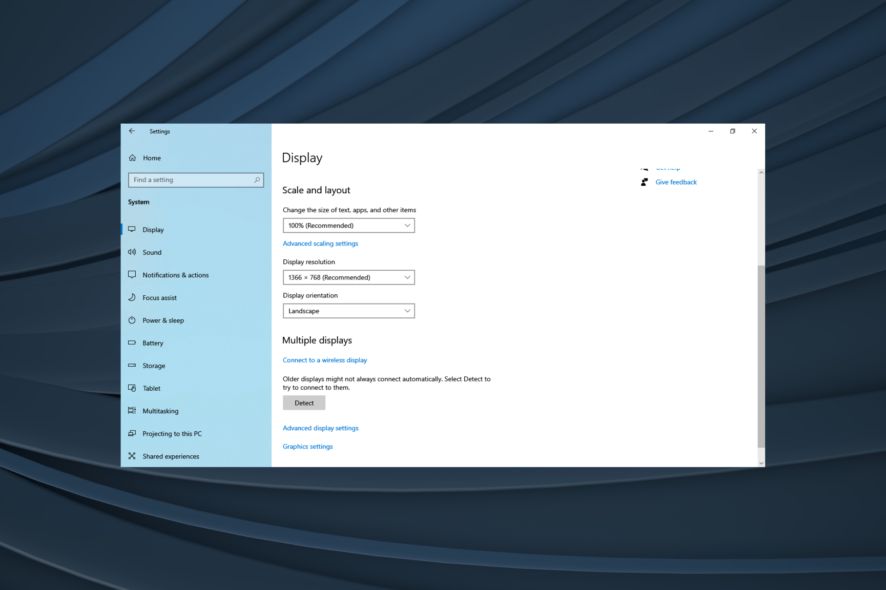
- Misconfigured settings: Several settings must be for the 4K resolution to appear on the Windows 10 PC.
- Issues with the driver: An incompatible or outdated driver has often been found to be the underlying cause when 4K resolution is not showing in Windows 10.
What can I do if 4K resolution is not showing on Windows 10?
Before we head to the slightly complex solutions, try these quick ones first:
- Ensure your graphics card and the monitor/TV support 4K resolution.
- Use a different port on the PC to connect the HDMI cable.
- Check for any cable damage and replace it with a compatible HDMI cable.
- If you use an HDMI to DP connector, make sure it works fine. Some users reported that replacing it with a DP-to-DP connector got things working.
- Disconnect the other displays and only use the one that supports 4K resolution and that you want to project to.
- Make sure any in-app settings are not changing or conflicting with the resolution.
- Check for any pending Windows updates and install them.
If none work, move to the fixes listed next.
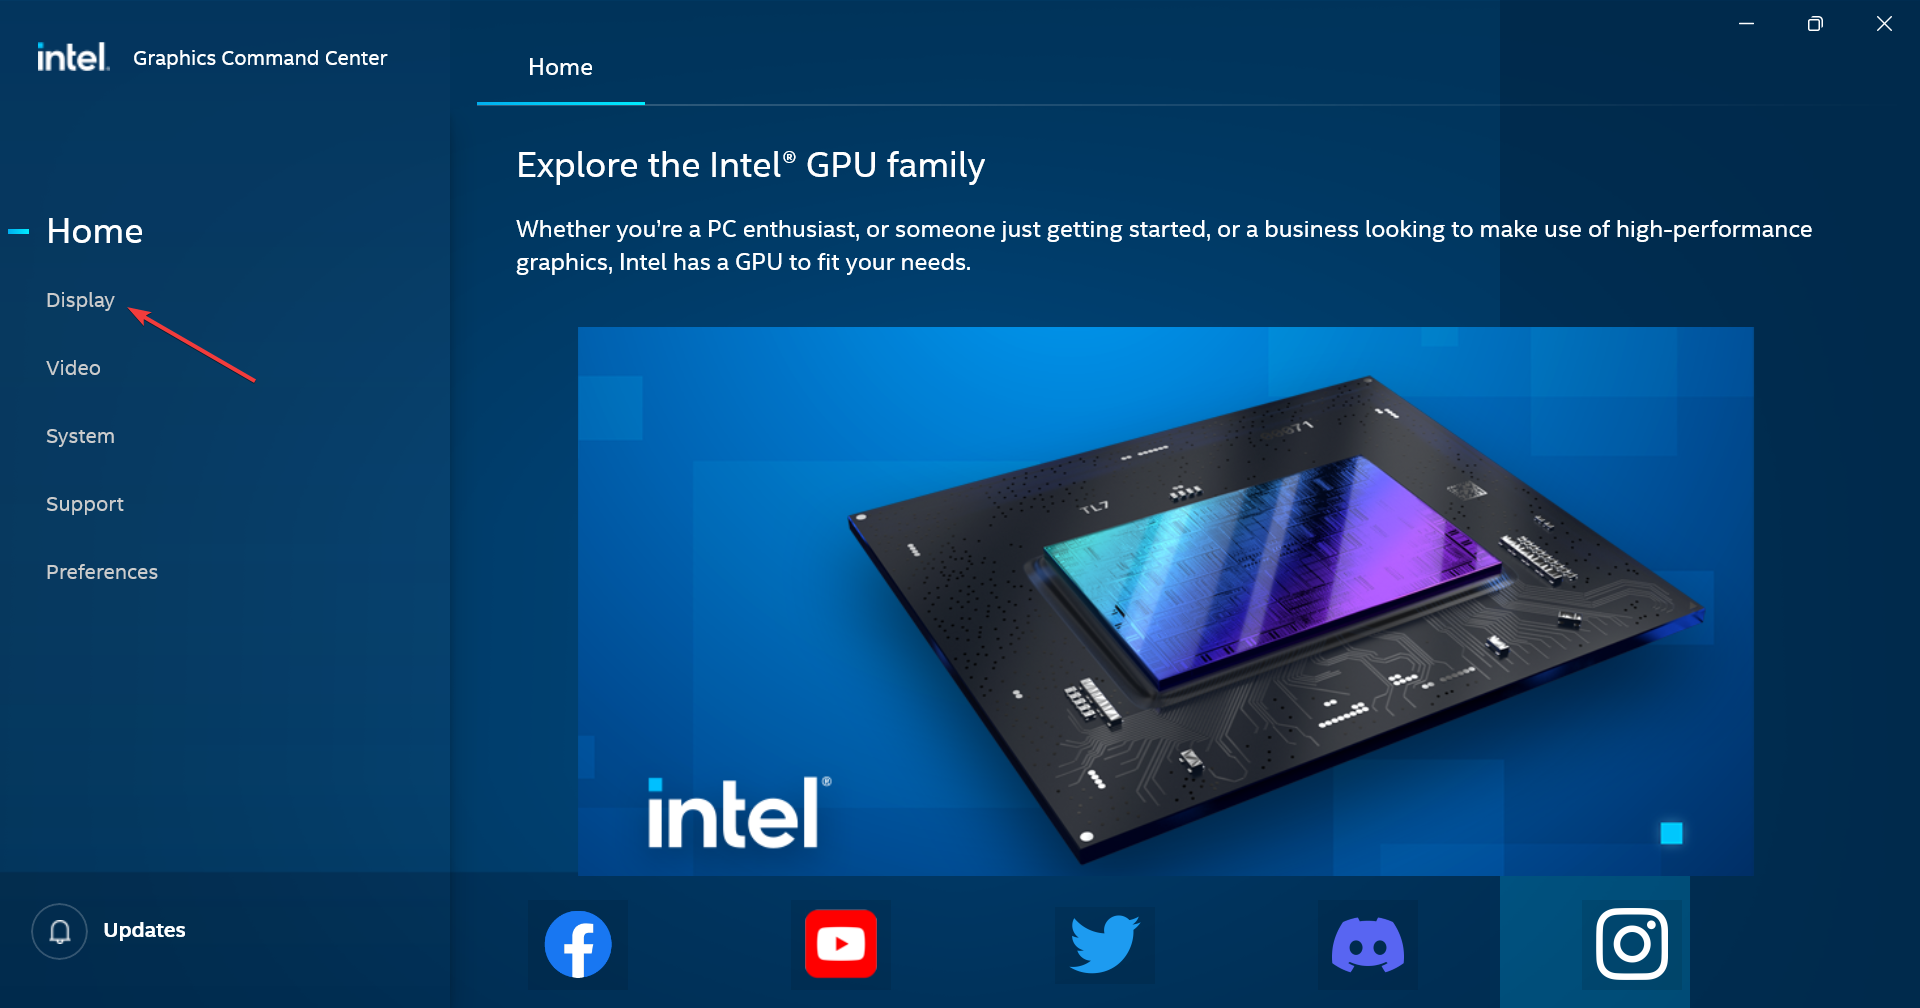
1. Use the dedicated utility to set the resolution
 NOTE
NOTE
- Launch the dedicated utility the graphics card manufacturer provides and head to the Display tab.
- Now, choose the desired setting from the Resolution dropdown menu.
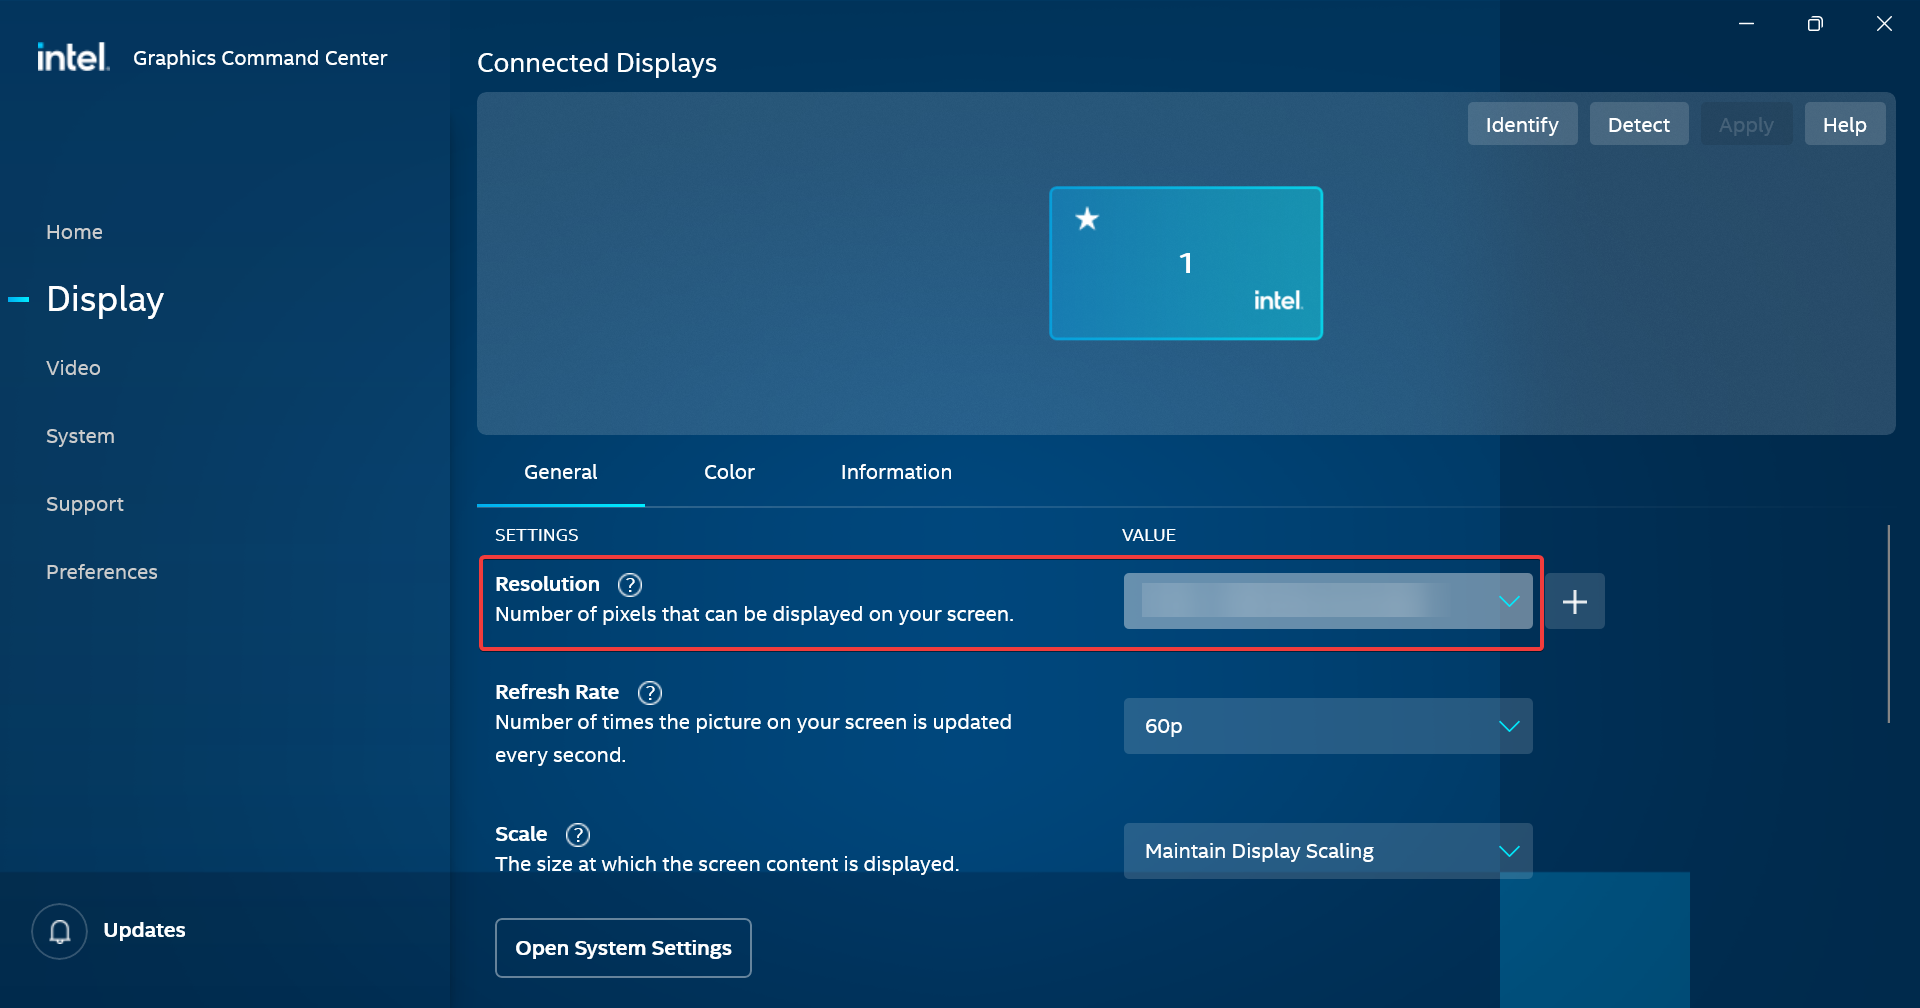
If 4K resolution is not showing in Windows 10, your primary approach should be to use the dedicated utility provided by the GPU manufacturer to set the desired resolution. If the option is also missing here, head to the next method.
2. Update the graphics driver
- Press Windows + X to open the Power User menu, and select Device Manager.

- Expand the Display adapters entry, right-click on the graphics card, and choose Update driver.

- Now, select Search automatically for drivers from the context menu.
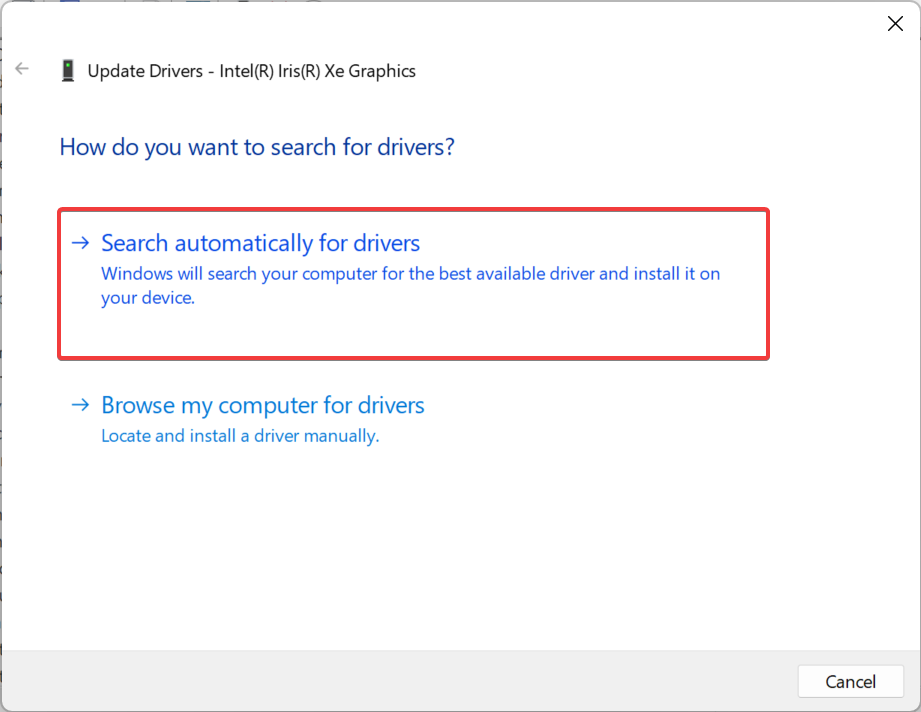
Updating the graphics card helps a lot of users get things running when 4K resolution is not showing in Windows 10. Also, if Windows is unable to find a better version, you can always manually install the latest driver.
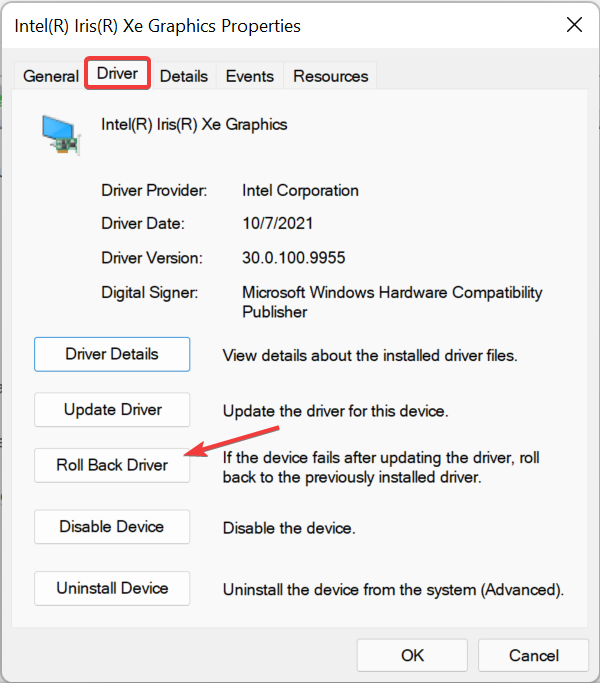
3. Roll back the graphics driver
- Press Windows + R to open Run, type devmgmt.msc, and hit Enter.

- Double-click on Display adapters, right-click on the graphics card, and select Properties.

- Navigate to the Driver tab, and then click on Roll Back Driver.
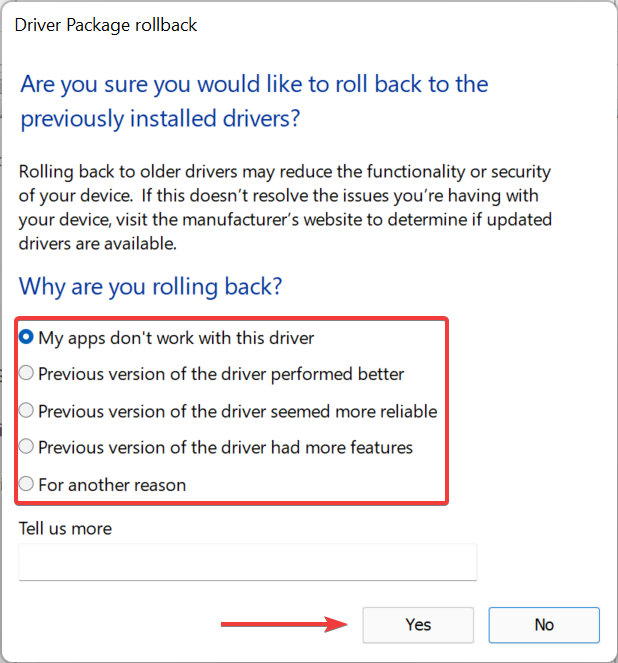
- Choose a reason for the roll back, and click Yes to confirm.
- Once done, restart the computer for the changes to come into effect.
That’s it! If updating the driver didn’t work and everything else, ranging from connections to cable and compatibility, seems to be in order, rolling back the driver should do the trick when 4K resolution is not showing in Windows 10.
Once you have fixed the problem, check some quick tips to enhance the display in Windows.
It seems that there is confusion between HD+ and Full HD. Read the highlighted article to clear this issue out.
For any queries or to share what worked for you in this case, drop a comment below.
Read our disclosure page to find out how can you help Windows Report sustain the editorial team. Read more


Improve this guide


User forum
1 messages