10 Display Settings & Tweaks for Better Windows 11 Graphics
Enable dark mode and night light to reduce eye strain
7 min. read
Updated on
Read our disclosure page to find out how can you help Windows Report sustain the editorial team Read more
Key notes
- If modern monitors or displays aren't tuned appropriately, you will not get the output your display is capable of.
- Several display settings can be tweaked to get the best possible display output.
- You can change the screen refresh rate, adjust the display resolution and text scale, and do more per your needs.
Do you have a high-end display and a powerful Windows 11 PC but don’t know how to optimize the display settings to get the best output?
If this is the scenario you are in and you are looking for a guide that would give you the best Windows 11 display settings, then you are in the right place. This guide will provide you with all tweaks and settings you need to make to get the best display output. So let’s get right into it.
How can I get the best display settings on Windows 11?
Before diving into the existing solutions, it is best to check for these elements which might resolve your problem:
- Make sure you have the best display at your disposal. A great display already enhances the picture quality, and you can get the best output results by performing specific tweaks.
- Ensure that the PC that you have has a lovely graphic card installed in it. Then, you can look at our guide, which lists some of the best graphics cards you can buy.
- Finally, ensure you use a high-speed HDMI cable to get the best display performance, low latency, high picture quality, etc.
1. Select recommended resolution
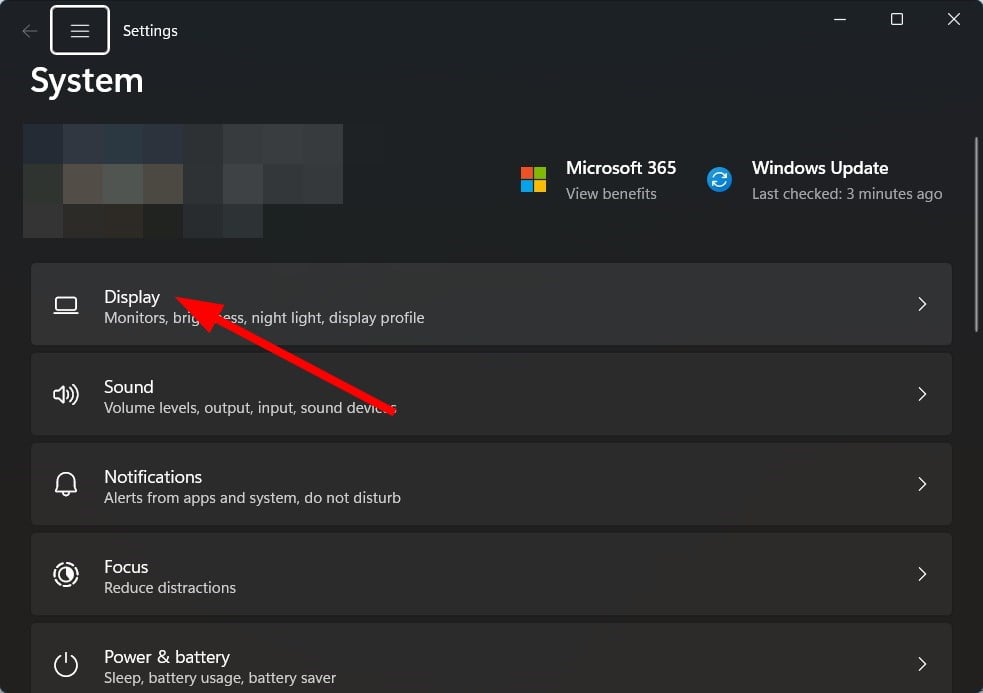
- Press the Win + I buttons to open Settings.
- Select Display.
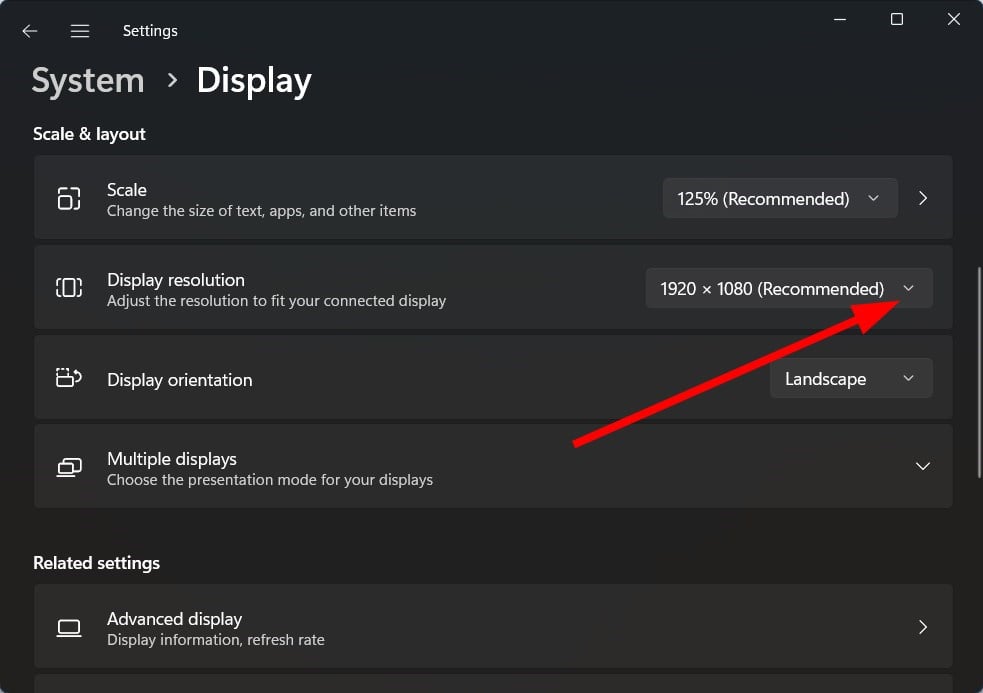
- From the Display resolution drop-down, select the recommended option.
You must select the correct resolution as per your display’s resolution. This ensures that everything you see on your display is crisp, sharp, and accurate colors.
For example, a resolution of 800×600 enlarges everything on display, resulting in poor picture quality. On the other hand, a resolution of 1920×1080 gives a better outcome.
To know what maximum resolution your display supports, you can quickly check out the box it came with or go through the manual. You can also hop onto the internet and search for the resolution support over the internet for your display.
2. Tweak the scale and layout
- Press the Win + I buttons to open Settings.
- Select Display from the right side.
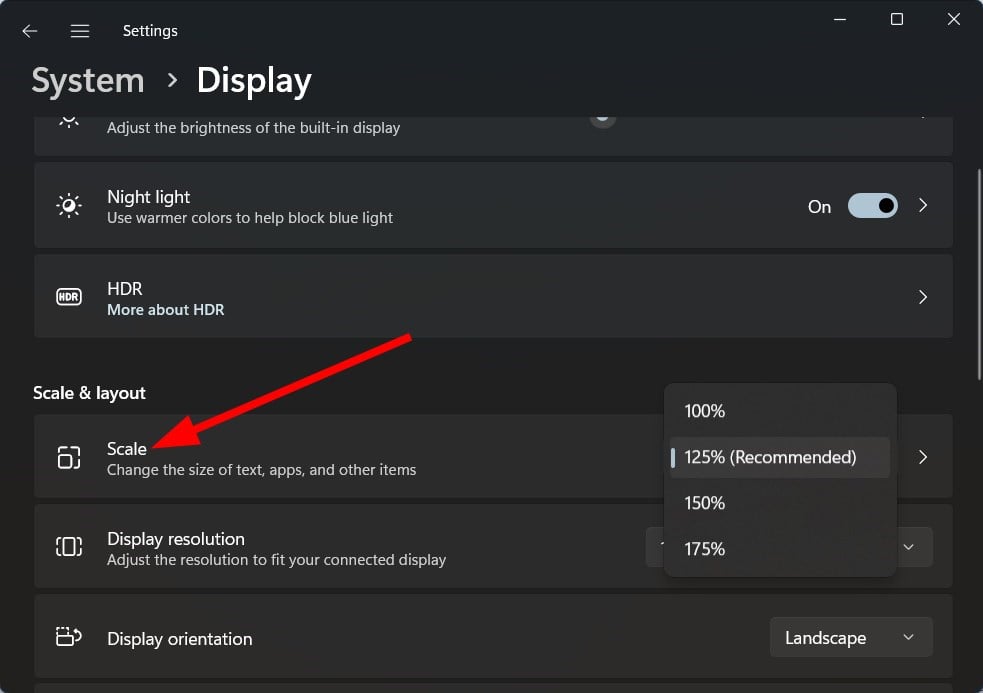
- From the Scale drop-down, select the recommended option.
You must select the correct scale to read the text and correctly see apps and other items on your display.
If you have a high-resolution display, you can opt for an increased scale size, i.e., above 100%. While the increased size may not look nice, it improves readability. Moreover, if you have a high-resolution display, everything will look nice; there shouldn’t be anything to worry about.
3. Calibrate the colors
- Press the Win + I buttons to open Settings.
- In the search field, type Calibrate Display Color and hit Enter.
- Click on the Calibrate Display Color option on the right side.
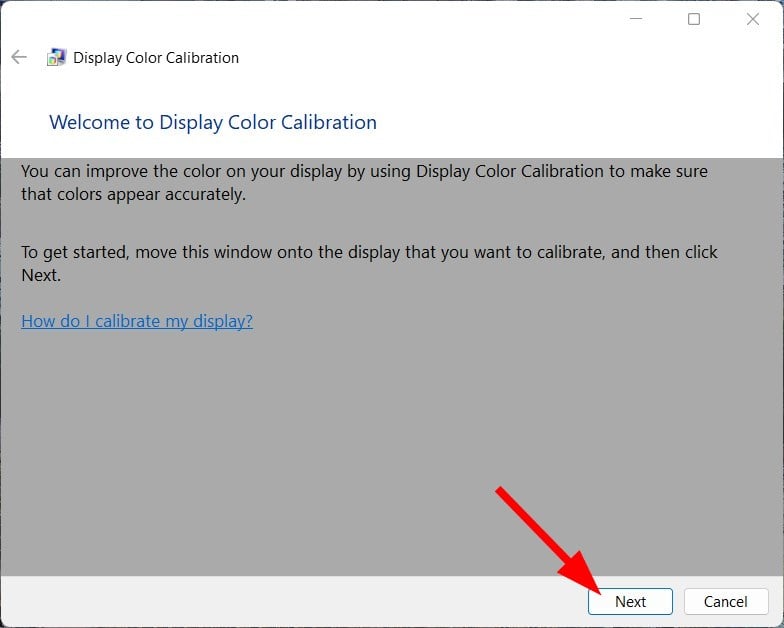
- Follow the onscreen steps as the wizard prompts you to set the ideal color settings for your monitor.
Using the Calibrate Display Color wizard, your PC will be set to the best color settings supported by your display.
4. Use Night Light to reduce eye strain
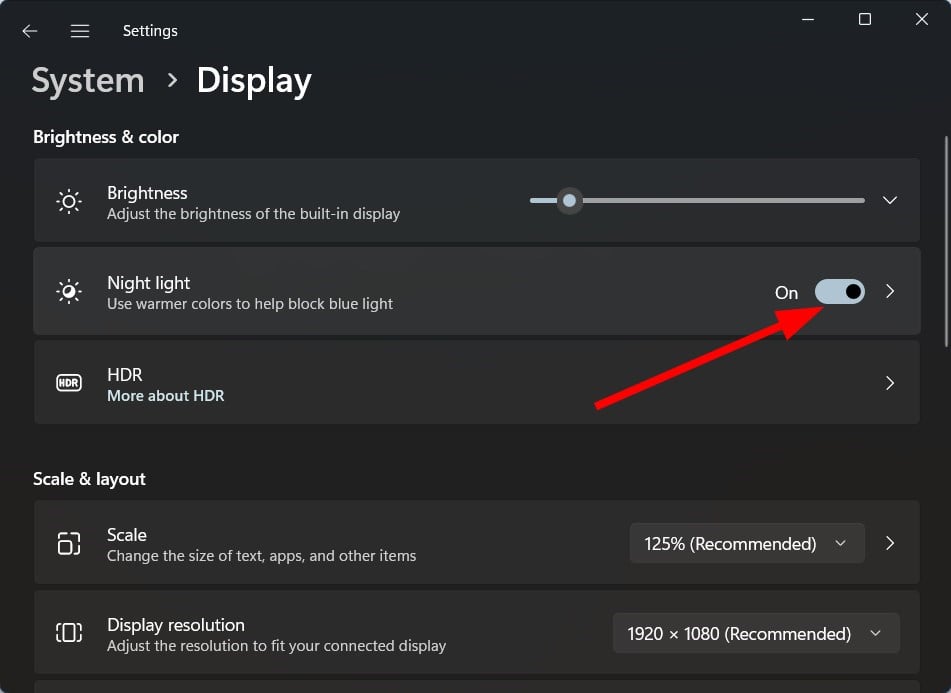
- Press the Win + I buttons to open Settings.
- Select Display from the right side.
- Click on the toggle for a Night light.
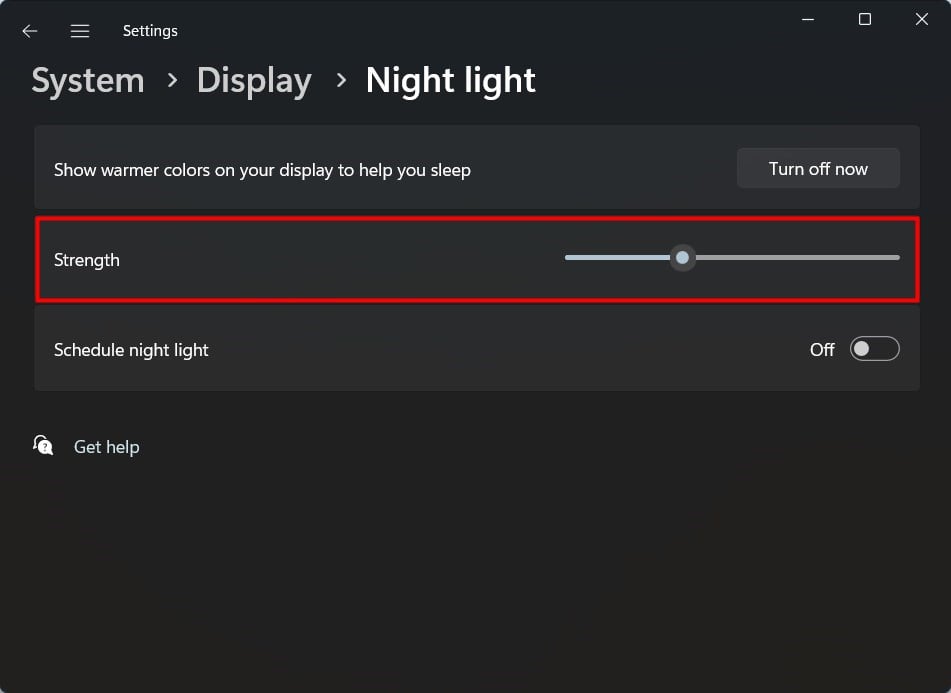
- Also, when you click on Night light, you can select the strength of the warmer tone that will color on your display.
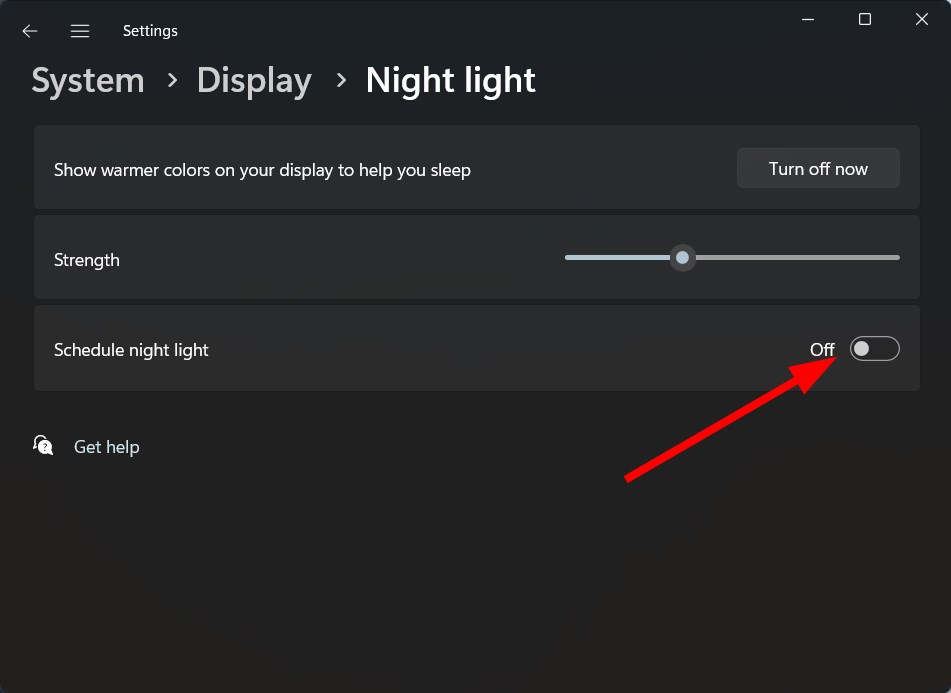
- You can also schedule the Night light by using the Schedule night light toggle.
Do you feel fuzzy, or do your eyes strain when you work for a longer time on your PC? If yes, you can use the Night light settings to apply a warmer tone.
This reduces the blue light that goes directly into your eyes, and you can use the PC for an extended period without irritating your eyes.
5. Turn on HDR for enhanced picture
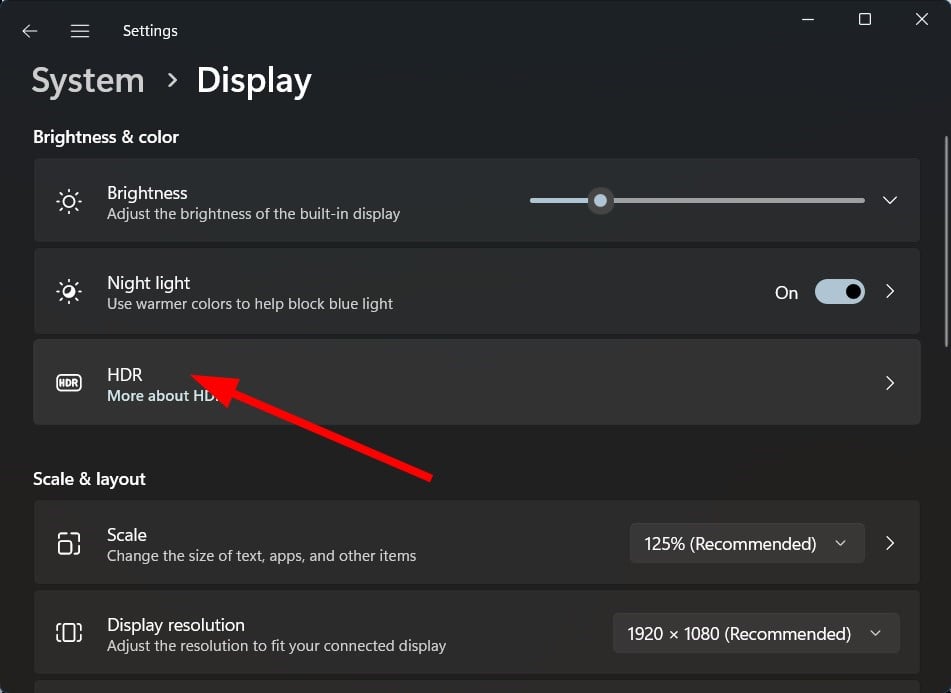
- Press the Win + I buttons to open Settings.
- Select Display from the right side.
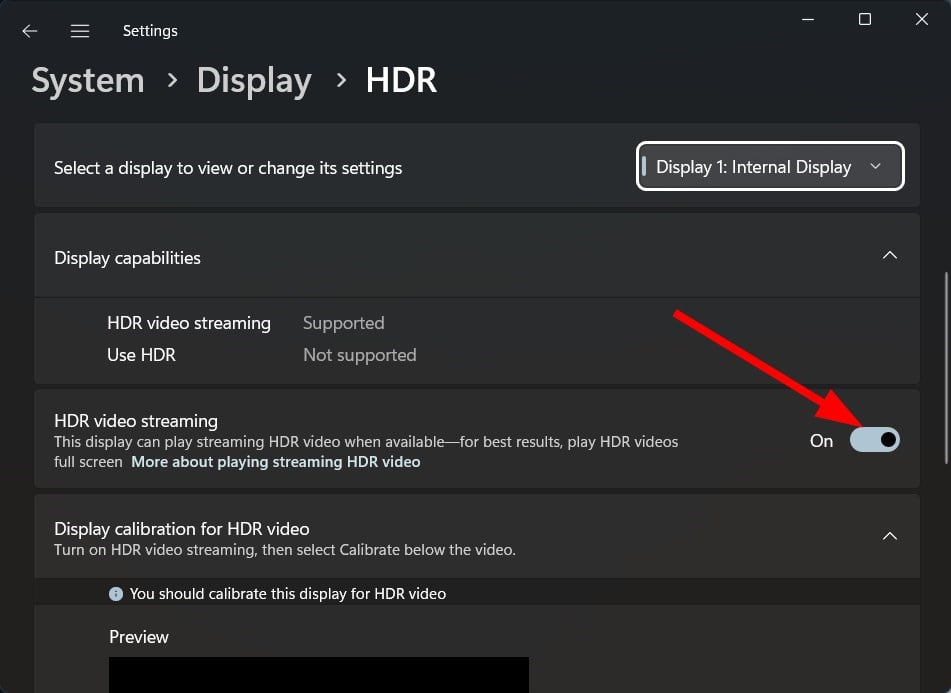
- Click on HDR.
- Turn on the toggle for HDR video streaming.
- This will help you stream HDR videos whenever available.
Do note that not all displays would support this feature. So, make sure that your collection supports HDR before turning on this feature.
HDR will enable an enhanced video viewing experience, as it details the bright and dark parts of the video to provide you with a true-to-life picture.
6. Tune the text
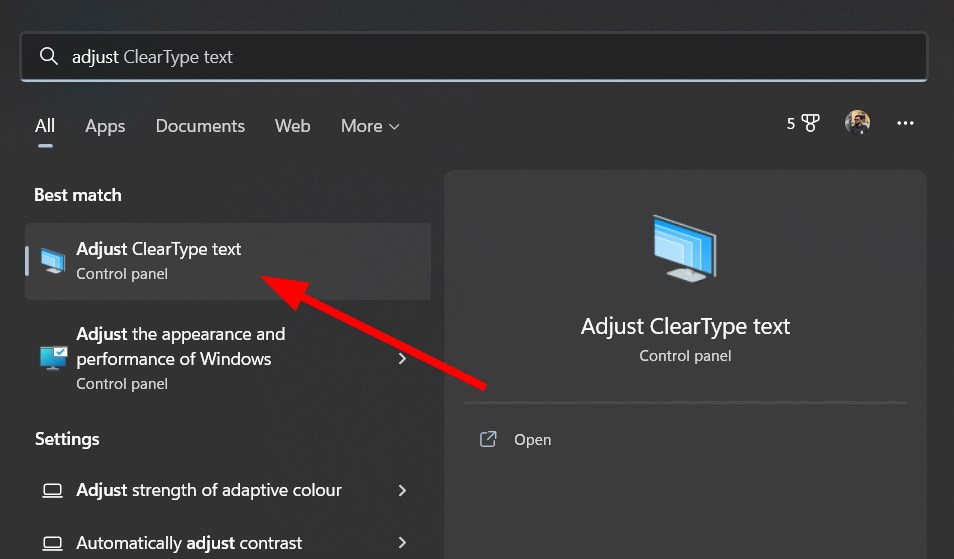
- Open the Start menu by pressing the Windows key.
- Type Adjust ClearType text and open it.
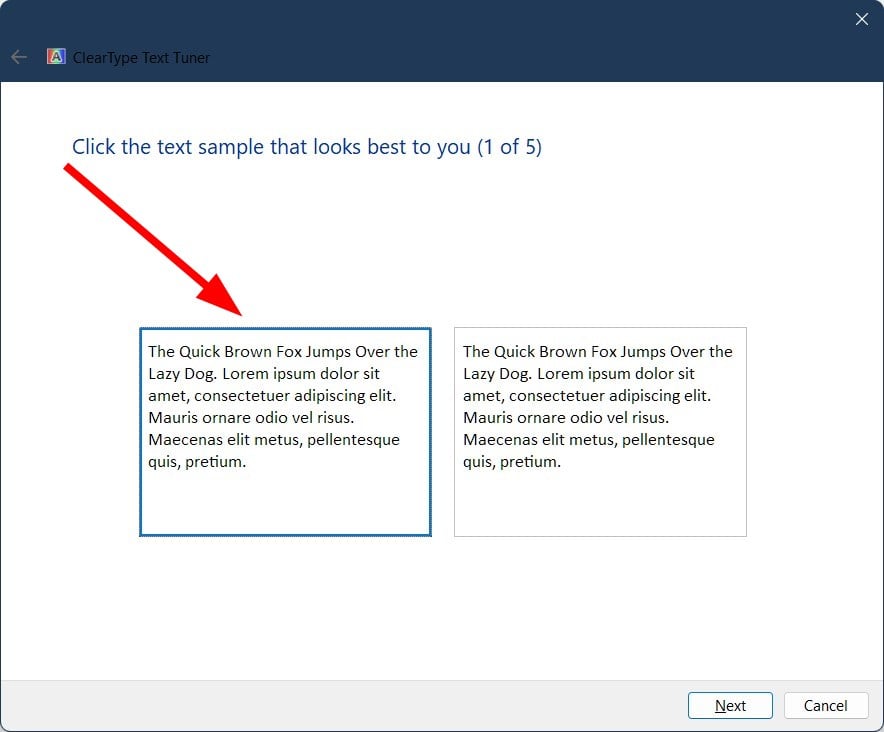
- Click on Next.
- A window will show you the five best options for text. You need to select the best one as per your liking.
- Follow the onscreen prompts.
- Once done, hit the Finish button.
Tuning the text, as shown above, makes sure that you are being displayed the text on the screen in the best possible way or the way that you like.
If you use your PC or laptop for reading or writing content, then this setting or calibration is a good one to ensure that the texts are readable as per your needs.
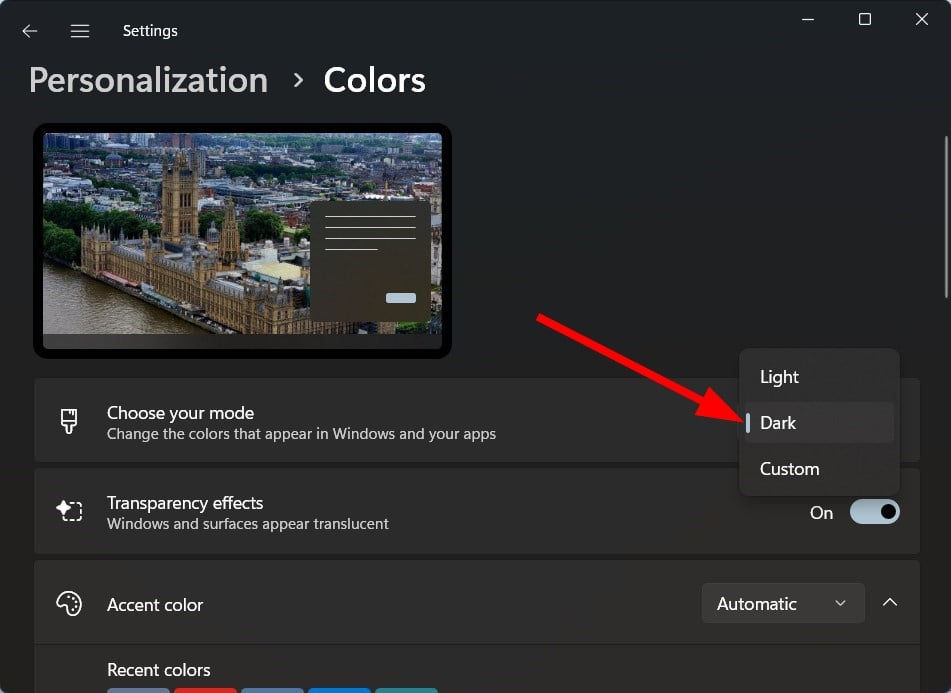
7. Apply dark mode
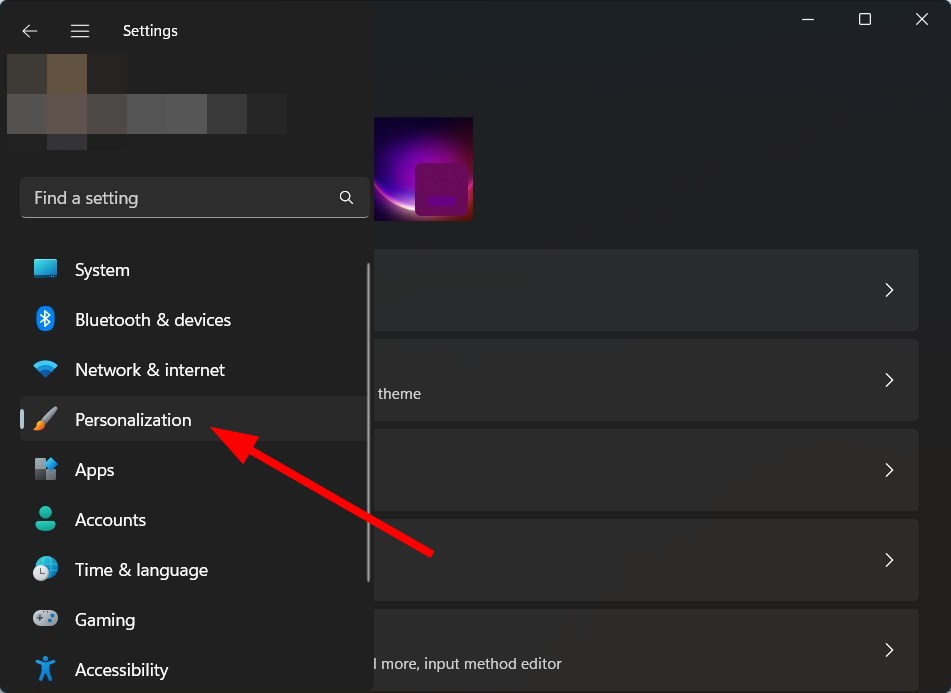
- Press the Win + I buttons to open Settings.
- Select Personalization from the left side.
- Click on Colors on the right.
- For Choose your mode drop-down, select Dark.
- This will enable dark mode on your PC.
The dark mode is the best theme setting you can apply if you want to eliminate the white colors that appear on Windows or apps.
This makes it easy on the eyes and protects your eyes from the bright white light. The dark mode also goes well with the backgrounds and wallpapers.
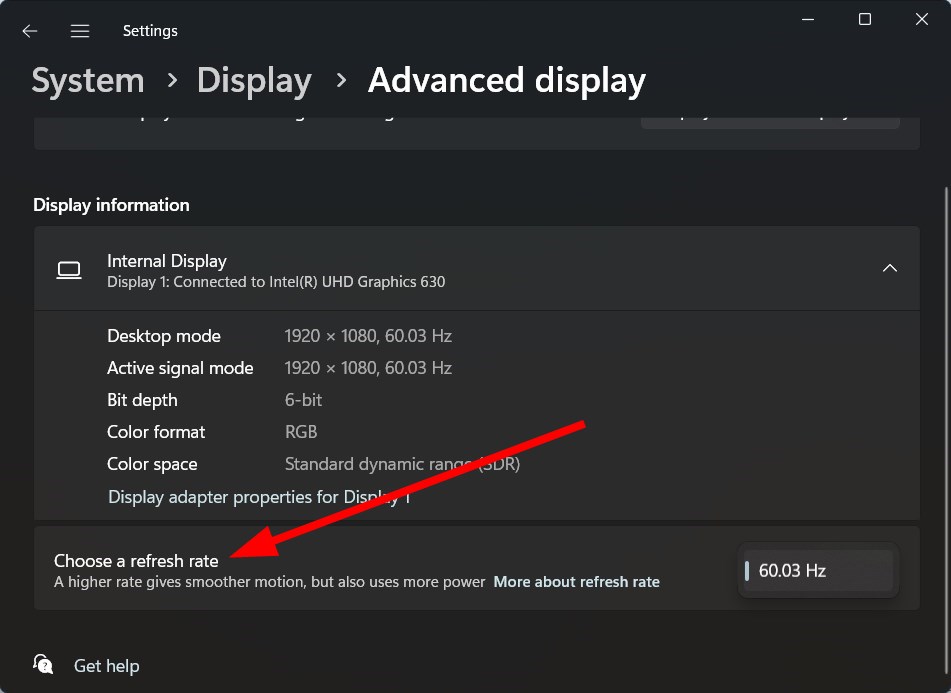
8. Change screen refresh rate
- Press the Win + I buttons to open Settings.
- Select Display from the right side.
- Select Advanced display.
- Select the appropriate refresh rate supported by your display for the Choose a refresh rate drop-down.
Windows 11 supports high refresh rate displays. Also, the best part is that it can dynamically switch content between different refresh rates, i.e., from 60Hz to 120Hz.
If your monitor or display supports a high refresh rate, you can follow the above steps and bump up the screen refresh rate to enjoy buttery smooth content viewing.
9. Adjust the power mode
- Press the Win + I buttons to open Settings.
- Click on Power and Battery.
- Under Power mode, select the Best performance option.
- This will ensure that everything at the highest level runs on your PC, including the performance or the display settings.
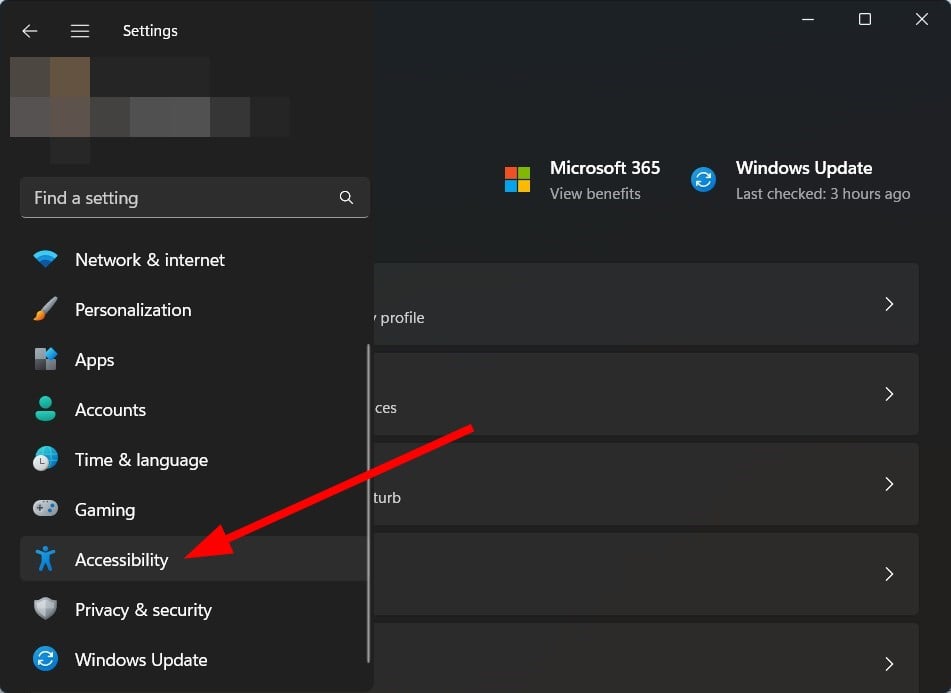
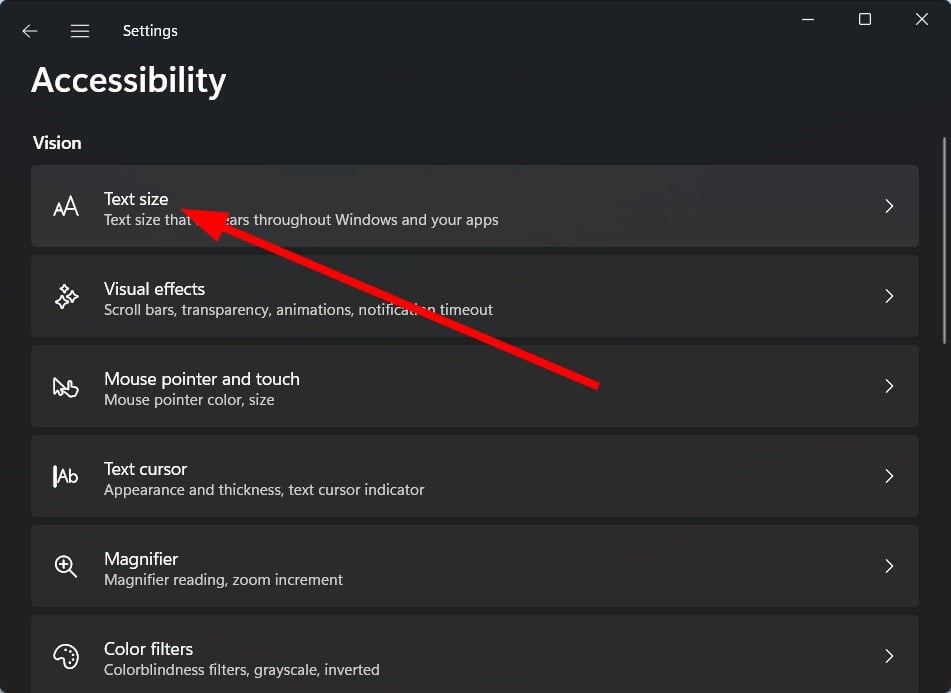
10. Change the text size
- Press the Win + I buttons to open Settings.
- Select Accessibility.
- Click on Text size.
- Use the Text size slider to adjust the size of the font.
- Click the Apply button.
Adjusting the text size ensures that the text appearing on your display is appropriate and readable.
Apart from all these settings, you should also ensure that you keep the display driver up to date. You can do that from the Device Manager. But that requires some steps to follow.
An alternative is using an automated tool called Outbyte Driver Updater. Using Outbyte Driver Updater will ensure that the display driver and all other outdated drivers on your PC are up to date.
You must launch the app, scan for outdated drivers, and hit the update button. It is far more efficient and time-saving than the manual method.
Keep Windows up to date as well, ensuring that all the bugs present in the previous versions are resolved and that you are protected with the latest security.
If you are facing screen distortion issues, you can check out our dedicated guide that lists some of the best solutions to resolve the problem.
Also, if there are some other screen problems you are facing and want to resolve, you can check out our guide.
That is it from us in this guide. Let us know in the comments below if you tweaked the settings as mentioned above and if you were able to get the possible output from your display or not.

