Windows 10 Notifications are Not Clearing: 7 Ways to Fix It
Explore these expert-recommended methods to resolve the issue
![]() 5 min. read
5 min. read
![]() Updated on
Updated on
Share this article

Improve this guide
Read our disclosure page to find out how can you help Windows Report sustain the editorial team Read more
Key notes
- If your Windows notifications are stuck, the major reason could be the faulty Windows update.
- This guide will discuss all the available troubleshooting fixes to resolve the issue.
If you are trying to clear notifications on Windows 10 and it is stuck, then you are not alone! Many users have complained about the issue, especially after updating their Windows.
This guide will discuss all the fixes after discussing the reason behind the issue. Let’s get started!
What causes the Windows 10 notifications are not clearing issue?
There might be several reasons behind the issue. We have listed some of the popular reasons here:
- Corrupted Windows Update – If a corrupted Windows update is installed on your computer, it could conflict with your computer’s basic functionalities, such as notifications. Hence the problem
- Pending Windows update – If you have not updated your Windows in a while, then this could cause a problem. Please make to update your Windows when there is an update available.
What can I do if the Windows 10 notifications are not clearing?
Before diving into detailed troubleshooting, check out these quick fixes to resolve the problem:
- Run Microsoft account troubleshooter.
- Check for Windows updates.
- Hide the Taskbar.
- Uninstall Dropbox.
- Go back to the Last known good configuration.
- Turn on Windows 10 notifications for desired apps.
- Reregister the Action Center.
- Uninstall Windows updates.
If the above fixes didn’t work for you, go through the solutions presented to you one by one and check what works for you:
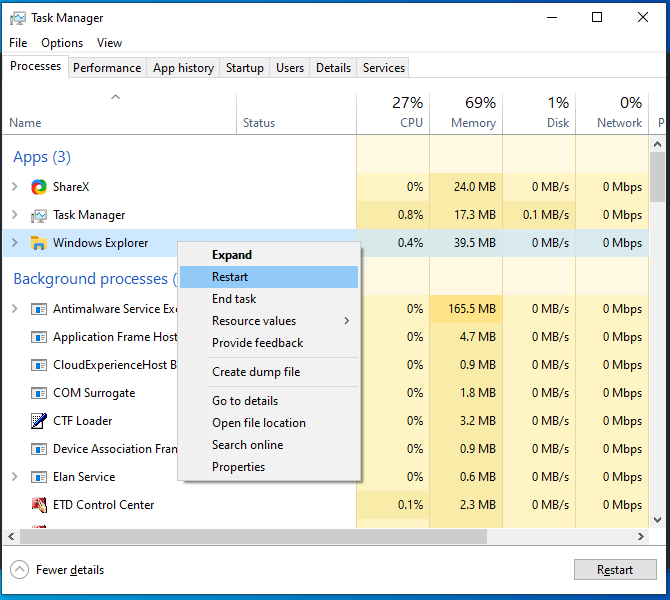
1. Restart the Windows Explorer
- Press Ctrl + Shift+ Esc to open Task Manager.
- Go to the Processes tab, go to the processes list, right-click on Windows Explorer, and select Restart.

- Wait a few minutes; if the issue persists, you must repeat the process more than twice. Therefore it is advised to create a bat file to rerun the process automatically.
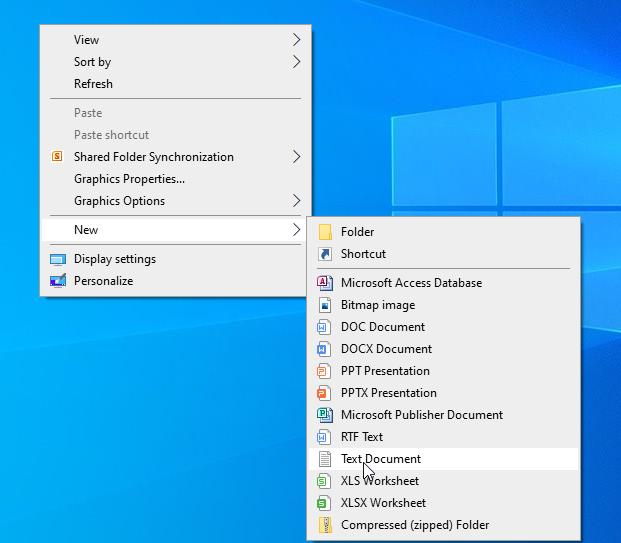
- Press the Windows + D to go to Desktop, right-click anywhere, select New, then Text Document.

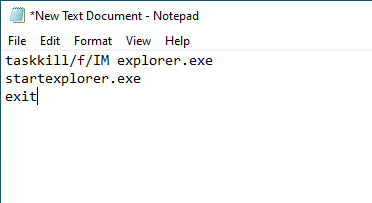
- Open that document using Notepad, copy and paste the following script:
taskkill /f /IM explorer.exestart explorer.exeexit
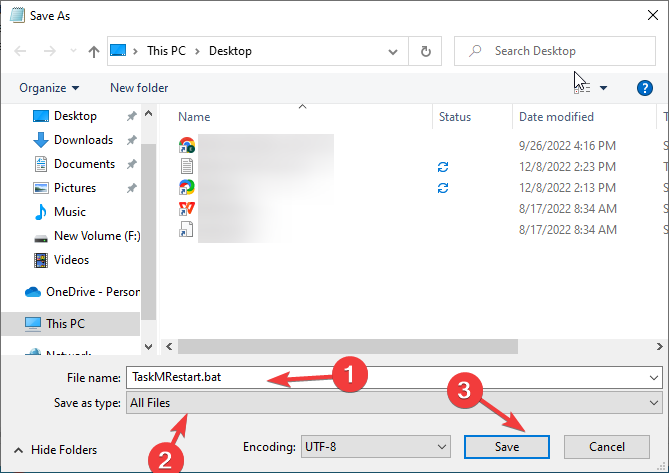
- Now click on File, select Save As and name the file TaskMRestart.bat. Select All files from the drop-down beside Save as type. Click Save. Whenever you double-click this file, it will restart Windows Explorer.

2. Enable the Let apps run in the background feature
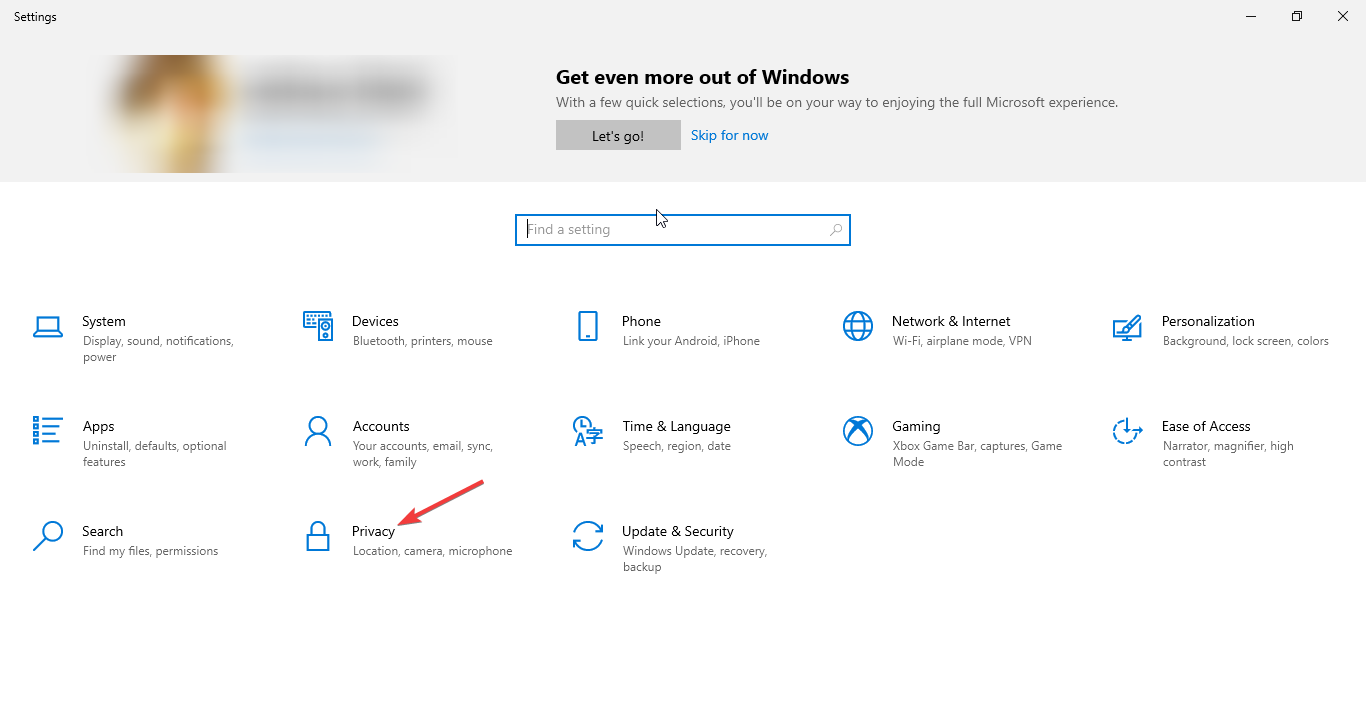
- Press Windows + I to open Settings.
- Select Privacy.

- Choose Background apps from the left side of the pane.
- From the list of apps, turn the toggle on for the apps you want notifications for.
- Restart your PC.

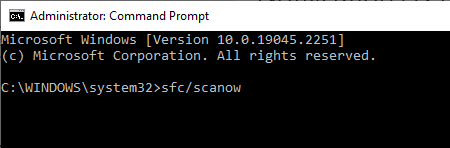
3. Run the System File Checker & DISM command
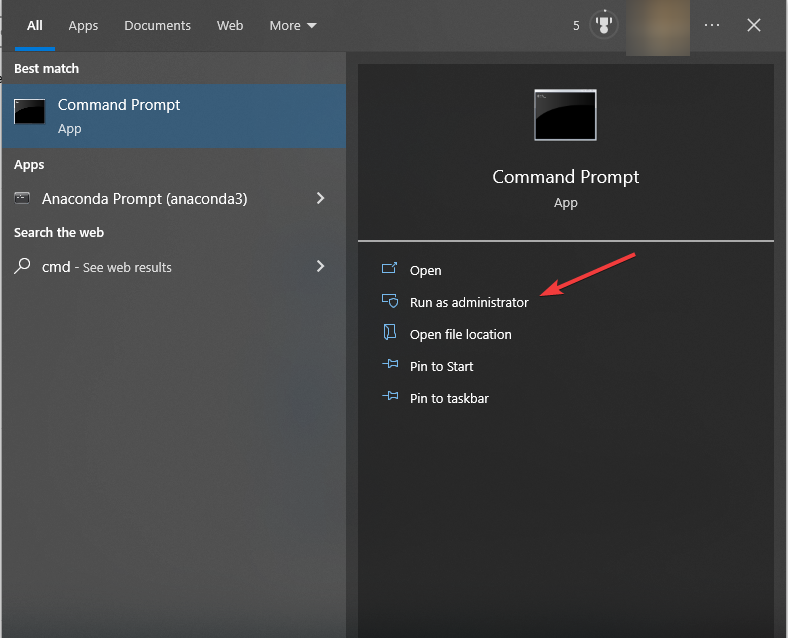
- Press the Windows key, type CMD, and click Run as administrator.

- Type the following command and press Enter:
sfc/scannow
- Wait for the process to complete and restart your computer.
- Copy and paste the following command and press Enter after every command:
DISM.exe /Online /Cleanup-image /CheckhealthDISM.exe /Online /Cleanup-image /ScanhealthDISM.exe /Online /Cleanup-image /Restorehealth - Restart your PC.
Other than following the manual steps, you can always rely on an automatic repair tool that can perform the entire process effortlessly.
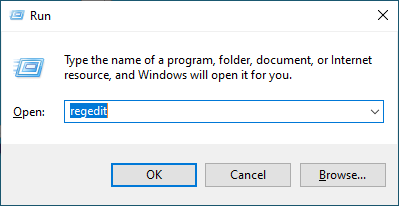
4. Reconfigure the push notifications via Registry Editor
4.1 If ToastEnabled is present
- Press Windows + R to open the Run window.
- Type regedit and press Enter to Register Editor.

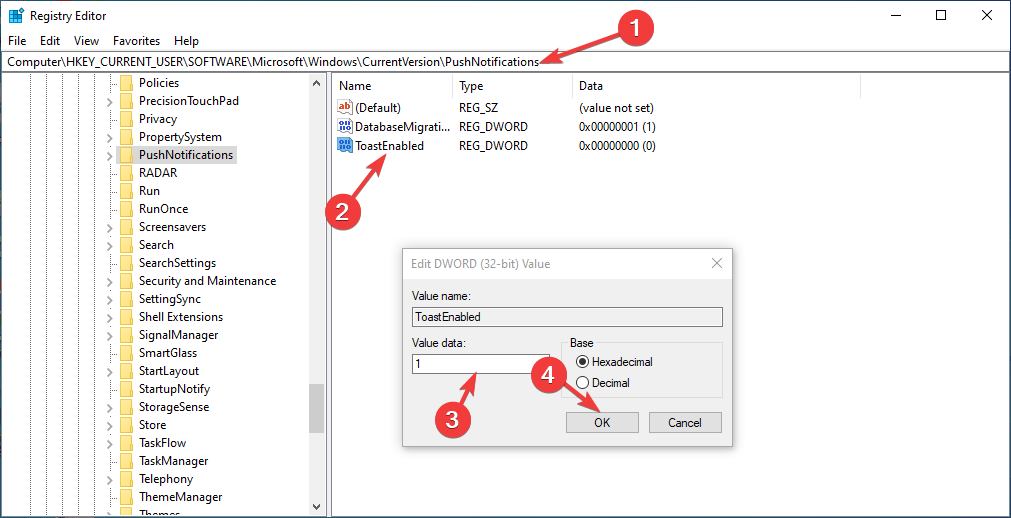
- Navigate to the below path:
HKEY_CURRENT_USER\Software\Microsoft\Windows\CurrentVersion\PushNotifications
- Locate and double-click on the ToastEnabled DWORD and change the Value data to 1 to turn on notifications. Press OK.
4.2 If ToastEnabled is not present
- Press Windows + R to open the Run console.
- Type regedit and press Enter.
- Go to this path:
HKEY_CURRENT_USER\Software\Microsoft\Windows\CurrentVersion\PushNotifications - Right-click on Push Notifications, select New, then click DWORD (32-bit) Value.

- Rename the DWORD ToastEnabled, double-click it and change the Value data to 1. Click OK to save.

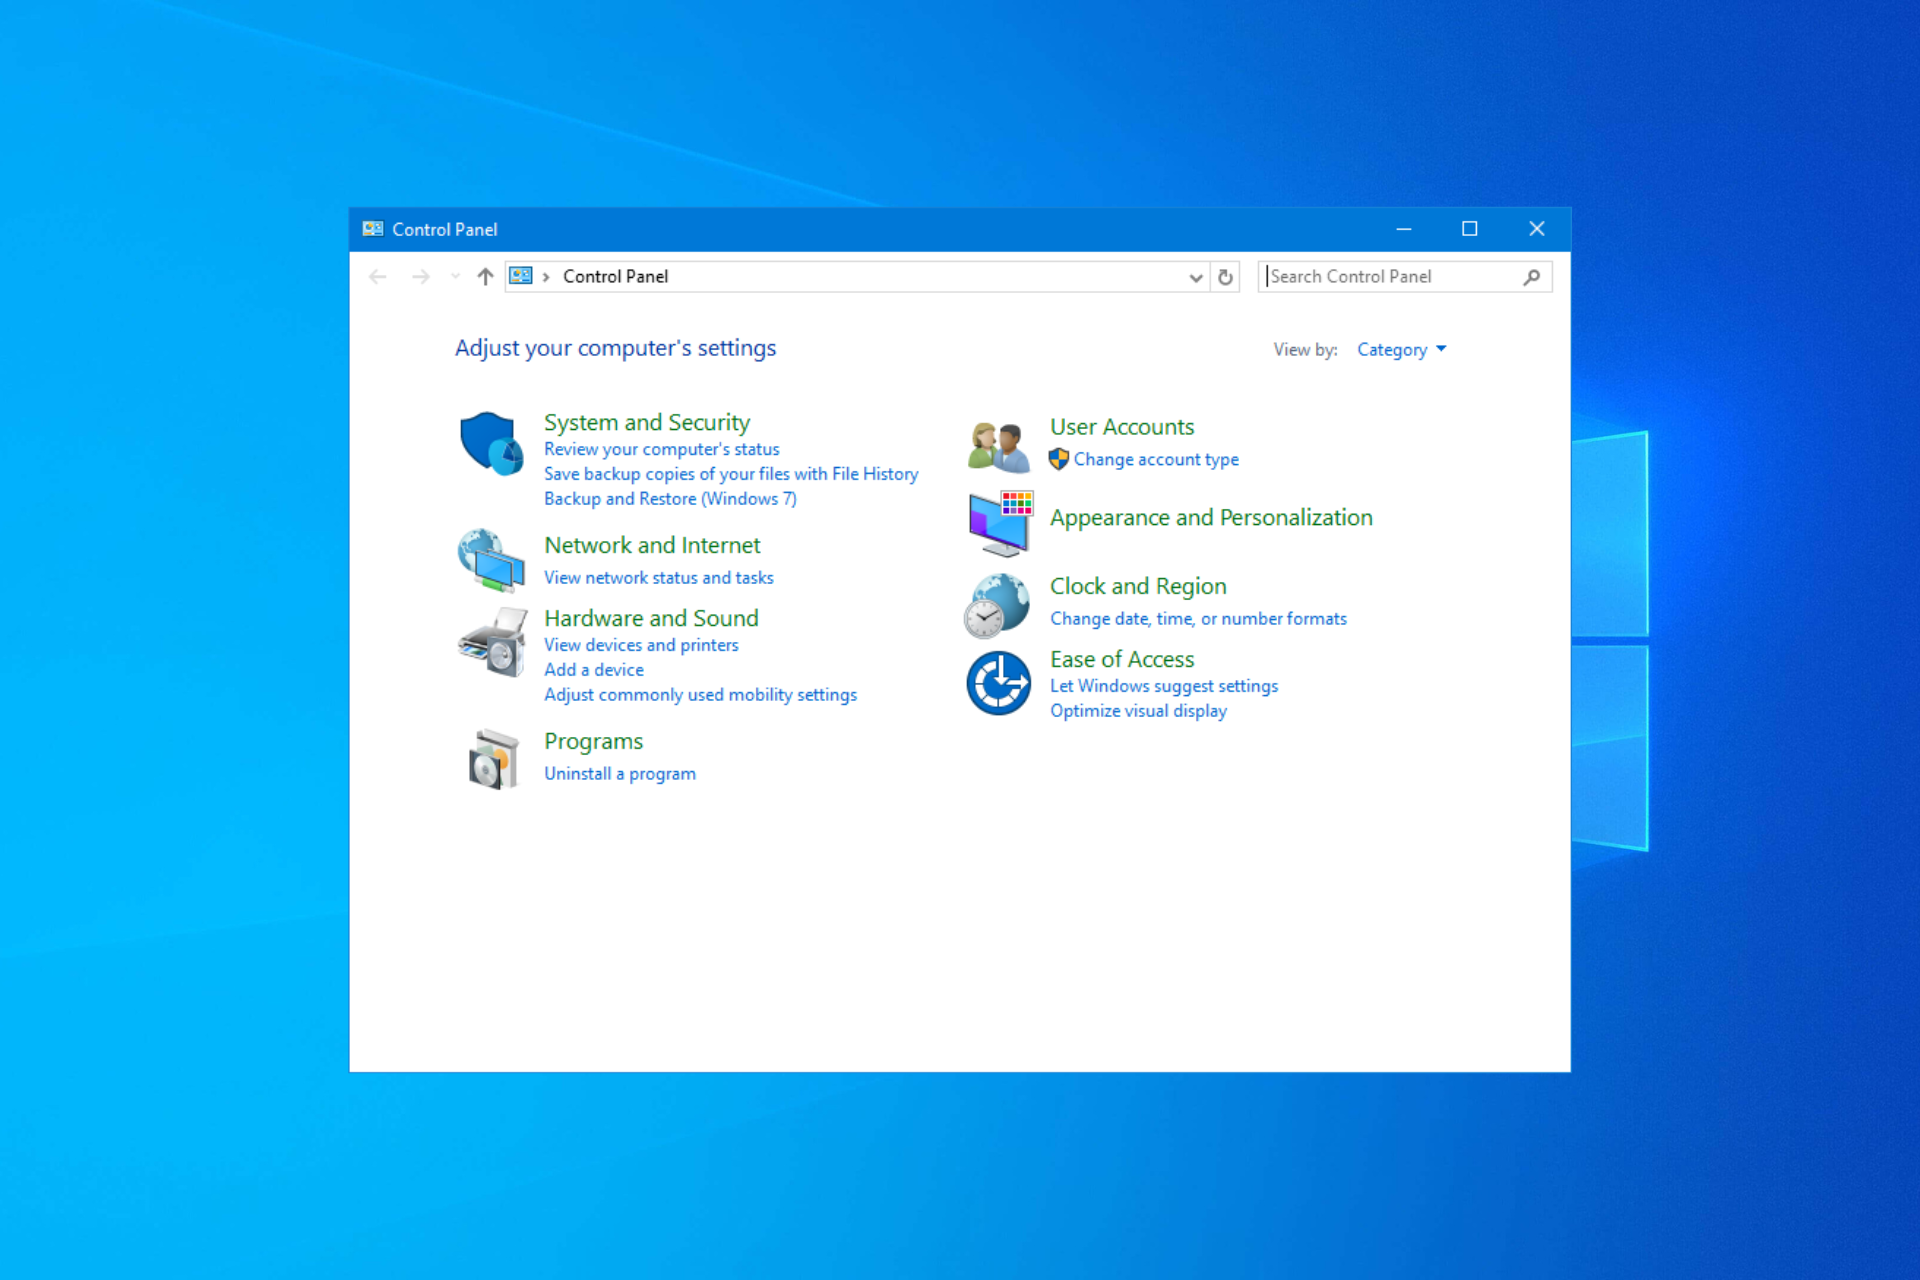
5. Turn off the Fast Startup option
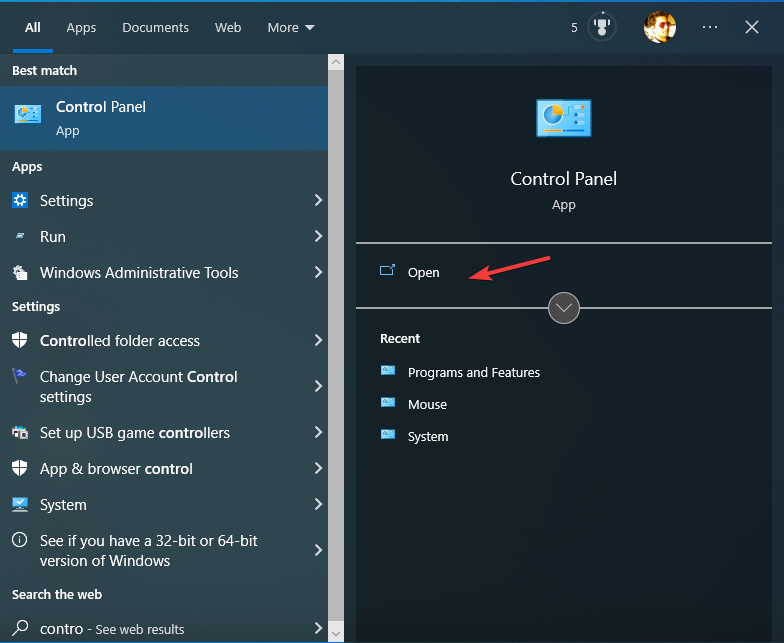
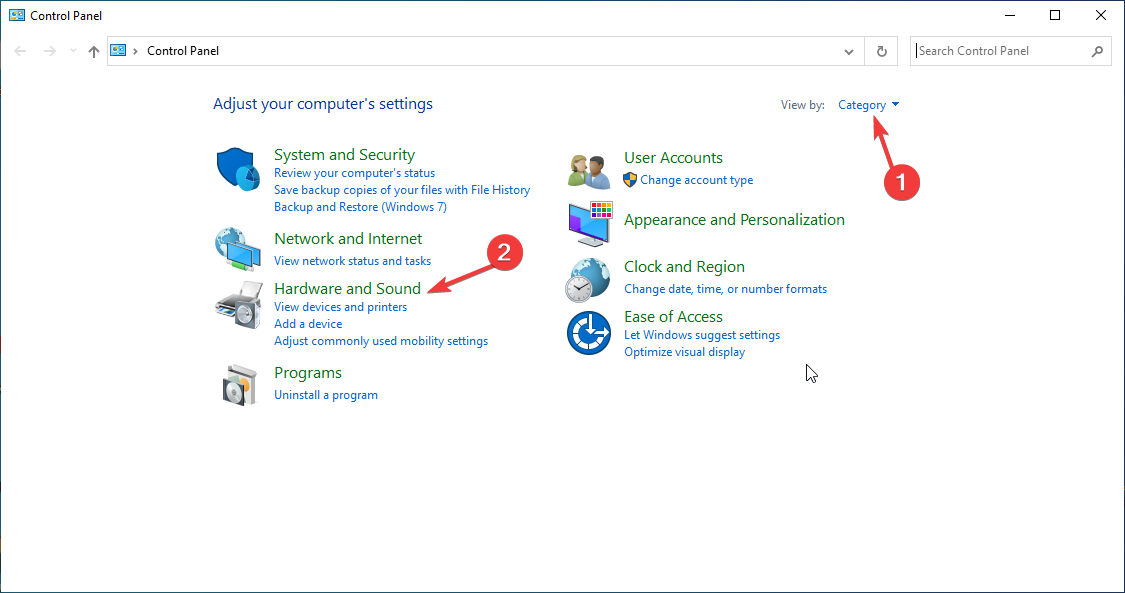
- Go to the search bar, type Control Panel, and click Open.

- Select Category from the drop-down next to View by.
- Click Hardware and Sound.

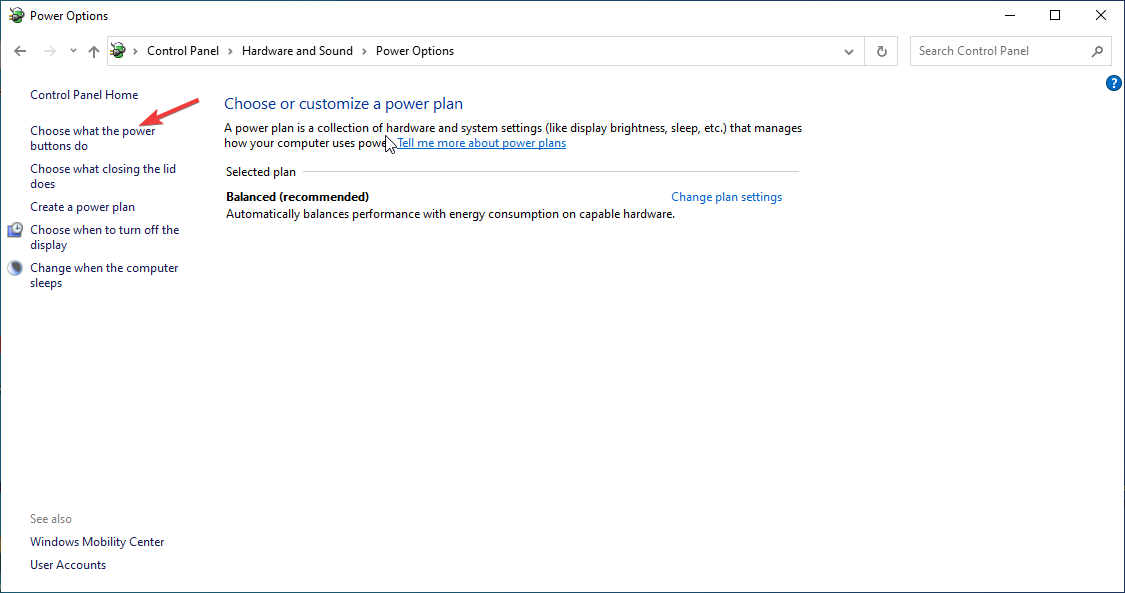
- Select Power Options.
- On the next window, select Choose what the power buttons do from the left-side pane.
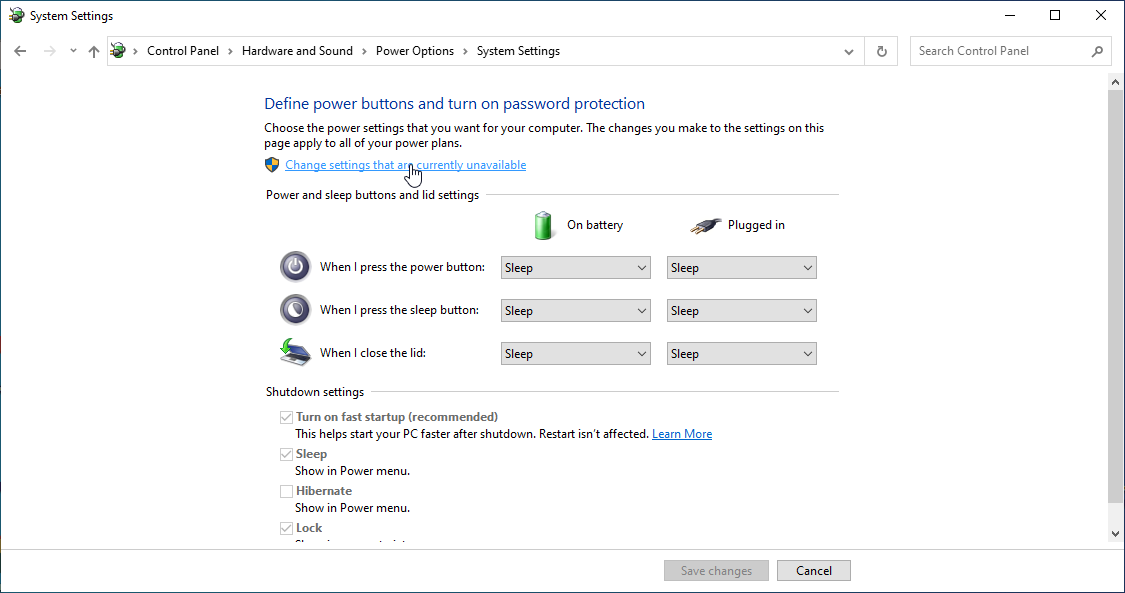
- Under the System Settings page, click Change settings that are currently unavailable.
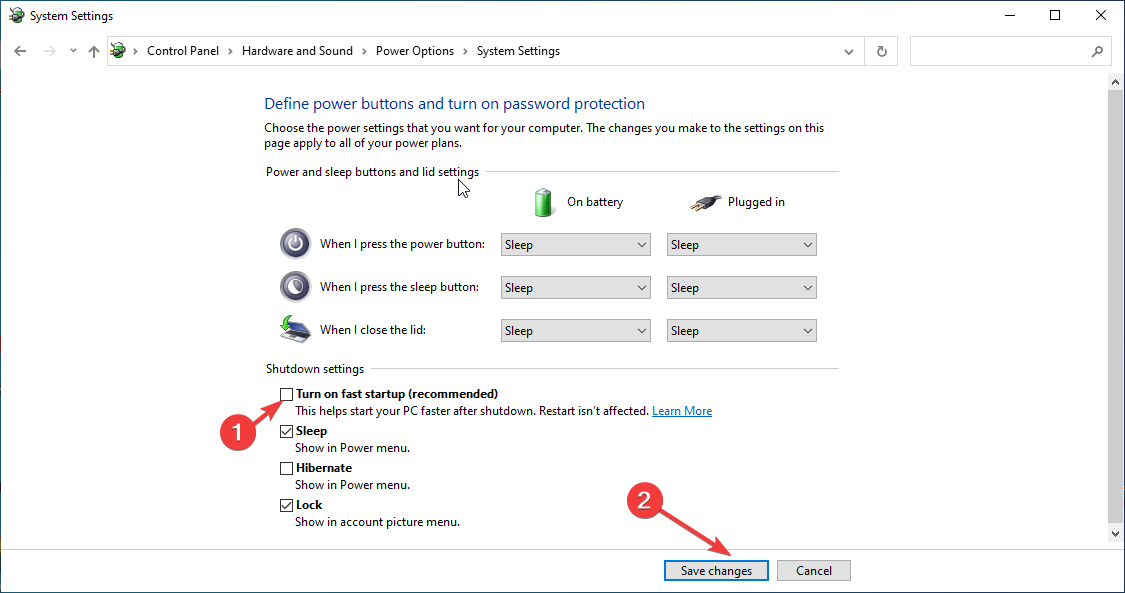
- Go to the Shutdown settings section, and remove the checkmark beside Turn on fast start-up(recommended).
- Click Save changes and close Control Panel.
- Restart your PC.

6. Rename the UsrClass.dat file
- Press Windows + R to open the Run window.
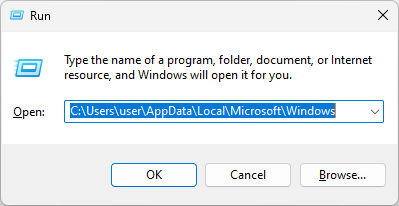
- Type the following path and press Enter. Replace username with your user account name:
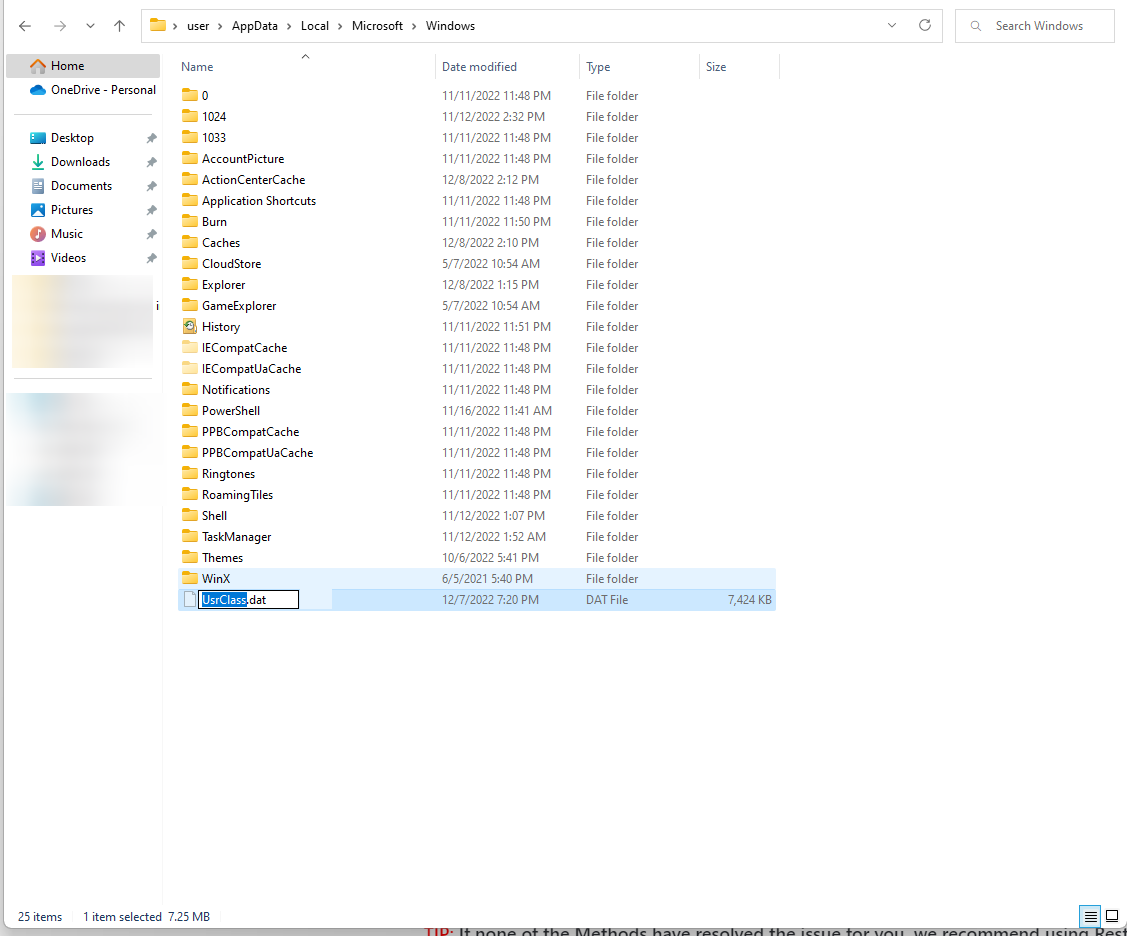
C:\Users\username\AppData\Local\Microsoft\Windows - Locate the UsrClass.dat file and rename it.

7. Low-level format on the HDD
 Tip
Tip
7.1 Create a recovery drive
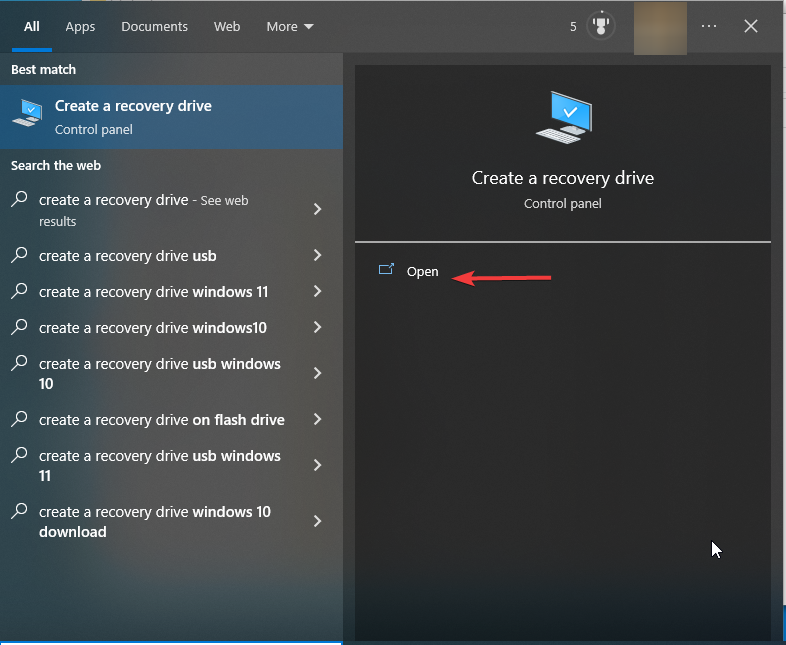
- In the search bar, type Create a recovery drive and click on the option to open. You might have to enter your sign-in credentials.

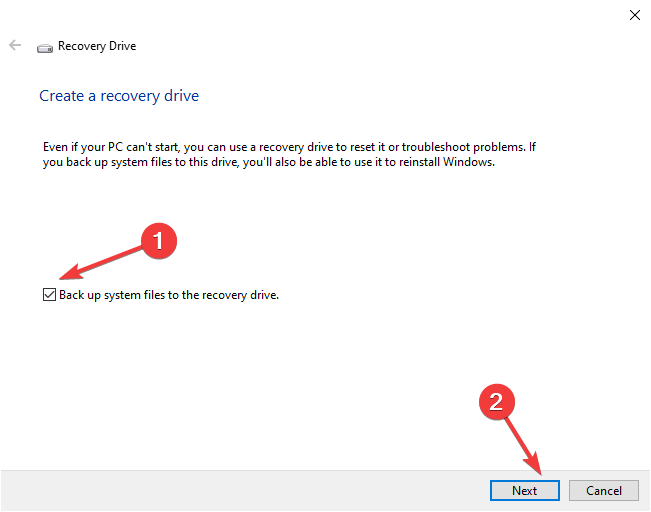
- On the tool, put a checkmark beside Back up system files to the recovery drive and click Next.

- Connect the USB drive and click Next.
- Select Create. The process might take a while.
7.2 Format the HDD
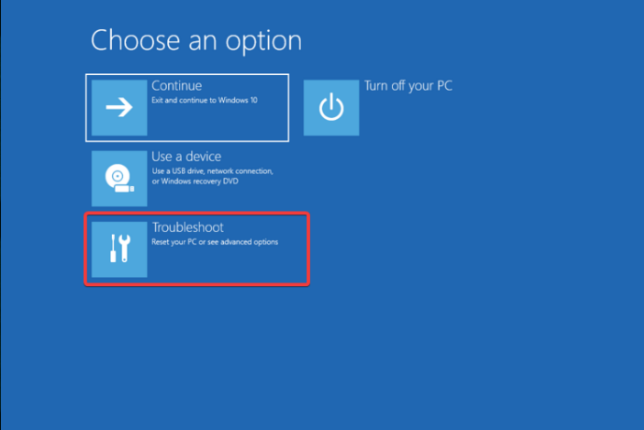
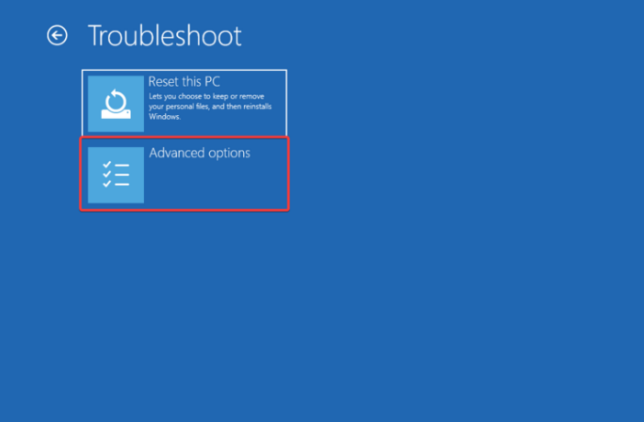
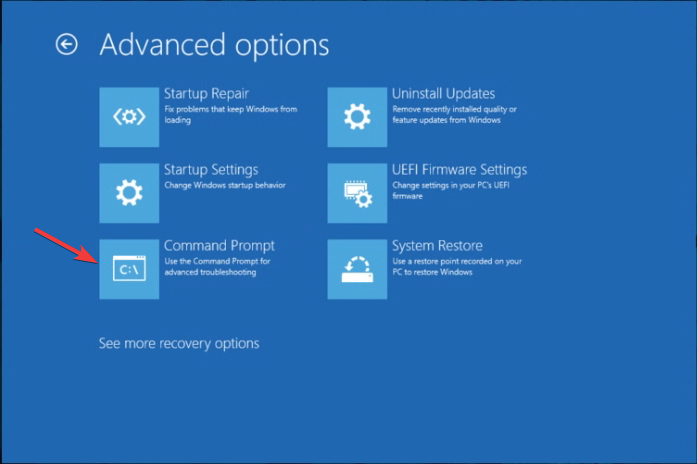
- Connect the USB drive and restart your computer.
- From Choose an option screen, click Troubleshoot.

- Next, click Advanced options.

- Select Command Prompt.

- Type the following command and press Enter. Replace C with the drive name where Windows is installed:
Format C: /P:4 - Once done, use the recovery drive and follow the on-screen instructions to reinstall Windows.
So, these are a few methods that you can try to fix Windows 10 notifications not clearing. Try them individually, and let us know which worked for you in the comments section below.