Error 0x80070422: 4 Confirmed Quick Fixes
Disabled Windows services can stop you from updating your PC
3 min. read
Updated on
Read our disclosure page to find out how can you help Windows Report sustain the editorial team Read more
Key notes
- Sometimes it’s necessary to repair system files to fix this issue.
- You can also fix the 0x80070422 error by disabling the Internet Protocol Version 6.
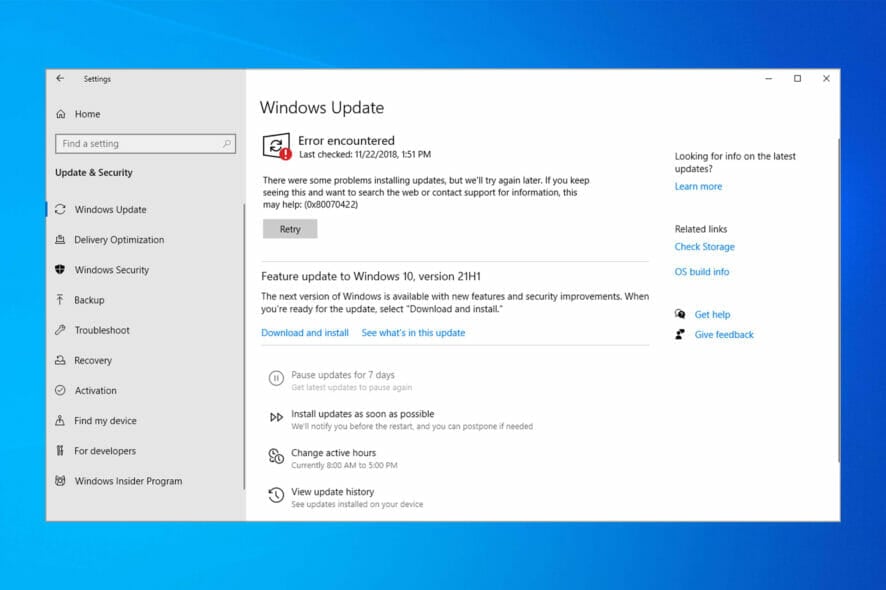
Many encountered 0x80070422 Windows Update error, and if this happens, you won’t be able to download the latest updates.
However, there is a way to fix this problem and in this guide, we’ll show you how to do that.
Why does the Windows Update Error 0x80070422 appear?
Disabled Windows services or corrupt system files can cause this problem. Network issues can also lead to Windows Update problems.
How can I fix error 0x80070422?
1. Enable the Windows Update service
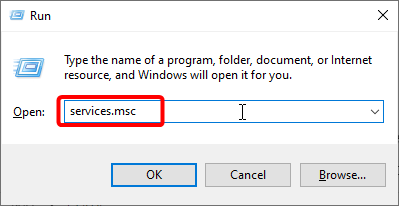
1. Press the Windows key + R, type services.msc, and hit Enter.
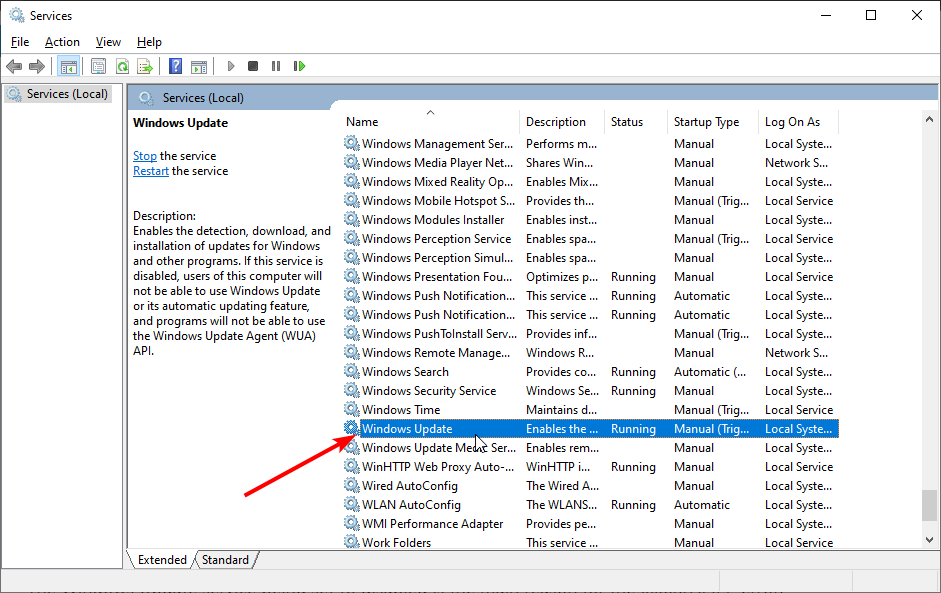
2. Locate and double-click the Windows Update service to open its properties.
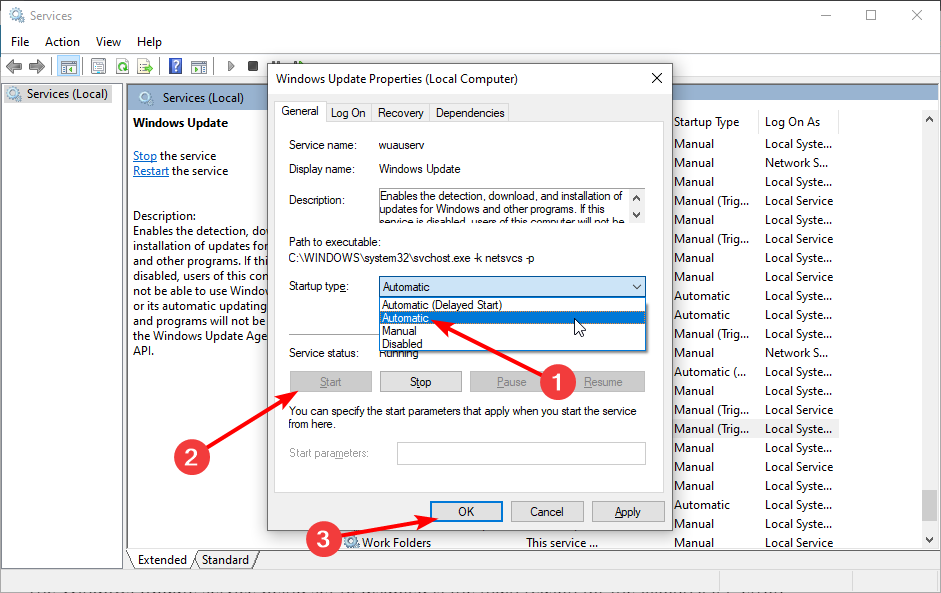
3. Click the dropdown next Startup Type and choose Automatic.
4. Now, check the Status to see if it is running. If it is not click the Start button.
5. Click OK to save your settings and restart your computer.
6. You can also repeat Steps 2, 3, and 4 for the services below to make sure they are running:
- Windows License Manager
- Network List
- Xbox Live Auth Manager
- Xbox Live Networking
The Windows Update service being set to disabled is the main reason for the 0x80070422 error. Restarting it should be enough to fix this issue.
However, some users complained that other services being disabled also caused other variations of the error.
So, ensure to enable them too and restart your PC.
Lastly, you might get an access denied message while trying to enable the Windows Update. You only need to log in as an admin and you will be able to get past it.
2. Disable IPv6
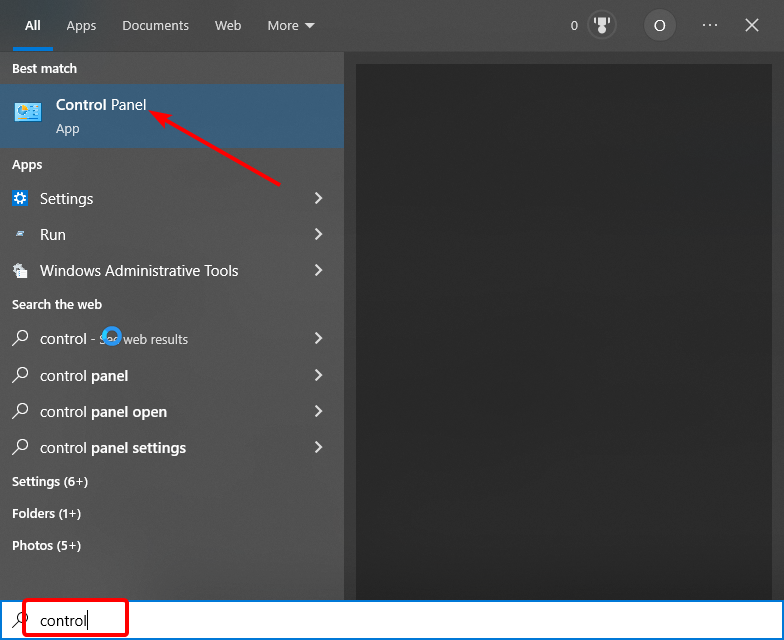
- Press the Windows key, type control, and select Control Panel.
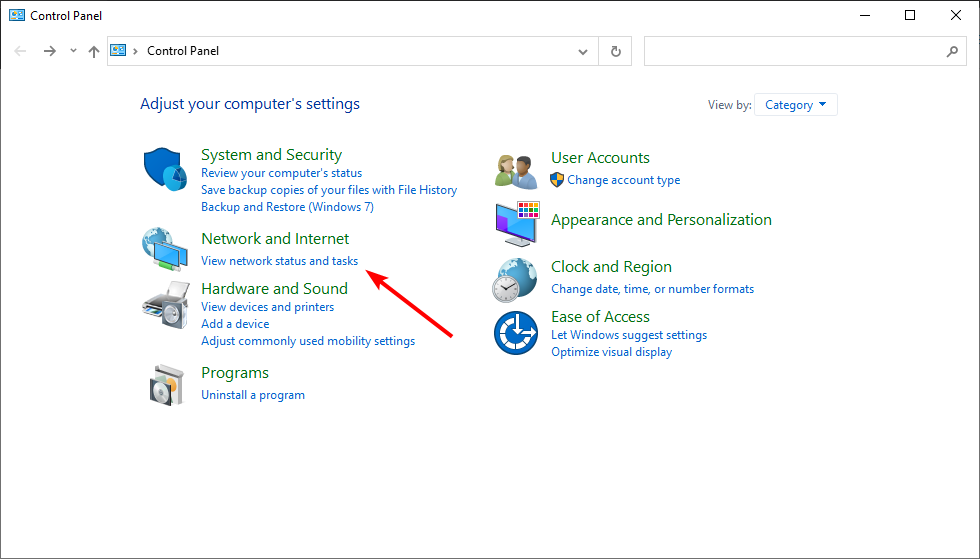
- Click the View network status and tasks option under Network and Internet.
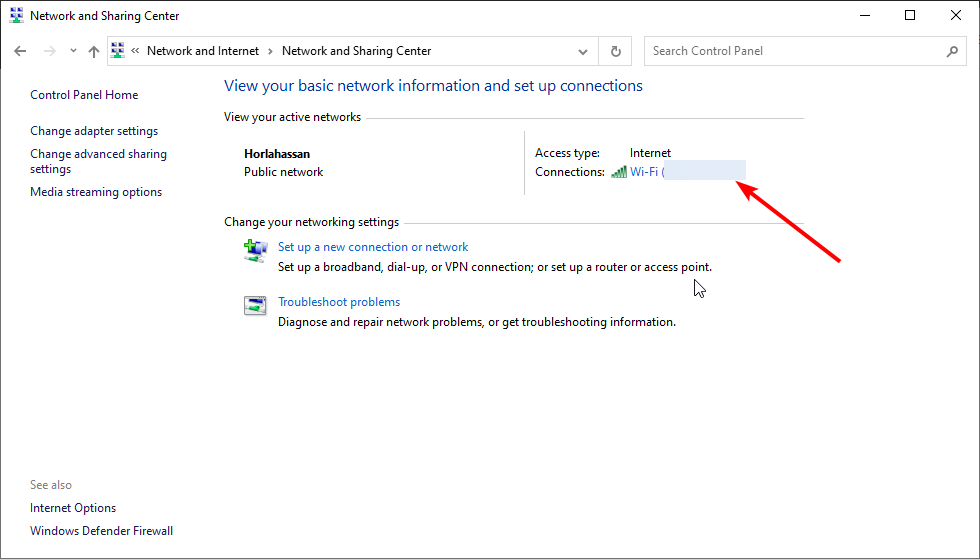
- From here, click the network you are connected to.
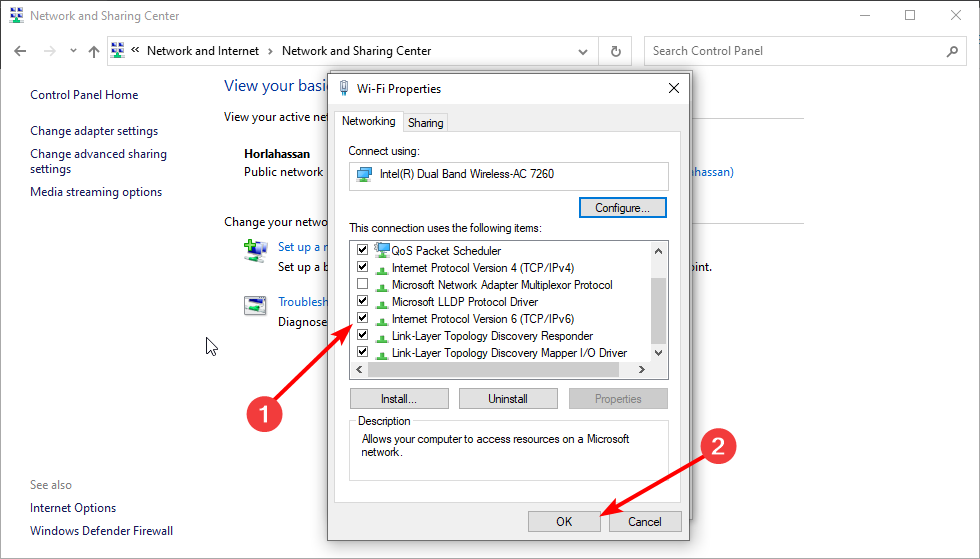
- Now, click the Properties button.
- Find and uncheck the box next to Internet Protocol Version 6 (TCP/IPv6) to disable it.
- Finally, click the OK button to save changes.
3. Run the SFC and DISM tools
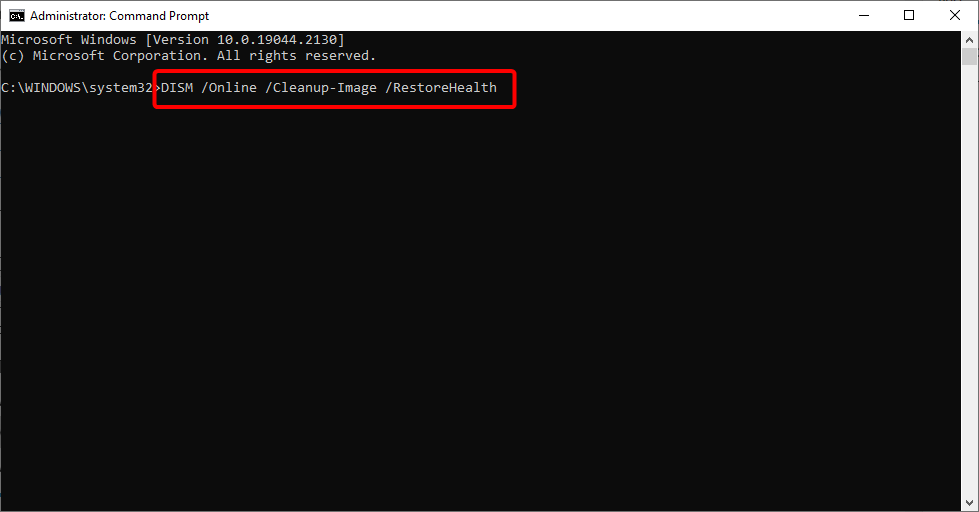
- Press the Windows key type cmd and click Run as administrator under Command Prompt.
- Type the command below and hit Enter.
sfc/scannow - Wait for the scan to finish. Now, copy and paste the command below and hit Enter:
DISM /Online /Cleanup-Image /RestoreHealth - Wait for the scan to complete.
Broken or corrupt system files can cause many problems including the error code 0x80070422. Thankfully, Windows has built-in repair tools that can help you fix these files.
Alternatively, you can use professional software that focuses on repairing your Windows OS and frees up space on your disk in order to help it function at full capacity.
This type of program can detect common issues that obstruct your Windows registry’s true performance and applies advanced system tweaks to fix them in real-time.
4. Run Windows update troubleshooter
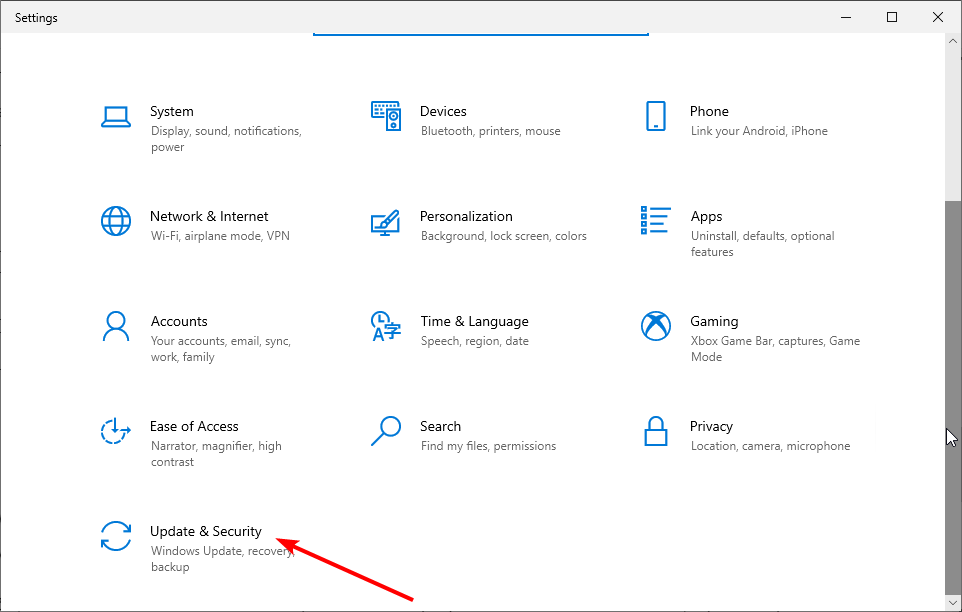
- Press the Windows key + I and select the Update & Security option.
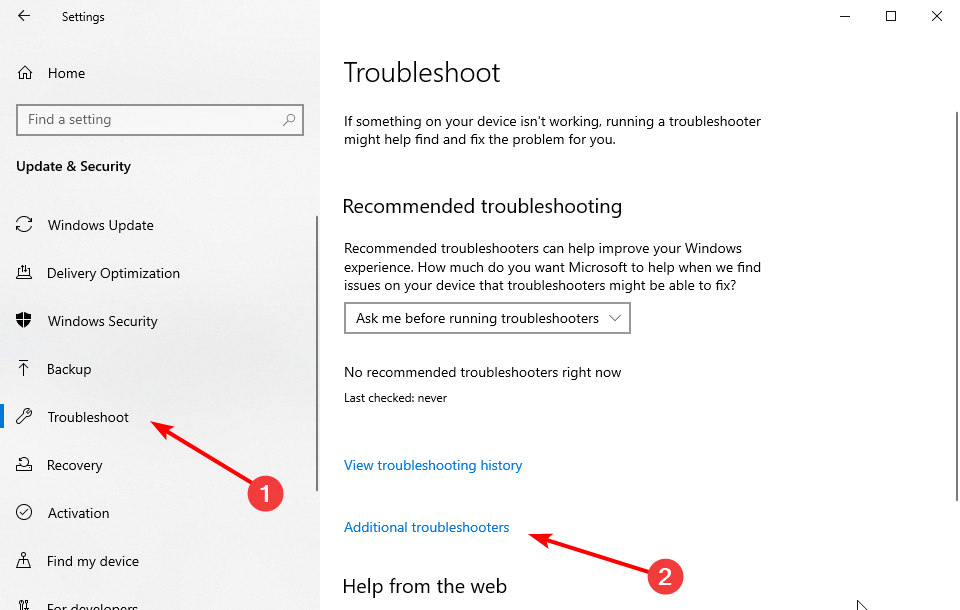
- Select Troubleshoot in the left pane and click Additional troubleshooters.
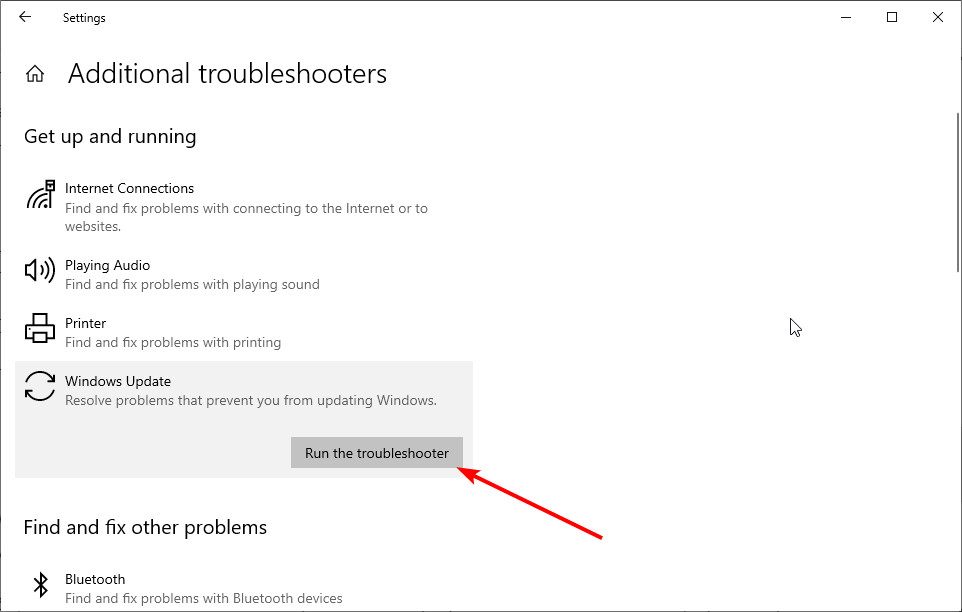
- Finally, select the Windows Update option and click the Run the troubleshooter button.
As you can see error 0x80070422 can cause a lot of issues since it prevents you from performing Windows updates. Thankfully, the fixes are not far-fetched, as shown in this guide.
If you are facing other issues like update error 0x800f0988, check our detailed guide to fix it quickly.
Keep in mind that other components can be affected by this issue, and many reported 0x80070422 error in Windows Firewall and 0x80070422 on Windows 11.
Feel free to let us the solution that helped you fix this issue in the comments below.

