How to Enable Ping on Windows 11

In this piece we’ll show you how to enable Ping on Windows 11 and all the steps you have to take in case it’s not working.
Ping, short for Packet Internet or Inter-Network Groper, is used to test and confirm if a particular IP address exists and measure the response time of that IP address.
Ping is also used for troubleshooting purposes to ensure that a client computer that the user is attempting to contact is up and running. All operating systems, such as Windows, Linux, and macOS, use ping.
Let’s see how you can enable it.
How to enable Ping in Windows 11 + troubleshooting
We’ll show you the exact steps for enabling ping, along with tips on diagnosing network issues, understanding ping results, and optimizing your connection for smoother performance.
1. Enable IPCM through Windows Defender
- Click on Start.
- Search for Windows Defender Firewall.

- Click on Advanced Settings.

- Right-click on Inbound Rules in the left pane and select New Rule.

- Click on Custom in the New Inbound Rule window.
- Click on Next.
- Select All Programs in the Does this rule apply to all programs or specific programs? Page.

- Now click on Next.
- Select ICMPv4 in the Protocol type drop-down menu that is under To which ports and protocol does this rule apply? Page.

- Click on Customize.

- Click on Specific ICMP types in the Customize ICMP Settings window.
- Enable Echo request In the ICMP types list.

- Click on Ok.
- Now click on Next in which ports and protocol does this rule apply?
- Now select the radio button to Any IP address for both Which local IP addresses does this rule apply to? And Which remote IP addresses does this rule apply to?
And to create an ICMPv6 rule, repeat the same steps, but in To which ports and protocols does this rule apply? Click on the Protocol type and select ICMPv6.
If you’re having any issues after this step, keep reading.
2. Try the Network Adapter Troubleshooter
- Click on the Start menu and search for Settings.

- Click on System.

- On the right windows, scroll down and select Troubleshoot and then Other Troubleshoot.

- Select Internet Connection and then click on the Run.

- Wait for the troubleshooter to diagnose the problem.
- Restart your PC.
If the troubleshooter didn’t fix the issue, you can try the below solutions.
3. Check your Antivirus
If you can’t ping computers on your network, your antivirus may be at fault. Check its settings to ensure it allows ping.
You can also reset the settings to default or temporarily disable the antivirus to see if that resolves the issue.
Should disabling the antivirus fix the problem, consider switching to a more user-friendly solution like ESET HOME Security Essential, which offers robust protection features without complicating your network settings.
If you are not satisfied with your existing antivirus software and want a more robust and feature-rich antivirus software, you can try ESET HOME Security Essential.
4. Turn off IPv4 and IPv6 Using Command Prompt
To disable IPv4 and IPv6 using the command prompt, follow the below steps:
- Click on the Start menu.
- Search for the command prompt and click on Run as administrator.

- Type the following command into the command prompts.
netsh int ipv6 isatap set state disabled
netsh int ipv6 6to4 set state disabled
netsh interface teredo set state disable
- Now restart your computer.

- Now confirm if the problem has been resolved and if you can ping commands properly.
5. Remove all applications that block HTTP traffic
Programs that are stopping the HTTP connection could be the reason your Windows 11 not respond to ping.
It is best to uninstall them as they block Windows 11 from responding to ping.
To remove the programs, follow the below steps:
- Open Control Panel.

- Click on Programs.

- Under Programs and Features click on Uninstall a program.

- Find applications that can be blocking HTTP traffic.
- Click on Uninstall.
Once uninstalled, restart your computer and test if everything is fixed.
6. Confirm if your PC is a member of the same domain
- Click on the start button and search for View advanced system settings.
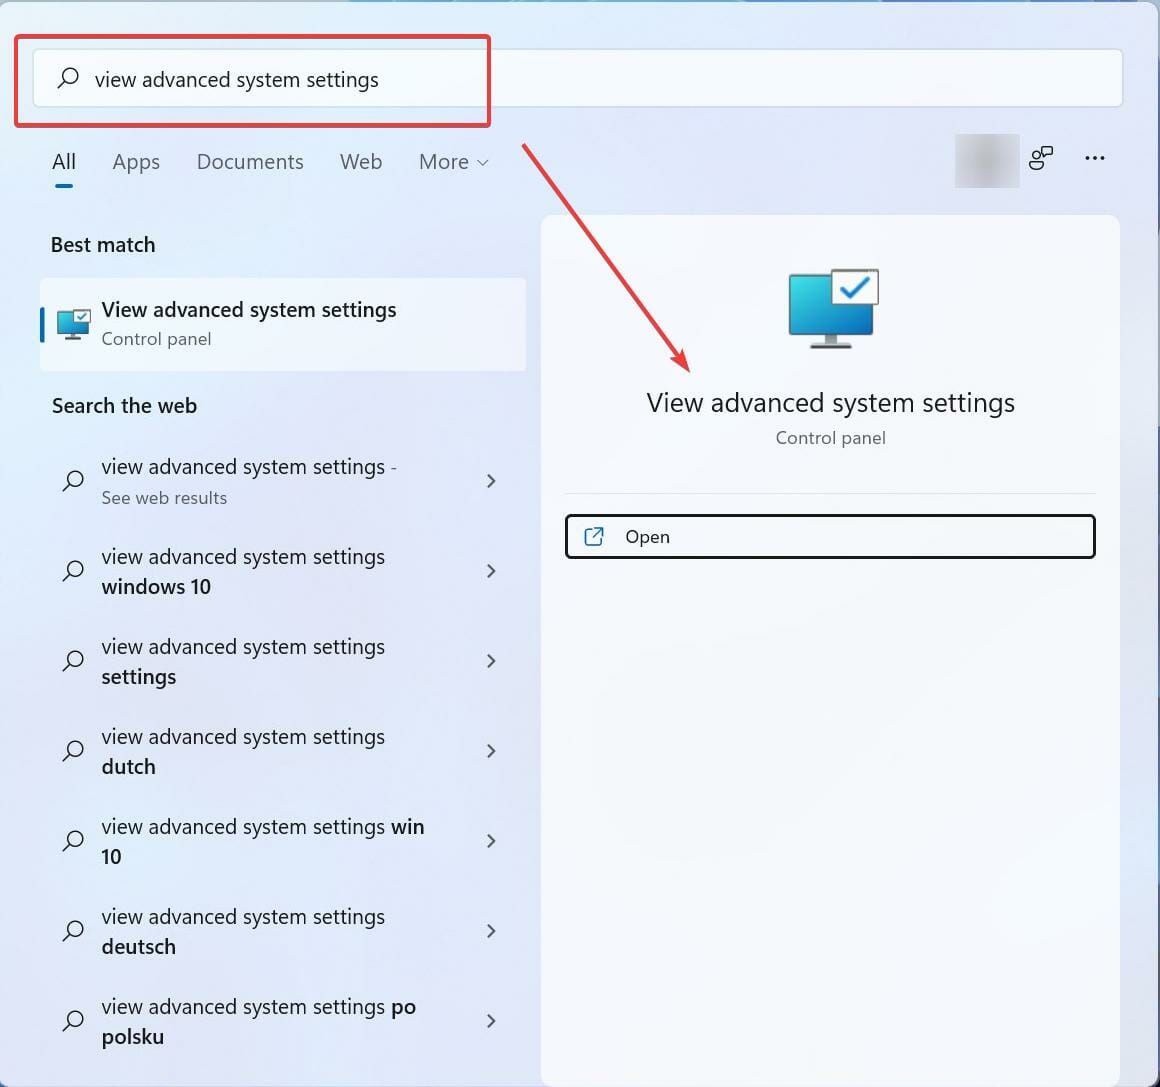
- Click on the tab called Computer name and click on Change.

- Confirm if your computer is a member of the same domain, and click on Ok.
7. Disable VPN
VPNs have become an integral tool that we use in our day-to-day life for various purposes, be it for entertainment, work, or any other reason. VPNs play an important part in our lives.
There is a high probability that your Windows 11 not responding to ping is because of your VPN. Try disabling the VPN, restart your computer, and confirm if your Windows 11 is responding to ping now.
Is it safe to enable ICMP?
Generally, the network administrator considers the Internet Control Message Protocol (ICMP) a security threat, and it is recommended to keep it blocked at the firewall. While ICMP is notoriously known for its security risk, you can still allow some ICMP traffic and it is safe.
On your Windows 11 computer, it is safe to allow Type 3 and Type 4 ICMP traffic. To send out the ping request, Type 8 OUT and Type 0 IN must be allowed.
The word Ping comes from sonar terminology, where a sound wave (pulse) is let out and listens for an echo (ping) in return. The greater the interval, the greater the distance to an object.
The same principle is also used in networking. By pinging, you can determine if your internet connection is working properly, see if there is any network congestion, resolve any latency issues, and also find out if the server is down.
Windows 11 and previous Windows versions have been found to fail to respond to ping, and this is not uncommon with Windows.
Although it is unclear why a Windows computer can stop responding to ping, with the fixes we provided above, you should be able to fix this.
Let us know your experience solving this, as we would love to hear from you!
Read our disclosure page to find out how can you help Windows Report sustain the editorial team. Read more


Improve this guide


User forum
0 messages