Can't Install Windows 11 Even Though I Meet Requirements [Fix]
![]() 6 min. read
6 min. read
![]() Updated on
Updated on
Share this article

Improve this guide
Read our disclosure page to find out how can you help Windows Report sustain the editorial team Read more
Key notes
- Several readers reported that the Windows 11 requirements have been met but they still can't install the OS.
- This problem is mainly attributed to using a corrupted Windows 11 ISO image that fails.
- The wrong drive format or old drivers may also cause this issue but our solutions will help you fix them.
If you want to install Windows 11 and get hit by other demands that the system requirements since you meet them. Then the issue is around the installation media and other peripherals.
Microsoft came up with a new set of hardware specifications on the new operating system to improve security and reduce the chances of cyberattacks.
This article will look at how to solve various issues users face when trying to install the new Windows 11 operating system.
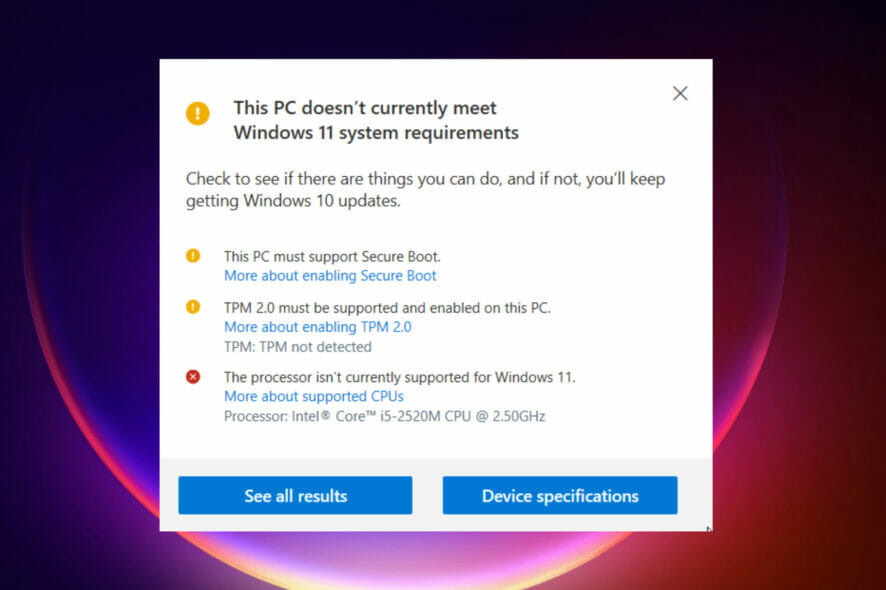
What makes Windows 11 fail to install after meeting the system specifications?
Several reasons can prevent the Windows 11 installation even if your PC meets the new system specifications:
- Corrupt Windows 11 ISO file
- Drivers are outdated when doing upgrades from Windows 10 to Windows 11
- External drives connected to the computer
- Improper configuration of installation media
- Problems with the hard disk and its partition
- Wrong format of the hard disk
How can I fix Windows 11 requirements met but can’t install?
1. Change the disk partitions from MBR to GPT
 NOTE
NOTE
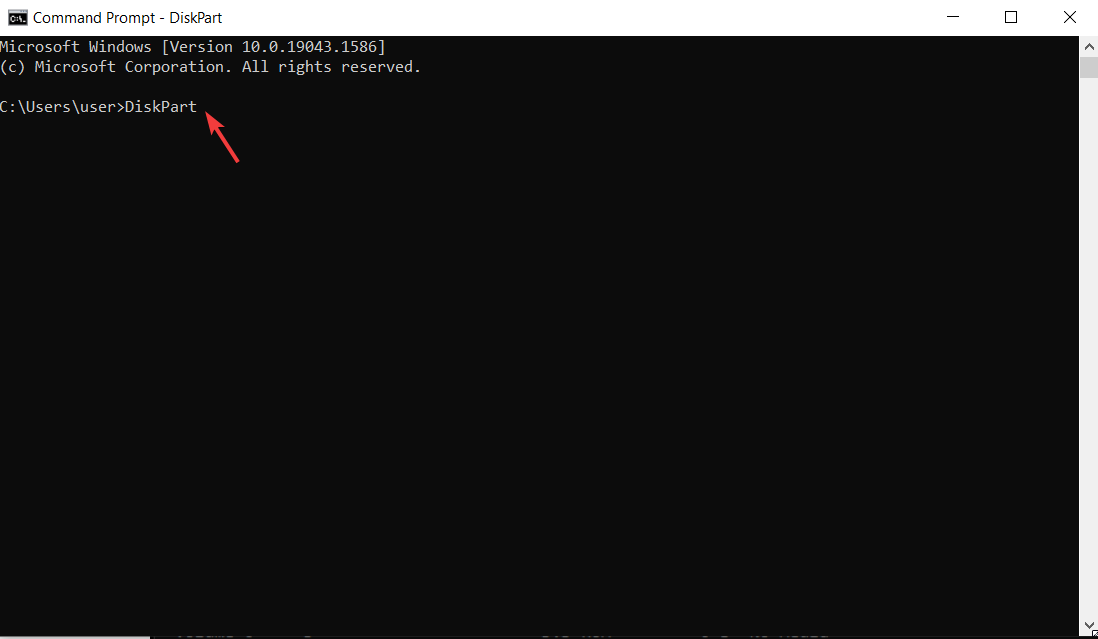
- Click the Windows Start button, type cmd, and select Run as administrator to start Command Prompt with full privileges.

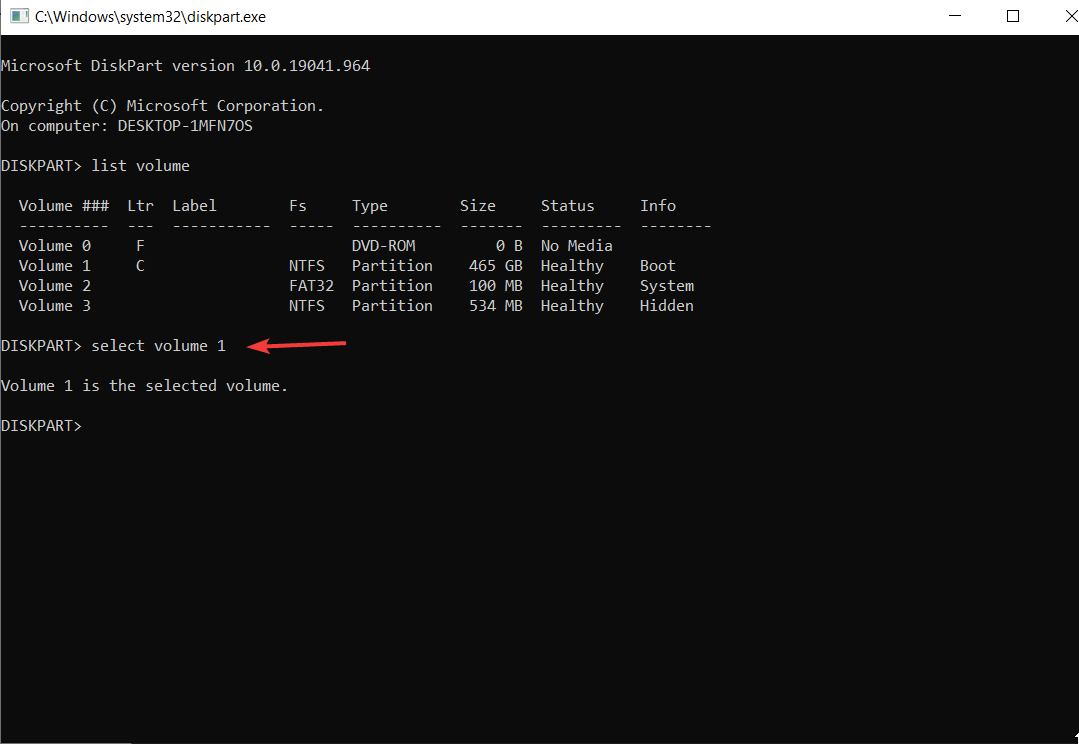
- Type DiskPart on the command line and press Enter.

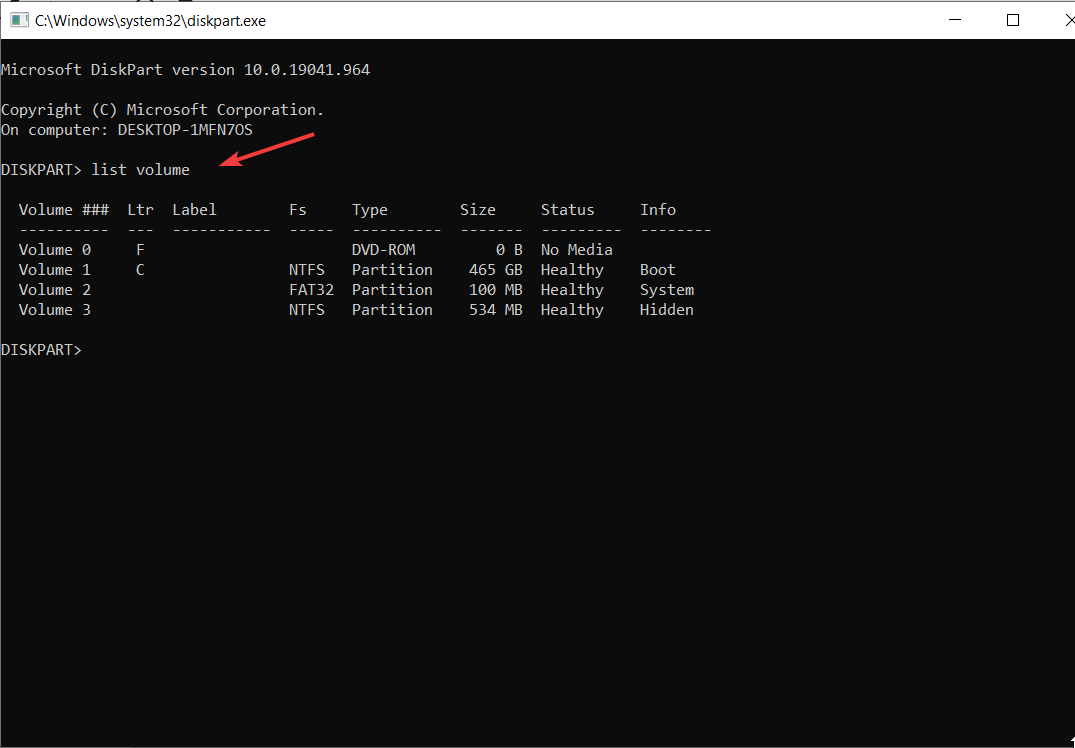
- Next type list volume to display all the partitions and their details like labels, file system, size, status, info, etc.

- Type select volume (number of the disk) and press Enter to choose the drive where you want to install Windows 11.

- Type list partition and press Enter to show all the partitions in the selected volume. It will show the section, size, type, and offset.

- Type detail partition to confirm more details about the section and its health status. You will need all this information to check the disks after the conversion to confirm if they were converted from MBR to GPT.
- Exit the DiskPart by typing exit.
- Click the Start button, type cmd, and click on Run as administrator from the results, just like you did on the first step.
- Type the following command and hit Enter to convert the disk from MBR to GPT:
mbr2gpt /convert /disk:0


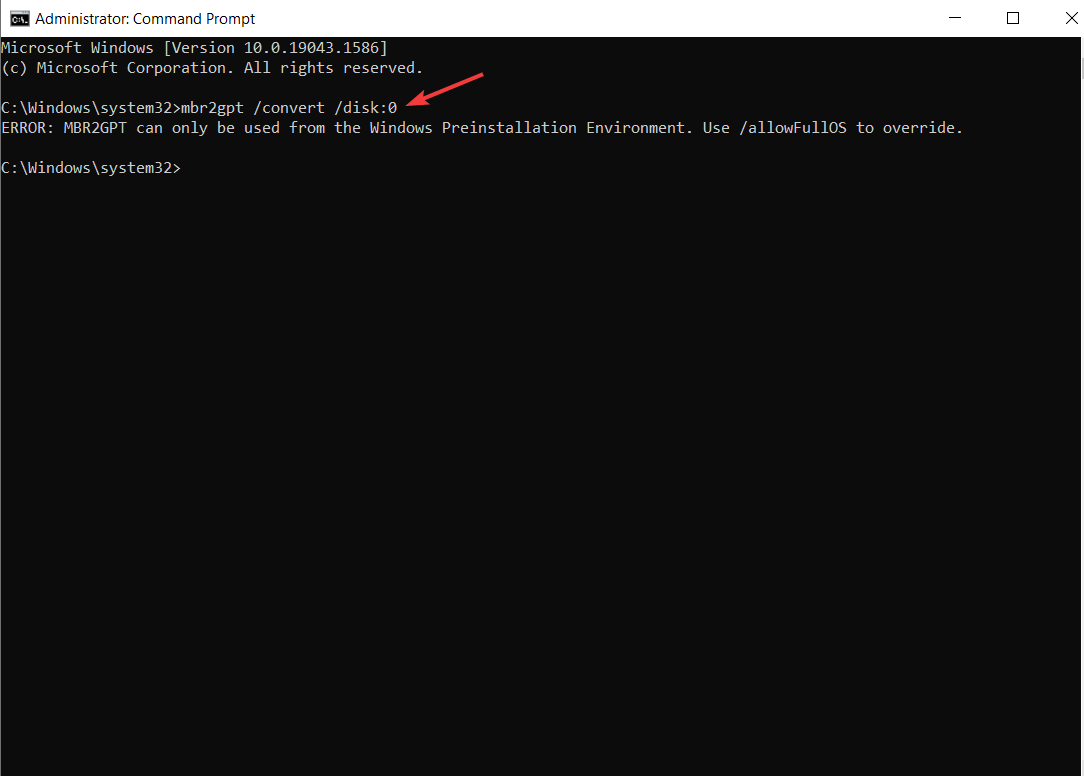
MBR to GPT most applies for those doing upgrades from Windows 10 to Windows 11. It involves the use of MBR2GPT.exe, located in the Windows\System32 folder.
2. Uninstall and update all the drivers and other peripherals
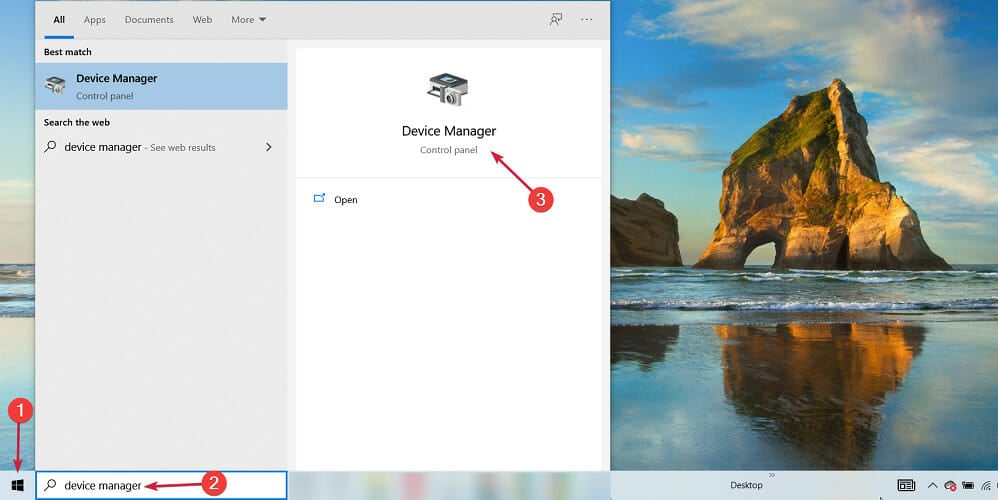
- Go to Start, type device manager, and click the app from the results.

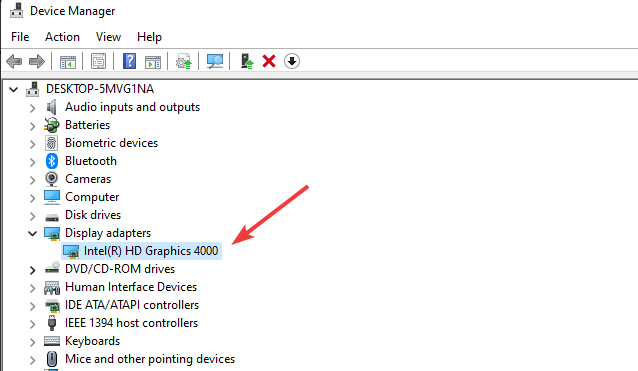
- Check for the Display UHD adapters.

- Right-click and select Uninstall device.
- Repeat steps 2 and 3 for USB drivers. Perform the same process to the other drivers you suspect they bring the issue.

- Restart the computer to apply the changes. Try installing Windows 11 again.


Updating drivers can be instrumental, especially when booting from a USB hard drive. If you have outdated USB drivers, it is hard for the computer to read or detect any USB you insert on the PC.
Manually updating the drivers could be problematic if you install the incorrect ones. This could harm your gadget in an almost irreversible way.
Outbyte Driver Updater is a program that not only downloads and installs drivers, but also troubleshoots, backs up, and restores them.
3. Install Windows using a different USB drive or media
It may fail when installing due to a bad USB drive, or the CD you use has issues. Try changing the USB drive or the CD when creating the installation media.
A fresh Windows 11 install may be a great idea but make sure to back up all your data before you format any drives.
4. Check the hard disk health for any hard drive errors
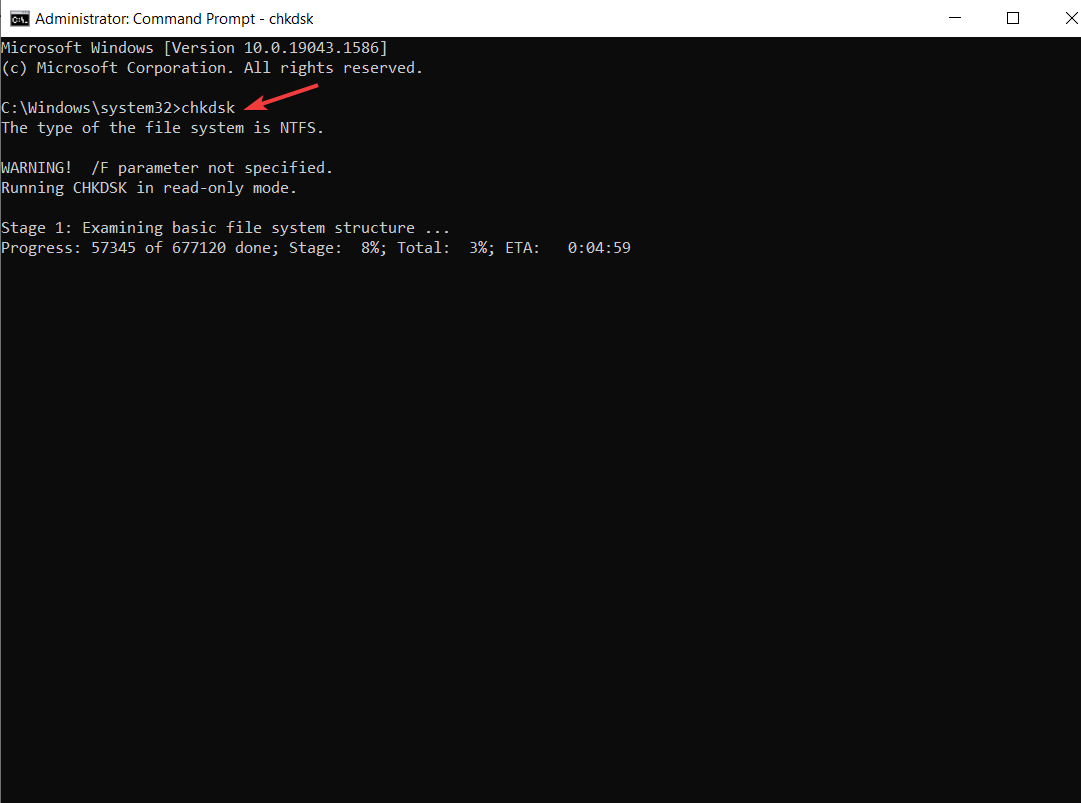
4.1 Use the chkdsk command
- Go to the Start icon, type cmd, and click on Run as administrator.
- Type chkdsk and hit Enter to start the basic scan.

- After the check is over, run this on the command line to fix the errors and try installing the Windows again:
chkdsk /f /r


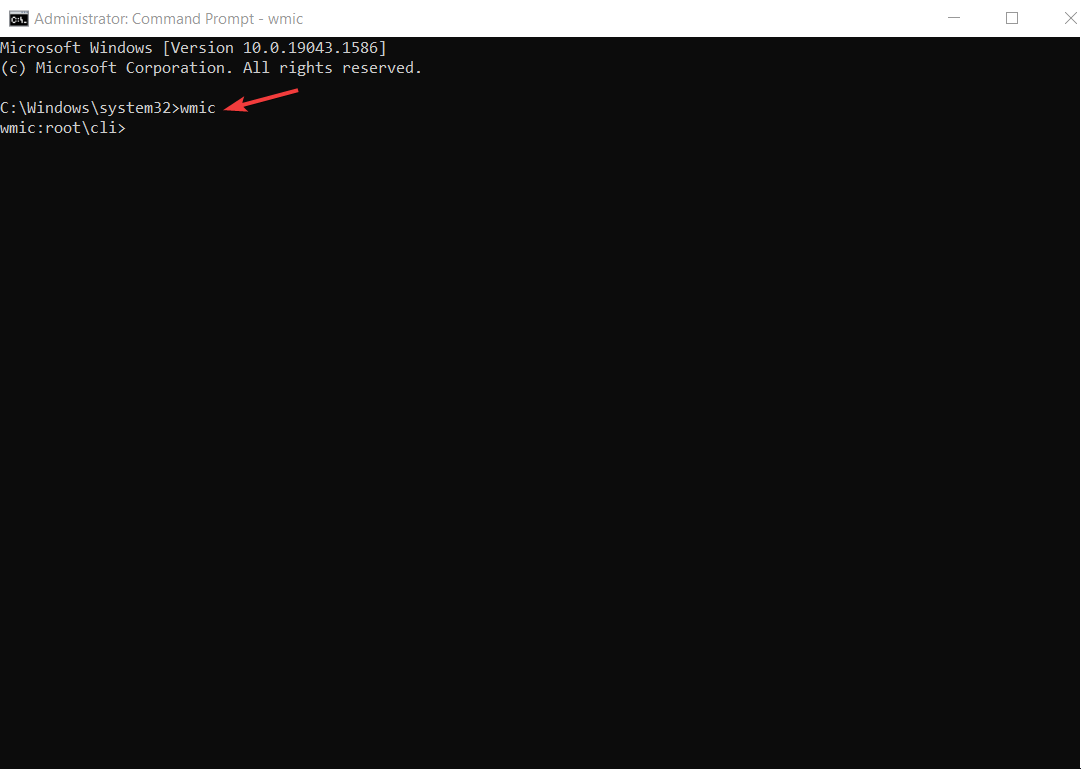
4.2 Use the WMIC command
- Click the Start button, type cmd and click on Run as administrator to start Command Prompt.
- Type wmic and hit Enter.

- After it runs successfully, run diskdrive get status to see the status of the hard disk.


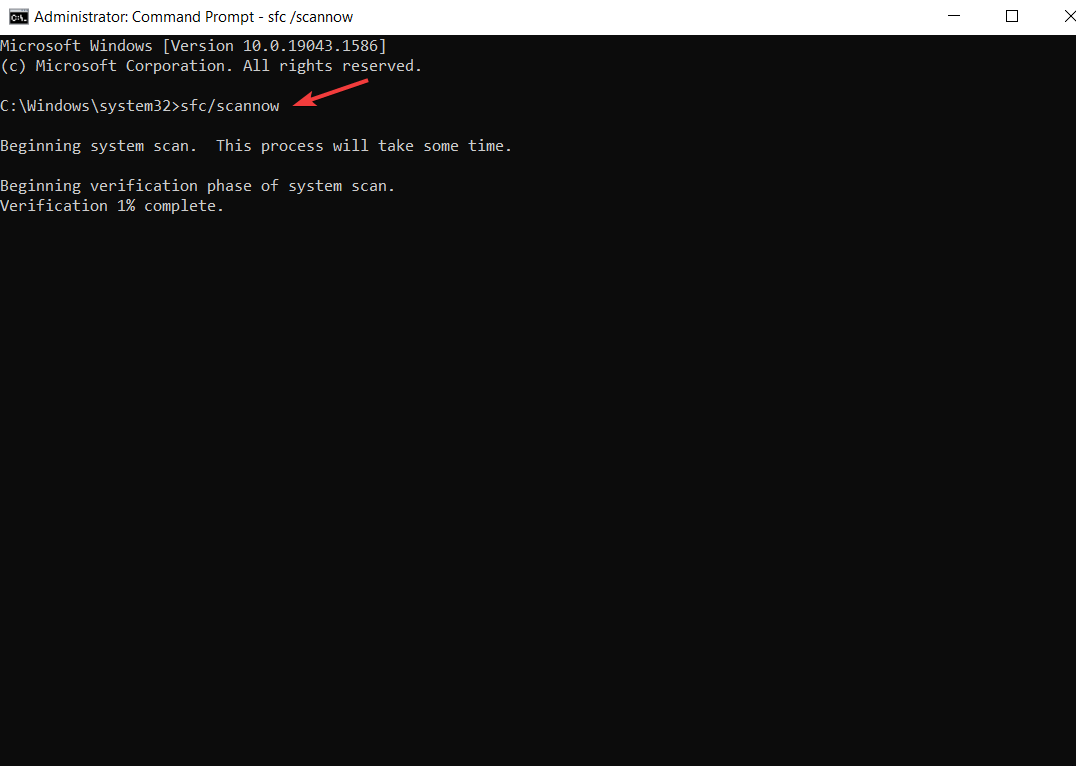
4.3 Use the scannow command
- Go to the Windows Start button, type cmd and choose Run as administrator.
- Type this command and press Enter:
sfc /scannow
- Let the process reach 100% so that you can analyze any errors present in the hard disk. If there are no errors, then the hard disk is good.

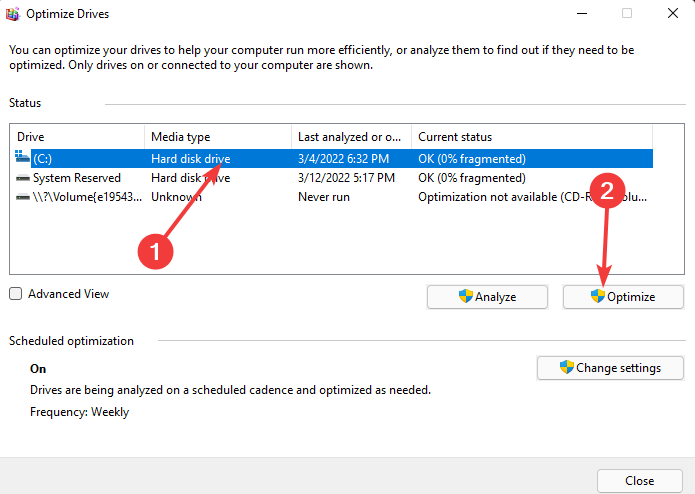
4.4 Use the Defragment tool
- Go to the Search box, search for Defragment and Optimizes and open it.
- Select the drive you want to optimize. This will remove all the fragmented files and ensure it’s well optimized.

Most of these commands check the hard disk to see if there are any issues and if it finds any, it will let you know the status of the disk.
5. Disconnect any external USB devices
Having external drives connected to the computer can affect the installation of Windows 11. It may prompt Windows to choose the USB drive not meant for installation.
Therefore, try to unplug all USB peripherals, except for the ones necessary to perform the installation before beginning the process.
6. Download the correct Windows 11 ISO file
Having a faulty or corrupt ISO can lead to the installation of Windows 11 fail. To avoid this scenario, download the ISO from the official Microsofts website.
It is genuinely free, and you can trust it to be free from phishing codes that can lead to malware attacks or installation failure.
After downloading the new ISO, try creating another installation media and perform a clean installation of Windows 11.
What next after fixing the issues?
Despite meeting the system requirements, most of the issues that block Windows 11 from going through come from the installation media, Windows 11 bugs, and computer issues.
Once you confirm and fix the issues, you perform another new installation of Windows.
The issue occurs on computers that support all the system requirements, but the installation of Windows 11 fails. Microsoft stated that they are aware of the problem and are working on fixing the issue.
It also advised users to report any more errors they face when using Windows 11 through the Feedback Hub.
We hope our articles have helped you solve the issue, and you are enjoying the features of Windows 11.
Let us know which solution worked for you and if you still face any issues, drop us a comment below.