Windows 11 Installation Has Failed [Upgrade Error Fix]
Use the solutions below in order to install Windows 11 successfully
5 min. read
Updated on
Read our disclosure page to find out how can you help Windows Report sustain the editorial team Read more
Key notes
- Windows 11 installation problems can usually happen because of faulty drivers.
- Some issues occur because the PC doesn’t meet the hardware requirements. Therefore, just rule out this option from the start.
- Certain security settings can also interfere and lead to repeated errors or the need to reinstall Windows 11, so be sure to check them.
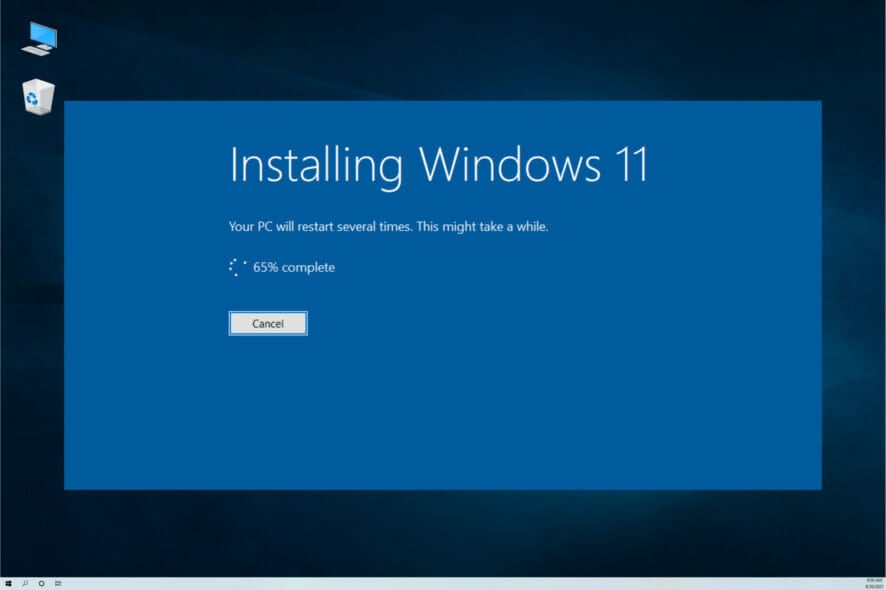
Windows 11 is here and many users are eager to test it. However, it seems that some of them are experiencing various issues while trying to install the OS.
The procedure should be straightforward, and all that you need is Windows 11 installation media and a PC that meets the hardware requirements.
However, various issues can sometimes occur, and in this guide, we’re going to show you how to solve them instead of thinking that it’s time to uninstall Windows 11.
But first, let’s see what to expect in order to determine what you’re up against. Just take a closer look below.
What are the most common Windows 11 installation problems?
Windows 11 can face multiple issues while installing, which leads to a plethora of different issues. Some of the most common ones are the following:
- The installation has failed with no error code – Before trying the upgrade, make sure that your antivirus software is disabled or, better yet, uninstalled.
- Windows 11 installation has failed ISO – Disconnect any external hard disks, USB drives, or SD cards that are currently attached to the computer.
- Windows 11 installation has failed 0xc1900101 – Users with insufficient disk space on their devices are more likely to encounter the error 0xc1900101 in Windows 11.
- Setup installation has failed – Check to see if your device has sufficient storage space.
- Windows 11 installation has failed safe_os phase – The Safe OS installation error can be solved by adjusting your RAM capacity or by upgrading the BIOS.
- Setup has failed to validate the product key – Eliminate any clutter from the Temporary Files.
- Windows 11 keeps failing to install – This warning can indicate that your computer is missing certain essential updates that have not been installed.
But don’t sweat it! We will cover all of them in this article. Simply make sure to follow our steps one by one in order to find the right solution for you.
How do I fix Windows 11 installation failed?
1. Enable TPM in BIOS
1. Access BIOS/UEFI on your PC. This procedure is different for each manufacturer but usually implies pressing an F (function) key on your keyboard before booting the OS.
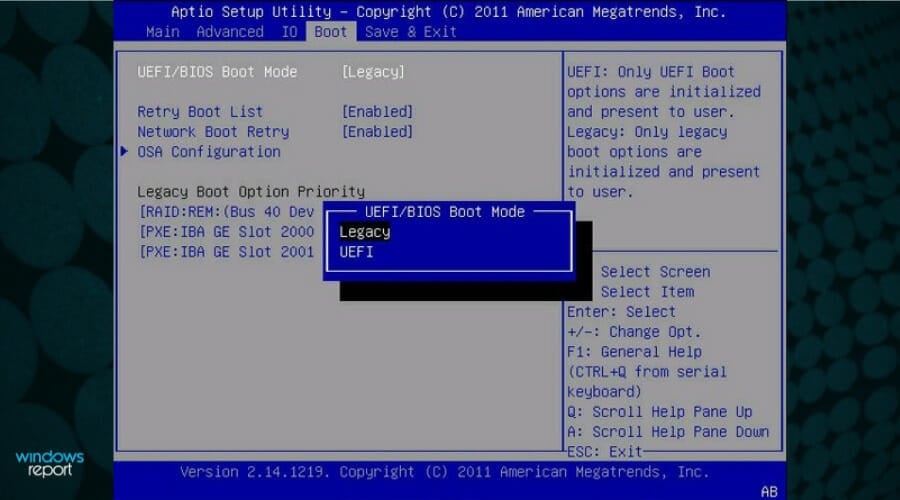
2. Now go to the Security section.
3. Locate the TPM option and enable it.
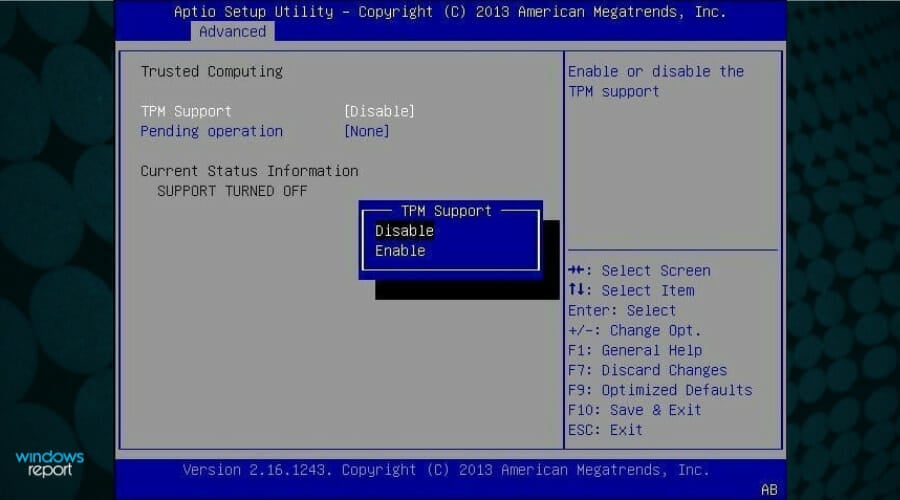
4. Finally, just save all recently made changes. Usually, you can press the F10 key to save and exit.
5. Check whether the Windows 11 installation problems are fixed.
Since Windows 11 requires TPM 2.0 to be enabled, many reported that TPM 2.0 errors are preventing them from installing Windows 11.
Therefore, in order to fix them, you should disable TPM support via BIOS/UEFI settings on your PC.
Keep in mind that this process is different for each motherboard model and version of BIOS, so you should check your motherboard manual for detailed instructions.
 NOTE
NOTE
2. Enable the Secure Boot option
- Click the Start button and select Settings then choose Update and Security.
- Click the Recovery option from the left pane, then select the Restart now button.
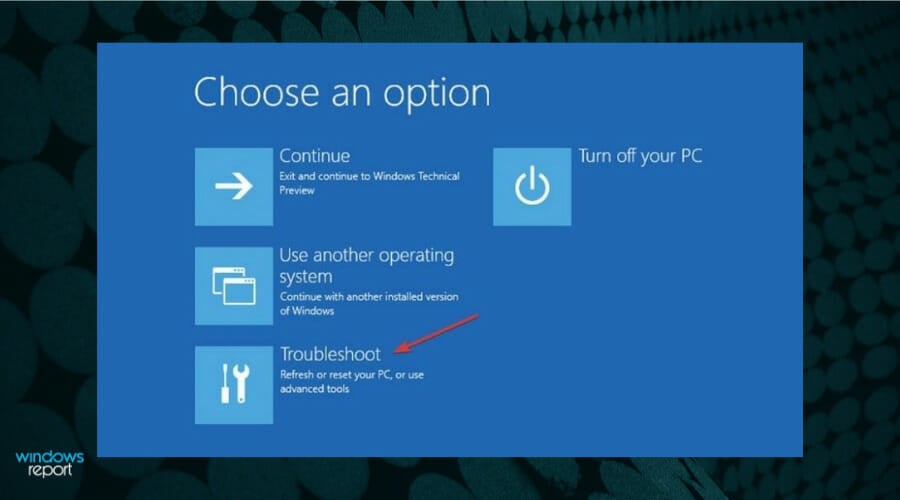
- When you see the boot options, select Troubleshoot.
- Click on Advanced options.
- Choose the UEFI Firmware settings option.
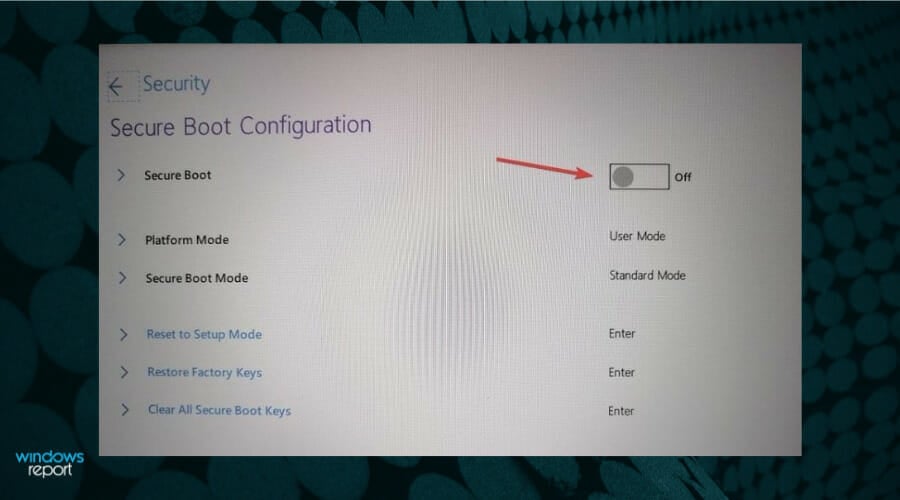
- After your PC gets into BIOS, click on Security, then select the Secure Boot option.
- Next, toggle the Secure Boot option to On to enable it, then accept the changes when you’re prompted.
- Save the changes and exit BIOS by pressing the F10 key on your keyboard.
- Wait for the PC to reboot, then try to install Windows 11.
If you have any problems performing this step, don’t hesitate to learn how to enable Secure Boot from BIOS.
3. Bypass TPM 2.0 and Secure Boot
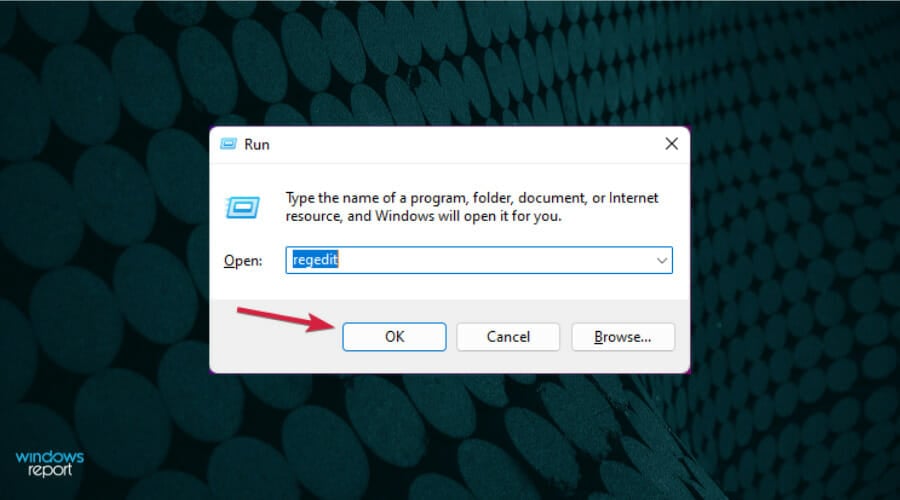
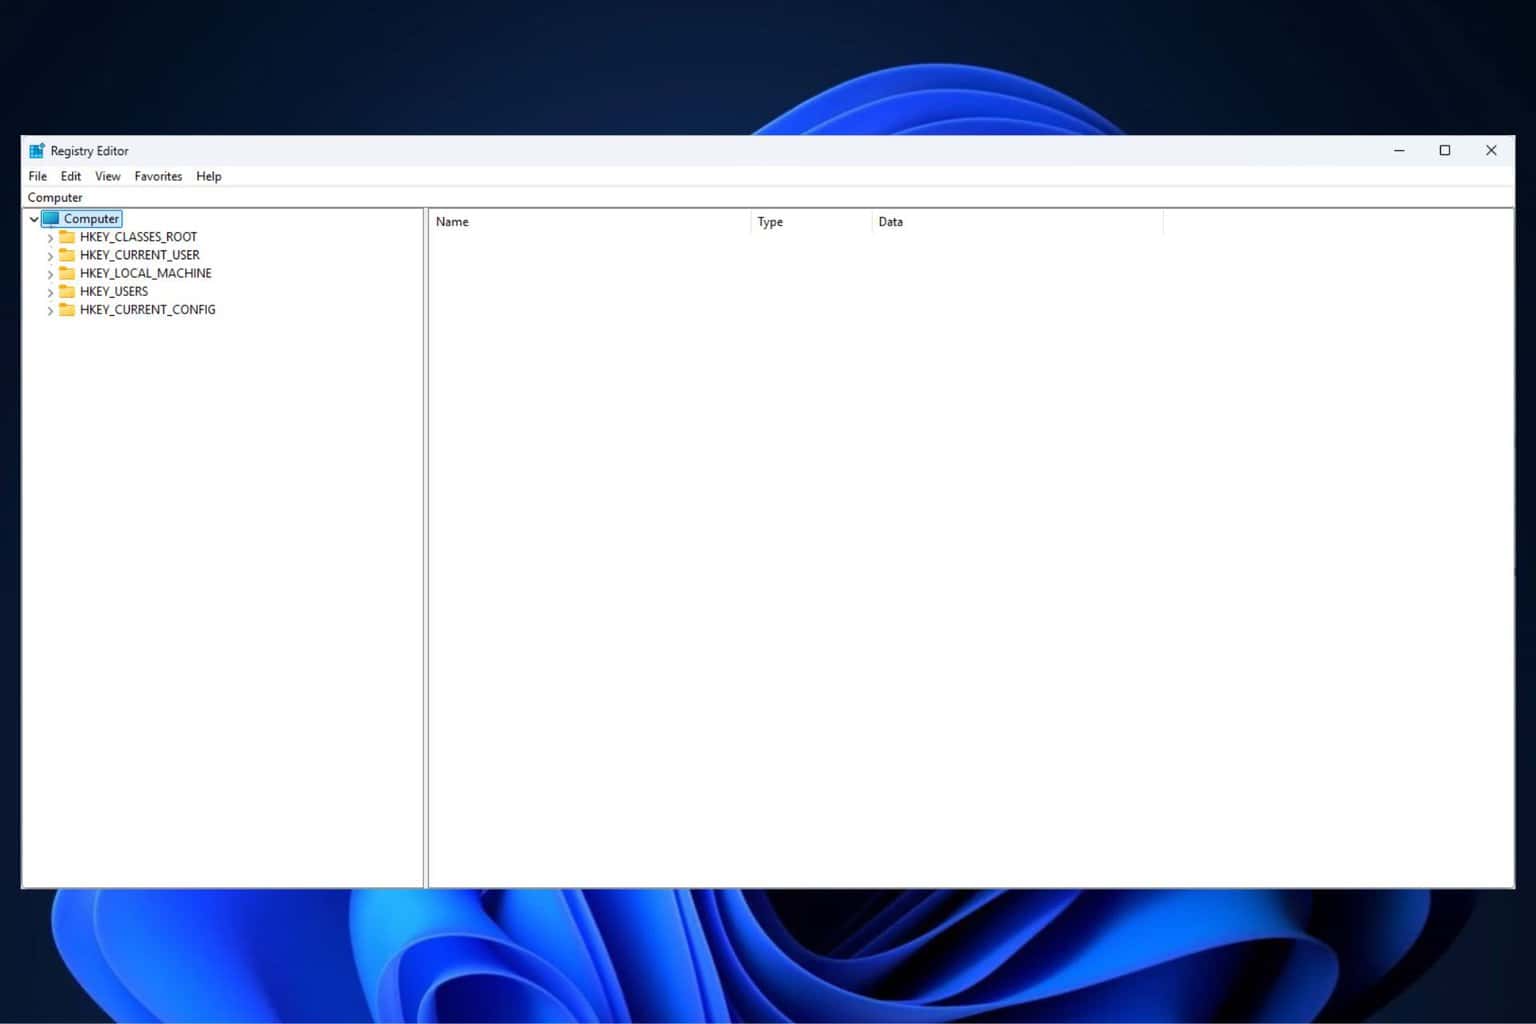
- Press the Windows key + R to start Run, type regedit, and press Enter or click OK.
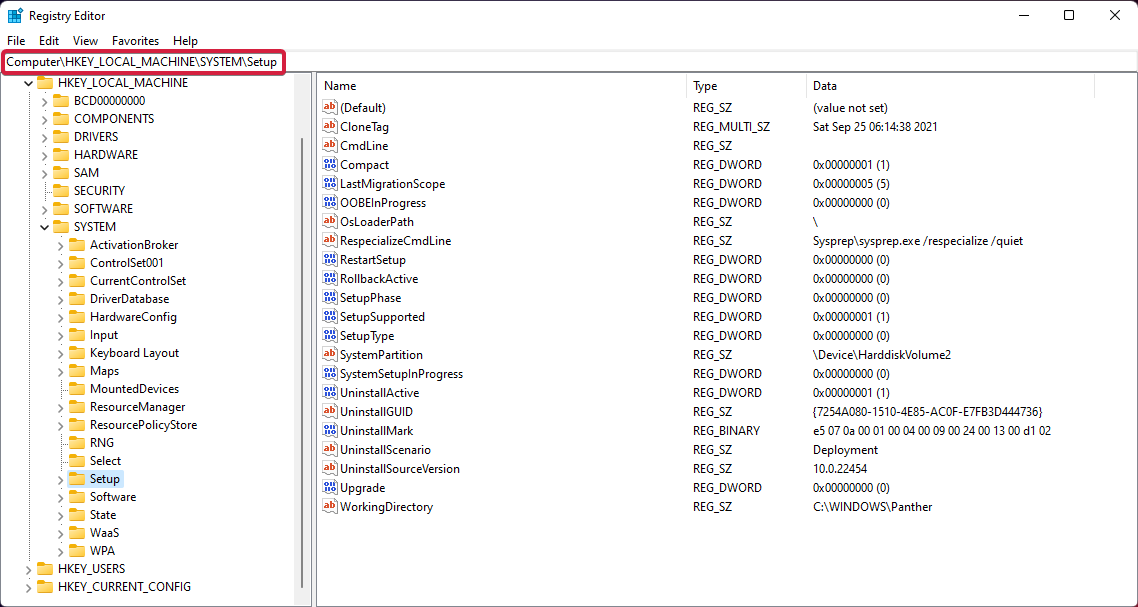
- Navigate to the following registry path:
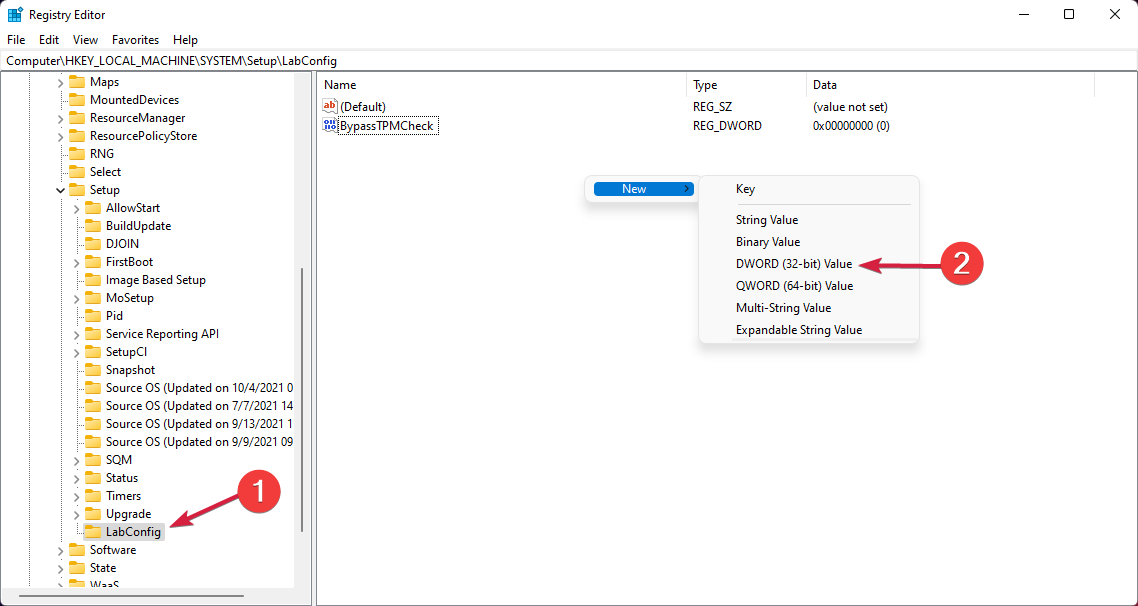
Computer\HKEY_LOCAL_MACHINE\SYSTEM\Setup - Right-click on an empty space on the right, select New, and select Key, then name it LabConfig.
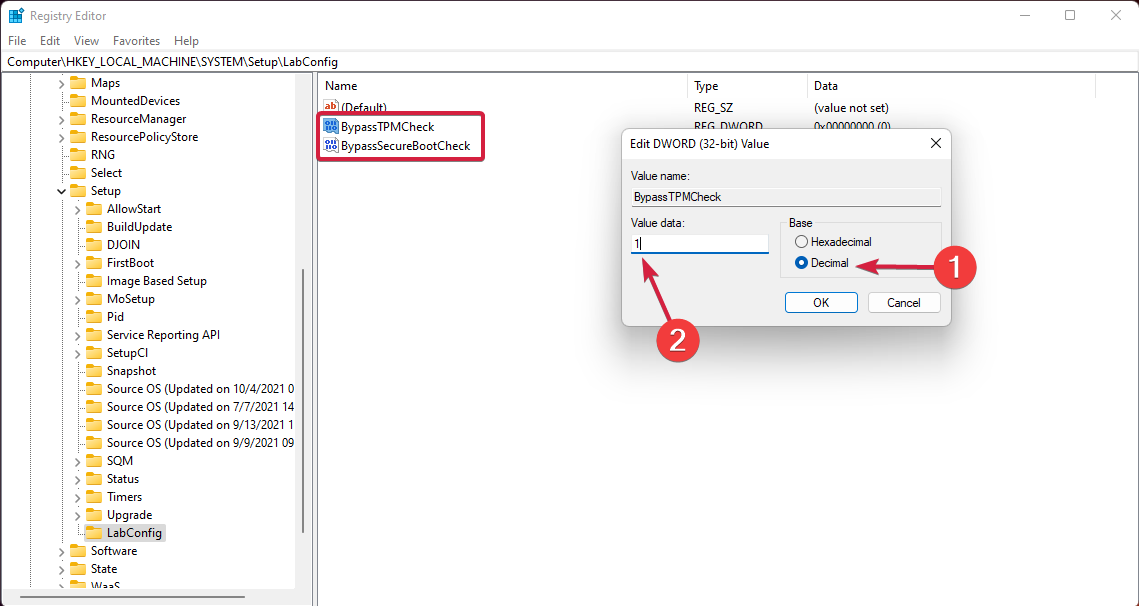
- Click on the new LabConfig key, right-click the blank space to create two DWORD (32-bit) Value options to, and name them BypassTPMCheck and BypassSecureBootCheck.
- Double-click the new items one by one, select the Decimal base, and set 1 in the Value data field, then click OK.
- Close the Registry Editor, then restart your PC. Try to install Windows 11 again.
If you need more details, also learn how to bypass TPM 2.0 check when installing Windows 11. However, after enabling these settings in BIOS, the installation errors should be gone.
Keep in mind that some motherboards don’t have the TPM chip, so you might have to purchase a TPM chip for your PC to fix that.
4. Remove the GPU driver
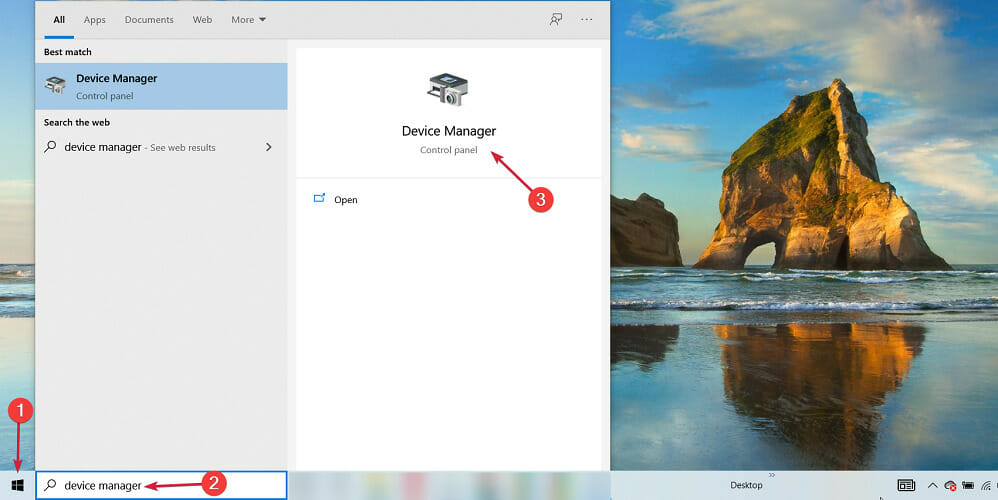
- Click the Start button, type device manager, and select the app from the results.
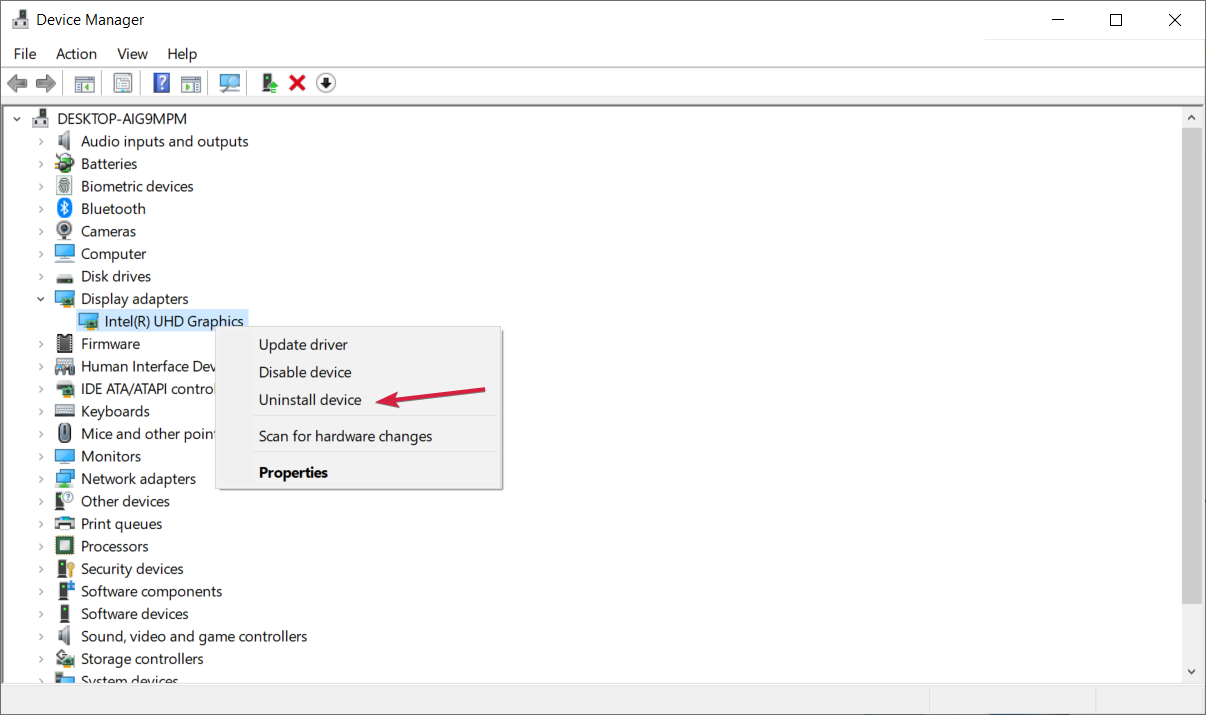
- Extend the Display adapters section, right-click the graphics driver, and select Uninstall device.
- The system will install a new driver after that.
Some of our readers reported that they managed to install Windows 11 after uninstalling their graphics driver, alternatively you can try updating your drivers with Outbyte Driver Updater which scans your PC for missing or outdated drivers and updates them automatically.
These are some of the most common installation problems that users have encountered, but hopefully, you should be able to fix them with the above tips.
What are the minimum hardware requirements for Windows 11?
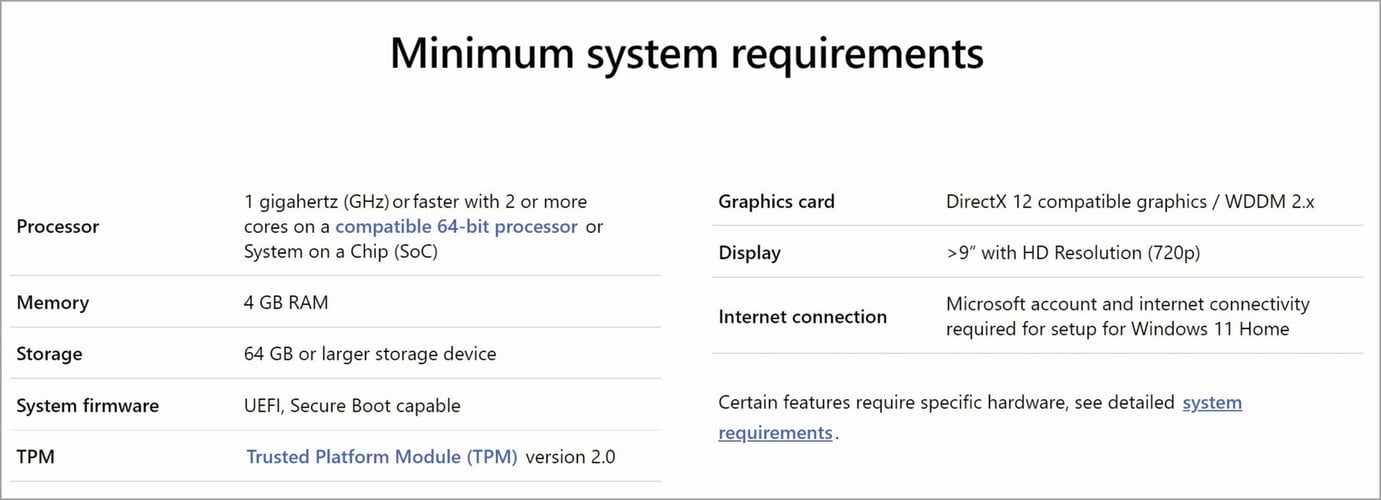
Windows 11 comes with a different set of install requirements, and even if you were able to run Windows 10, you might not be able to run Windows 11.
To make sure that you don’t encounter any issues, we encourage you to check the official Windows 11 requirements before upgrading.
Can’t install Windows 11 even though I meet requirements?
The hardware requirements aren’t that different, and the biggest change is the need for a TPM 2.0 chip, which some older PCs don’t have. If your PC meets the requirements but you still can’t install Windows 11, that’s probably because the upgrade isn’t ready yet for your specific device.
Microsoft has lowered the requirements over time, so be sure to check the PC Health Check app constantly.
If your computer meets the Windows 11 install requirements, you’ll ensure that the upgrade process is smooth and without any issues, and you’ll avoid the dreaded This PC can’t run Windows 11 message.
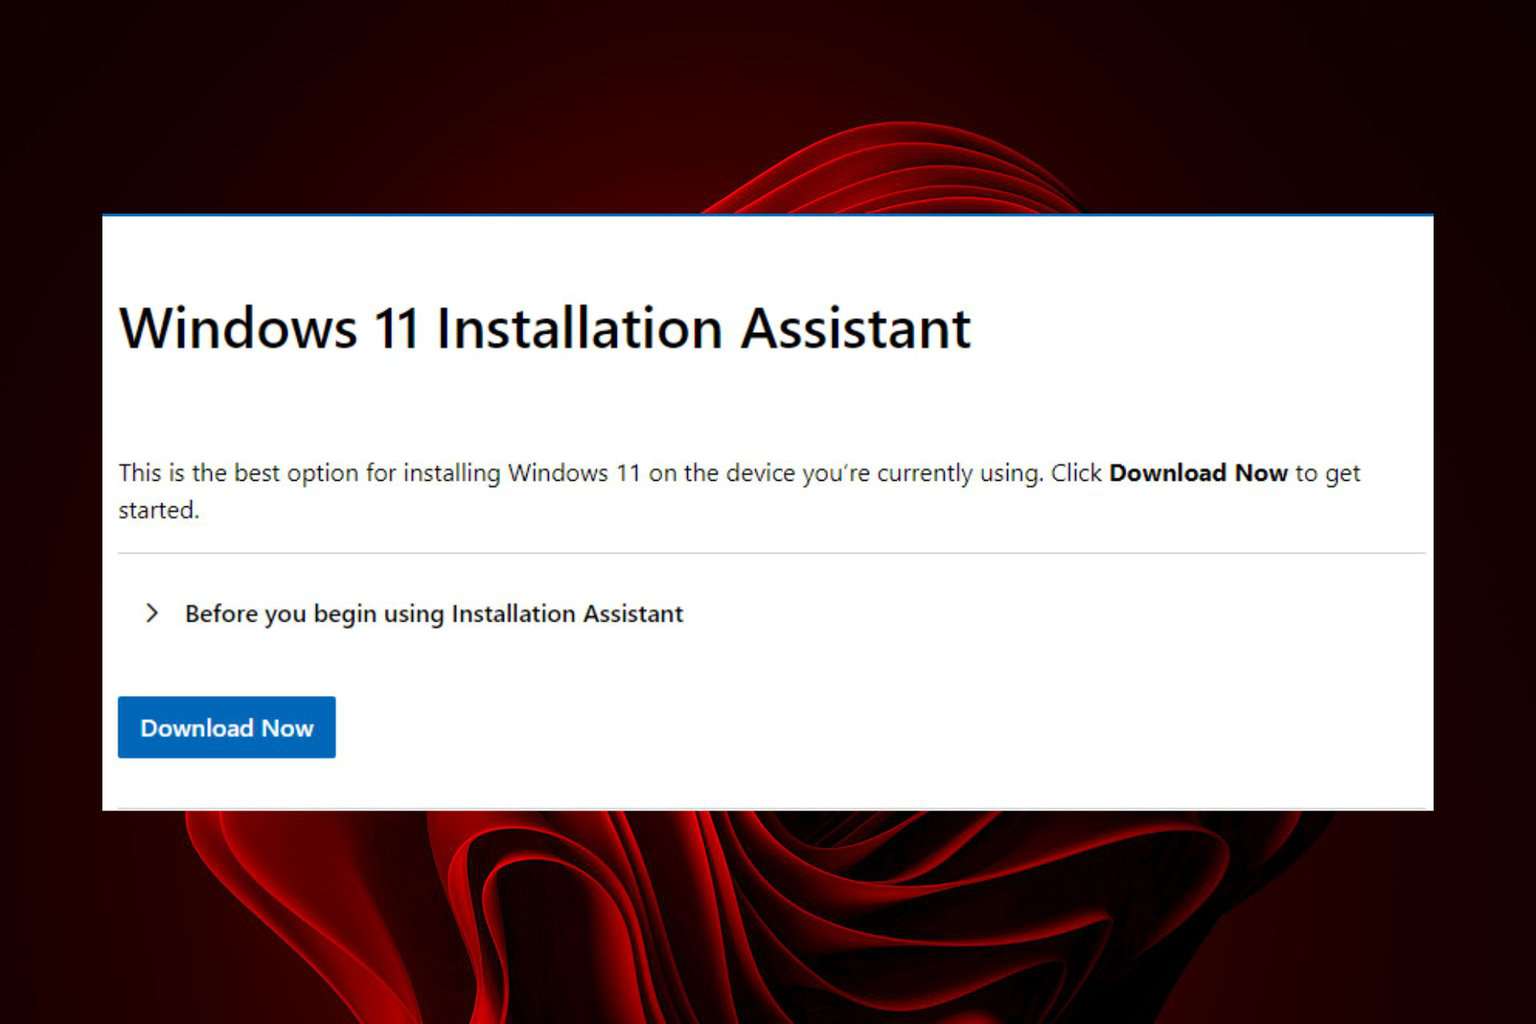
Moreover, if you’re new to this, let us remind you how easy is to download Windows 11 in the first place. When available, you may simply install the update or use the Windows 11 Media Creation tool instead.
Have you tried this OS already and did you encounter any installation issues? Do not hesitate to share your experience with us and other readers in the comments section below.






User forum
5 messages