Windows always needs to update? Fix it now
4 min. read
Updated on
Read our disclosure page to find out how can you help Windows Report sustain the editorial team Read more

Admittedly, Microsoft updates are super important in securing your PC against myriad security threats. They also ensure that you enjoy the best experience when using various Microsoft software including their Office suite. But sometimes the updates can prove a nuisance because the tech giant has designed the update function such that Windows always needs to update, sometimes several times in one day.
So, how can you stop this behavior and use your Windows 10 PC in peace? Well, let’s look at the cause of this intrusive conduct before discussing how to halt it.
As I mentioned, an updated operating system guarantees maximum security for users. But not all users are committed to updating their Windows 10 so apparently, Microsoft thought it wise to make Windows 10 update itself automatically.
The company is always trying to catch up with makers of malicious software by releasing new updates rather frequently. Consequently, there are so many updates seeking to address specific vulnerabilities. To some, the automatic update feature is time-saving. However, other users find it pretty intrusive and will go all out to terminate the practice.
Why is Windows 10 constantly updating?
- Use Group Policy to disable automatic updates
- Disable auto-updating using the Windows registry
- Set your Internet connection to be metered
- Block the Windows Update Service
- How to install updates manually
1. Use Group Policy to disable automatic updates
Users of Windows 10 Professional, Enterprise and Education versions can bar automatic updates using their Group Policy Editor. Once done, the Group Policy will be notifying you of fresh updates instead of automatically installing them.
- Press Windows key + R to launch the Run utility.
- Type gpedit.msc then click OK.
- Click on Computer Configuration, then select Administrative Templates and lastly choose Windows Components.
- Now click Windows Update.
- Double-click on Configure Automatic Updates.
- Choose Disabled (as shown) and click Apply then OK.
This disables the automatic Windows Update feature.
2. Disable auto-updating using the Registry
If your Windows always needs to update, you might fix it by using the Registry Editor. The registry is one of the most powerful computer management tools and can help you rein in on this issue. To make these changes, do the following:
- Launch the Run tool by pressing the Windows key + R.
- Type regedit and press Enter. Choose Yes if prompted by UAC (User account control).
- Go to this path:
- HKEY_LOCAL_MACHINE\SOFTWARE\Policies\Microsoft\Windows
- Right-click on the Windows folder/key then select New and click on Key.
- Name this key(new) WindowsUpdate then press Enter.
- Now right-click on the freshly created key (Windows update) and select New again and then click on Key. You will name this newest key AU then press Enter.
- Now Right-click on the right-hand side (of AU) then select New then click on DWORD(32-bit) Value.
- Name this new DWORD key NoAutoUpdate then press Enter.
- Again Double-click on this newly created DWORD key and modify its value date to 1 (from 0).
- Click OK and restart your PC.
Alternatively, use these workarounds if you’re on Windows 10 Home Edition to fix this problem.
3. Set your Internet connection to be metered
Limiting your WiFi Internet connection can also help impede the terrible behavior where Windows always needs to update.
- Click on the Start button.
- Click on the Settings.
- Choose the Network & Internet.
- Click WiFi (on the left pane).
- Select the name of the Wi-Fi connection you’re using.
- Click it, and enable Set as metered connection option.
4. Block the Update Services
Disabling the service in charge of the automated updates can sometimes help if Windows always needs to update.
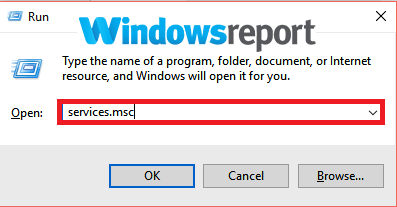
- Press Windows key + R to start the Run box.
- Type services.msc then press Enter.
- Scroll down until you find Windows Update then double-click it.
- Choose Disabled in the Startup type then select Apply and OK.
5. How to install updates manually
Once you implement any of the above fixes, you still need to download and install essential updates at your own convenience. Here is how to manually check for updates.
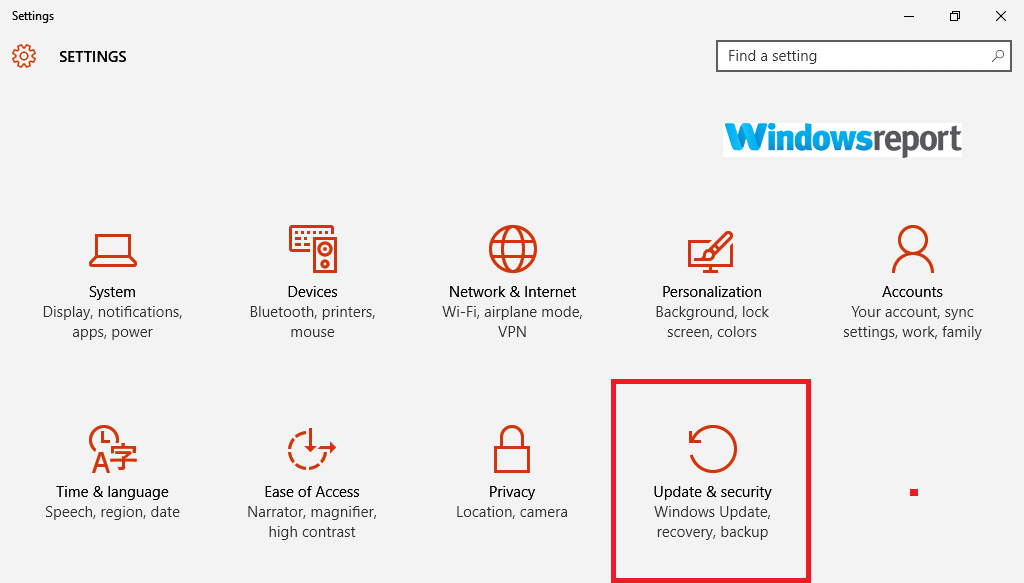
- Open the Settings app.
- Click Update & Security and then Windows Update.
- Now click Check for updates.
- If there are pending updates, install them.
There you go, these are some solutions that you can use if Windows always needs to update, so be sure to try them all, and let us know if they work in the comment section below.
MORE GUIDES SELECTED JUST FOR YOU:


