Windows Update Service Not Running [SOLVED]
Clearing the Windows update history can fix this issue quickly
5 min. read
Updated on
Read our disclosure page to find out how can you help Windows Report sustain the editorial team Read more
Key notes
- If you are facing the Windows update service not running issue, it might be because of a faulty service on your PC.
- One effective and quick solution to this issue is to run the Windows update troubleshooter.
- Another excellent fix is to perform a clean boot and remove any problematic program.
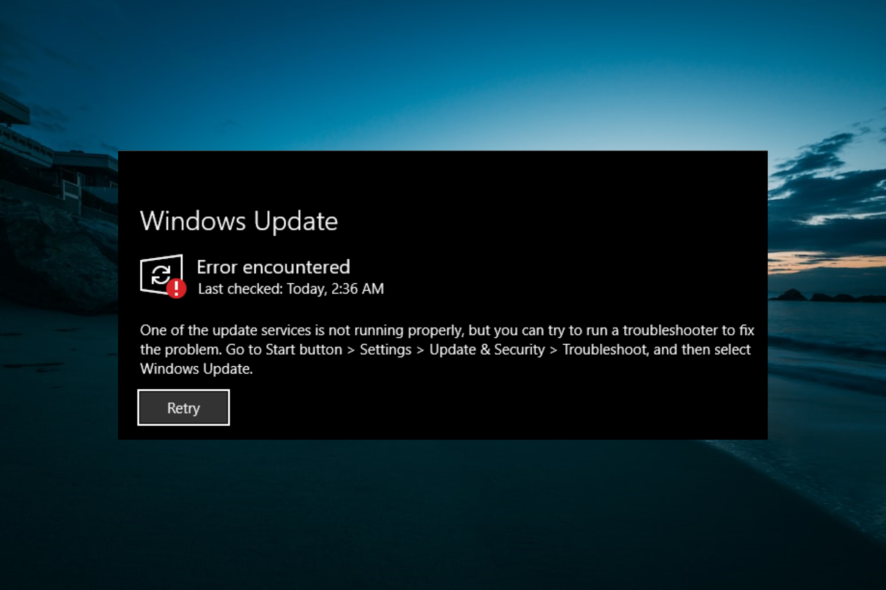
As a veteran Windows user, I can assure you that Windows updates are important for the smooth running and security of your PC. However, there are times when the Windows update won’t work and delivers a prompt saying that the service is not running.
The full error message states: Windows Update cannot currently check for updates, because the service is not running. You may need to restart your computer.
This can prevent you from installing important updates and make your PC vulnerable. Fortunately, as I have also dealt with this issue before, I can help you with a few tips and tricks that I have learned over the years.
How can I fix the Windows Update service not running issue?
Before exploring the sophisticated fixes in this section to make the Windows Update service run, below are some general troubleshooting steps you should try:
- Restart your PC. Read our guide to learn what you can do if Windows won’t restart.
- Disable or remove the third-party antivirus software.
1. Run the Windows update troubleshooter
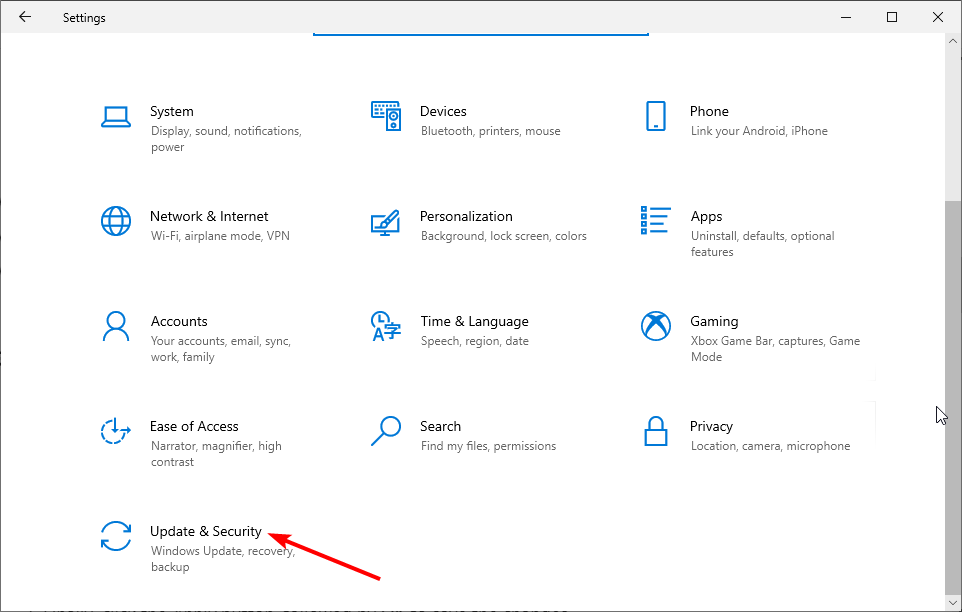
- Press the Windows key + I to open the Settings app, and select Update & Security.
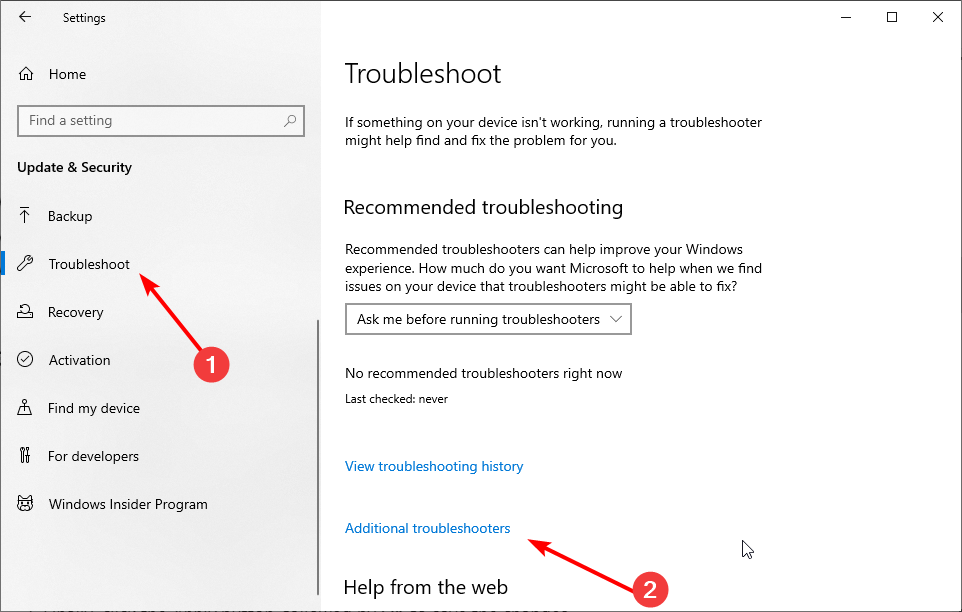
- Select Troubleshoot in the left pane and click Additional troubleshooters.
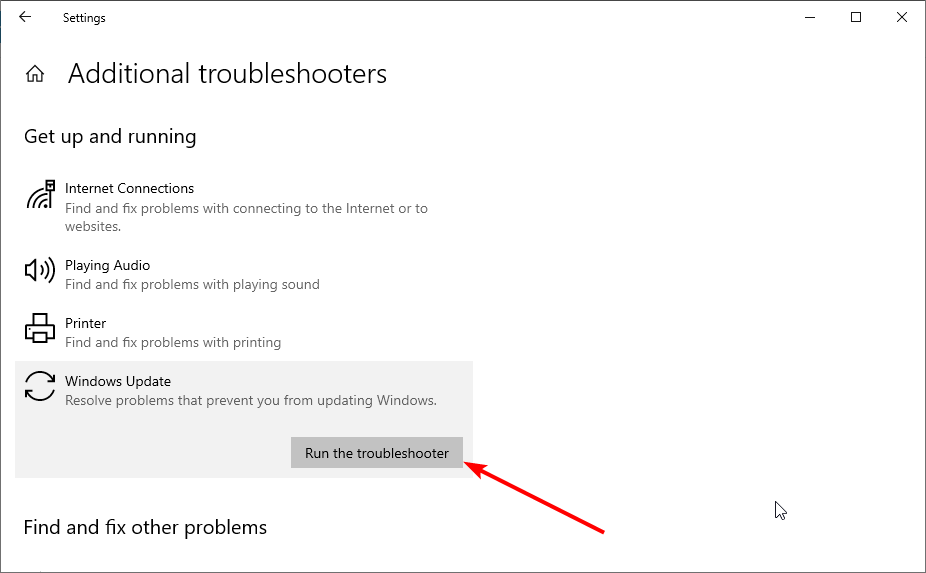
- Now, select Windows Update and click Run the troubleshooter.
- Finally, apply any recommended troubleshooting steps.
The Windows Update troubleshooter is one of the best tools for fixing update issues, including the service not running error. After running the troubleshooter, try checking and installing updates again.
2. Disable or remove problematic services
2.1. Enable Clean boot
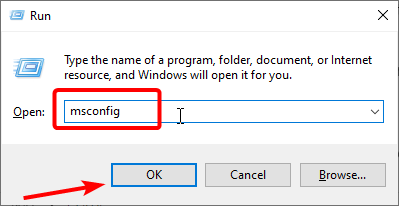
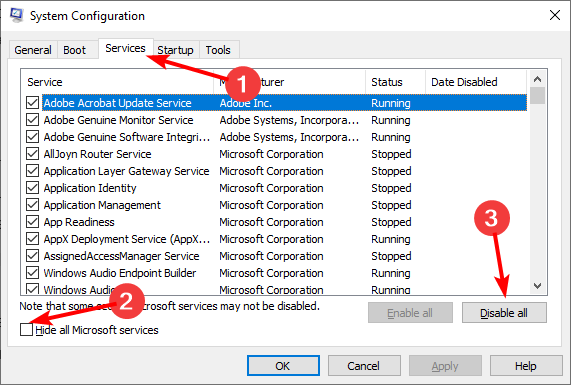
- Press the Windows key + R, type msconfig, and click OK.
- Click the Services tab at the top, check the Hide all Microsoft services box, and click Disable all.
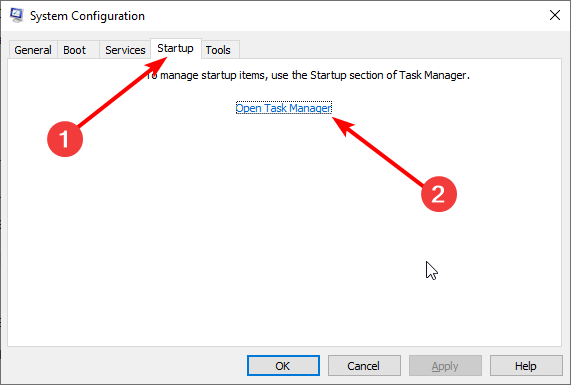
- Now, choose the Startup tab at the top and click Open Task Manager.
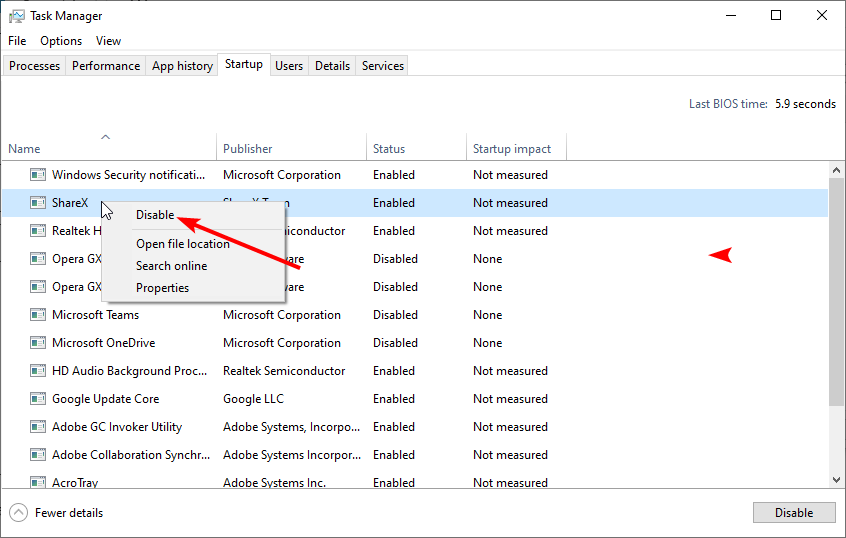
- Right-click each service there and select the Disable option.
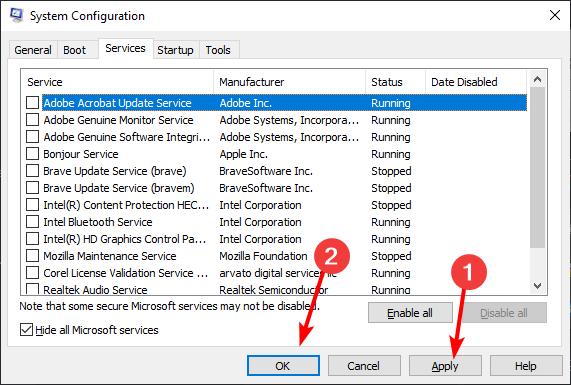
- Go back to the System Configuration window, click the Apply button, followed by OK, and restart your PC.
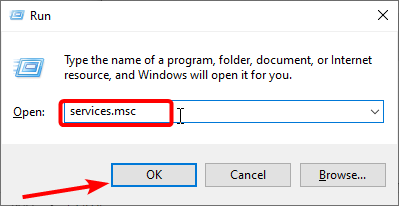
- Now, press the Windows key + R, type service.msc, and click OK.
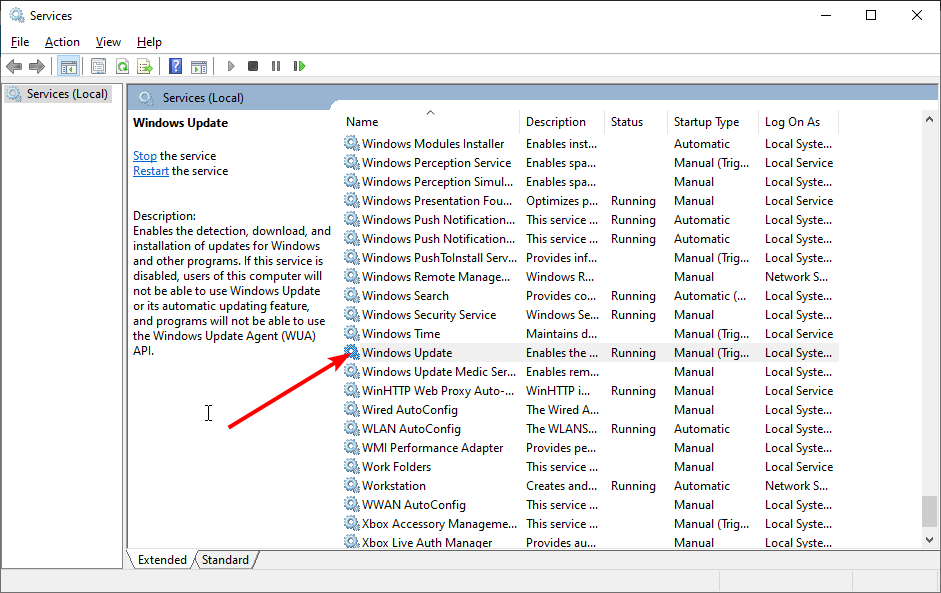
- Double-click the Windows Update service to open its properties.
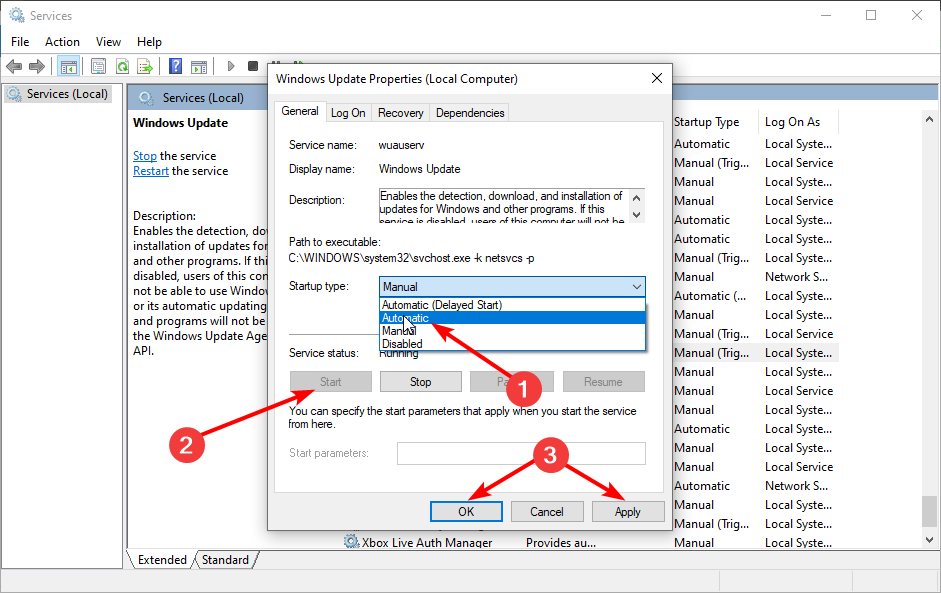
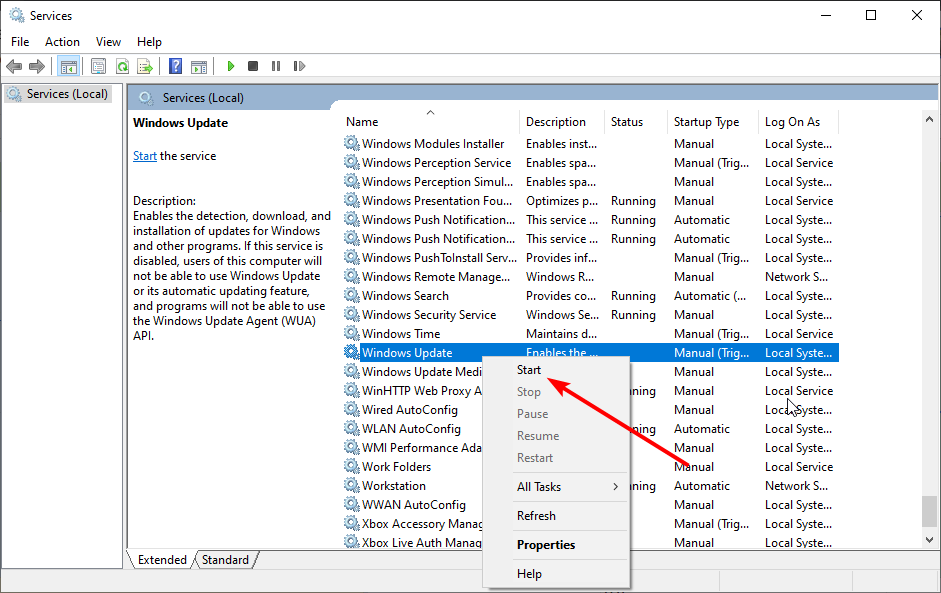
- Finally, set its Startup type to Automatic, choose the Start option, and click the Apply button, followed by OK.
The first step to disabling any problematic app or process that could be causing the Windows update service not running issue is to clean boot your PC. If the issue is fixed after restarting your PC, you need to find the service or app that could be causing the problem.
You can do this by enabling the disabled services in batches. One service that users have found to cause this issue is the StopUpdates10Guard service. Below are the steps to follow to disable or remove it.
2.2. Disable or remove faulty service
- Press the Windows key + R, type services, and click OK.
- Double-click the StopUpdates10Guard service to open its properties.
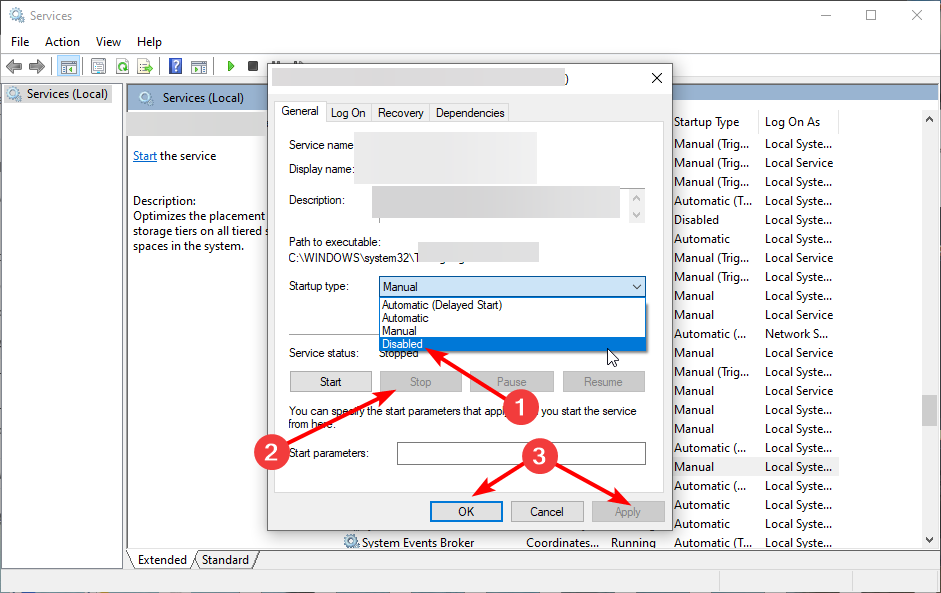
- Now, set its Startup type to Disabled and click the Stop button.
- From here, click the Apply button, followed by OK.
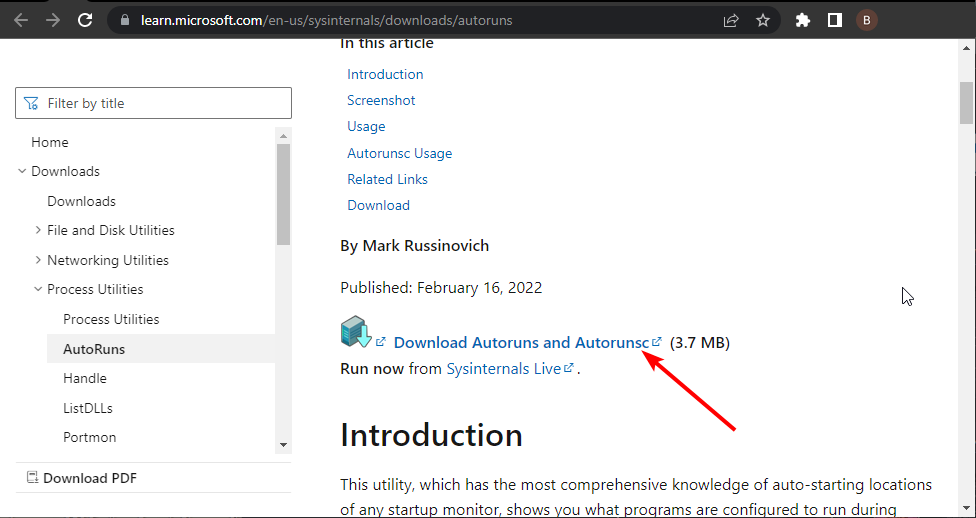
- To remove the service completely, download the Autorun tool.
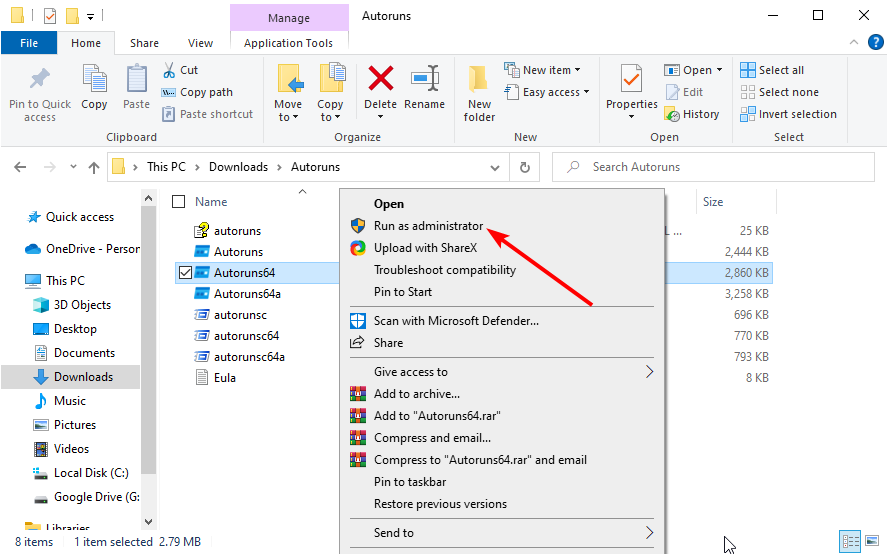
- Unzip the file, right-click the Autorun 64-bit (for 64-bit system) option, and select Run as administrator.
- Finally, look for any reference to the StopUpdates10Guard service, right-click it, and select Delete.
With this, you should be able to fix the Windows update service not running issue.
3. Clear the update cache
- Press the Windows key + R, type services.msc, and click OK.
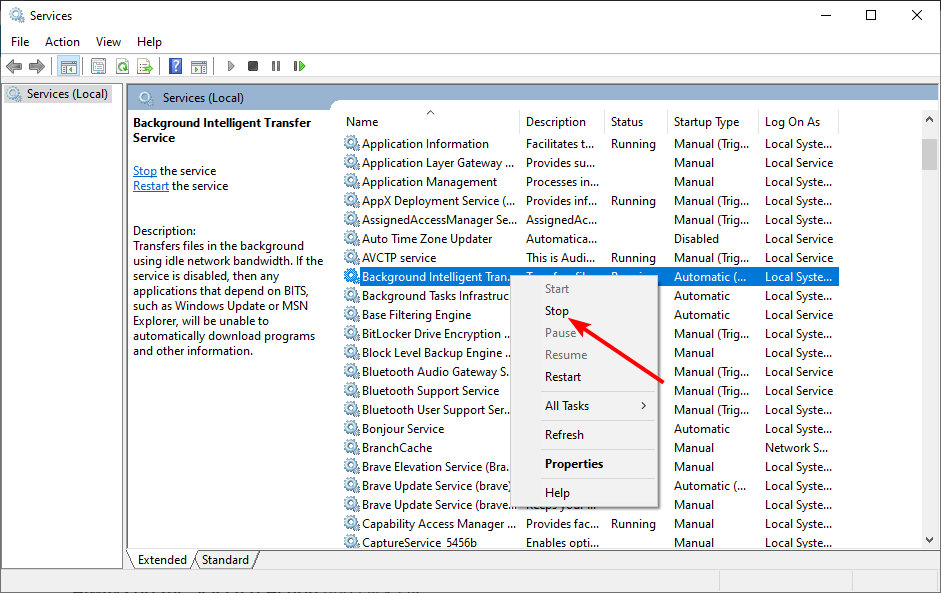
- Right-click the Background Intelligence Transfer Service and select the Stop option.
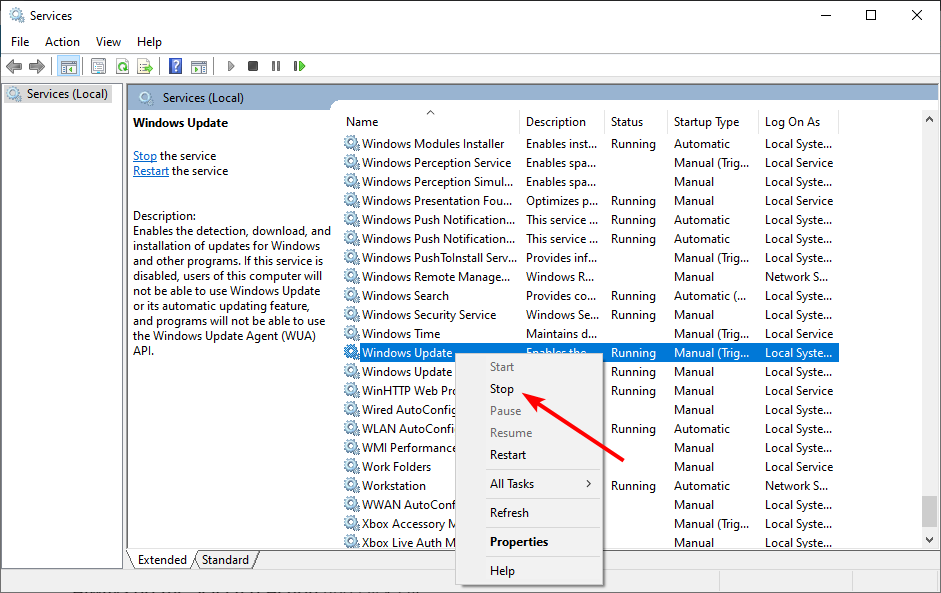
- Now, right-click on Windows Update and then click Stop.
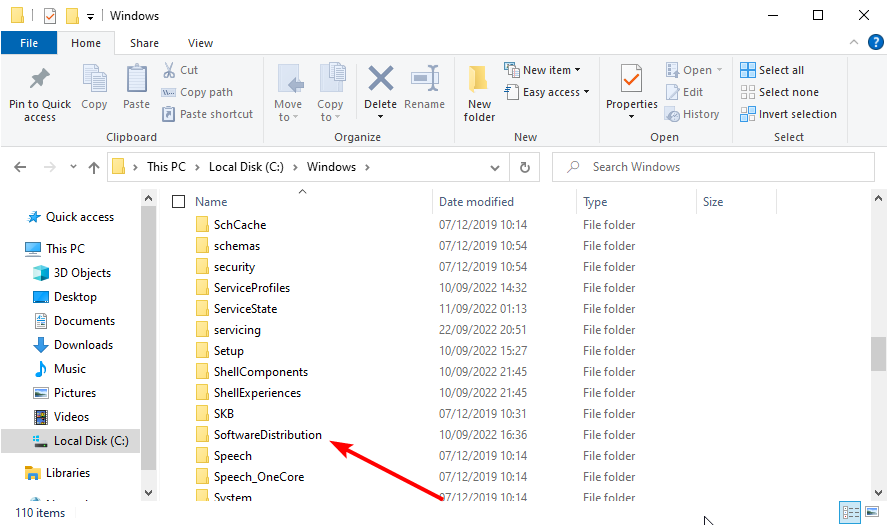
- Press the Windows key + E to open File Explorer and navigate to the path below:
C:/Windows/SoftwareDistribution - Now, delete the contents of the SoftwareDistribution folder.
- Finally, go back to the Services app, right-click the BITS and Windows Update services, and select Start.
Restart your PC after applying the steps above. You can now check if you are still getting the Windows service not running error.
Why is the Windows Update service stopped?
Below are some of the factors that can cause the Windows update service not running error:
- Faulty apps and services: One of the main causes of Windows could not start the Windows Update service on the Local Computer prompt is problematic apps. In some cases, it might be your third-party antivirus or service that is running in the background. The solution is to disable or remove the program using one of the best uninstaller software.
- Corrupt update cache: If you get the Access denied prompt while trying to install a Windows update or restart the service, it might be down to a corrupt cache. You need to clear the update cache and restart the needed services again to fix this.
With this, we have come to the end of this guide. You now have everything to fix the Windows update service not running error on your PC. All you need to do is follow the detailed instructions, and everything should be back to normal.
If you are facing other issues like Windows update not showing, check our detailed guide to restore it. We also have a guide dedicated to the 0x8024001e error in Windows Update, so don’t miss it.
Feel free to let us know the solution that helped you solve the problem in the comments below.

