Could Not Reconnect all Network Drives: 5 Solutions to Use
Everything you need to disable and fix the network alert on your PC
7 min. read
Updated on
Read our disclosure page to find out how can you help Windows Report sustain the editorial team. Read more
Key notes
- If you get could not reconnect all network drives on your PC, it might be because your OS is outdated.
- You can solve this problem by creating and running an official batch file.
- Another excellent solution to this issue is to update your operating system.
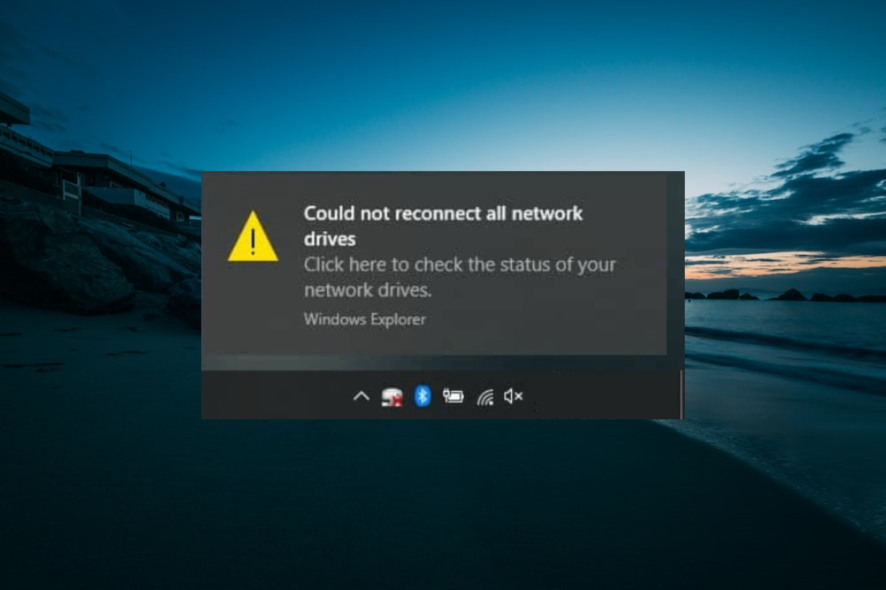
You will receive different system notifications when your PC is connected to a specific network. Among these notifications, we have the alert that says: could not reconnect all network drives.
While this default notification lets you know that some devices from your network cannot be currently used, it can also be a false positive. In this guide, we will show you how to disable the notification.
Why does Could not reconnect all network drives message appear?
Below are some of the reasons you get could not reconnect all network drives error message:
- Outdated PC: If your PC is outdated, you will likely get this error message when you connect your network drives. The solution to this is to update your operating system.
- Wrong settings: Sometimes, some settings in GPO or Regedit can be the cause of could not reconnect to all network drives. You need to make the necessary changes to eliminate the error message.
How can I fix Could not reconnect all network drives error?
Here’s what to do first:
- If this notification concerns a driver currently disconnected from your computer, you only have to re-establish the actual connection. For example, if we’re talking about an external hard drive that’s currently not recognized by your PC, and if this specific external hardware causes the actual alert, we should unplug and re-plug the USB cord.
1. Update your PC
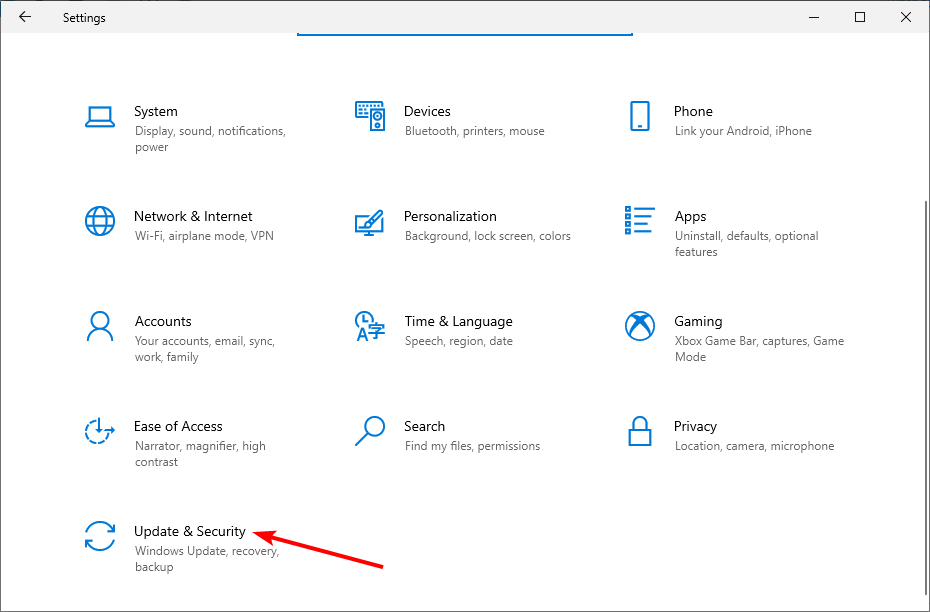
- Press the Windows key + I and select Update & Security.
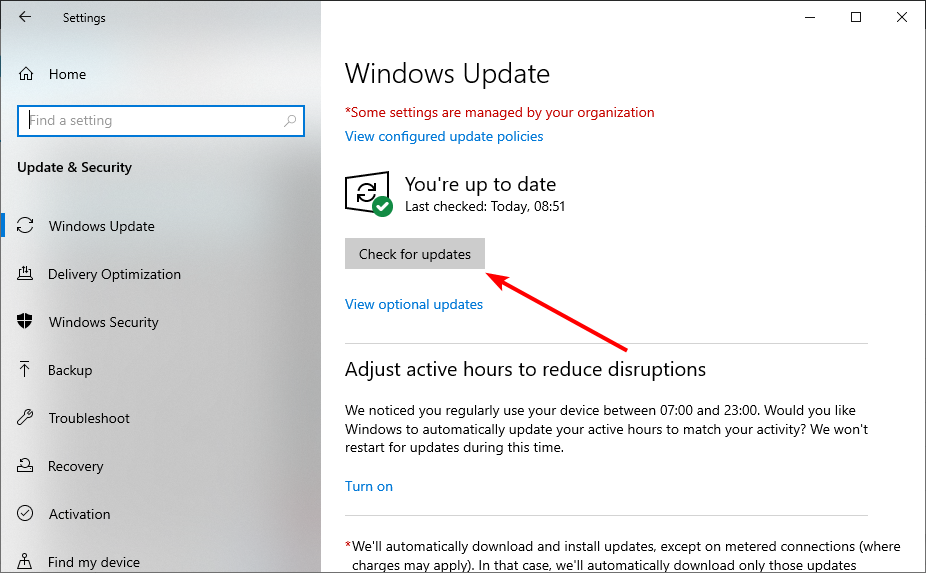
- Click the Check for updates button.
- Finally, download and install all available updates.
At times, could not reconnect all network drives issue might be due to an outdated operating system. Downloading and installing the latest patches should do the trick here.
2. Use a batch file from Microsoft
2.1. Create a startup file
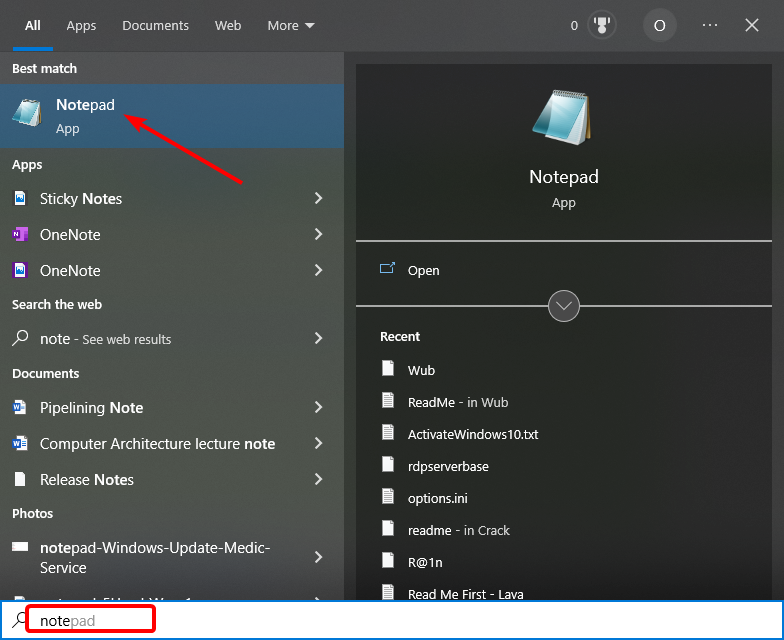
- Press the Windows key, type note, and select Notepad.
- Copy and paste the script below on Notepad:
PowerShell -Command "Set-ExecutionPolicy -Scope CurrentUser Unrestricted" >> "%TEMP%\StartupLog.txt" 2>&1
PowerShell -File "%SystemDrive%\Scripts\MapDrives.ps1" >> "%TEMP%\StartupLog.txt" 2>&1 - Press the Ctrl key + S to save the file.
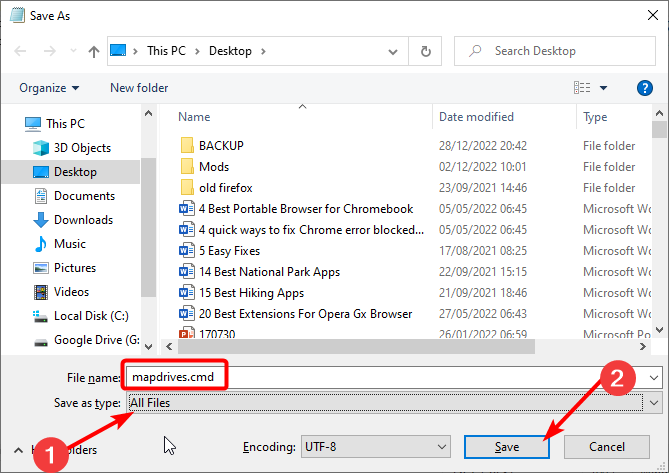
- Now, change the File name to MapDrives.cmd and choose All Files as the Save as type.
- Click the Save button.
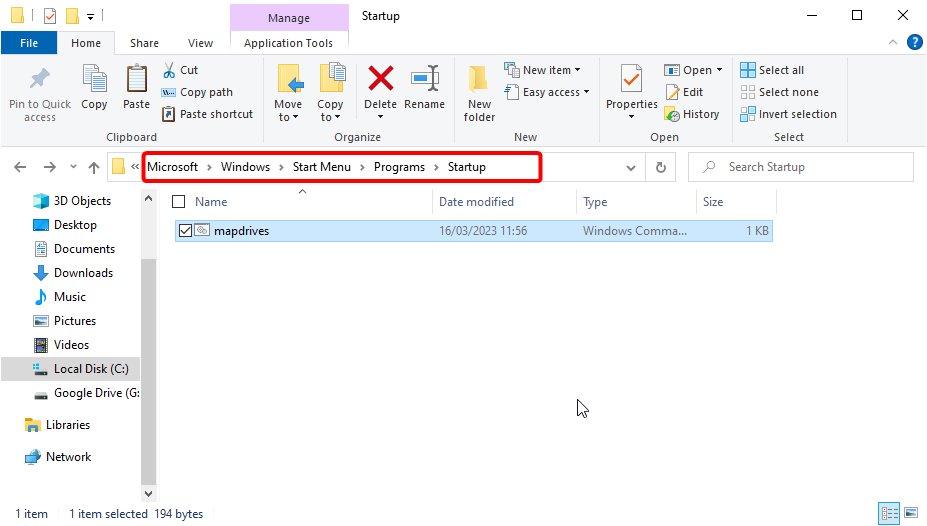
- Next, copy the MapDrives.cmd file and navigate to the path below:
C:\ProgramData\Microsoft\Windows\Start Menu\Programs\Startup - Paste the file into the StartUp folder.
- Next, open a new Notepad window and copy and paste the script below:
$i=3
while($True){
$error.clear()
$MappedDrives = Get-SmbMapping |where -property Status -Value Unavailable -EQ | select LocalPath,RemotePath foreach( $MappedDrive in $MappedDrives) {
try { New-SmbMapping -LocalPath $MappedDrive.LocalPath -RemotePath $MappedDrive.RemotePath -Persistent $True
} catch {
Write-Host "There was an error mapping $MappedDrive.RemotePath to $MappedDrive.LocalPath"
}
} $i = $i - 1
if($error.Count -eq 0 -Or $i -eq 0) {break}
Start-Sleep -Seconds 30
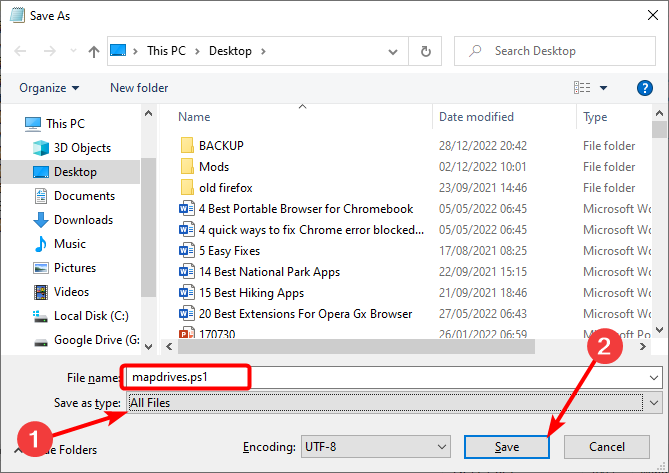
} - Now, press the Windows key + S, set the File name to MapDrives.ps1, and Save as type as All files.
- Click the Save button.
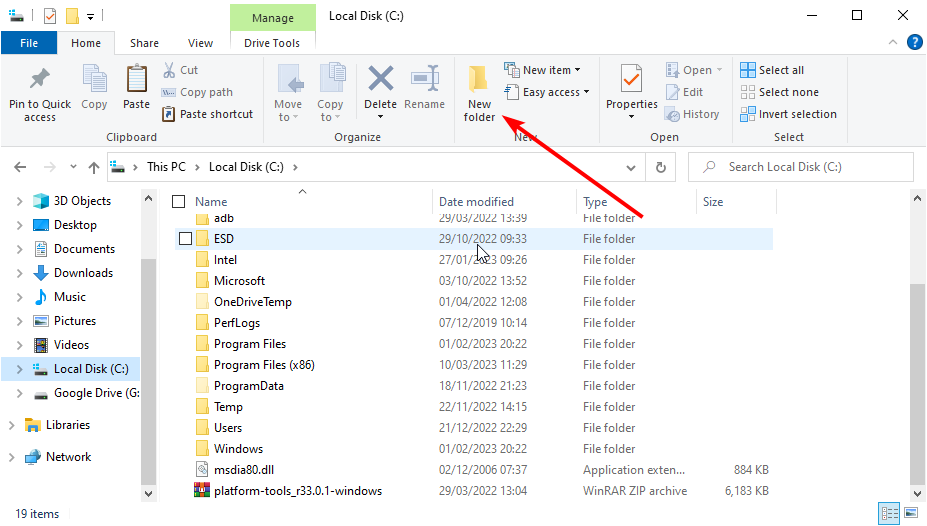
- Copy the MapDrives.ps1 file and click your C: drive in the left pane.
- Next, click the New folder icon at the top and name the folder Scripts.
- Finally, paste the MapDrives.ps1 file into the Scripts folder and restart your PC.
If you keep getting could not reconnect all network drives error message, you can fix it using the batch file from Microsoft. If this method does not work for you, you can try running the batch file following the second method.
2.2. Use the Task Scheduler
- Leave the MapDrives.ps1 file in the Scripts folder, as shown in the solution above.
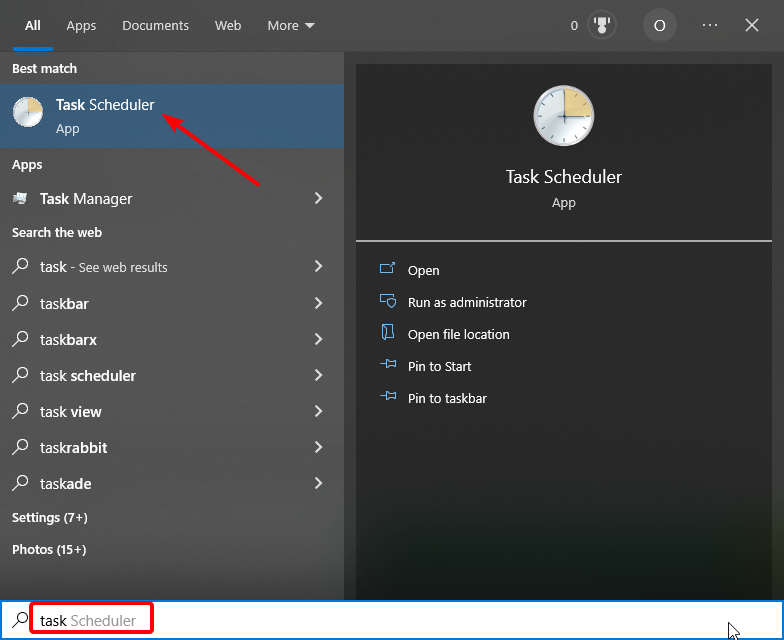
- Press the Windows key, type task, and select the Task Scheduler option.
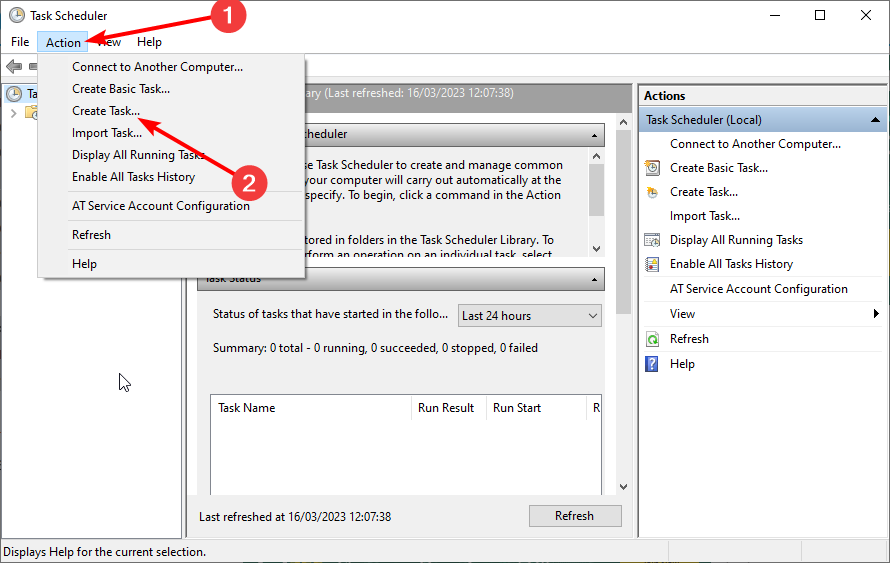
- Now, choose Action > Create Task.
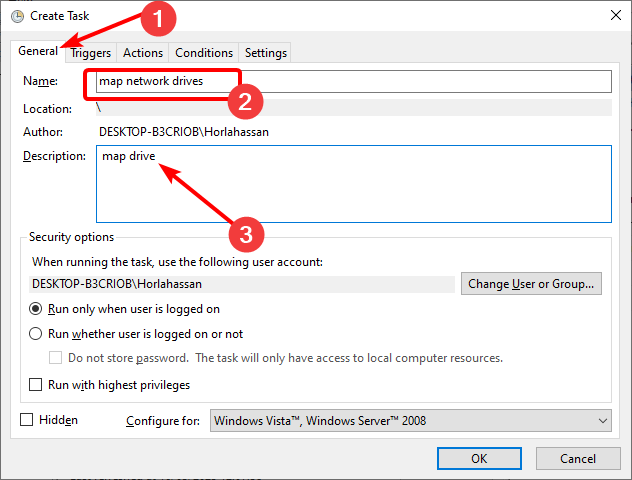
- Type the name (something like Map Network Drives) and description of the task in the Create Task dialog box under the General tab.
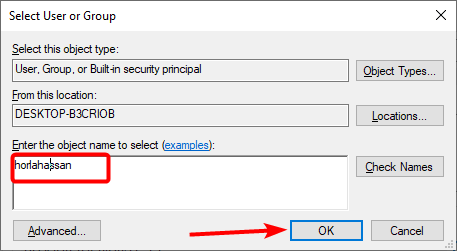
- Click the Change User or Group option, select a local user or group, and then click the OK button.
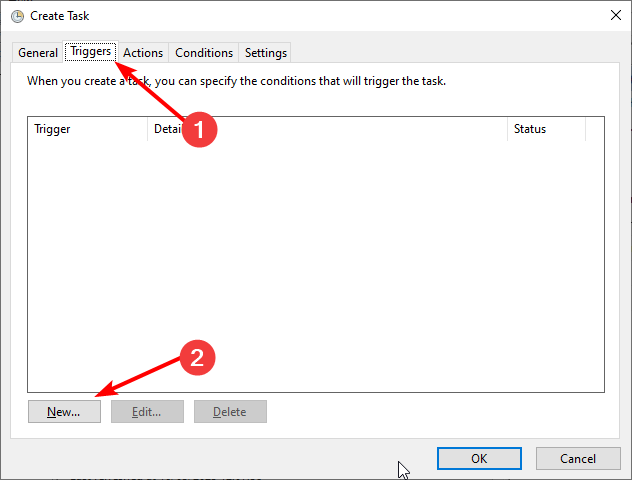
- Next, choose New on the Triggers tab.
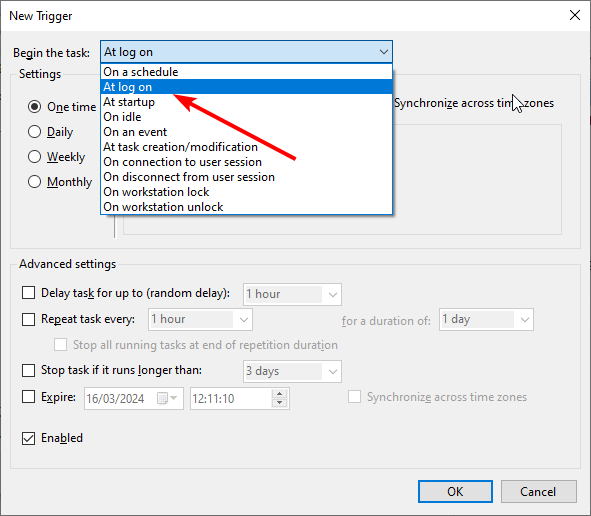
- Choose At log on under the Begin the task section.
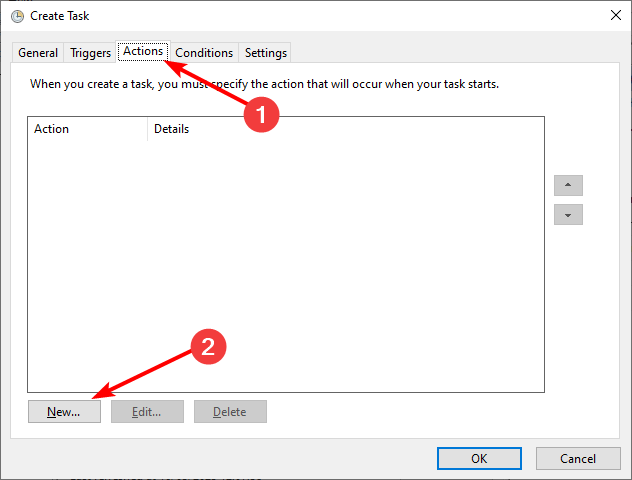
- Now, choose New on the Actions tab.
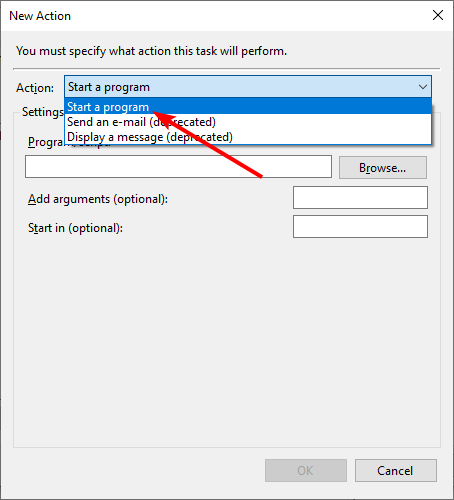
- For the Action field, choose Start a program.
- Enter Powershell.exe in the Program/script field.
- Next, type the command below in the Add arguments (optional) field:
-windowstyle hidden -command .\MapDrives.ps1 >> %TEMP%\StartupLog.txt 2>&1 - Type the location (%SystemDrive%\Scripts\) of the script file In the Start in (optional) field.
- Now, select Start only if the following network connection is available in the Conditions tab.
- Select Any connection and click OK.
- Finally, sign out and sign in to your PC to run the scheduled task.
If creating a startup file does not eliminate could not reconnect all network drives option, you can use the Task Scheduler.
3. Make Window wait for the connection before mapping network drivers
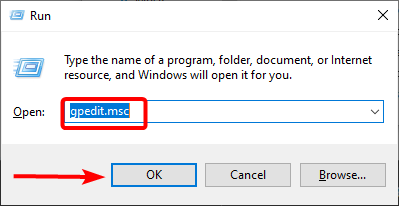
- Press the Windows key + R, type gpedit.msc, and click OK.
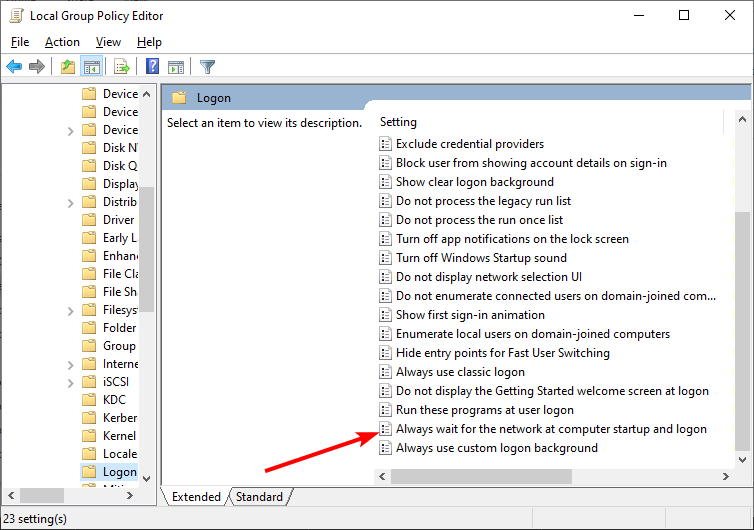
- Navigate to the path below in the left pane: Computer Configuration > Administrative Templates > System > Logon.
- Now, double-click Always wait for the network at computer startup and logon to open.
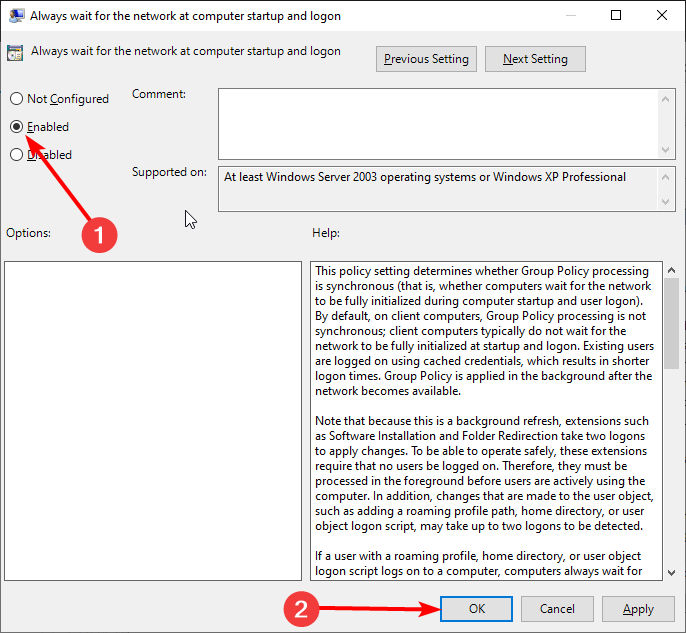
- Tick the Enabled radio button.
- Finally, click the Apply button, followed by OK, and restart your PC.
In some cases, could not reconnect all network drives message shows up because the policy that tries to map your drive is initiated at startup. However, there might be no drive connected at this point.
Hence, you must change the settings to wait until the drive is ready.
4. Disconnect network drive
- Press the Windows key + E to open Windows Explorer and click This PC in the left pane.
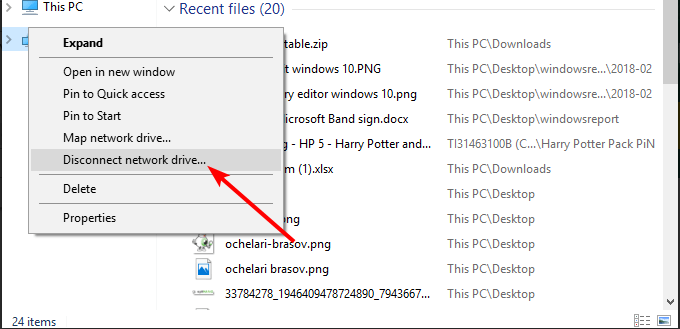
- Find the driver that’s not connected and right-click on its icon.
- From the list of options that are displayed click on the Disconnect network drive entry.
- Or, from the main window status bar, click on the Map network drive and choose Disconnect network drive.
5. Disable the Windows cannot connect to all network drivers message at start-up
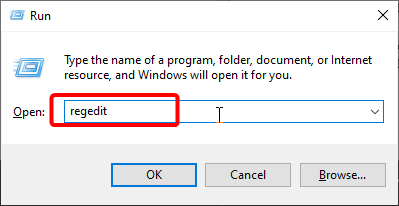
- Press the Windows key + R, type regedit, and click OK.
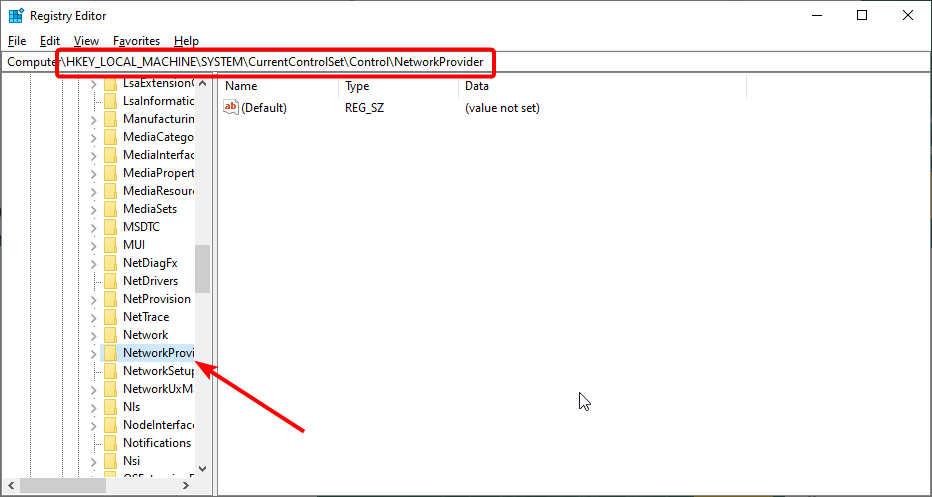
- Navigate to the path below in the pane:
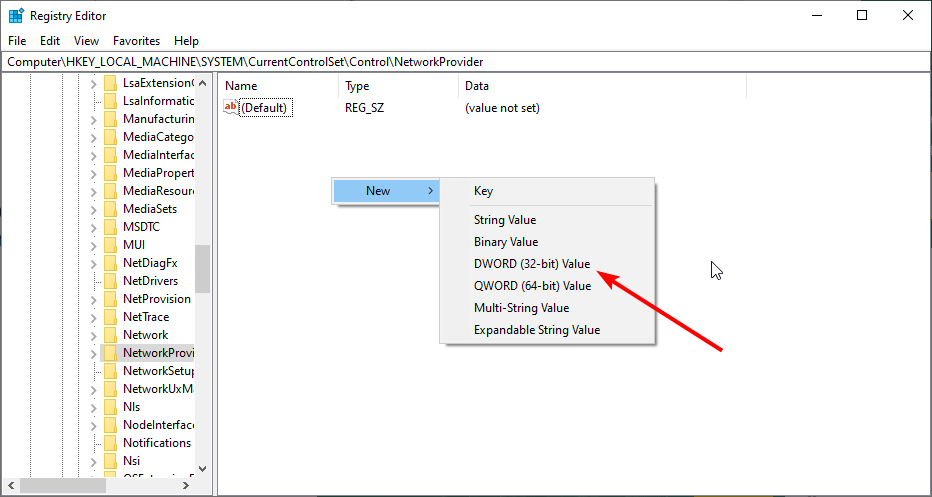
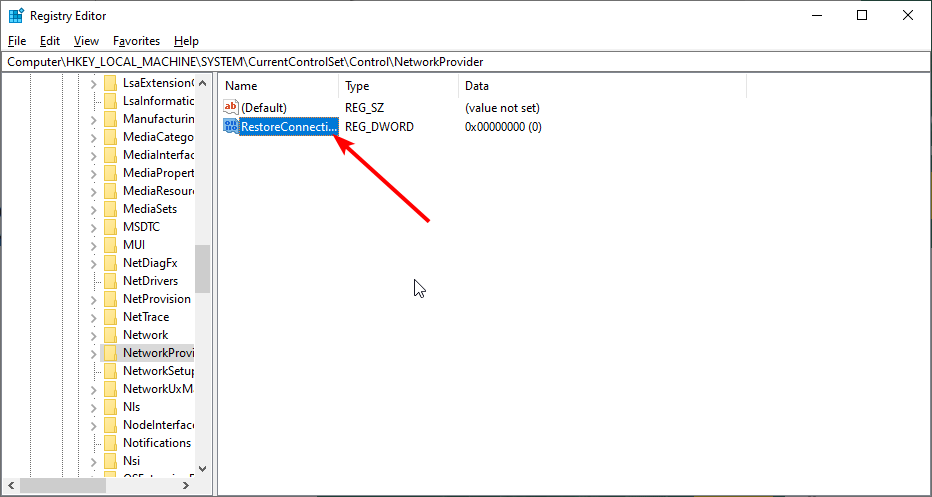
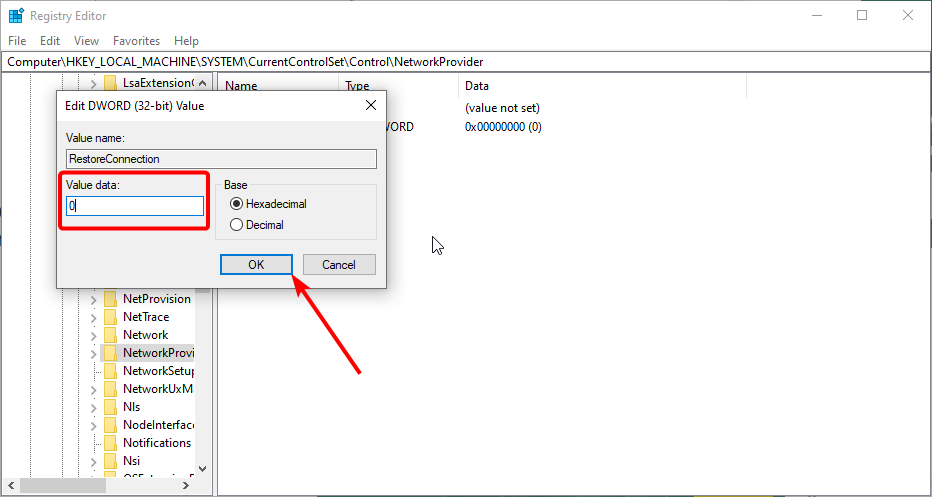
HKEY_LOCAL_MACHINESYSTEMCurrentControlSetControlNetworkProvider - Now, double-click on RestoreConnection in the right pane. If the option is not available, do the following:
- Set the Value data to 0 and click the OK button.
- Finally, restart your PC.
How to disable Could not reconnect all network drives on Windows 10 notification?
To disable could not reconnect all network drivers on Windows notification, you need to go through the Group Policy Editor. We have shown how to do this in solution four above.
The troubleshooting solutions we listed in our article should help you fix or disable could not reconnect all network drives message displayed on your Windows 10 computer.
If you can’t map a network drive on your PC, because of error_dev_not_exist, check our detailed guide to fix it easily. Network drives are known for issues, and we already wrote about WD My Cloud not showing on network in Windows 11 in a separate guide.
Feel free to let us know the solution that helped you fix this issue in the comments below.


User forum
0 messages