How to Disable Windows Defender SmartScreen: 5 Easy Steps
Disable SmartScreen from your Edge browser
Key notes
- The Windows Defender SmartScreen feature is a useful security tool that can help protect you from malicious websites and applications.
- However, if you're having problems with SmartScreen — or simply find it annoying — disabling it is an option.
- Unfortunately, doing so can leave your PC vulnerable to malicious software. That’s why you should reconsider if you’ve been planning to turn it off.

Windows Defender SmartScreen helps protect you against web-based threats by checking URLs against a list of known malicious websites, which hackers often use to spread viruses and other types of malware.
Some people disable Windows Defender SmartScreen because it slows down their PC or they don’t like the messages it pops up. If this sounds like some of the issues that make you want to disable Windows Defender SmartScreen, below are ways to go about it.


Should I disable Windows Defender SmartScreen?
Windows Defender SmartScreen is a built-in feature of Windows 11 that provides a layer of protection against malware and phishing attacks. While it can be disabled, it should only be done after careful consideration.
SmartScreen helps protect your PC by warning you before you run unrecognized apps. However, sometimes, it can block unrecognized apps. You may get a Microsoft defender SmartScreen prevented an unrecognized app from starting message.
This can prevent these apps from launching, which can be frustrating, especially if these are your most used apps.
Other reasons why disabling Windows Defender SmartScreen is a bad idea:
- Makes your computer vulnerable to malware attacks – SmartScreen filters out malware before it can infect your computer. If you disable this feature, you’ll have no protection against malicious software like ransomware or spyware.
- Your credentials become less secure – SmartScreen helps prevent unauthorized access to sensitive information such as your email address, credit card number, and password when completing online forms on websites that don’t use HTTPS encryption.
- You’re more likely to download unsafe apps – SmartScreen also checks apps when they’re installed on your computer and warns you if an app has been reported as unsafe by other users or by Microsoft itself.
If you find that SmartScreen is making your PC slow or unresponsive, it’s better to find alternative ways to improve your PC’s performance.
How do I disable Windows Defender SmartScreen?
1. Use the Microsoft Edge browser
- Launch the Edge browser and click on the three ellipses at the top right corner.
- Click on Settings.

- Next, select Privacy, search, and services, scroll down to the Security section, and toggle off Microsoft Defender SmartScreen.

2. Use the Control Panel
- Hit the Windows key, type Control Panel, and click Open.

- Navigate to Network and Internet.

- Next, click on Internet Options.
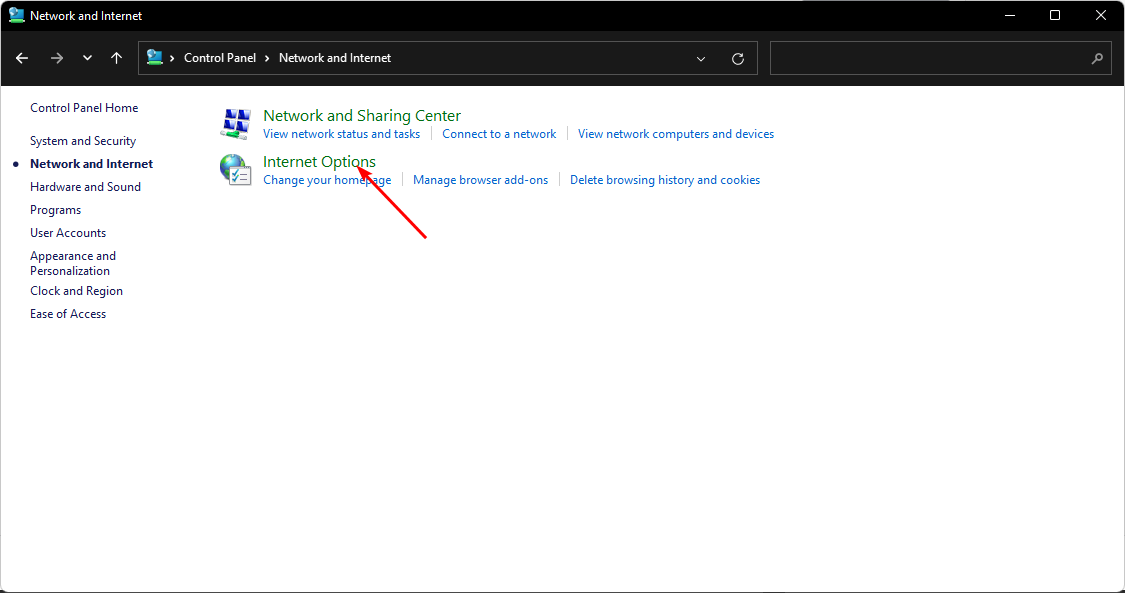
- Navigate to the Advanced tab in the Internet Properties window.

- Under the Security section, uncheck the Enable Windows Defender SmartScreen option then click on Apply and OK to save the changes.
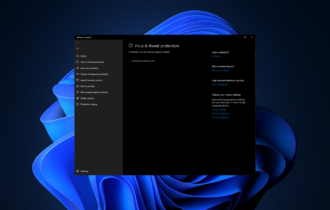
3. Use Windows Defender
- Hit the Windows key, type Windows Security in the search bar, and click Open.

- Click on App & browser control on the left pane, then select Reputation-based protection settings under Reputation-based protection.

- You’ll now open a page that displays four filters. You can choose those that only apply to you or toggle off the disable button for all four.

For some users, the option to disable the Smartscreen will be greyed out. This means that your organization manages those settings, and you can’t make changes. You can contact your administrator to disable them if you don’t need them.
4. Use the Group Policy
- Hit the Windows + R keys to open the Run command.
- Type gpedit.msc in the dialog box and hit Enter to open the Group Policy.
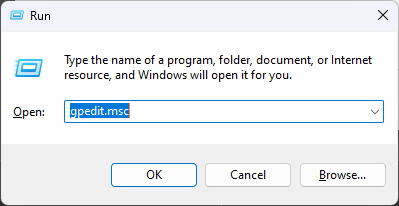
- Navigate to the following location:
Computer Configuration/Administrative Templates/Windows Components/File Explorer - Double-click on Configure Windows Defender SmartScreen to edit.

- Click on the Disabled checkbox then hit Apply and OK.

- Close the Group Policy, then restart your PC.
5. Use the Registry Editor
- Hit the Windows + R keys to open the Run command.
- Type regedit in the dialog box and hit Enter to open the Registry Editor.
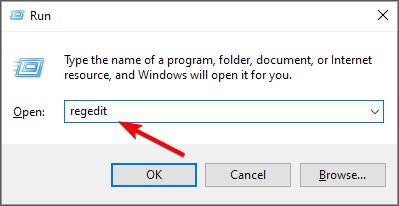
- Navigate to the following location:
HKEY_LOCAL_MACHINESOFTWAREPoliciesMicrosoftWindowsSystem - On the right pane, double-click on EnableSmartScreen to modify. If unavailable, right-click on an empty space, select New DWORD (32-bit) Value, and rename it as EnableSmartScreen.

- Under Value data set it as 0, then click OK to save changes.

- Restart your PC to effect the changes.
And that’s how to disable SmartScreen from the registry. We highly recommend you try the four other methods and only use the registry if necessary. Editing the registry can be disastrous, especially for novices.
To cushion yourself from any after-effects that could render your PC unusable, ensure you create a restore point first. This way, you’ll have a point of return if anything goes wrong.
We also have an exciting article on what to do if your Windows Defender SmartScreen is blocked.
Share with us any additional thoughts on this topic in the comment section below.
Read our disclosure page to find out how can you help Windows Report sustain the editorial team. Read more


Improve this guide


User forum
0 messages