The Display Settings Could Not be Saved [Error Fix]
This error can be easily fixed using the solutions listed below
Key notes
- You aren't the only Windows 11 user to stumble across this error on Windows 11.
- So, if the display settings cannot be saved, the guide below is precisely for you.
- Go through the solutions carefully, and you will be back to normal in no time.

Display-related issues are undoubtedly the most annoying because of the many problems users are prone to discover while dealing with the Windows 11 operating system.
Many of us are unfortunate enough to run into display issues or binging our favorite shows in the middle of work.
However, we are always here to help with such problems, so don’t worry. And, if your PC shuts down instead of sleeping, you will also find that answer here.
We also have a guide that covers autorun.dll errors on Windows 10/11, just in case you or one of your friends need such knowledge.
Why weren’t my display settings saved?
Don’t worry, we’re not talking about any severe or system-breaking bugs, so your PC is not even close to becoming bricked or unusable.
However, the causes triggering The display settings could not be saved and have to be dealt with swiftly to avoid future unpleasant surprises.
And before we get into how we can fix this, let’s see exactly what triggers it:
- Outdated or corrupt display drivers – To cover this aspect of the issue, feel free to explore how to update your drivers with ease.
- Obsolete version of Windows OS – This can be resolved by simply installing the latest update released by Microsoft.
- Incorrect order/identity of plugged monitors – Fixing this problem will involve sorting out the monitor’s number system.
Now that we know what causes this erratic behavior let’s get to why we are here and find out how we can eliminate this problem.
How can I fix the display settings could not be saved error?
1. Change the display resolution
- Press Win + I to access Settings.
- Select the System tab, then click on Display.

- Select the desired resolution, then close the Settings window.

2. Update the graphics driver
- Search for Device Manager and open the app.

- Expand Display adapters, right-click the one you are using, then select Update driver.
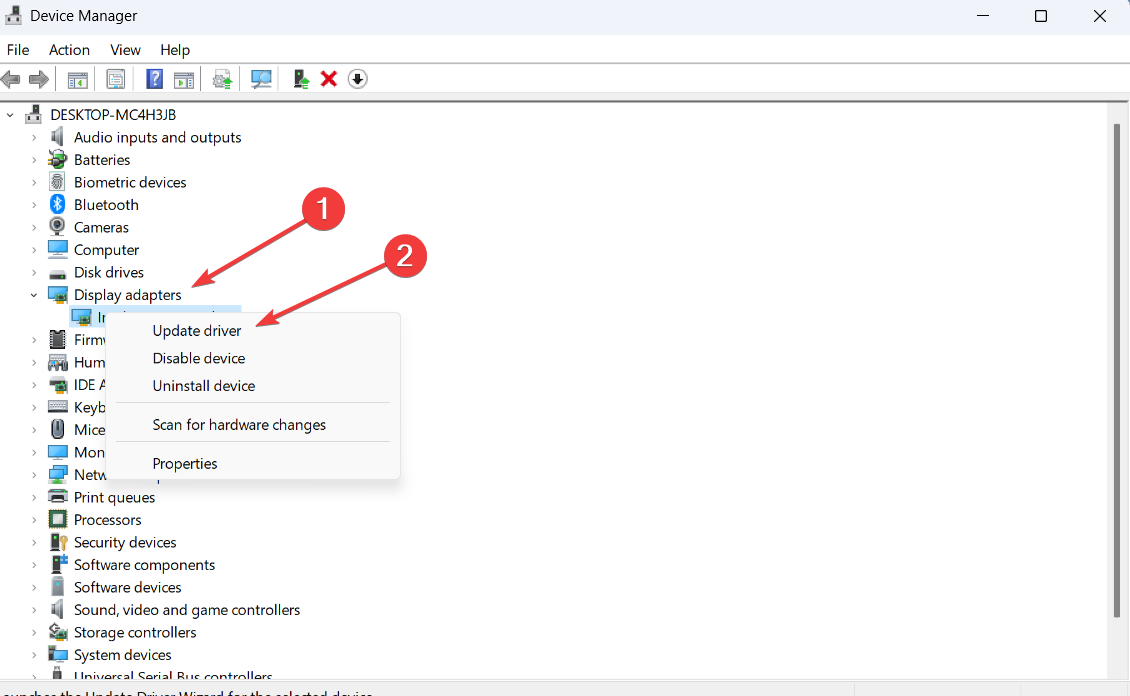
- Select Search automatically for drivers.

- Download and install the Outbyte Driver Updater app.
- Launch the software and wait for the app to detect all incompatible drivers.
- Now, it will show you a list of all outdated drivers to select the ones to Update or Ignore.

- Click on Update & Apply Selected to download and install the latest versions.
- Restart your PC to ensure the applied changes.

Outbyte Driver Updater
Maintain your device healthy by letting OutByte Driver Updater find the latest driver options.3. Change monitor order
- Press Win + I to access Settings.
- Select the System tab, then click on Display.

- Click on Identify to display a number on each screen to identify which screen is primary and which is secondary.

- Now click on the screen number you want to make primary, expand Multiple displays and then check the box next to Make this my main display.

4. Run the troubleshooter
- Search for cmd, then click Run as administrator to open Command Prompt with administrator privileges.
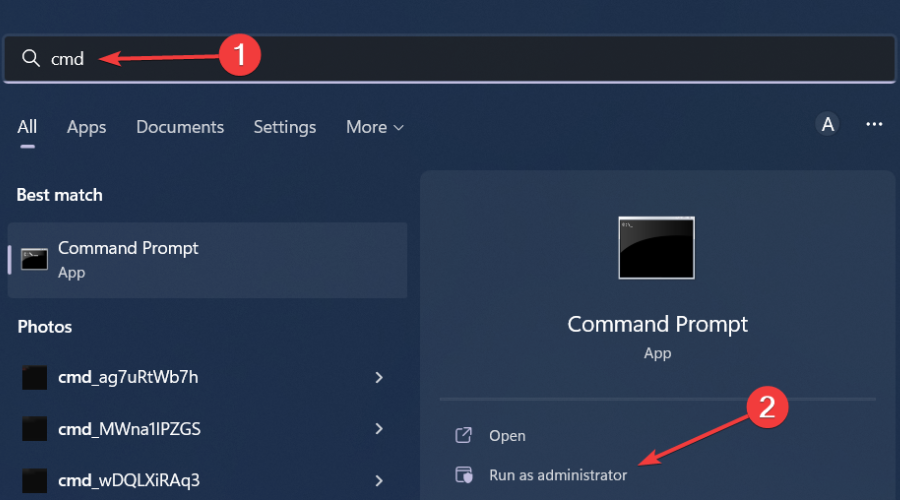
- Type in the following command, then press the Enter button on your keyboard:
exe -id DeviceDiagnostic
- Click on Hardware and Devices troubleshooter, run the tool and restart your PC.
5. Reinstall the graphics card driver
- Search for Device Manager and open the app.
- Expand Display adapters, right-click on the one you are using, then select Uninstall device.

- Your PC will automatically search for the latest drivers and install them.
After reading this article, you will be much more prepared and knowledgeable when such a situation arises.
Remember that not all issues are as severe and need a clean reinstall for Windows 11. Sometimes, the most straightforward solutions are the most effective ones.
Leave a comment below if this simple guide has also helped you fix this annoying display issue for the latest Microsoft-designed operating system.
Read our disclosure page to find out how can you help Windows Report sustain the editorial team. Read more


Improve this guide


User forum
0 messages