Windows Hello Not Available on Domain? Here's Why and What You Can Do
These quick fixes have been tested by our team
Key notes
- Windows Hello is not available on the domain issue happens because it has been discontinued on the domain following the 1607 update.
- To use Windows Hello on the domain, you must deploy this service on a business account.
- Installing OS updates is the first step in fixing any software-related issue.

If you’re on a work or school computer joined to a domain, you might have noticed that Windows Hello just doesn’t show up as an option.
Many organizations disable it on domain-joined PCs to keep things secure. It’s annoying, but there’s usually a good reason behind it, and some steps your IT team can take if you really need it.
What can I do if Windows Hello is not available on domain?
1. Disconnect from Work or School Account
- You may find the Access Work or School option by going to Windows Settings and then Accounts.

- Disconnect the Work or School Account setting with the bright Windows logo next to it.
- You shouldn’t change the Connected to domain setting.
- Next, select Sign-in Options. PIN and fingerprint are no longer grayed out. Make sure convenience PIN sign-in is enabled if it’s still grayed out.
- Select PIN first, then set fingerprints.
- Go back to Settings, Accounts, and select Access Work or School.
- Enter the user’s email address and password after clicking Connect.

You must disconnect the Work or School Account service and then reconnect if your company’s PCs are domain-joined. By disconnecting, you may set up your PIN and fingerprint.
2. Set registry key
- Open the Windows Registry Editor by typing Regedit in the Start menu search box.

- Go to the following location to continue:
Computer\HKEY_LOCAL_MACHINE\SOFTWARE\Policies\Microsoft\Windows\System
- When you get to the directory, make a DWORD called AllowDomainPINLogon by right-clicking on the page.
- Put 1 as the value.
- Restart your computer.
Registry Editor is a useful application to alter registries to fix issues with Windows Hello.
3. Update Windows
- A Run dialog box will appear if you simultaneously click the Windows key and R on your keyboard.
- Enter wuapp.exe in the text box and hit Enter to launch the Windows Update tab of the Settings app. (Or look for the Windows update tab in Settings.)

- When you reach the Windows Update screen, click Check for updates.

- Next, install each pending update by following the on-screen instructions that appear.
- After each Windows update has been installed, restart your computer.
Updating Windows is always the first step in fixing any issue since Windows patches often fix bugs and errors in the OS.
4. Make sure you have the Pre-requirements installed
- Install Active Directory Domain Services on a Domain Controller running Windows Server 2016 or later.
- Make sure that the Active Directory Schema is 2016 or above.
- Active Directory Certificate Services (ADCS) 2012 or above is required.
- An HTTP-accessible certificate revocation list (CRL) is required.
- You need a resolvable DNS for the CRL on the client.
- A new Kerberos Authentication Template will be created, which must be deployed on all Domain Controllers (overwriting the previous one).
- Setup, configure and synchronize users from on-premise AD into AAD with Azure AD Connect.
- Licensing for Azure AD Premium P1 or P2 or equivalent.
- Installation of the Domain Controller Root Certificate for the clients.
Before attempting to deploy Windows Hello for business, make sure you have the necessary preparations.
5. Run an SFC scan
- Type Command Prompt or CMD into the Start Menu search box, right-click the top result and select Run as administrator.

- Type the following after starting the tool:
sfc /scannow.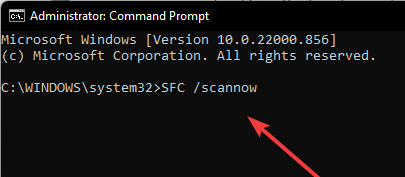
- The System File Checker will now perform an integrity check on your computer’s protected operating system files.
- It might take some time to finish. Once you’ve started the process, you can’t stop it before it’s finished.
- Restart your computer.
How do I set up Windows Hello for Business?
Cert-Trust and Key-Trust are two distinct implementations of Hello for Business by Microsoft. The default and simplest to set up is Key-Trust.
Each of these techniques needs certain software and apps. Visit this page on how to Setup Windows Hello for Business because the instructions are too lengthy to fit in one article.
But if you have set up Hello for Business but it still doesn’t work on the domain, here are five quick fixes.
Wrapping up
While Windows Hello might be blocked on domain-joined devices by default, it’s not a dead end. With the right Group Policy changes or Windows Hello for Business setup, your IT team can enable secure biometric sign-in across your organization.
Still running into issues? You might be dealing with something else under the hood. For example, the Windows Biometric Service might have stopped working, or your Hello Face driver could be missing or outdated.
Some users also see the Windows Hello face option marked as unavailable, or find that Windows Hello isn’t working at all in Windows 11. And if your device doesn’t support it, there might be no compatible fingerprint scanner installed.
Read our disclosure page to find out how can you help Windows Report sustain the editorial team. Read more


Improve this guide


User forum
0 messages