How to install Active Directory in Windows Server
A comprehensive step-by-step guide on configuring the Directory
Key notes
- As soon as you finish installing your preferred Windows Server, whether it is the 2012, 2016 or 2019 version, you can proceed to install the Active Directory as well.
- The Server Manager tool that’s available to use on your PC comes in very handy and allows you to both install and configure the Active Directory.
- Read on to find out how to perform this installation yourself.

After the installation and initial configuration of the server of choice (be it 2012, 2016, or 2019), the next step is to install Active Directory (AD) on your server.
Besides centralized domain management, this directory service has many directory-based uses. So, if you were wondering how to install Active Directory in Windows Server, follow the steps below.
How do I install Active Directory on Windows Server?
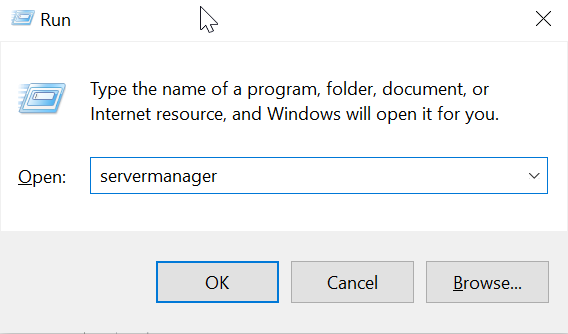
1. Press the Windows + R keyboard buttons at the same time to open the Run dialog, type servermanager in it, and then press Enter.
Alternatively, you can also open the Server Manager menu via Taskbar, by clicking on its icon.
2. Select Add roles and features in the dashboard.
3. Once you see the Roles Features Wizard, select the Role-based or features-based option and then click Next two times in a row.
4. Now, click Active Directory Domain Services and then press on Add features.
6. Add the features you want to install and then click Next.
7. Check everything before hitting Install.
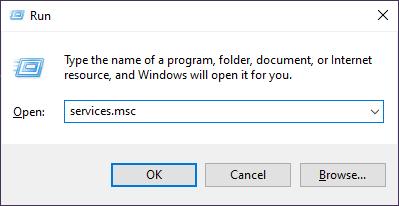
8. Now, press the Windows key + R to bring the Run command line and type services.msc. Press Enter.
9. Under Services, locate the Remote Registry service. Right-click on it and choose Start from the contextual menu.
10. Open the Server Manager again.
11. From Notifications, select Post-deployment configuration and then click Promote this server to a domain controller.
12. In the Deployment Configuration tab, choose Radial options and then click Add a new forest.
13. Insert your domain name and then click Next.
14. Choose Forest functional level and Domain.
15. Enter and confirm a password for DSRM (Directory Services Restore Mode), and then click Next.
16. In a few new windows, confirm NetBIOS name select the locations for the Database, SYSVOL folders, and Log files.
17. Click Next and then finally click Install.
18. Reboot the Windows server.
Installing the Active Directory on Windows Server is a lengthy but easy-to-follow process that can be done by anyone, as it doesn’t require a lot of technological knowledge.
The entire installation is done via the built-in Server Manager tool on your device. Upon installing the Active Directory, you can also configure it to your liking, as show in the steps above.
Along the way, you might need to make certain configuration changes depending on the features you require.
Before you go, you should know that issues such as An account with the same name that exists in Active Directory can appear as well, but we have a guide that addresses them.
These were instructions on how to install Active Directory on Windows Server. If you have any questions, make sure to post them in the comments section below.
Read our disclosure page to find out how can you help Windows Report sustain the editorial team. Read more


Improve this guide


User forum
0 messages