Windows Resource Protection Found Corrupt Files [Error Fix]
8 min. read
Updated on
Read our disclosure page to find out how can you help Windows Report sustain the editorial team. Read more
Key notes
- If Windows Resource Protection is unable to fix corrupt system files, it’s likely that the files are beyond repair, or there are conflicting processes or programs running.
- To solve this, you can run the DISM tool, perform a Startup Repair, or try the other methods here.
- Also, find out how to manually fix a corrupt file.
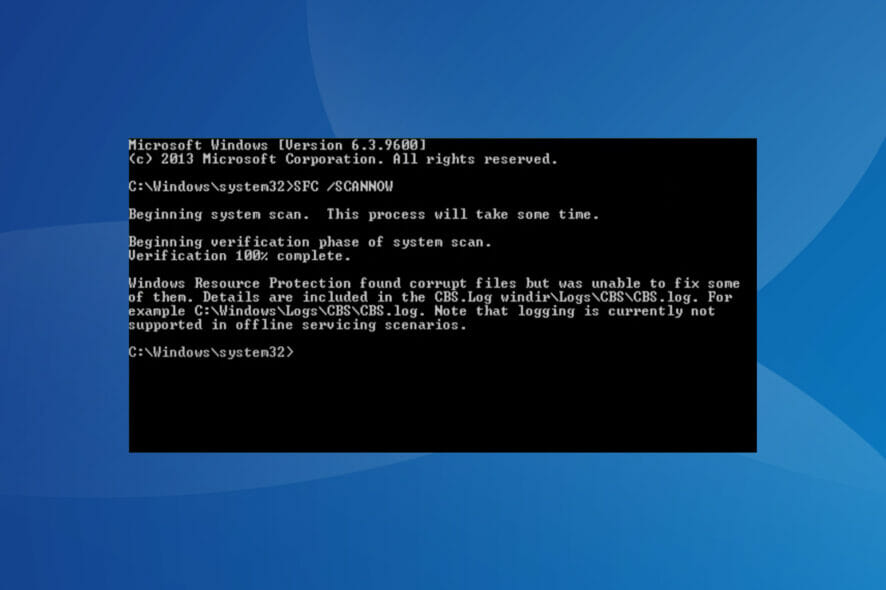
Whenever the computer feels buggy or does not respond to commands properly, our first hunch is to check for corrupt system files. However, many users came across the Windows Resource Protection found corrupt files but was unable to fix some of them message.
The message is seen when running the SFC (System File Checker) scan to automatically identify and replace the corrupt system files on the computer.
But, as is the case with other errors, there are many ways to fix this problem as well. Read the following sections to find out all about it and the most effective solutions.
What are corrupt files?
Corrupt files are often confusing since these exhibit a behavior similar to malware or virus. If you try to open one, it would either lead to a crash or display an error. Distinguishing these is a tricky affair but with the built-in tools provided in Windows, you can easily fix these.
A file may corrupt due to a number of reasons. One of the common ones includes power failure and the subsequent crash of the PC. If you are trying to save the file during this period, there’s a likelihood that it would corrupt.
Also, several third-party applications may corrupt a file while modifying it, though if you are careful with the apps you install on the system, this wouldn’t happen. Oftentimes, the bad sectors on the disk too can lead to corruption of the files stored on them.
Therefore, it’s recommended that you periodically defragment the hard drive to ensure that it remains in a healthy state. But, never defragment an SSD (Solid State Drive), since it could affect the state of the drive and reduce its life.
Whatever be the underlying cause, the SFC scan is usually able to take care of things. However, if the SFC scan found corrupt files but is unable to fix them in Windows 11, there are a bunch of ways to fix the problem.
What do I do if Windows Resource Protection is unable to fix corrupt system files?
1. Run the DISM tool
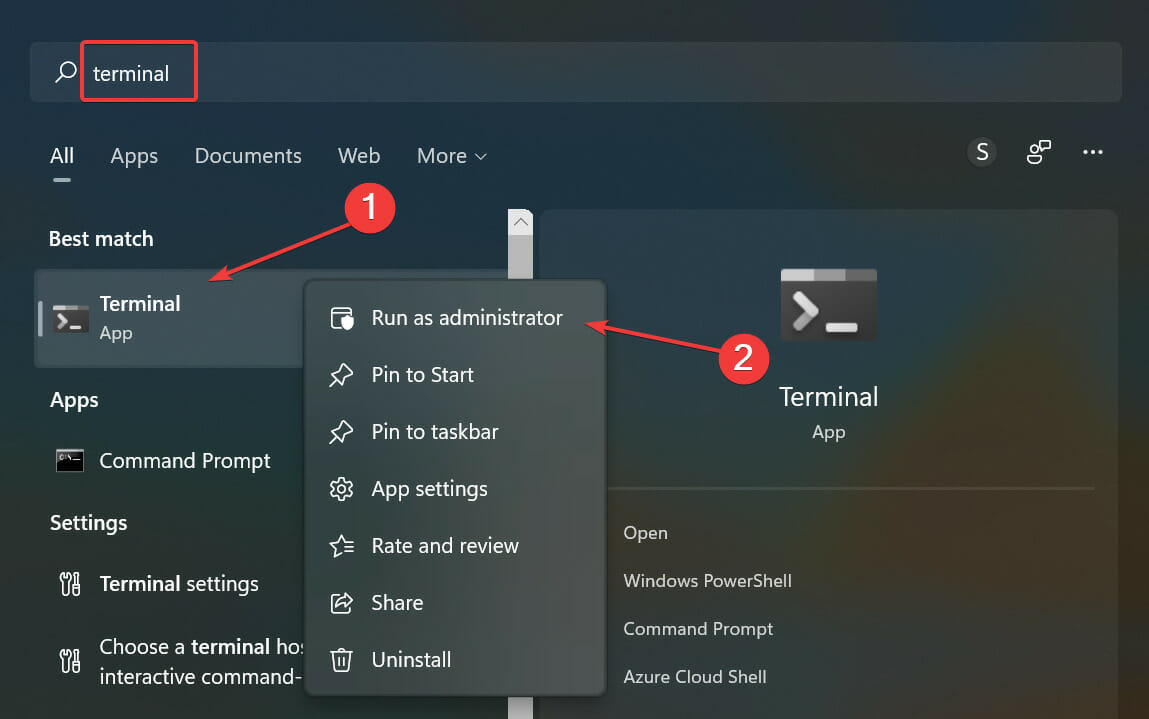
- Press Windows + S to launch the Search menu, enter Terminal in the text field at the top, right-click on the relevant search result, and select Run as administrator from the context menu.
- Click Yes in the UAC (User Account Control) prompt that pops up.
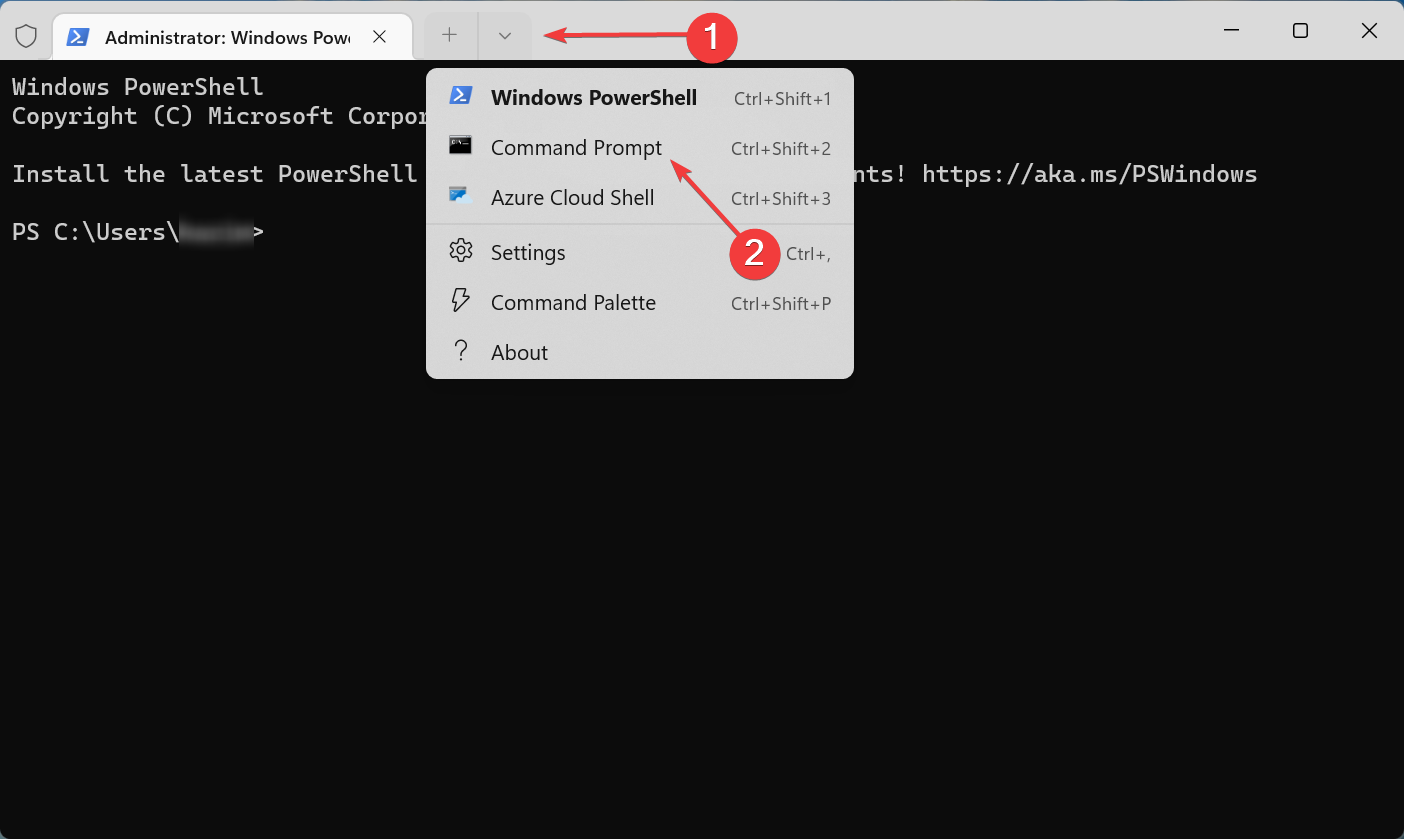
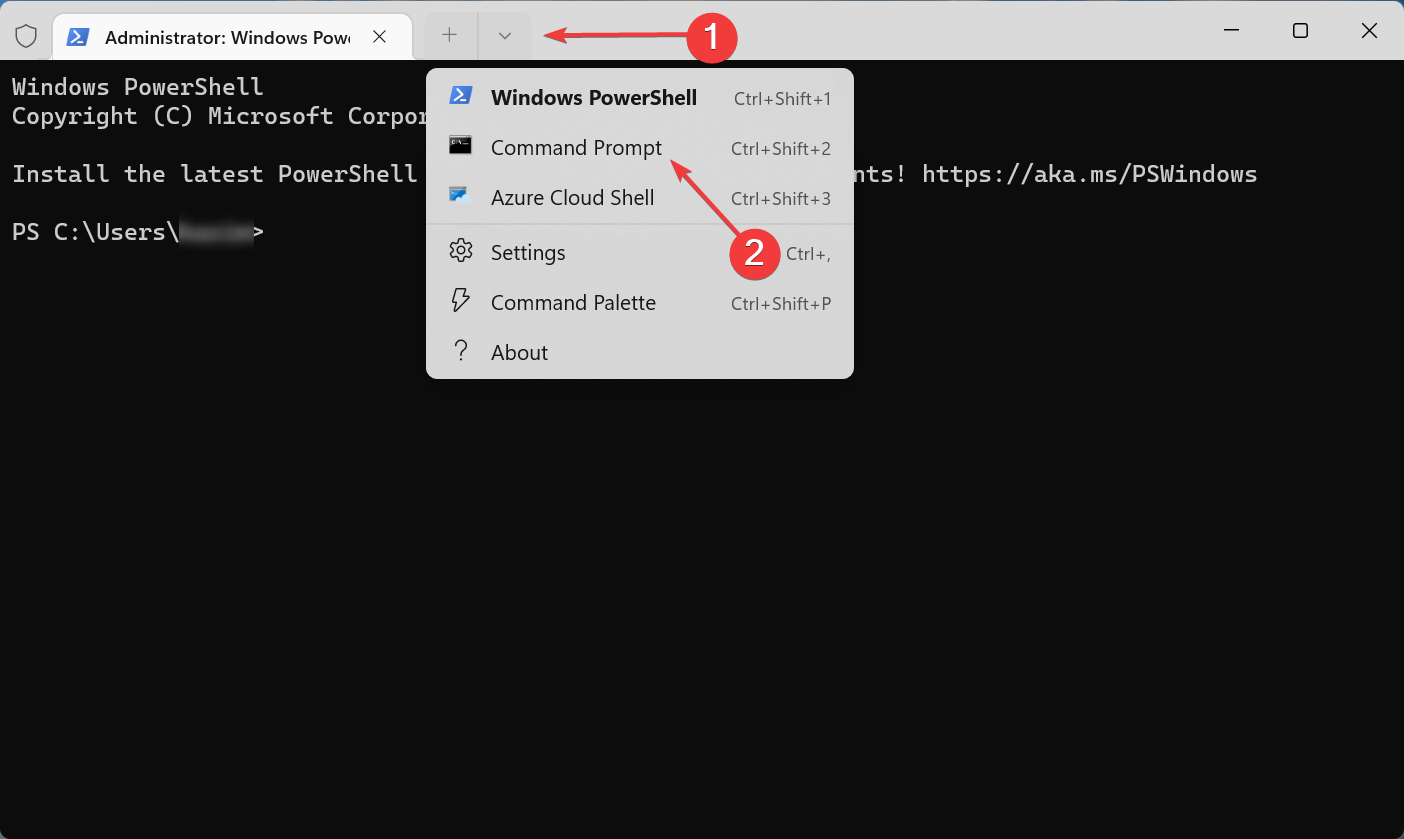
- In Windows Terminal, click on the downward-facing arrow and select Command Prompt from the menu to open it in a new tab. Alternatively, you can hit Ctrl + Shift + 2 to launch Command Prompt.
- Now, paste the following three commands one at a time and hit Enter after each:
DISM /Online /Cleanup-Image /CheckHealthDISM /Online /Cleanup-Image /ScanHealthDISM /Online /Cleanup-Image /RestoreHealth
Once done, restart the computer for the changes to come into effect, and check if the Windows Resource Protection found corrupt files but was unable to fix some of them error is eliminated. In case, the SFC scan is still unable to fix corrupt system files, head to the next method.
2. Perform a Startup repair
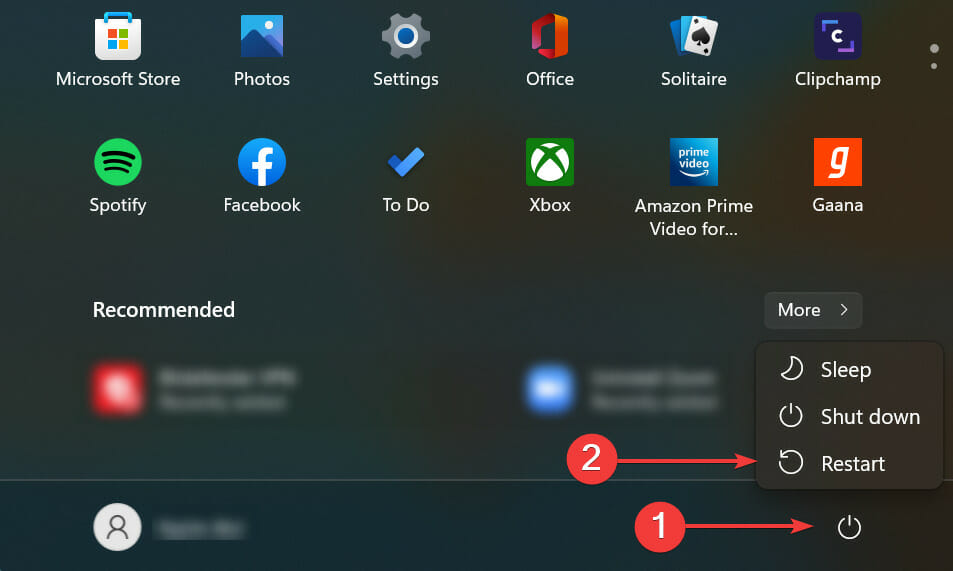
- Press the Windows key to launch the Start menu, click on the Power icon, hold the Shift key and then select Restart from the list of options.
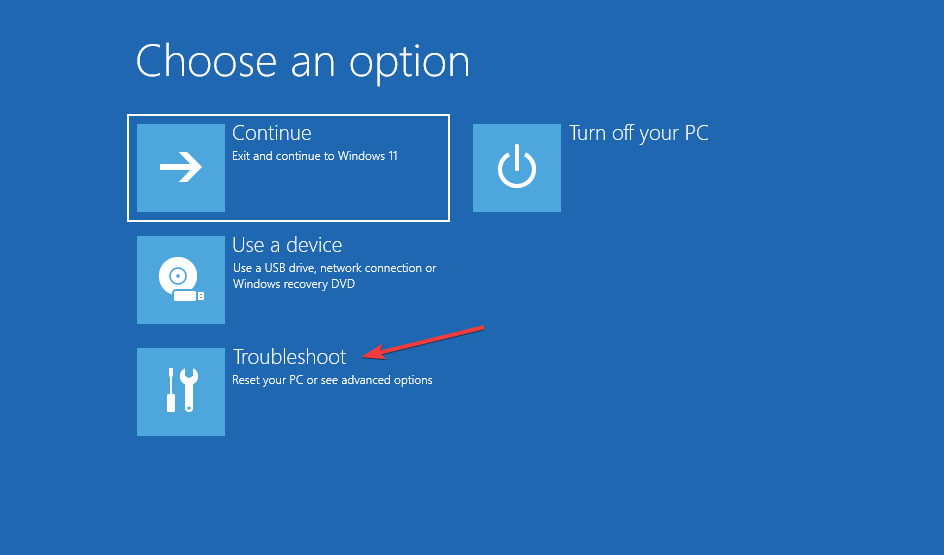
- Your computer will now restart in the Windows RE (Recovery Environment).
- Select Troubleshoot from the options that appear here.
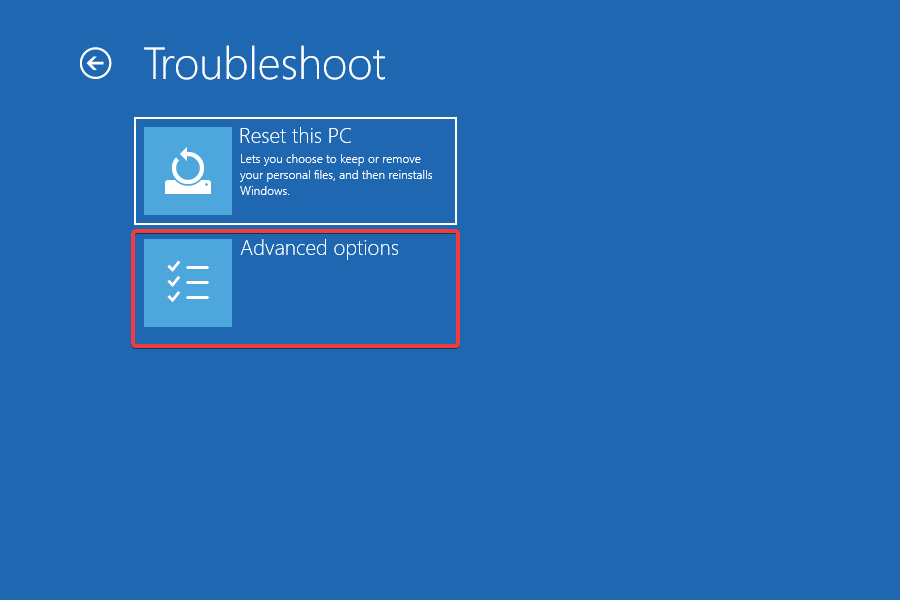
- Next, click on Advanced options.
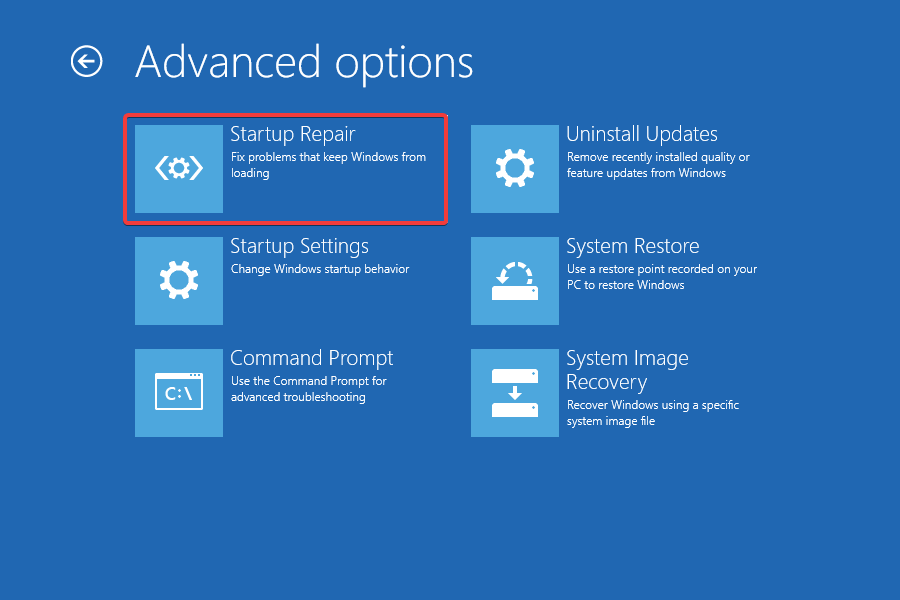
- Now, select Startup Repair from the options listed here.
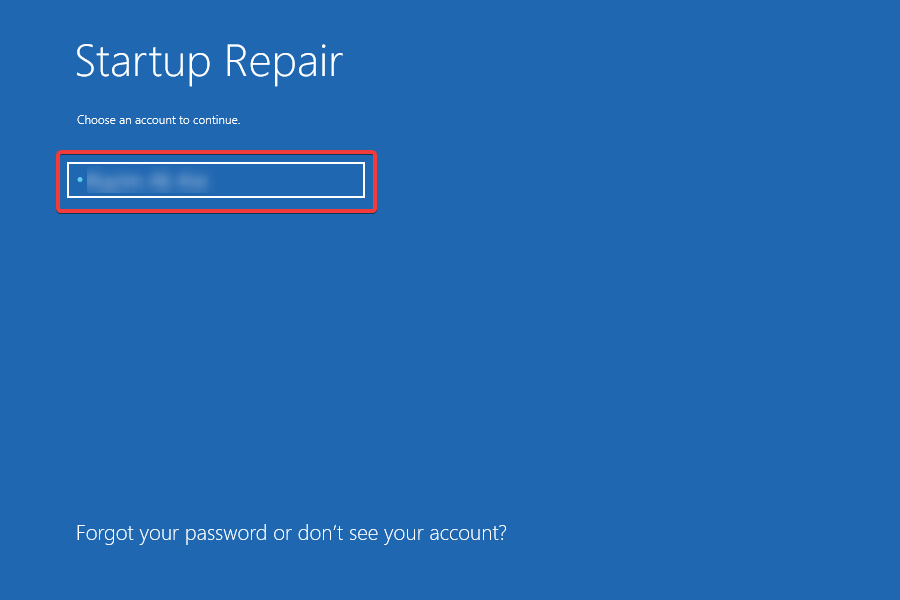
- Choose an account to proceed with.
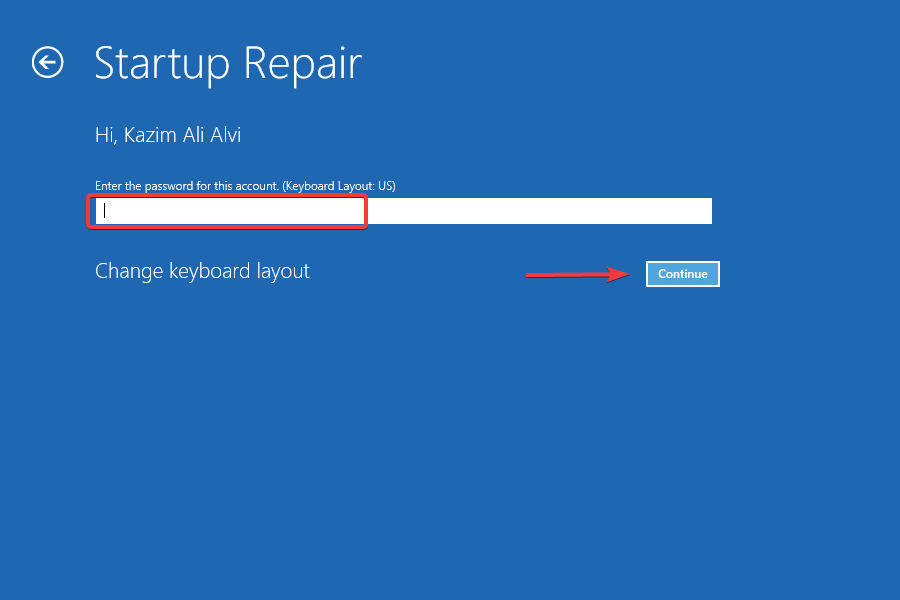
- Enter the password for the account and click on Continue. If you haven’t set a password, simply leave the field blank.
- Now, wait for the repair process to complete.
Startup repair is a great built-in utility that automatically checks for corrupt or missing system files and takes the necessary action. As the name suggests, it usually comes in handy when you are unable to start the computer and boot Windows.
Run it and check if the Windows Resource Protection found corrupt files but was unable to fix some of them error is resolved, and the corrupt system files are replaced with their original versions.
3. Run the Check Disk (CHKDSK) tool
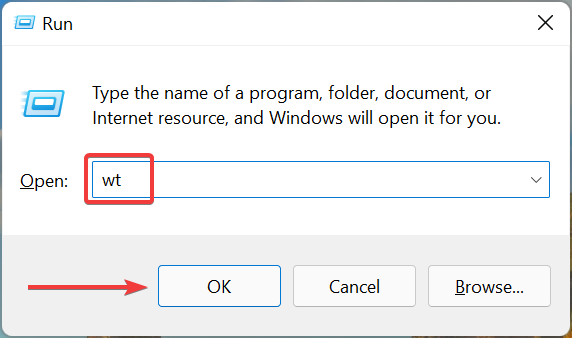
- Press Windows + R to launch the Run command, enter wt in the text field, hold the Ctrl + Shift keys, and click on OK to launch Windows Terminal.
- Click Yes in the UAC prompt that appears.
- Now, click on the arrow at the top, and select Command Prompt.
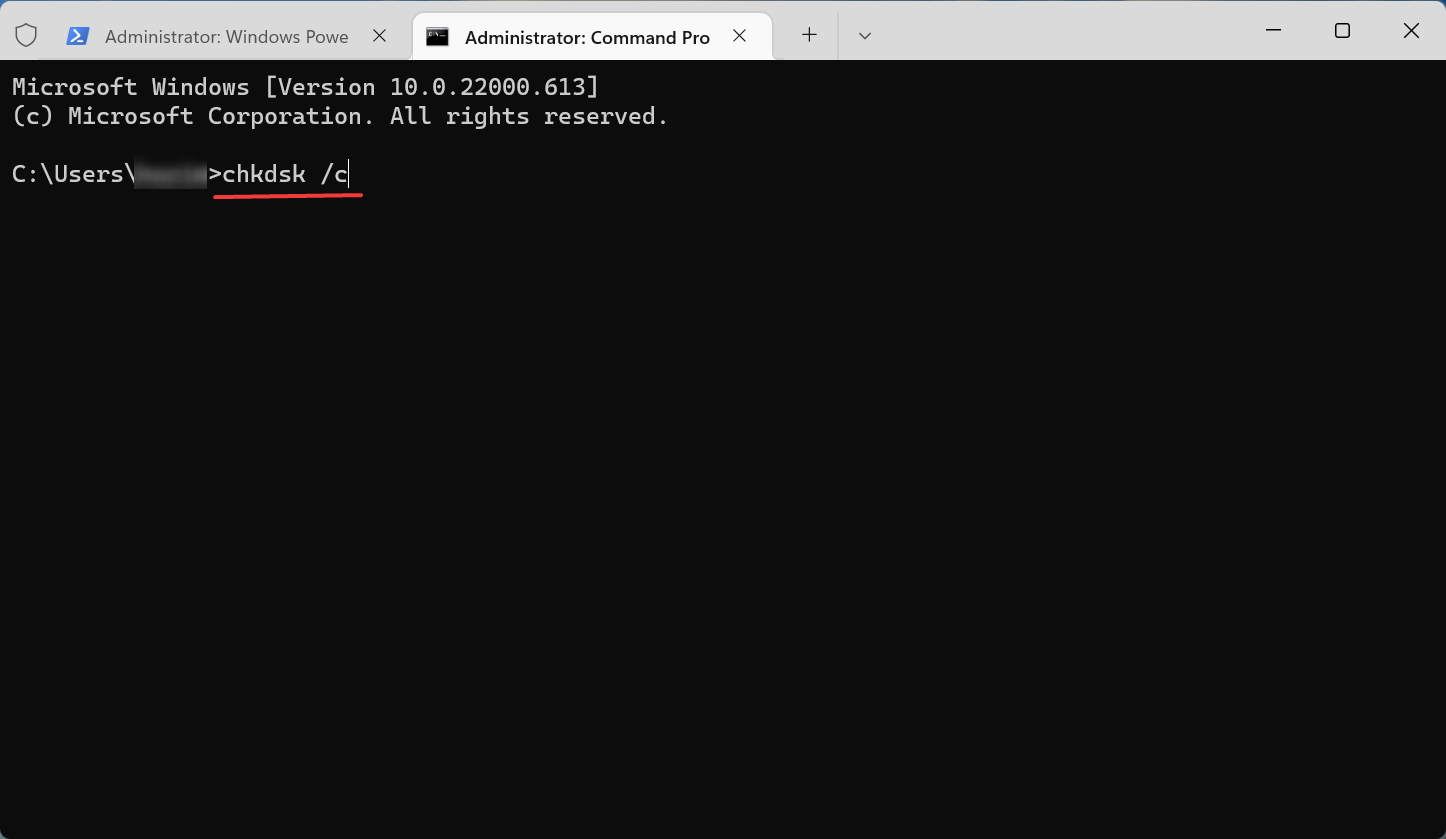
- Type/paste the following command and hit Enter to run the Check Disk tool:
chkdsk /c
The command listed above will scan the files on the C: drive. In case you want to run a scan for the others, simply add their drive letter in the command instead of the C: drive. The scan might take some time to complete depending on the data stored and the health of the disk.
In case the problem persists after the scan, head to the next method.
4. Perform a clean boot
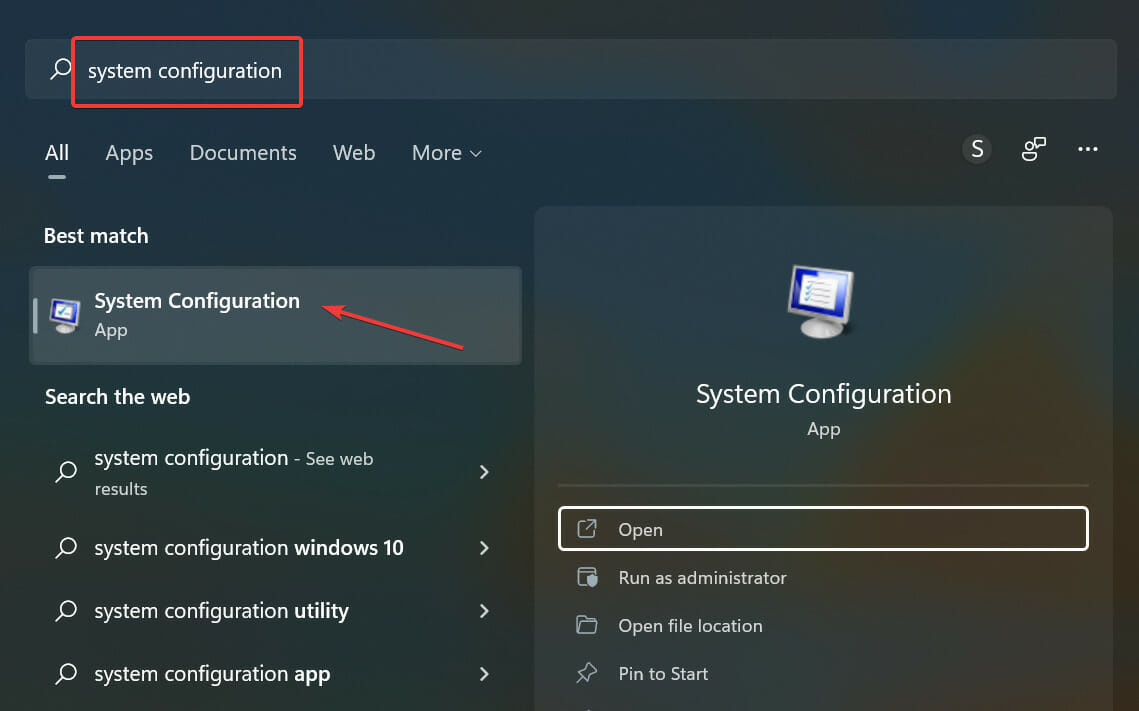
- Press Windows + S to launch the Search menu, enter System Configuration in the text field, and click on the relevant search result.
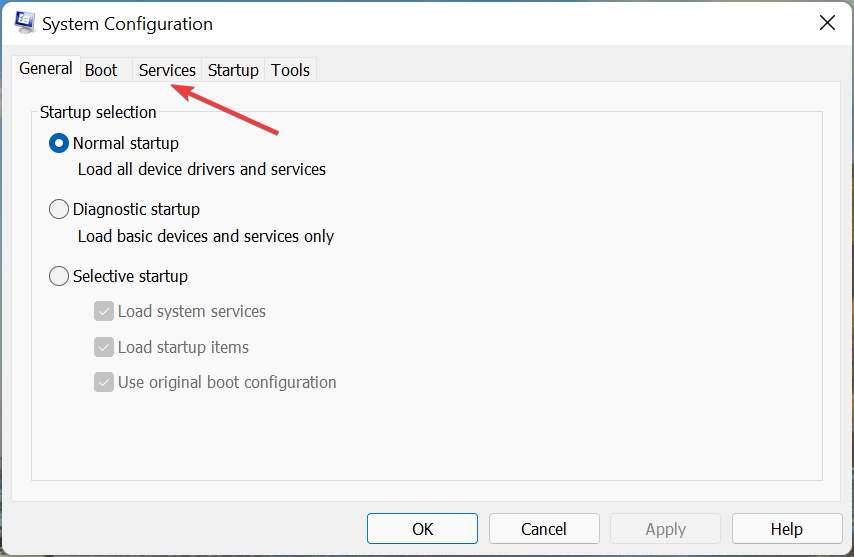
- Navigate to the Services tab from the top.
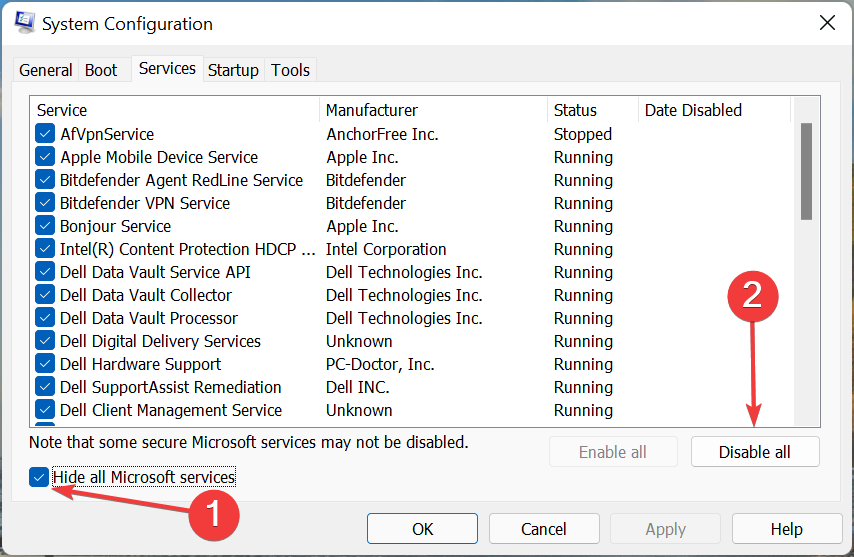
- Tick the checkbox for Hide all Microsoft services, and click on Disable all.
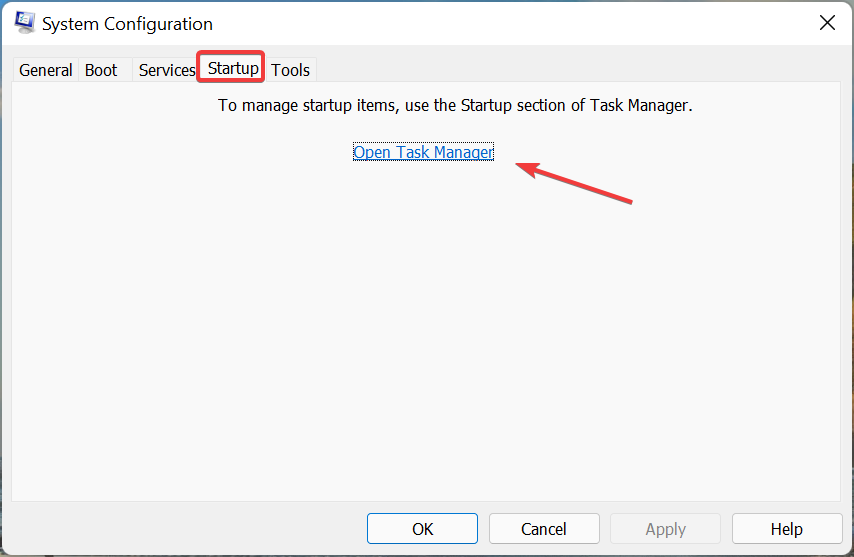
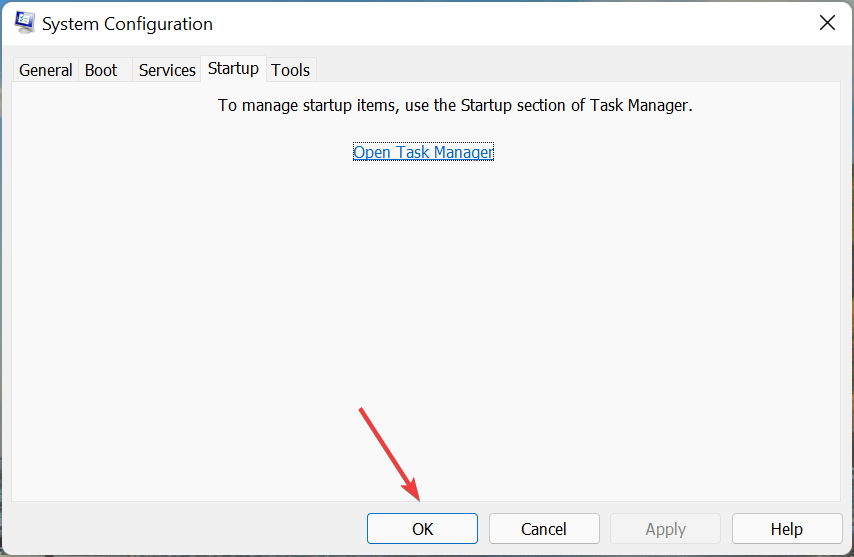
- Now, go to the Startup tab and click on Open Task Manager.
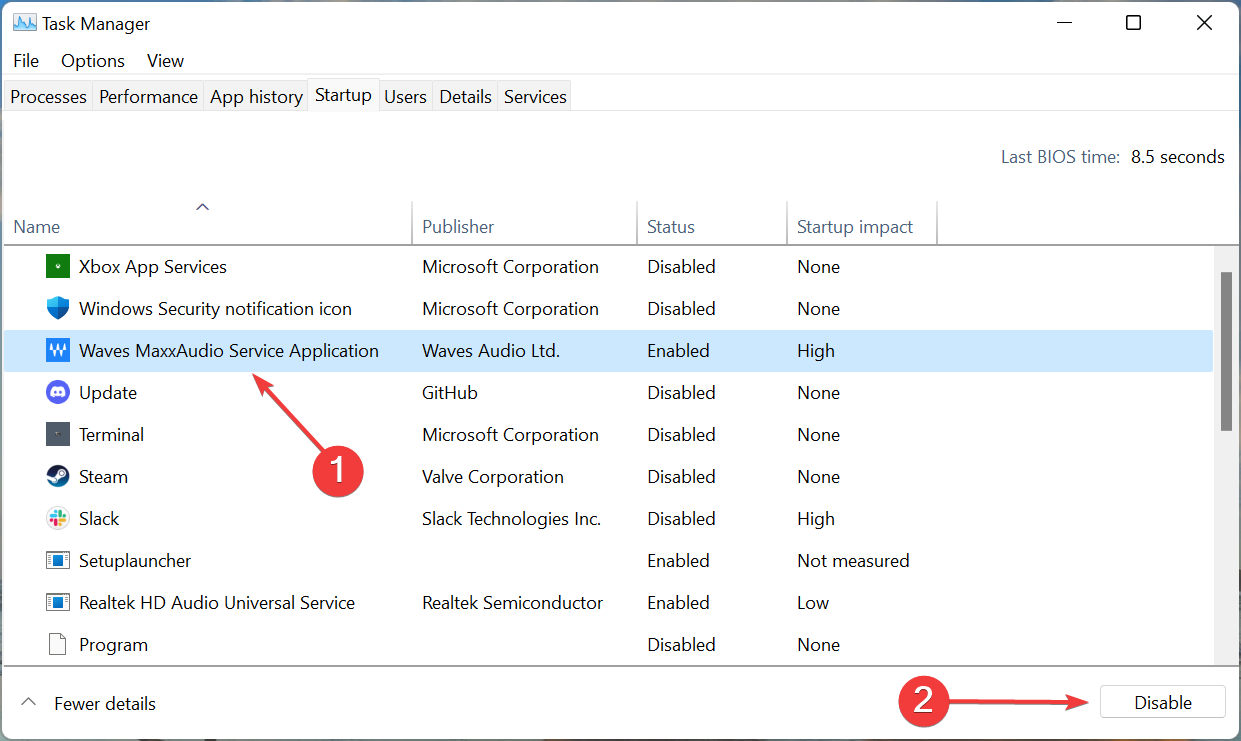
- Locate the programs that are configured to launch at boot, select them individually, and click on the Disable button. Once done close the Task Manager.
- Now, click OK in the System Configuration window.
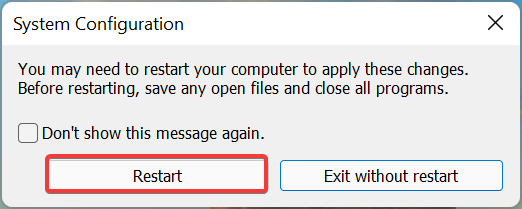
- Finally, click Restart to launch Windows in a clean boot environment.
Clean boot is a state where Windows runs with just the critical drivers, services, and programs. Once in clean boot mode, check if you still encounter the Windows Resource Protection found corrupt files but was unable to fix some of them error on running the SFC scan.
If not, then it’s most likely a conflicting driver, service, or program that’s causing the issue. The quickest way to identify the one conflicting with the SFC scan is to enable half of them at a time.
For instance, you can enable the first half of the services disabled earlier, and check if the problem reappears. If it does, one of these is responsible for the conflict. In case you don’t encounter the problem, it’s a process or service from the other half.
Now, further, divide the problematic half into two, and proceed similarly until the problematic service is identified. Also, you can follow the same approach with the startup programs disabled earlier, and check if any of these are responsible for the error.
5. Perform a System Restore
Many a time, the error is caused to a combination of several factors, and identifying and fixing each of them is a tricky and time-consuming task.
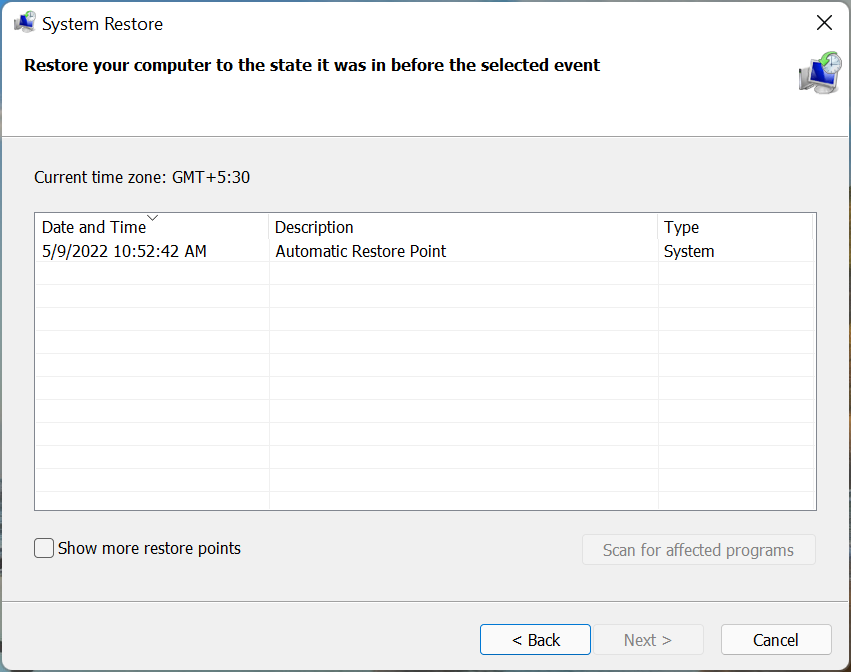
In this case, performing a system restore would do the trick. It’s one of the best troubleshooting techniques that can fix even the most intricate of the issues. But, remember to choose a restore point created before you first encountered the problem.
Can SFC (sfc /scannow) scan cause problems?
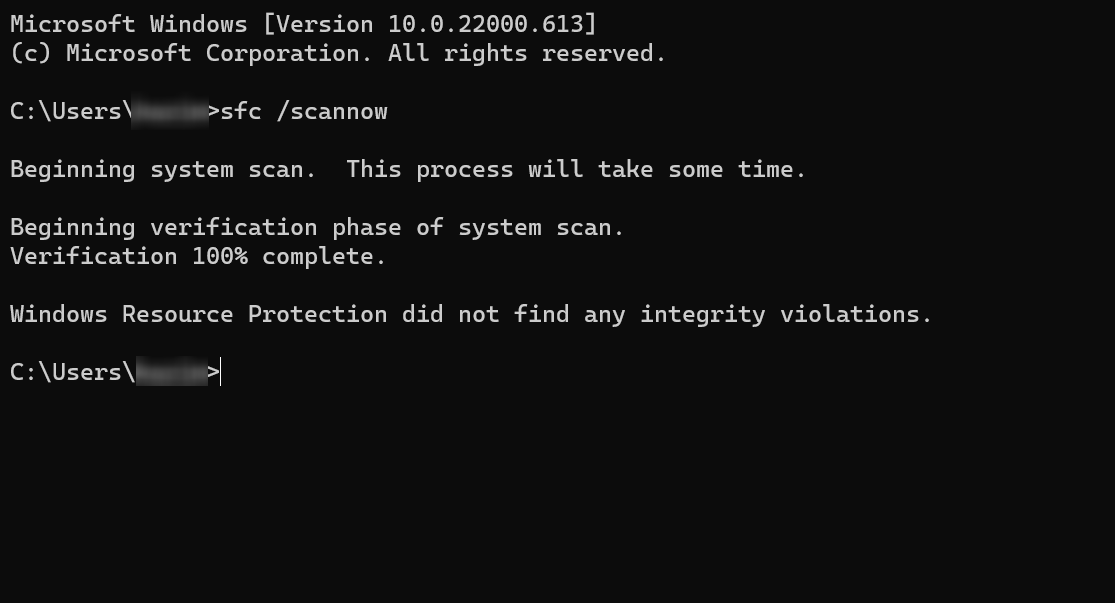
The SFC scan is a built-in tool and completely safe to run. However, you should run it only if there seems to be an issue due to corrupt system files. In most cases, after running the SFC scan, you will receive the Windows Resource Protection did not find any integrity violations message.
Though the SFC scan has been found to provide unreliable results and false positives. So, you cannot always depend on it and should try running the DISM tool or the Startup Repair utility to fix problems.
How do I manually fix a corrupted file?
In all likelihood, the Windows Resource Protection found corrupt files but was unable to fix some of them issue should be fixed by now, but you might need to manually fix a corrupted file in the future.
To do that, simply identify and replace the corrupt file with a fresh one, that’s exactly what these tools do. For instance, if a game file is corrupt, just head to the official download source and look for that particular file.
There’s also a simple way out here, use a reliable third-party tool. The best part about using software is that it will automatically scan and fix/replace the corrupt files. So, you wouldn’t come across any errors or have to execute these lengthy troubleshooting methods.
These are all the ways you can fix the error in Windows 11 and get your computer up and running. Also, if the SFC scan found integrity violations but was unable to fix them in Windows 10 and Windows 7, the methods listed here would work.
Besides, find out how to fix a corrupt ZIP file after download.
Tell us which fix worked for you in the comments section below.






User forum
1 messages