How To Enable History in Task Scheduler
Use Command Prompt to enable task history
![]() 6 min. read
6 min. read
![]() Updated on
Updated on
Share this article

Improve this guide
Read our disclosure page to find out how can you help Windows Report sustain the editorial team Read more
Key notes
- Enabling task history on Task Scheduler is simple and can be done using the app or Command Prompt.
- It helps you acquire information about the execution of the task, the date & time of execution, exit codes, and more.
While the Task Scheduler app provides a convenient way to automate and see the scheduled tasks, it also offers a valuable feature called History.
With history enabled in Task Scheduler, you gain access to a log of executed tasks, including information such as the date and time of execution, the status (success or failure), exit codes, & other relevant details.
In this guide, we will explore different methods to enable task history in Windows Task Scheduler, allowing you to maintain a comprehensive record of task executions.
Why enable history in Task Scheduler?
Enabling history in the Task Scheduler app offers various benefits; here are some of the compelling reasons why you should enable it:
- Task execution monitoring – The History tab provides a detailed tasks execution log, which allows you to monitor when the tasks were run, how often they ran, and their overall performance.
- Troubleshooting & issue resolution – It helps you quickly identify and troubleshoot any problems or errors during task execution, making it easier to pinpoint issues.
- Performance analysis – Analyze the performance of your tasks over time, which helps identify potential bottlenecks, optimizes task scheduling, and improves overall system efficiency.
- Audit & compliance – It serves as an audit trail to ensure tasks were executed as intended and maintain a historical record of actions performed.
- Decision-making and planning – Viewing task history in Windows Task Scheduler helps identify trends, determine resource requirements, & optimize scheduling to ensure tasks are executed on time.
Now you know the advantages, let us check out the ways to enable it on Task Scheduler.
How do I enable history in Task Scheduler on Windows 11?
1. Use the Windows Task Scheduler app
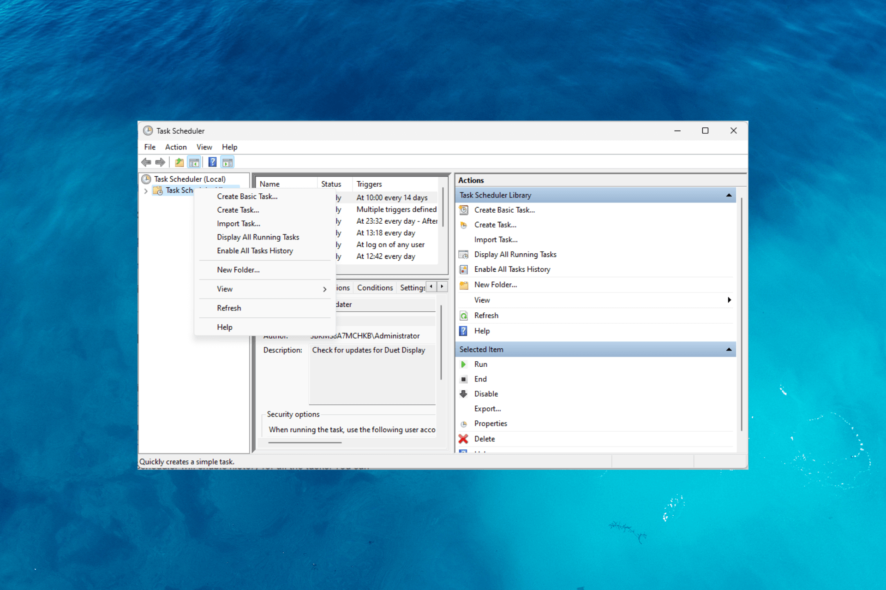
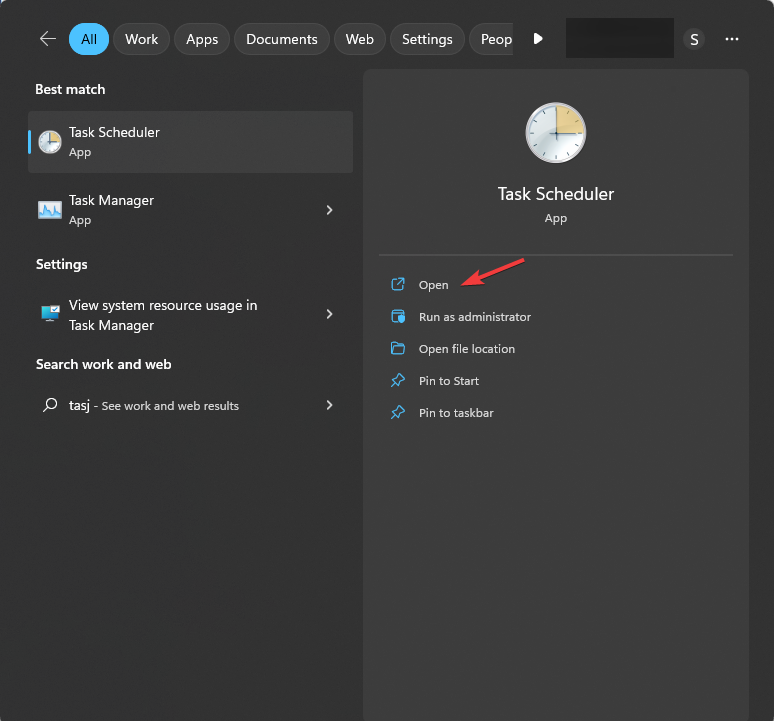
- Press the Windows key, type task scheduler, and click Open.

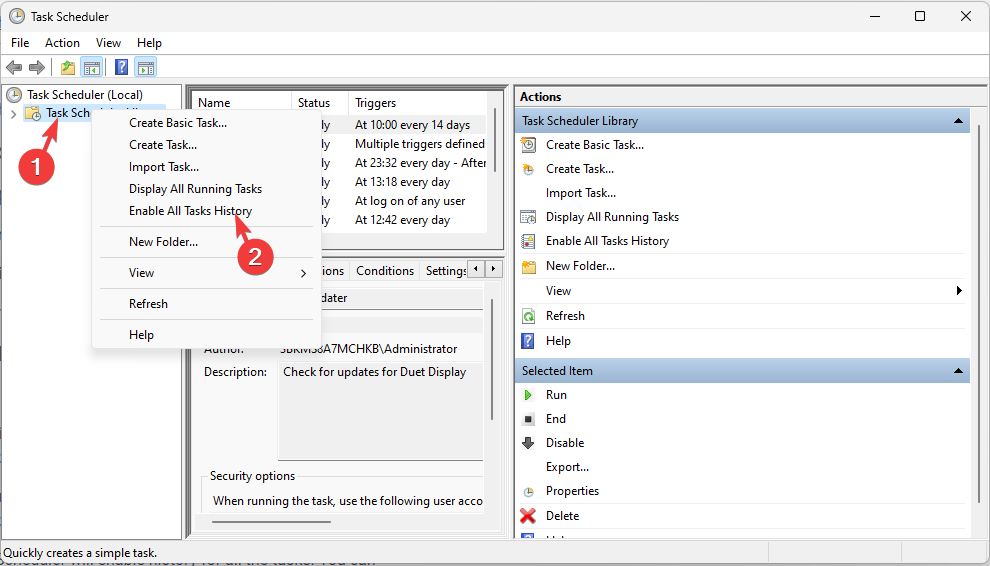
- Locate and right-click the Task Scheduler Library folder, then select Enable All Tasks History.

- Once enabled from the actions tab, the next time a task runs, it will be recorded in the History tab.
2. Enable Task History using Command Prompt
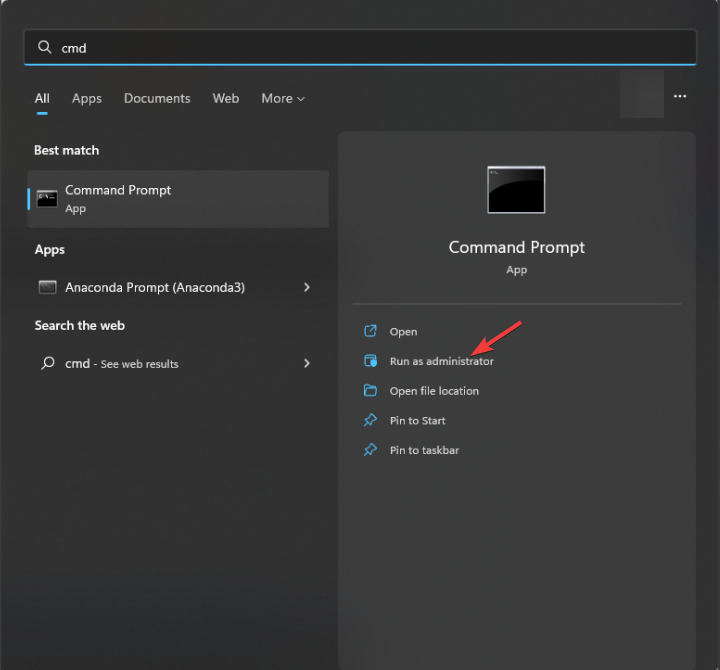
- Press the Windows key, type cmd, and click Run as administrator.

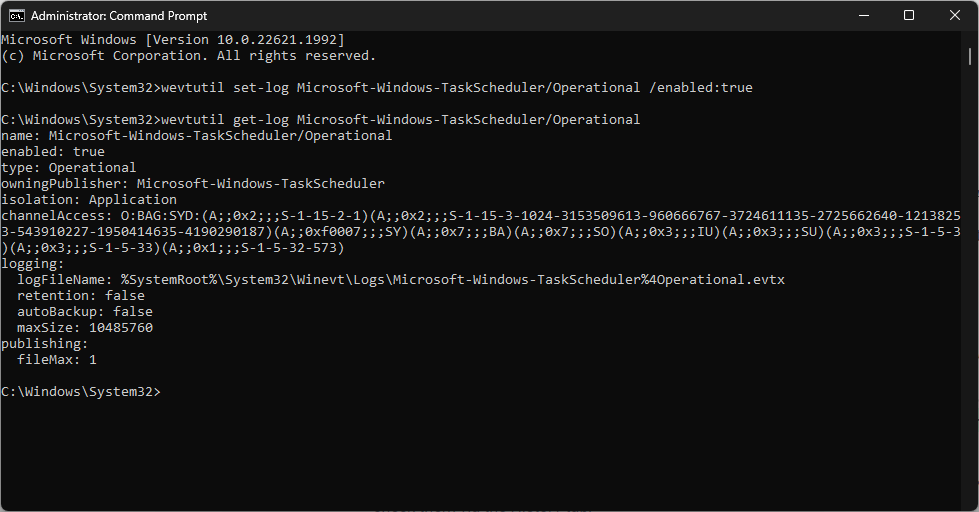
- Copy & paste the following to enable task history on Task Scheduler and hit Enter:
wevtutil set-log Microsoft-Windows-TaskScheduler/Operational /enabled:true - Type the following to confirm that the feature is enabled and press Enter:
wevtutil get-log Microsoft-Windows-TaskScheduler/Operational
- After executing these commands, Task Scheduler will enable history for all the tasks. You can check them via the History tab.
Using Command Prompt to enable Task History is only advised if you know how to use and work on the command line interface.
How can I view task history in Task Scheduler?
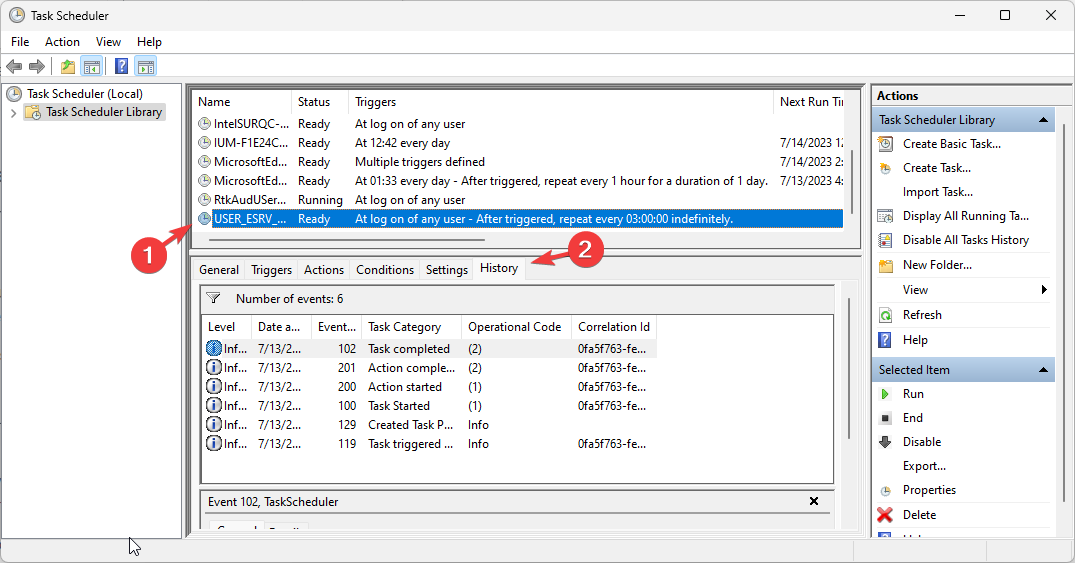
- Press the Windows key, type task scheduler, and click Open.
- Select the task from the list in the middle pane and go to the History tab.

- You can find the details of the task, including the execution, status (success or failure), exit codes, and other related information.
Why is it important to regularly check task history?
Regularly checking task history in Task Scheduler holds significant importance; some of them are:
- Checking task history allows you to verify that critical task events have been executed as intended.
- It ensures that important operations like backups, system maintenance, or data synchronization tasks run as scheduled.
- Identifies patterns of failed or incomplete tasks, investigates their causes, and takes appropriate corrective actions.
- Analyzes execution times, durations, and resource usage that can help determine any performance bottlenecks or areas for optimization.
- Monitors task executions can help identify recurring issues, unexpected failures, or inconsistencies affecting the system’s stability.
- The history log helps identify peak usage periods, assess resource availability, and plan accordingly.
How can I locate task history within Event Viewer?
Task Scheduler allows you to schedule and automate tasks. Event Viewer acts as a centralized event log repository, capturing a wide range of system events, including scheduled task history.
By leveraging both in-built Windows tools, you can have a more holistic view of the system’s activities and performance. Here is how you can view task history via the Event Viewer app.
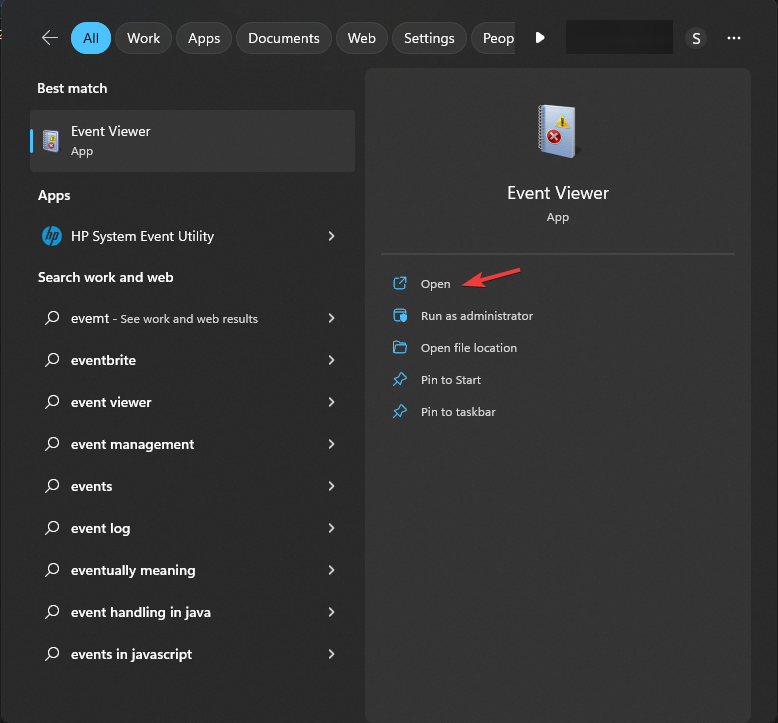
- Press the Windows key, type event viewer, and click Open.

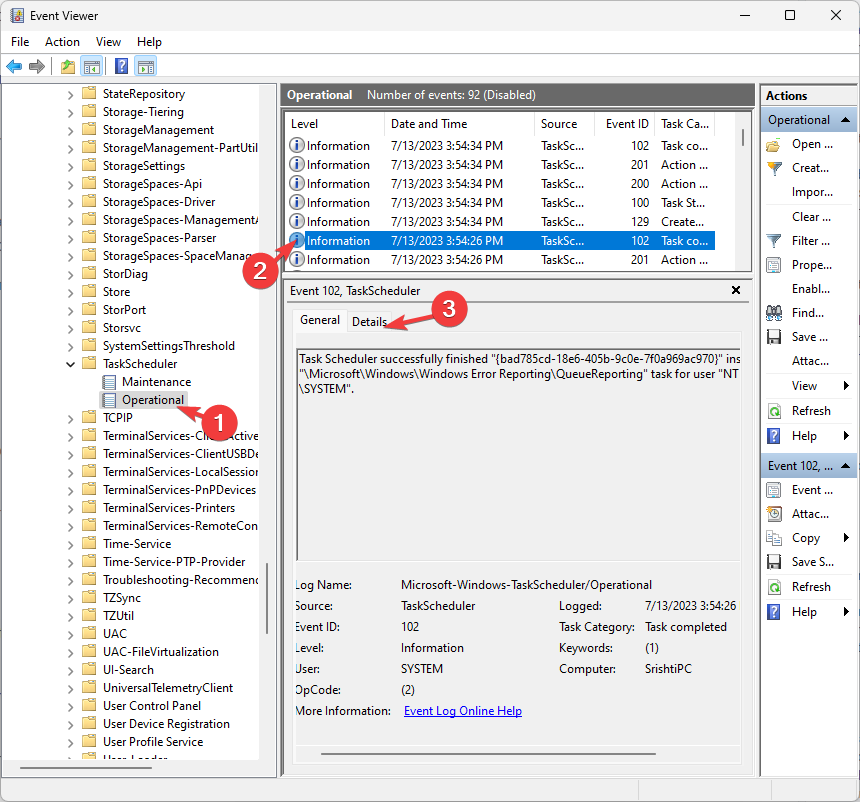
- Navigate to this path: Applications and Services Logs\Microsoft\Windows\TaskScheduler\Operational

- Once you’ve located the task history log within Event Viewer, you’ll get a list of individual events related to task executions.
- You can check the date & time, Task status, details, results, error codes, and task actions.
Why should I secure Task Scheduler?
Administrative permissions are crucial in securing Task Scheduler app and controlling the History feature. Here’s a brief overview of their importance:
- Ensures that only authorized users can create, modify, or delete tasks, minimizing the risk of unauthorized or malicious activities within the scheduler.
- Only you or other users with administrative privileges can modify task settings, including the option to turn history tracking on or off.
- Control access to this sensitive data and ensure only authorized individuals can view, modify, or delete the task history logs.
- Reduces the chances of unauthorized individuals tampering with task settings, executing malicious code through tasks, or gaining unauthorized control over critical system operations.
How do I enable history in Task Scheduler on Windows 10?
To enable history for task execution in the Windows Task Scheduler app, you can use the methods mentioned above for Windows 11.
Enabling task history in Task Scheduler brings numerous benefits and enhances the management of automated tasks on your Windows computer.
Its ability to verify task execution, diagnose errors, optimize performance, ensures compliance, and provide a historical reference for documentation and collaboration.
Also, by promptly identifying errors, you can resolve these issues, optimize resource allocation, and plan for future requirements.
This is not it; Task Scheduler also has other features; you can explore them to enhance your task automation and streamline your workflows.
If you are looking for a way to schedule tasks on Windows 10, we recommend you check out this guide.
Please feel free to give us any information, tips, and your experience with the subject in the comments section below.