Fix: WMI Provider Host High CPU Usage on Windows 11
Restarting associated services can help fix this high CPU usage issue
4 min. read
Updated on
Read our disclosure page to find out how can you help Windows Report sustain the editorial team. Read more
Key notes
- If you're experiencing high CPU usage with WMI Provider Host on Windows 11, you might be able to fix that by disabling unnecessary services.
- Background applications are responsible for this issue, so you must find and disable them.
- Restarting associated services using the command line is another great way to fix this problem on your PC, so be sure to try that.
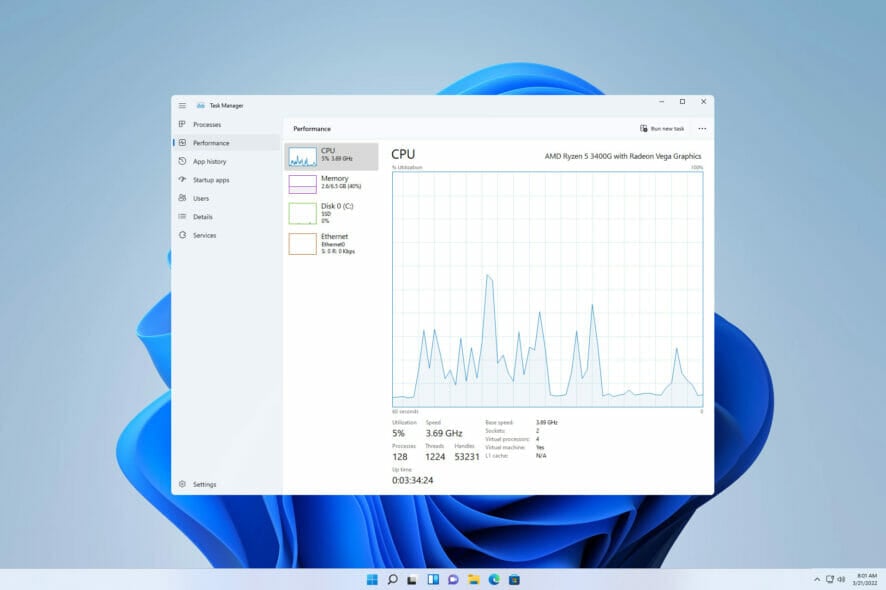
The WMI Provider Host process plays a crucial role in Windows 11. It makes it possible for other applications to request information about your computer.
Processes associated with the WMI Provider Host typically run in the background; as such, they usually don’t consume many system resources.
However, it has been reported that this service can sometimes use more than 50% of the CPU power because of other applications.
It’s worrisome that your computer’s processor runs almost at its maximum capacity for extended periods, which can lead to overheating and damage to system components.
Today’s guide will examine why WMI Provider Host has high CPU usage on Windows 11 and how you can fix this problem.
Why does WMI take up so much CPU?
As stated earlier, the WMI Provider Host process should not register high CPU usage usually. However, some factors, like the activities of third-party apps, can make it deviate from the norms.
Also, the high CPU usage might be due to problems with the associated services. Restarting these services should help fix this issue.
Why is WMI Provider Host causing high memory usage?
In most cases, this is caused by third-party applications or services associated with the WMI Provider Host, so you need to find the cause of the problem and remove it.
Sometimes a quick restart of associated services can help; you make sure you try that as well.
How can I fix the WMI Provider Host’s high CPU usage on Windows 11?
1. Initiate a Clean Boot
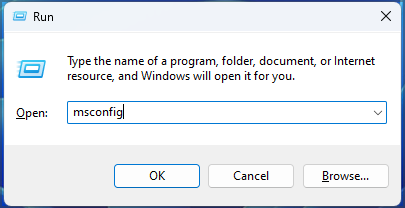
- Launch the Run menu by pressing Windows key + R and entering msconfig. Once done, press Enter.
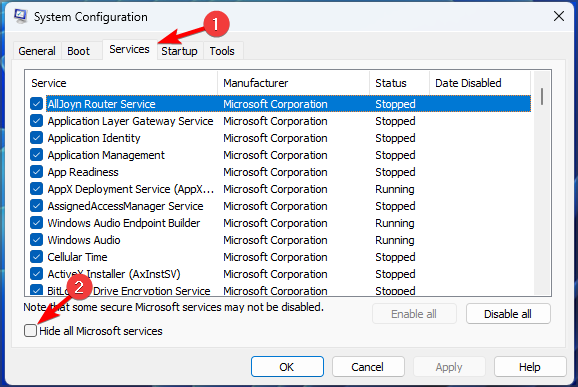
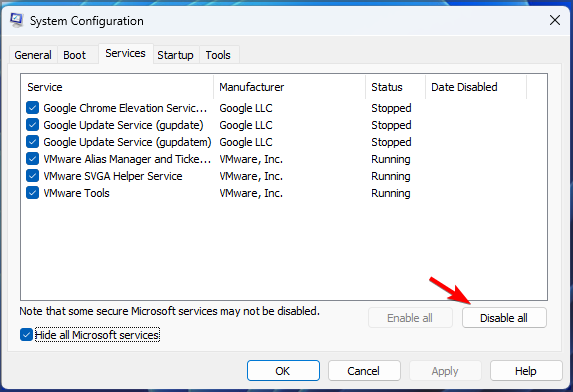
- Upon opening the System Configuration window, navigate to the Services tab and select Hide all Microsoft services.
- Next, click on Disable all.
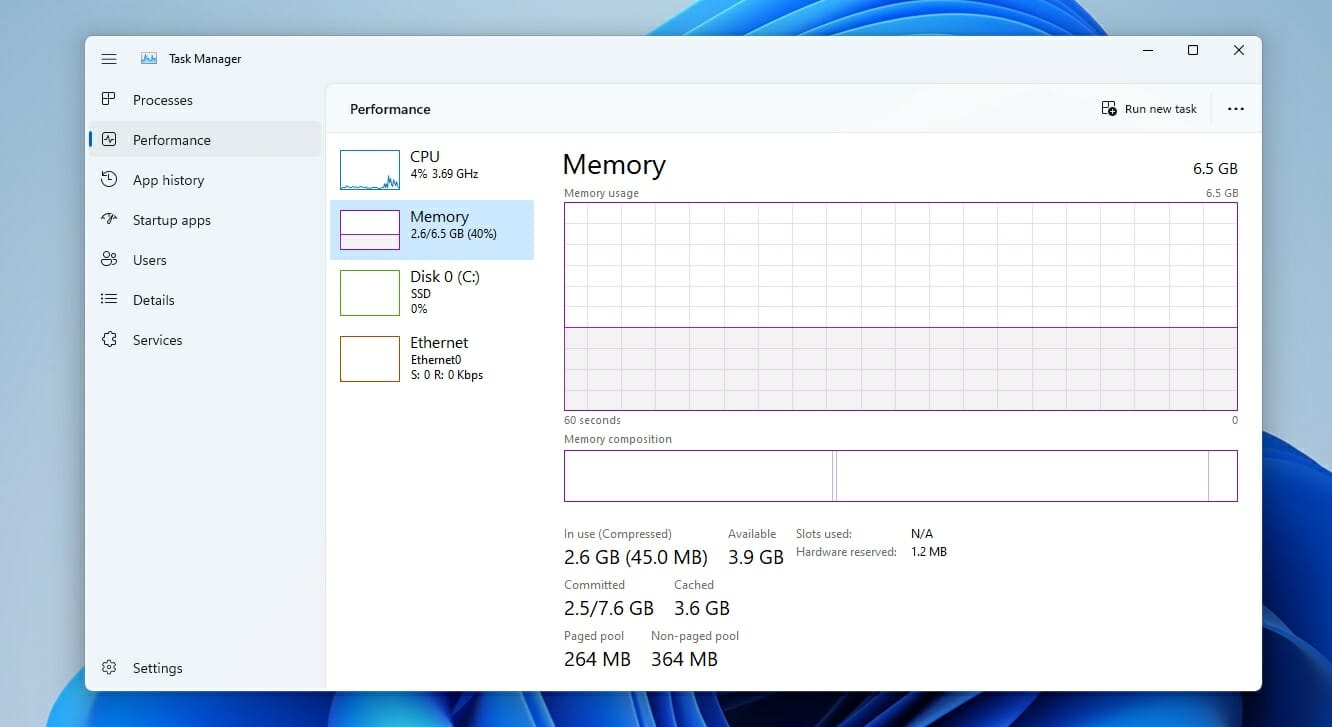
- Next, click on the Startup tab and select Open Task Manager.
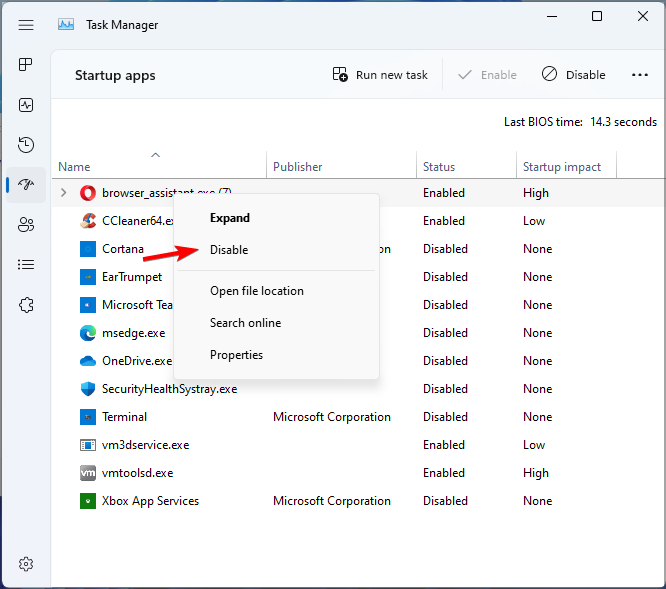
- An overview of all startup applications will appear. Disable the first application in the list using the right-click menu and click Disable.
- Repeat this process for all applications.
- Once all applications have been disabled, close the Task Manager and return to the System Configuration window.
- Save the changes by clicking OK and Apply.
- Restart your PC.
2. Launch System Maintenance Troubleshooter
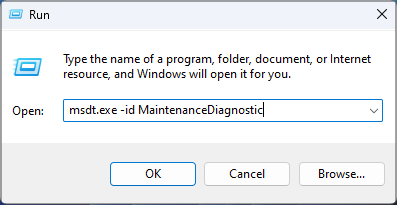
- Open the Run dialog box by pressing the Windows key + R.
- Type msdt.exe -id MaintenanceDiagnostic and click OK.
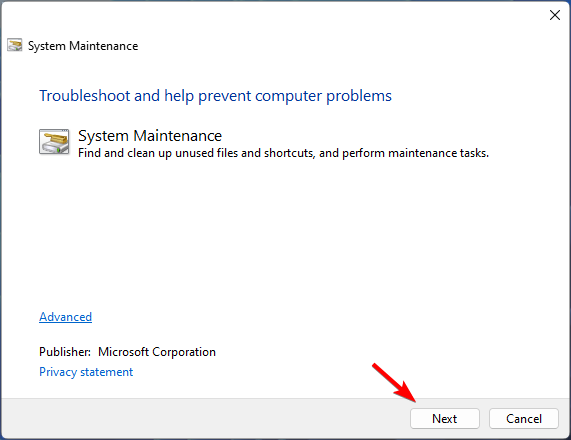
- The System Maintenance window will appear. Click on Next and follow the on-screen instructions.
- After running the System Maintenance tool, verify that the problem has been fixed.
3. Use Event Viewer
- Press Windows key + X and select Event Viewer from the list.
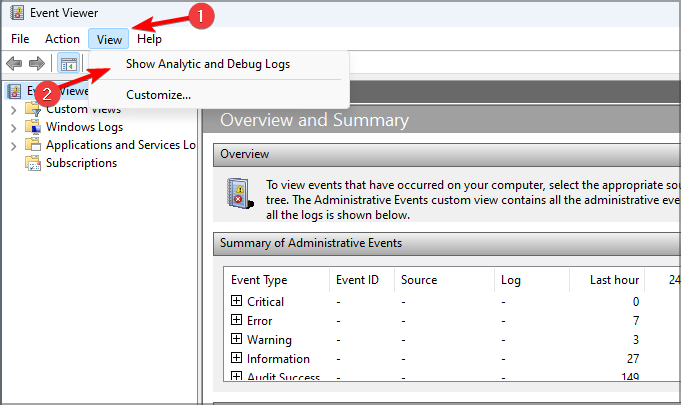
- Upon launching Event Viewer, click on View from the menu at the top and select Show Analytic and Debug Logs.
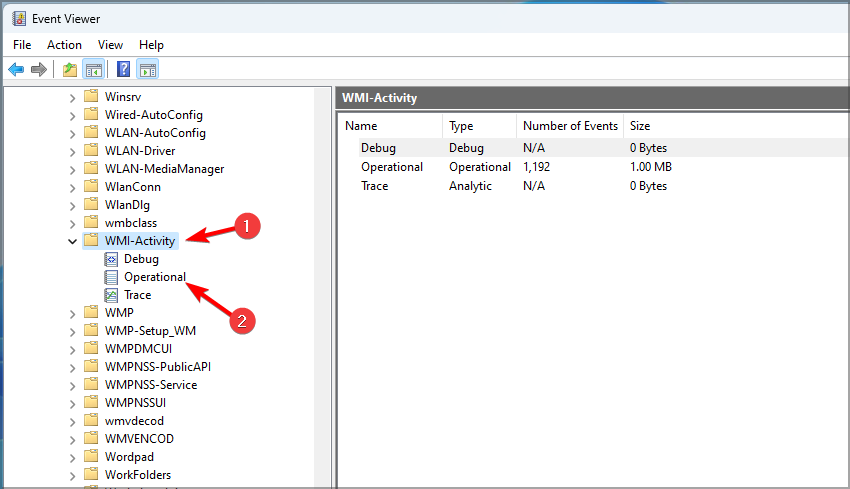
- On the left side, select Applications and Service Logs and then Microsoft. Navigate to Windows and expand WMI Activity. Select Operational.
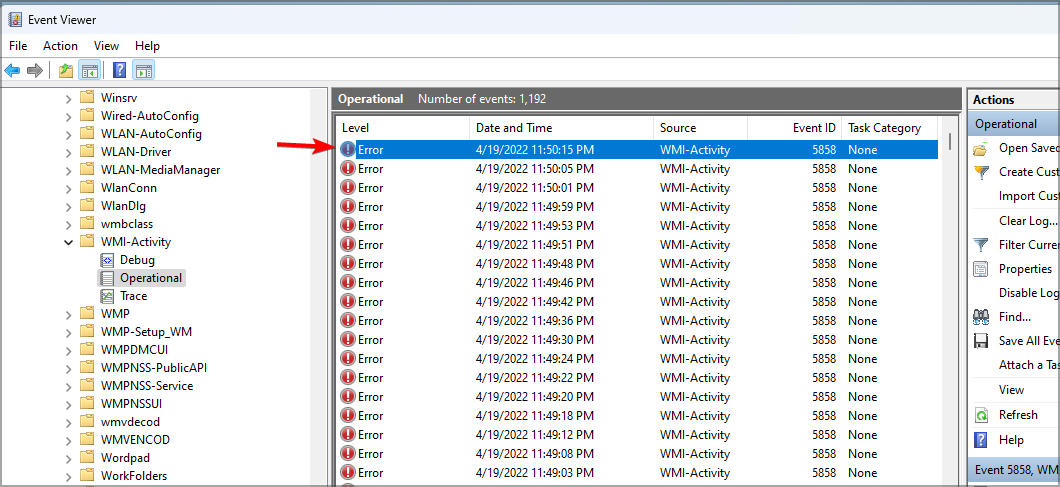
- Click on any available error to find out more information.
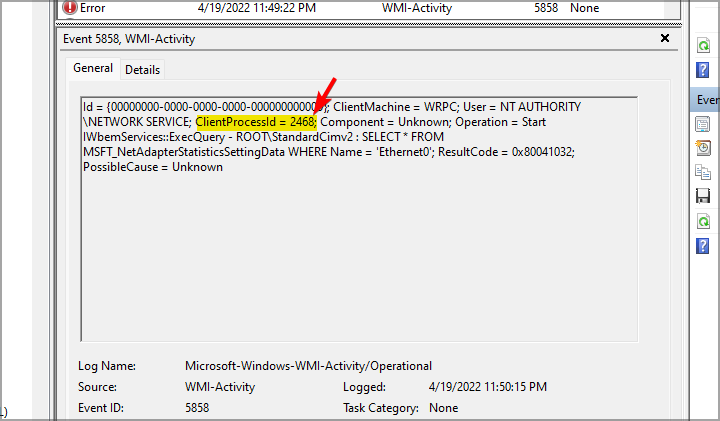
- Locate ProcessId and remember its value. You will likely run into multiple errors, so check each and note down each ProcessId value.
- Next, press Ctrl + Shift + Esc to launch Task Manager.
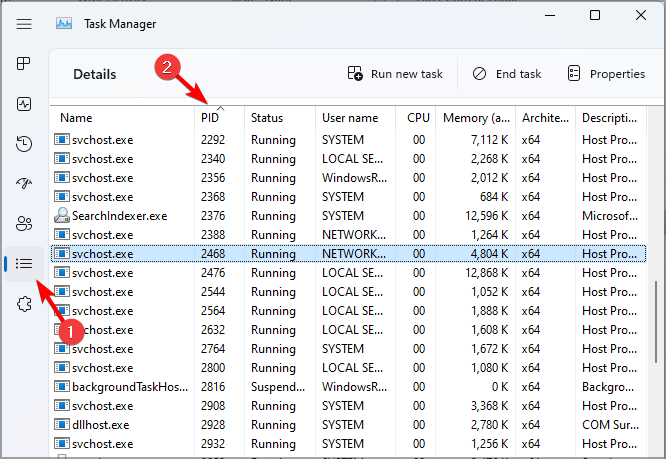
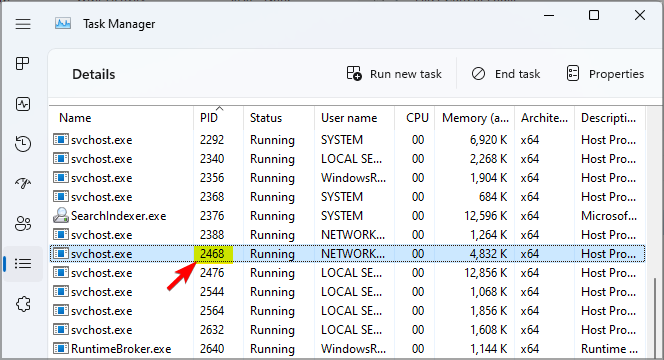
- Once Task Manager is launched, click the Services tab and check each service’s PID.
- Once you find a service that corresponds to the value from Step 5, you need to uninstall the application related to that service or stop the service.
4. Restart associated services
- Press the Windows key + X and select Windows Terminal (Admin).
- Run the following commands:
net stop iphlpsvcnet stop wscsvcnet stop winmgmnet start winmgmtnet start wscsvcnet start iphlpsvc - After the commands are completed, restart your PC.
Can I disable WMI Provider Host?
The WMI Provider Host process is a critical system service that ensures your Windows 11 PC runs smoothly. In addition, it serves as the link that allows other applications to request the necessary information from your PC.
So, it can not be disabled, nor can it be stopped from running. You can only try to fix things that might be causing issues with it, as shown in this guide.
Is WMI Provider Host a virus?
WMI Provider Host is a core Windows component that provides management information and control, making it an essential part of Windows.
You can rest assured that the service is entirely safe and malware-free. However, in some rare instances, malware can cause issues with it, most notably high CPU usage.
If that happens, it’s advised to scan your PC with antivirus software for Windows 11.
This can be a tricky issue, but we hope our solutions helped you fix the problem on your Windows 11 PC.
We also have a detailed guide on fixing WMI provider host high CPU usage in Windows 10, so you can take a closer look at it for additional solutions.
What solution did you use to fix this problem? Let us know in the comments section below.






User forum
0 messages