FIX: WSClient.DLL errors in Windows 10/11
One quick way to solve the error message is to use a dedicated tool
7 min. read
Updated on
Read our disclosure page to find out how can you help Windows Report sustain the editorial team Read more
Key notes
- The wsclient.dll error message is an annoying pop-up because it appears on every Windows startup.
- You can also solve the problem by performing a WSReset and following our method.
- Try re-registering the problematic file with our quick solution below.
Some Windows 10 users have been troubled by another annoying DLL error, and they wish to get rid of it immediately. Thankfully, we’ve got the solutions for it in this article.
Reportedly, a few users said that they encounter a strange bug when they boot up their computers. Some others said they get the error message saying wsclient.dll is not a valid win32.
Others got the error message saying error in wsclient.dll Missing entry: RefreshBannedAppsList appears on every startup. However, what is this wsclient.dll problem?
The message doesn’t affect the system, as it disappears when you close it, but since it shows up on every boot, it’s really annoying.
WSClient.DLL errors can sometimes occur, and speaking of these errors, here are some common issues that users reported:
- WSClient.dll error Windows 8.1 – wsclient.dll error can appear on Windows 8.1 as well. Since Windows 8.1 and 10 are so similar, you should be able to apply all of our solutions to Windows 8.1 as well.
- WSClient.dll error has occurred – This is just a variation of the original error, and in most cases, you can fix the issue by running the WSReset command.
- WSClient.dll refreshbannedappslist – Sometimes certain tasks in Task Scheduler can cause this issue to appear, but you can fix it by finding and removing the problematic task.
- Rundll32.exe WSClient.dll wsptlr licensing – If this error message occurs, you might be able to fix the issue simply by re-registering the problematic file.
- WSClient.dll not found – In some cases, this file might not be even present on your PC. To fix that, perform SFC and DISM scans. In case that doesn’t work, you might have to reinstall your system.
How do I fix WSClient.DLL error in Windows 10?
1. Use a specialized tool
A go-to solution for fixing WSClient.DLL errors is using dedicated repair software because it can proceed with this task automatically.
In addition, it can scan other stability issues on your PC and replace them with healthy parts, thus increasing its overall performance.
2. Perform a WSReset command
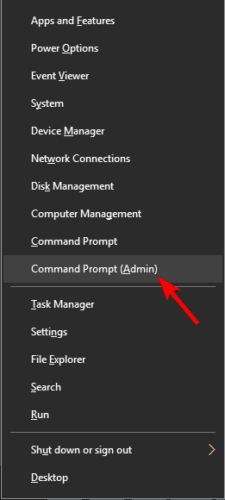
- Open Win + X menu. You can do that by right-clicking the Start Button or by using Windows Key + X shortcut.
- Choose Command Prompt (Admin) or PowerShell (Admin) from the menu.
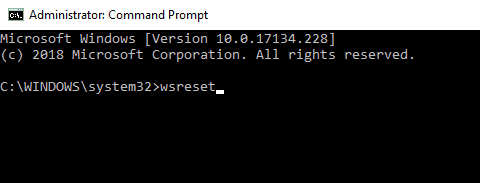
- Enter wsreset and press Enter.
After a couple of moments, the process will be finished and the issue should be resolved.
If you’re having issues with the WSClient.DLL error starting Windows, you might solve them simply by running a WSReset command. This is quite straightforward to do, and you can do it by following the steps above.
3. Disable the WSRefreshBannedAppsListTask
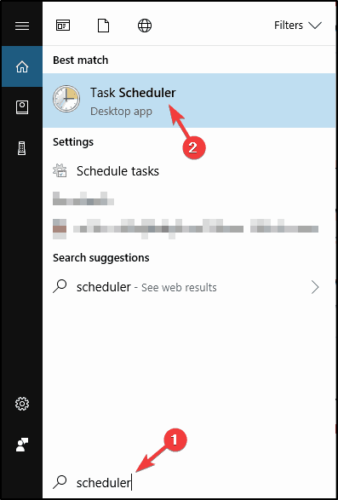
- Press Windows Key + S and enter scheduler. Select Task Scheduler from the list of results.
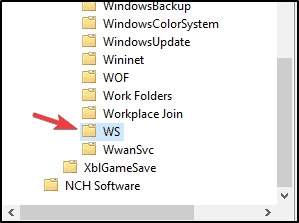
- Under Task Scheduler, go to Microsoft>Windows>WS.
- Right click on the task WSRefreshBannedAppsListTask, and choose Disable.
After disabling this task, check if the problem is still there. In case this task isn’t available in Task Scheduler, you should skip this solution and move to next one.
According to users, sometimes certain tasks in Task Scheduler can cause problems with WSClient.DLL. However, you can fix this issue simply by disabling these tasks.
It’s also worth mentioning that you can remove this task using the Command Prompt. You can just remove it by running a single command. To do that, follow these steps:
- Start Command Prompt as administrator. We showed you how to do that in the previous solution.
- When Command Prompt starts, run the following command:
schtasks /delete /TN "\Microsoft\Windows\WS\WSRefreshBannedAppsListTask" /F
Both methods are similar, but if you’re an advanced user or if you want to do it quickly, you might use the command line method.
4. Re-register the problematic DLL file
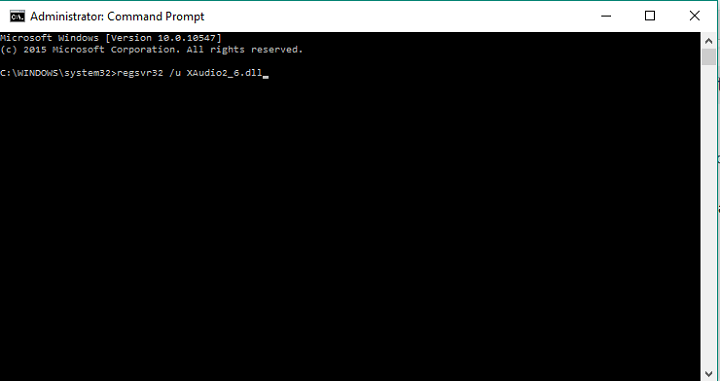
- Start Command Prompt as an administrator.
- When Command Prompt starts, run the following command:
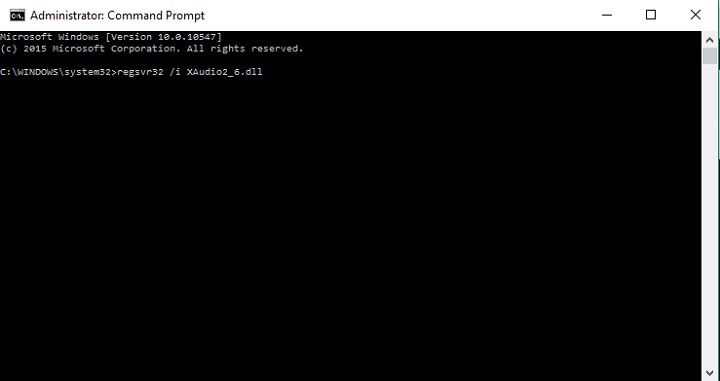
regsvr32 /u WSClient.dll - Then, run another command:
regsvr32 /i WSClient.dll - Close the Command Prompt, and you should be set.
After running both of these commands, you’ll re-register the problematic DLL file and the issue should be resolved.
Sometimes you might be able to fix the problem with WSClient.DLL simply by re-registering the problematic DLL file. This process is relatively simple and you can do it by following the steps above.
4. Run SFC and DISM commands
- Start Command Prompt as an administrator.
- Now run the following command:
sfc /scannow - The SFC scan will start. Keep in mind that this scan can take about 15 minutes, so don’t interfere with it.
Once the scan is finished check if the problem is still there. In case the issue is still present, or if you weren’t able to run the SFC scan, you’ll have to use DISM scan instead. To do that, just follow these steps:
- Open Command Prompt as an administrator.
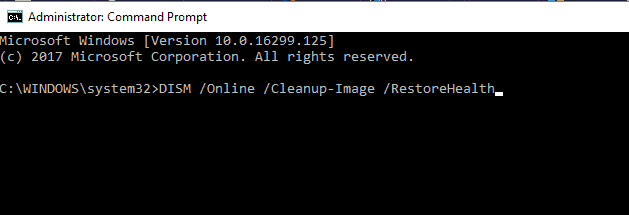
- Type the following command:
DISM /Online /Cleanup-Image /RestoreHealth - DISM scan will now start. The scan can take up to 20 minutes, so don’t interfere with it.
Once the scan is completely finished, check if the problem is still there. If you weren’t able to run an SFC scan before, perhaps you should try to run it again and check if that solves the issue.
In some cases, problems with WSClient.DLL can occur because your Windows installation is damaged. However, you might be able to repair it by performing an SFC scan.
5. Change your DNS servers
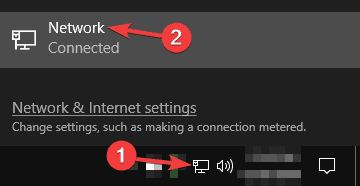
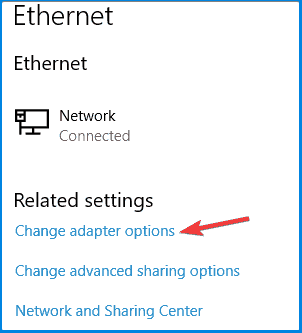
- Click the network icon on your Taskbar and choose your network connection from the menu.
- Now select Change adapter options.
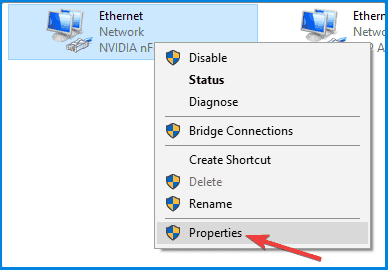
- A list of available network connections will appear. Right-click your network connection and choose Properties.
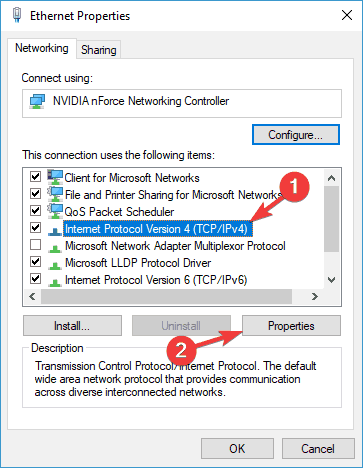
- Select Internet Protocol Version 4 (TCP/IPv4) and click the Properties button.
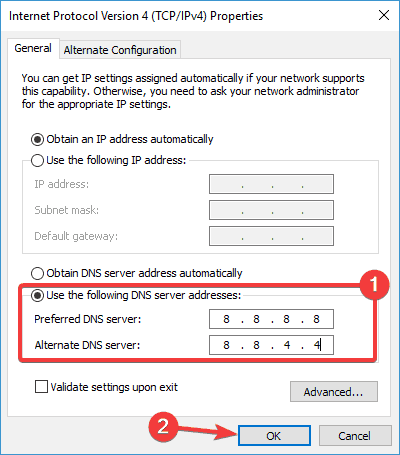
- Select Use the following DNS server addresses option.
- Enter 8.8.8.8 as the Preferred.
- Now enter 8.8.4.4 as the Alternate DNS server. Click OK to save changes.
After making these changes, you’ll switch to Google’s DNS and the problem should be resolved. If you want, you can use a different DNS server such as OpenDNS.
Your DNS servers play a large role, and sometimes issues with your DNS can cause WSClient.DLL error to appear. Several users reported that they managed to fix this issue simply by changing their DNS servers.
6. Perform a System Restore
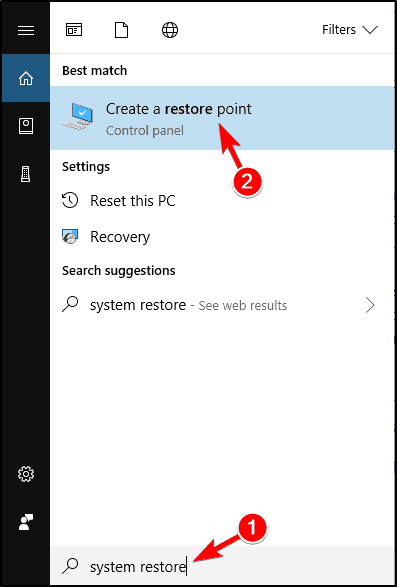
- Press Windows Key + S and enter system restore.
- Now select Create a restore point.
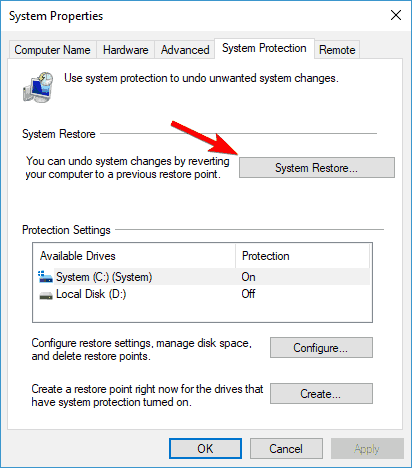
- When the System Properties window appears, click System Restore button.
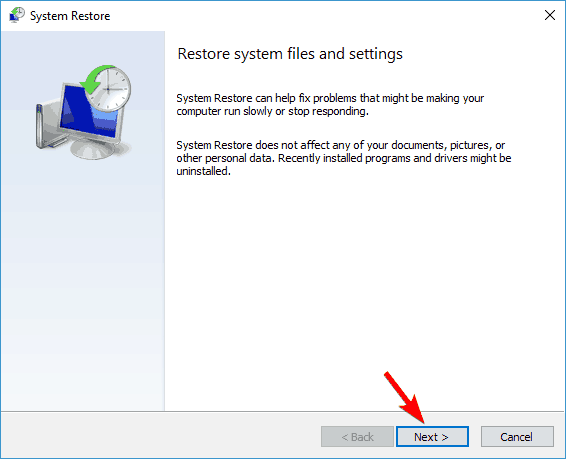
- System Restore window will now open. Click Next to proceed.
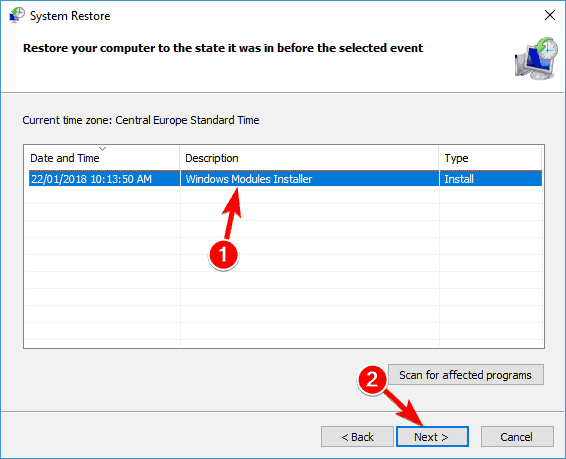
- If available, check Show more restore points option. Choose the desired restore point and click Next.
- Follow the instructions on the screen to complete the restoration process.
After your PC is restored to its original state, check if the problem is still there.
If the problem with WSClient.DLL started occurring recently, you might be able to solve it simply by performing a System Restore.
In case you don’t know, System Restore is a built-in feature that allows you to restore your system to the previous state and fix all sorts of issues.
7. Perform an in-place upgrade
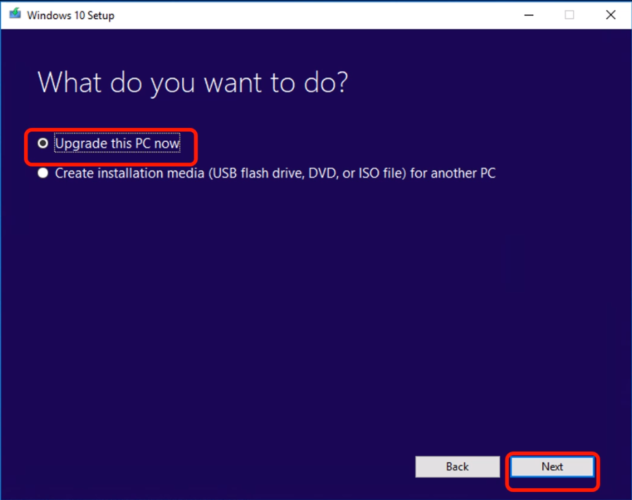
- Download and run Media Creation Tool.
- Select Upgrade this PC now.
- Select Download and install updates (recommended) option and click Next. This step isn’t mandatory, so you can skip it if you want.
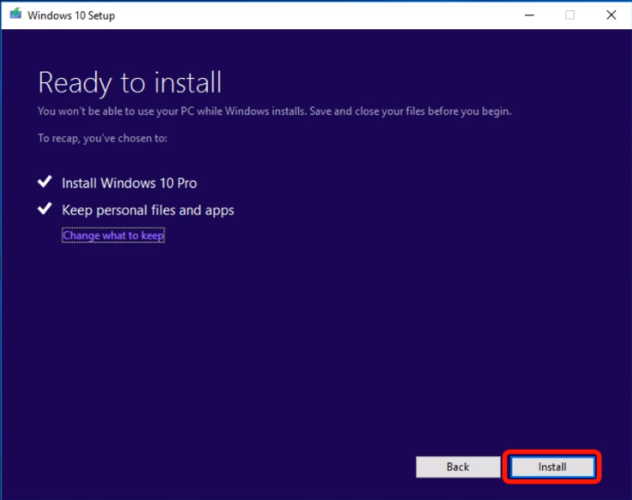
- Follow the instructions on the screen until you reach Ready to install screen. Select Change what to keep.
- Select Keep personal files and apps and click Next.
- Follow the instructions to complete the process.
Once the process is finished, you’ll have a fresh installation of Windows 10, all your files and applications will be preserved, and the problem should be resolved.
We also have to mention that this process will keep all your files and applications, which is also a big plus.
In some cases, the only way to fix WSClient.DLL error is to perform an in-place upgrade. In case you don’t know, an in-place upgrade will reinstall Windows and update it to the latest version.
Performing one of these solutions should solve the problem with WSClient.DLL error message. If you noticed some other bug in the build 11099, let us know in the comment section below.

