You Don't Currently Have Permission to Access This Folder [Fix]
User group removed from the list of Groups or usernames
5 min. read
Updated on
Read our disclosure page to find out how can you help Windows Report sustain the editorial team. Read more
Key notes
- This issue could have occurred if the user group had been removed from the list of groups or usernames.
- This guide will discuss some of the available methods to fix the issue.
Many users have complained that they encountered the you don’t currently have permission to access this folder issue after upgrading their Windows computer to a newer version.
In this guide, we will cover all the available fixes to resolve the issue right after talking about the potential causes.
What causes the You don’t currently have permission to access this folder issue on Windows 11? There could be reasons why you don’t have permission to access the folder; some of the common ones are:
- Insufficient permissions – If the file or folder you are trying to open is owned by another group or user account, and you don’t have ownership or necessary permission, you might face this issue.
- Restricted access – If the user account or group has set the permission in a way that prohibits you from accessing the file or folder you want to access, then you might see this error.
- UAC settings – The User Account Control (UAC) Settings might be blocking your access to the folder, hence the issue.
- Corrupted file system – If the file system is damaged or missing, you might face this issue when accessing files.
- File or folder is currently open or in use – The file or folder could be used by another program or process and might prevent you from accessing the folder therefore, you get this error.
How to fix the You don’t currently have permission to access this folder issue?
Before moving to the actual troubleshooting steps. It would be best if you went through these preliminary checks:
- Restart your computer.
- Close the unnecessary programs and process running on the computer.
1. Gain complete control
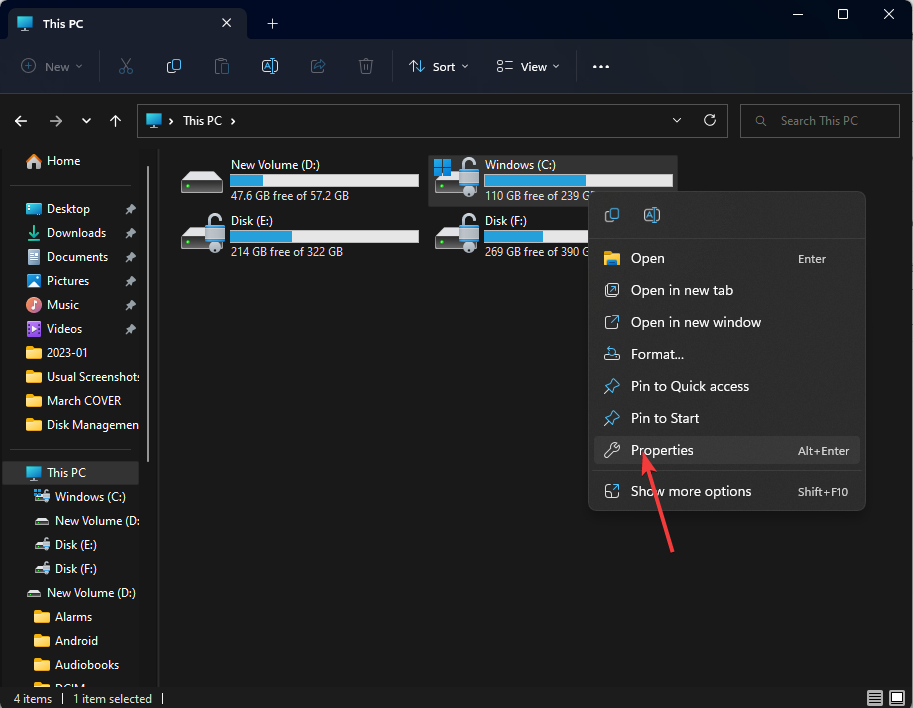
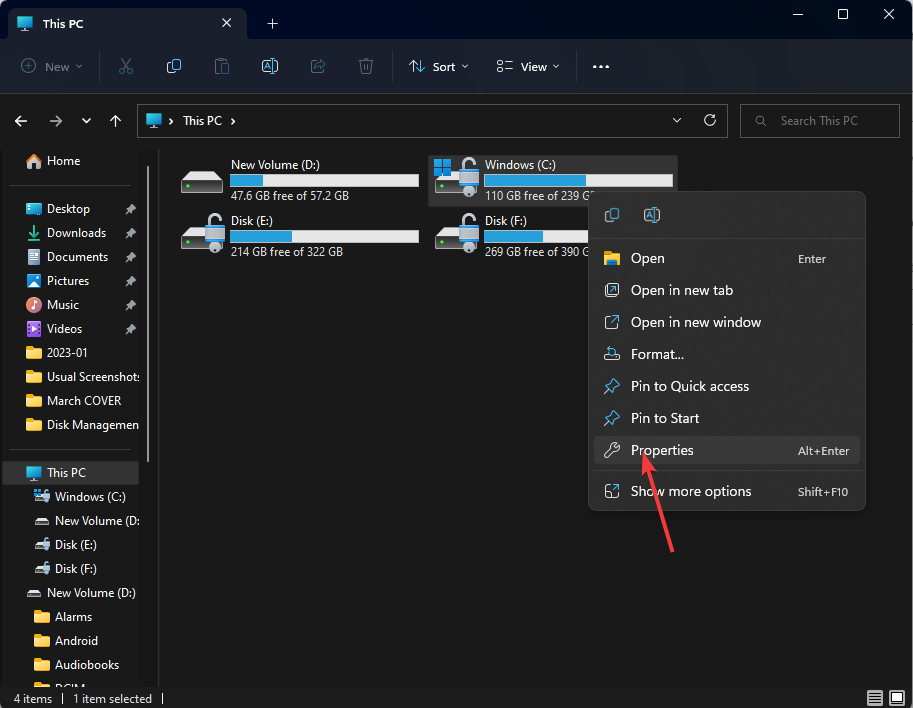
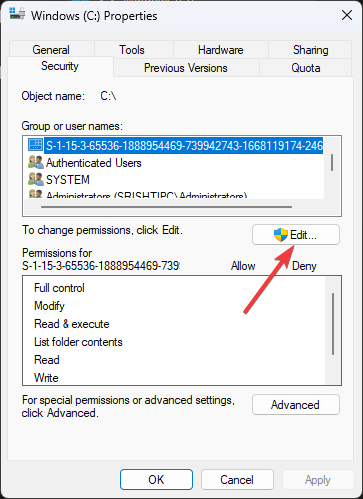
- Locate the folder from your hard drive or select the drive itself. Right-click on it and choose Properties.
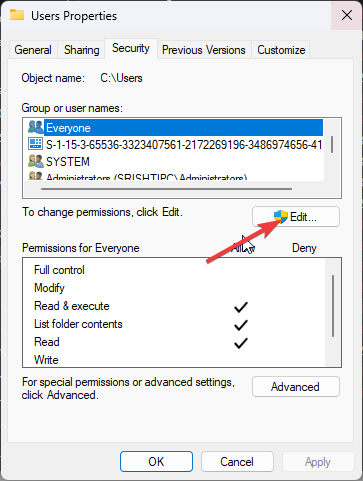
- On the Properties window, go to the Security tab.
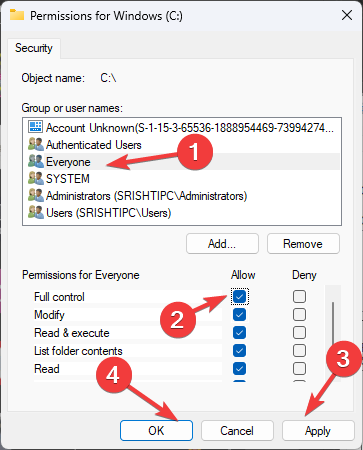
- Select Everyone and click Edit.
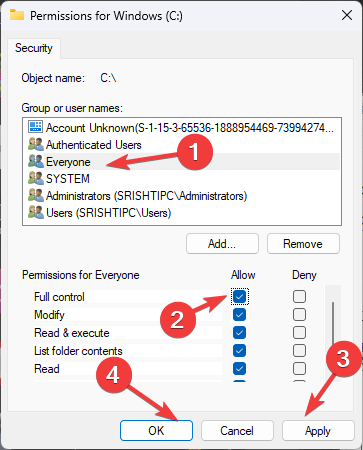
- Now select Everyone and under Permissions for Everyone: for Full control, choose Allow and Modify.
- On the next window, click OK.
- Click Continue on all the following windows.
- Now click Apply and OK to confirm the changes.
- Restart your computer.
Note: If the Everyone option is not present, follow these simple steps to rectify it:
- Go to the folder location or select the drive itself, and right-click it. Choose Properties.
- On the Properties window, switch to the Security tab.
- Under Groups & user names, click Edit.
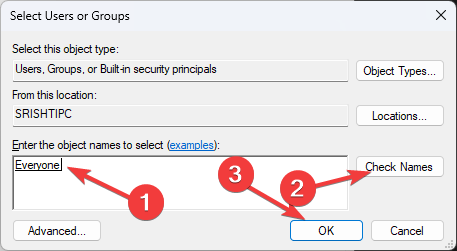
- Click Add.
- Now, type Everyone and lick Check Names, then click OK.
- Select Everyone, and under Allow, choose Full control and Modify.
- On the following window, click OK.
- Click Apply and OK to save the changes.
- Restart your computer.
2. Use the Command Prompt
- Press Windows + E to open Windows Explorer.
- Go to the folder location, and copy the address path from the address bar.
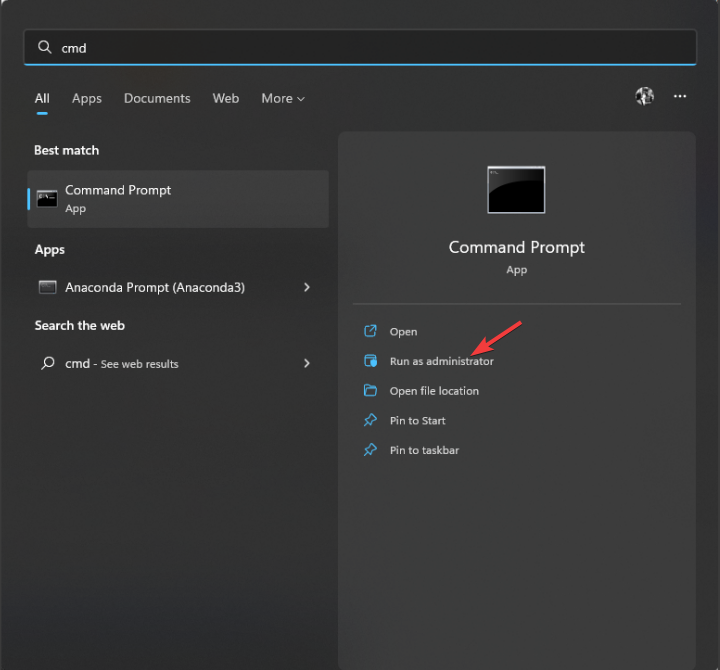
- Now press the Windows key, type CMD, and click Run as Administrator.
- Copy and paste the following command, replace the path of the file or folder\ file or folder name with the path that you copied, and press Enter:
TAKEOWN /F "path of the file or folder\ file or folder name" /R /D Y - Type the following command, replace type in the path of the folder that you want to take access with the path of the folder, and press Enter:
ICACLS <type in the path of the folder that you want to take access> /grant administrators:F - Close the Command Prompt.
3. Change the ownership settings
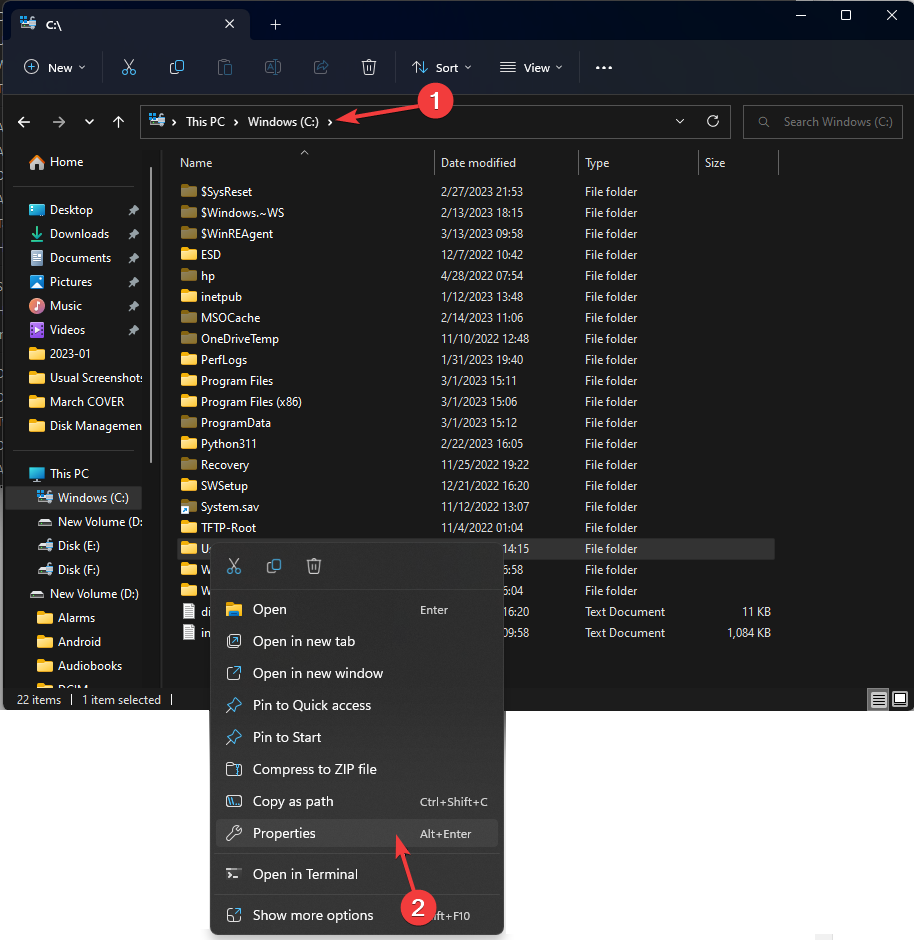
- Go to the folder location or select the drive itself, and right-click to select Properties.
- Switch to the Security tab, and click Advanced.
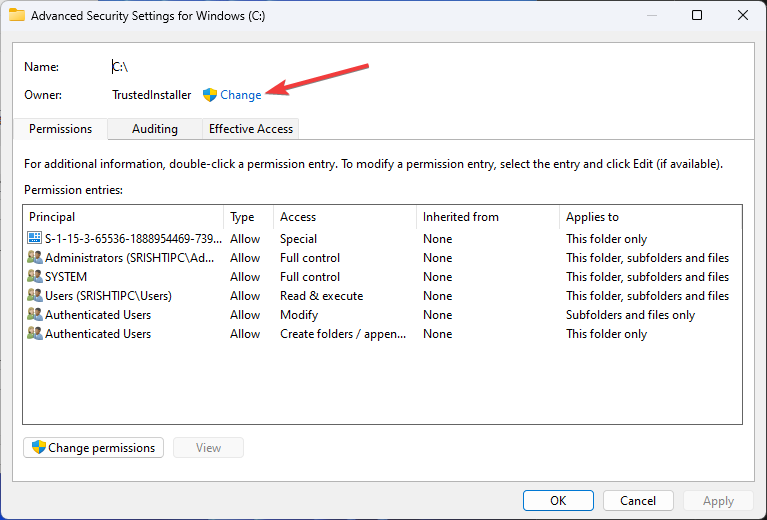
- On the Advanced Security Settings for Users, click Change.
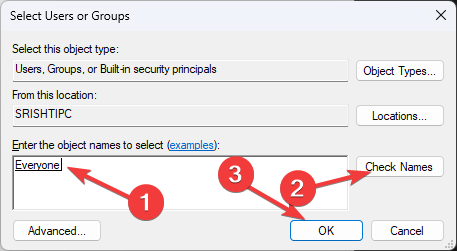
- Now on the Select User or Group window, type the name of the person you want to give ownership to and click Check Names.
- Click OK.
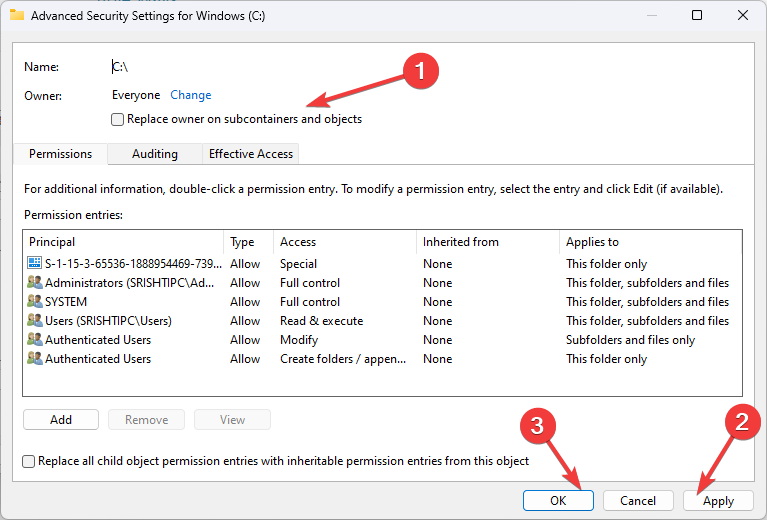
- Place a checkmark next to Replace owner on subcontainers and objects.
- Click Apply and then OK.
- Click Yes on the permission prompt that appears.
4. Authorize a user account
- Navigate to the following path:
C:\Users - Right-click to open the context menu, and choose Properties.
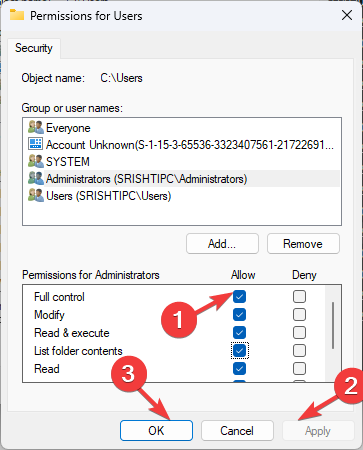
- Switch to the Security tab and click Edit.
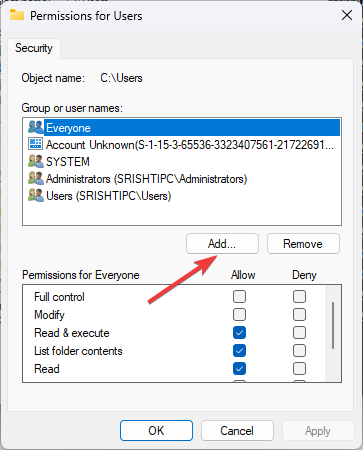
- On the Permissions for Users dialog box, click the Add button.
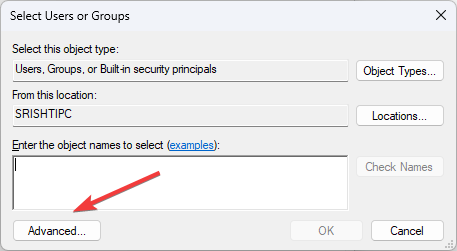
- Now under Select Users or Groups, click the Advanced button.
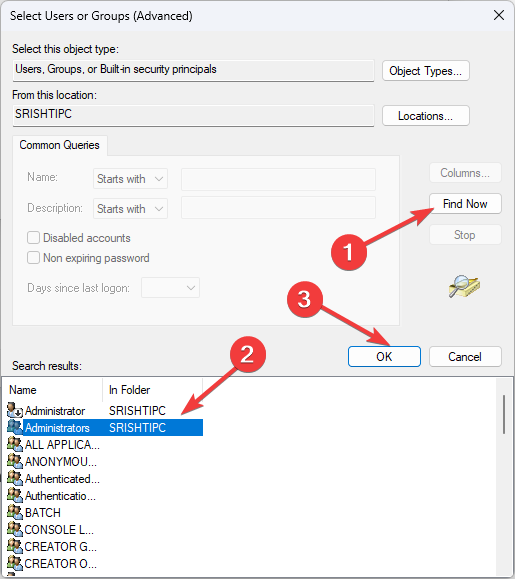
- Click the Find Now button, and it will list the users.
- Choose your PC username and hit OK.
- Again, click OK on the following window to close it.
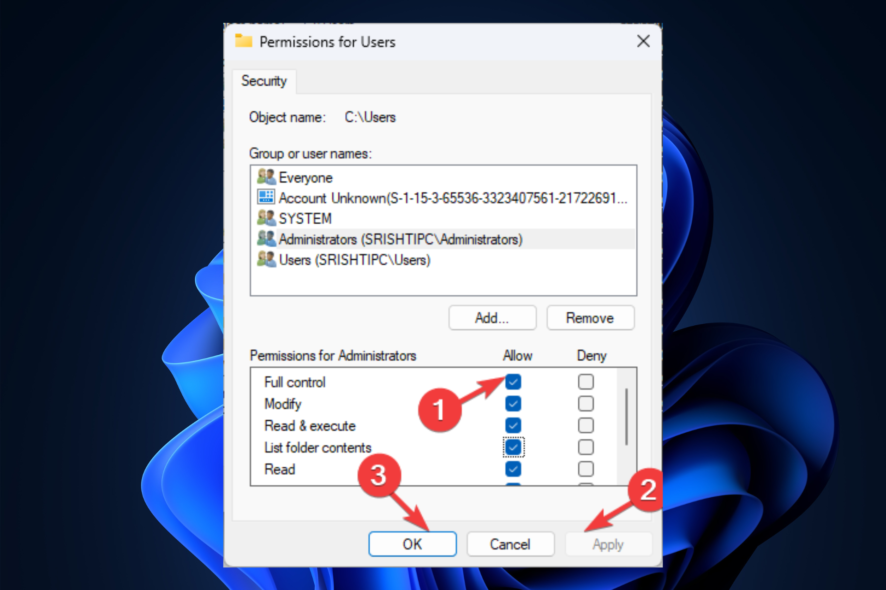
- Select the newly added username from Group or user names, and under Permissions, for Full control, select Allow.
- Click Apply and OK to complete the process.
5. Disable the Read-Only option
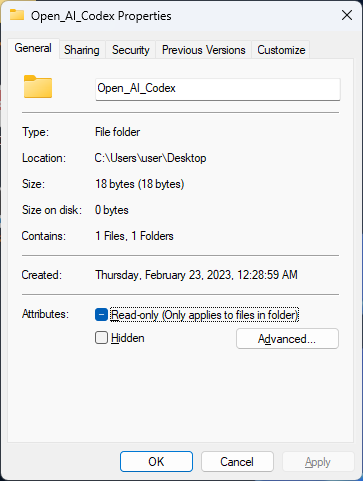
- Locate & select a file or folder or select the drive itself and right-click to choose Properties.
- Switch to the General tab, and remove the checkmark Read-only (Only applies to files in the folder).
- Click Apply and OK.
6. Make changes in Group Policy Editor
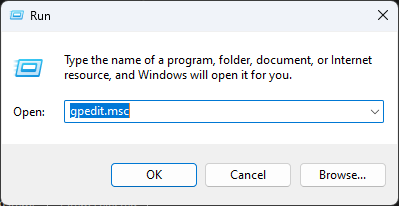
- Press Windows + R to open the Run window.
- Type gpedit.msc and click OK to open Group Policy Editor.
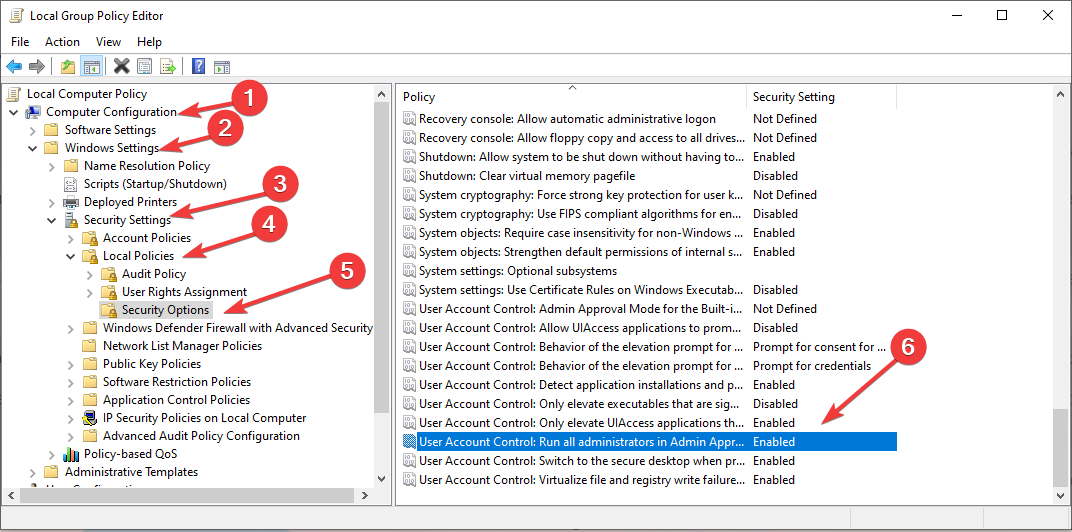
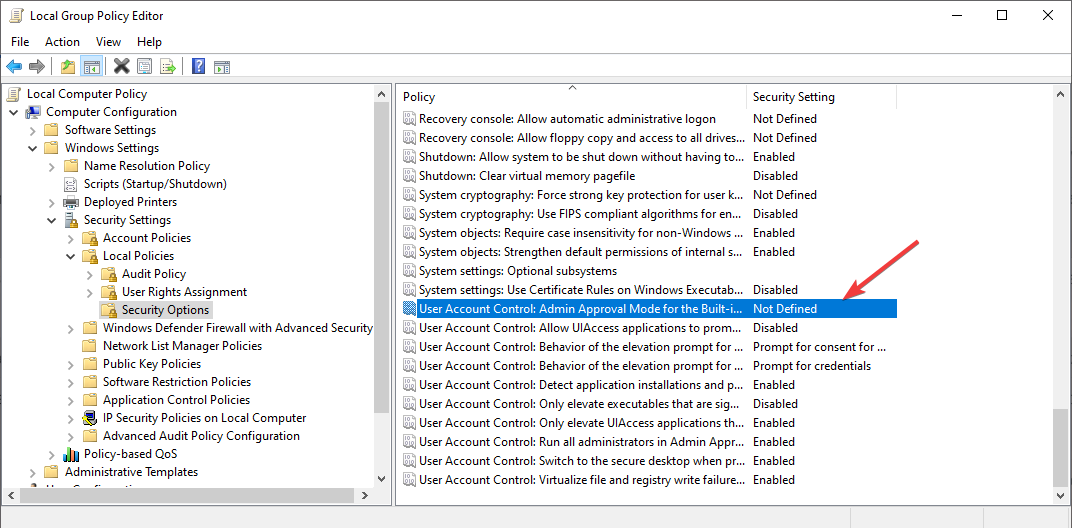
- Navigate to this path:
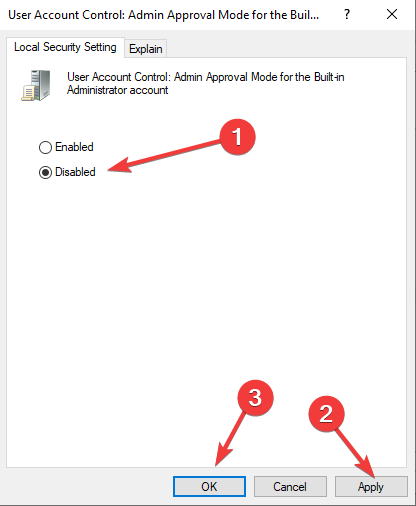
Computer Configuration\Windows Settings\Security Settings\Local Policies\Security Options - Locate and double-click User Account Control Admin Approval Mode for the Built-in Administrator account to open its Properties.
- Click Disabled, then Apply and OK.
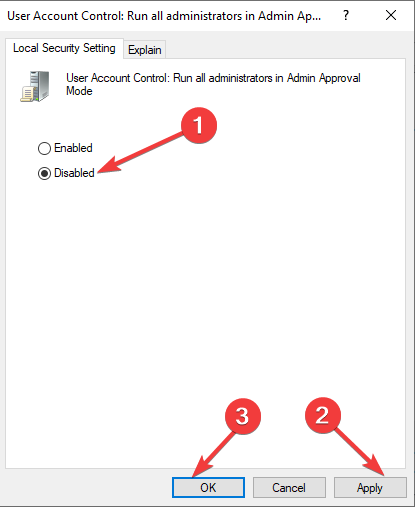
- Locate and double-click User Account Control Run all administrators in Admin Approval Mode to open its Properties.
- Click Disabled, then Apply and OK.
- Restart your computer.
So, these are the methods you can follow to fix you don’t currently have permission to access this folder. Try them and let us know what worked in the comments section below.








User forum
0 messages