Clean Install Windows 10 on SSD: 13 Steps to Properly do it
Experts recommend clean install on SSD for better performance
Key notes
- Cleaning and installing Windows 10 on SSD eliminates errors and enhances performance.
- The process is quite simple and shouldn't take long, given you are installing Windows 10 on an SSD.
- You only need a functional USB drive with 8GB or more storage and an SSD to clean install Windows.
Windows 10 is a free upgrade for those running the previous iteration and is one preferred choice. But for those already running Windows 10, a clean install on SSD is usually the best choice.
Experts often recommend installing Windows 10 on SSD when the computer has both HDD and SDD since the latter helps deliver faster performance. So, let’s find out how you can install Windows 10 on SSD without removing HDD.
Can I directly install Windows 10 on SSD?
Yes, you can directly clean install Windows 10 on SSD UEFI without affecting the PC’s functionality. The process is straightforward and shouldn’t take much time.
Before you do, here are a few benefits of clean installing Windows 11:
- Eliminates errors – One of the common reasons why users do a clean install is that it fixes all errors seamlessly.
- Removes malware and virus – A clean install of Windows 10 removes any malware or virus on the PC, even if it’s disguised as an app or process.
- Fixes corrupt system files – If the system files are corrupt, users usually go with the SFC scan and DISM tool. But if these two fail, only a clean install will ensure that all the system files are replaced.
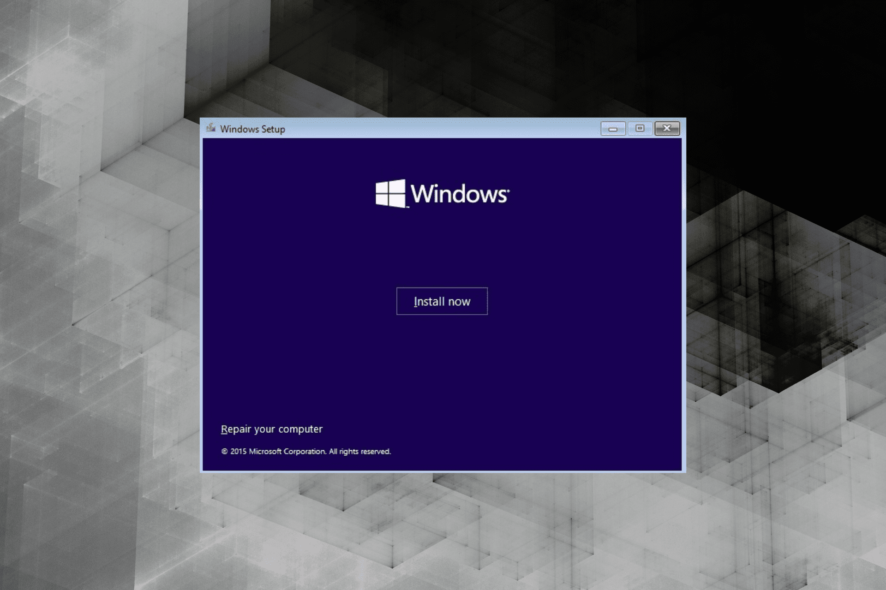
How can I clean install Windows 10 on SSD?
 NOTE
NOTE
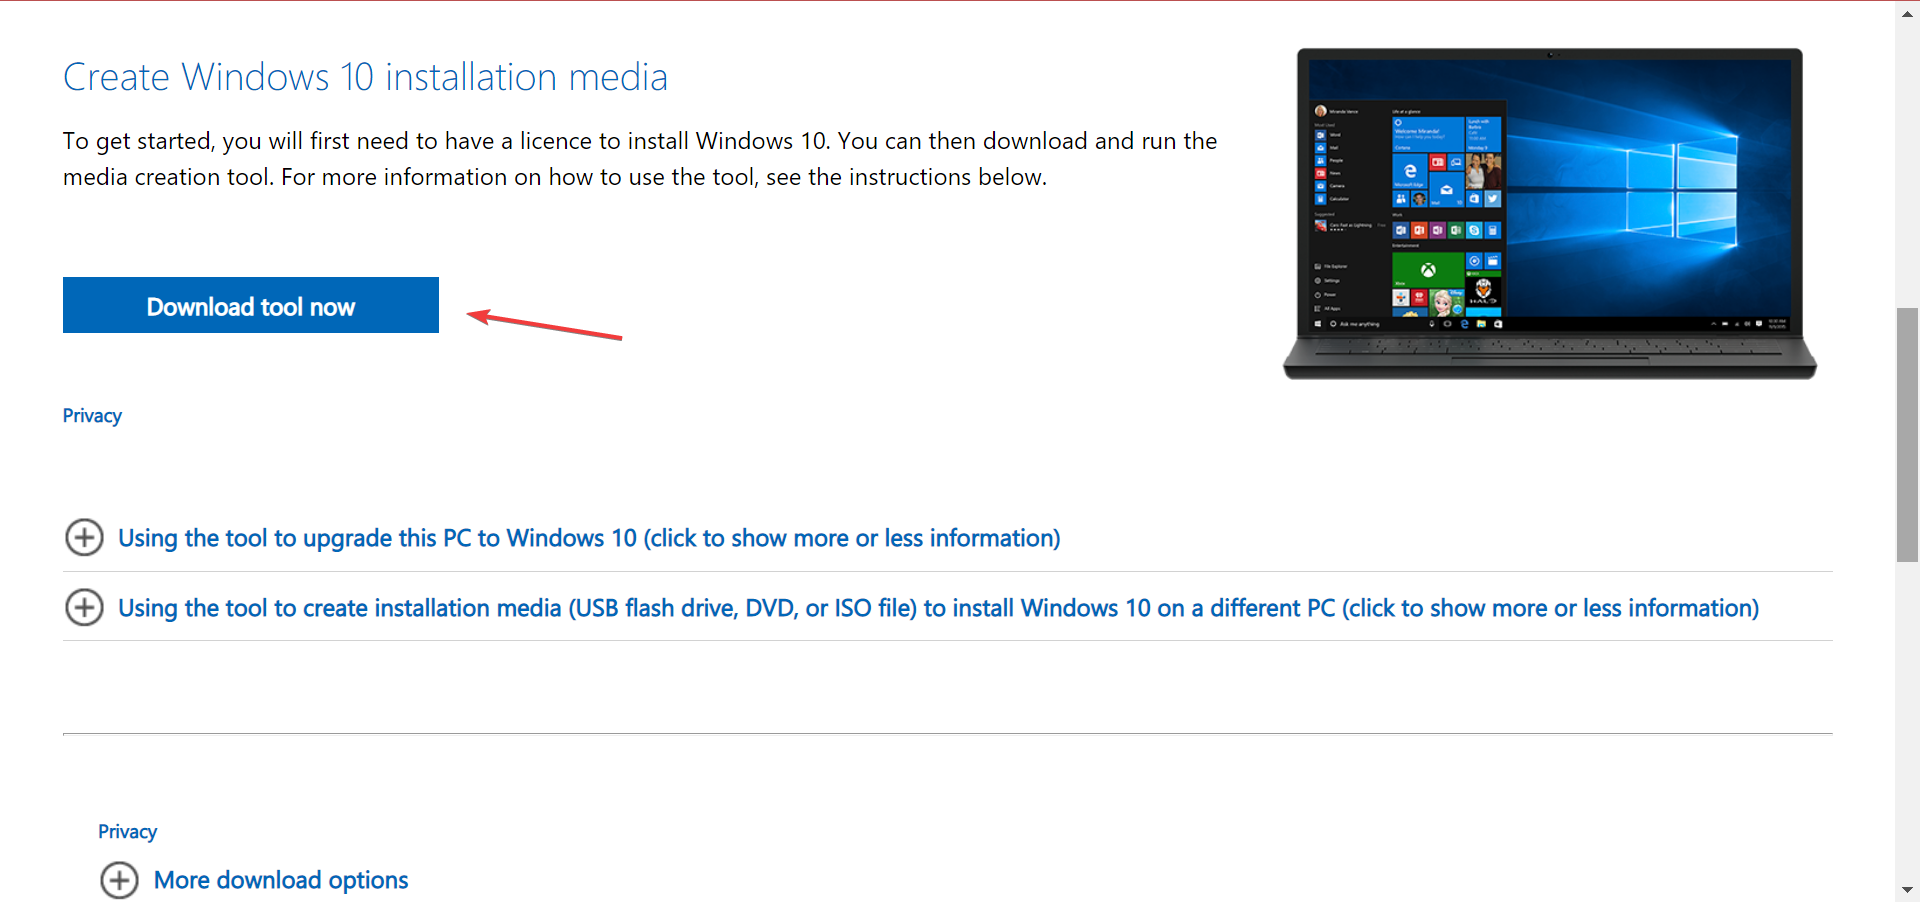
- Go to Microsoft’s official website, and click on the Download tool now to get the Windows 10 Media Creation Tool.
- Once done, run the setup and click Yes in the UAC prompt.
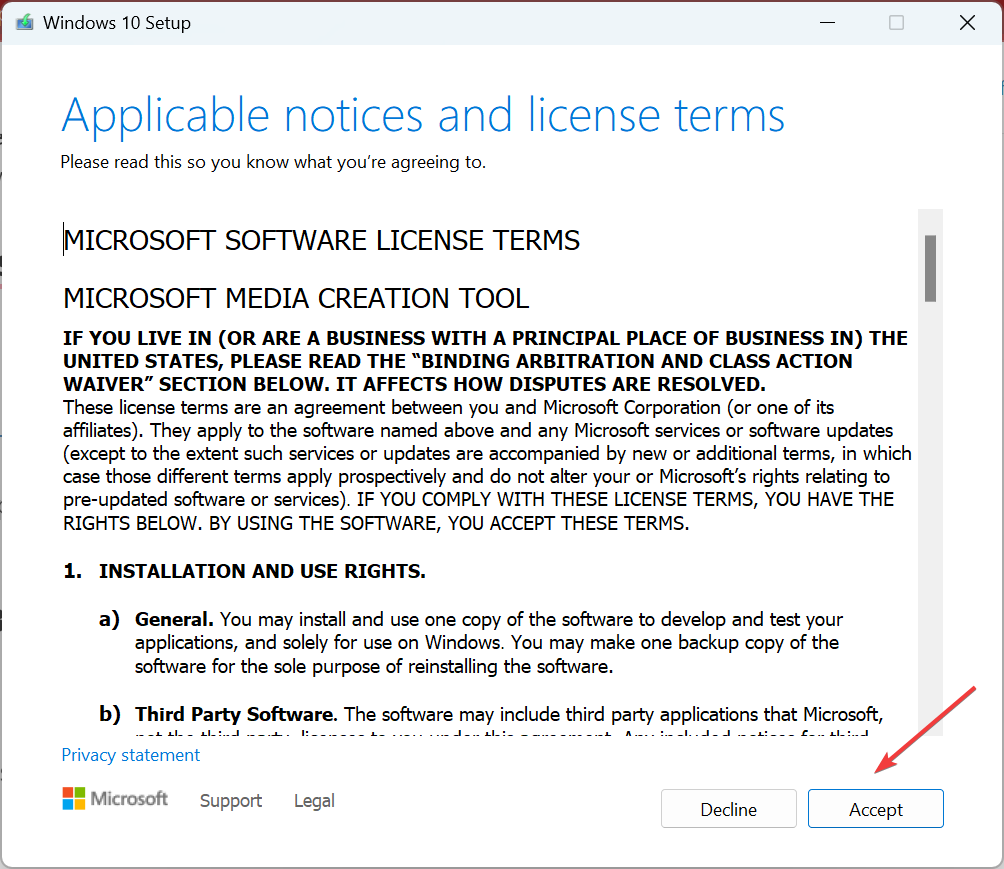
- Click on Accept to agree to the license terms.
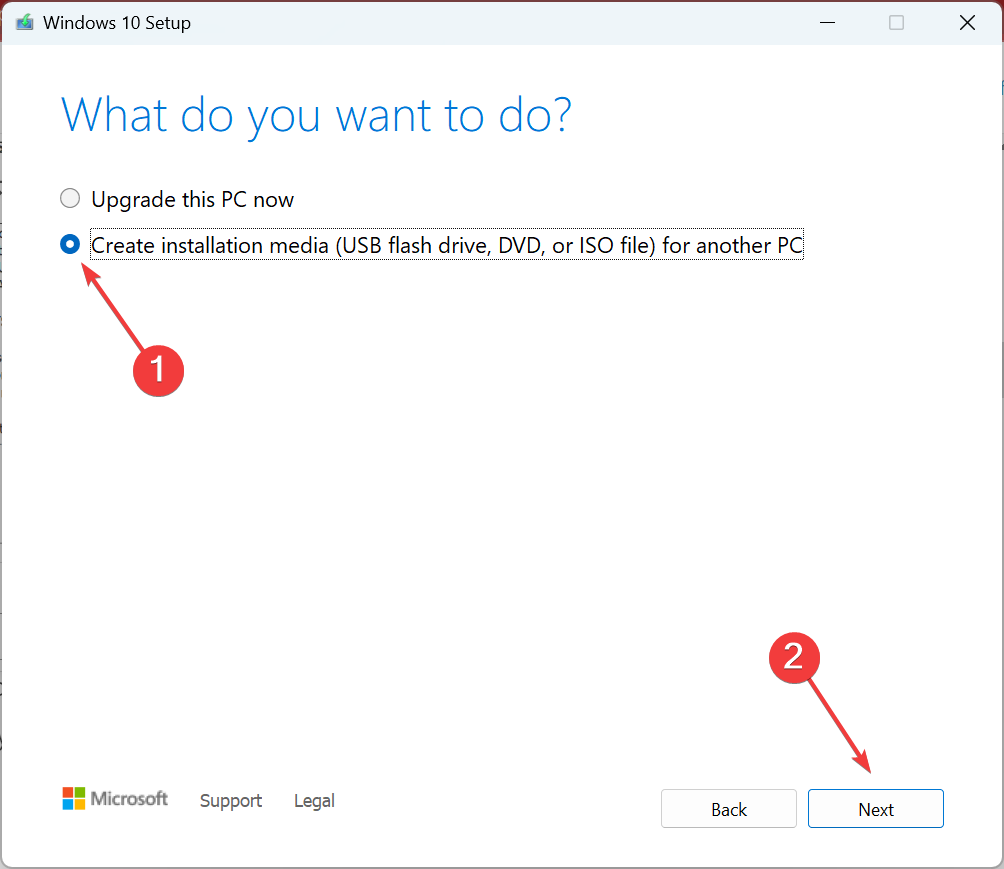
- Choose Create installation media (USB flash drive, DVD, or ISO file) for another PC, and then click Next.
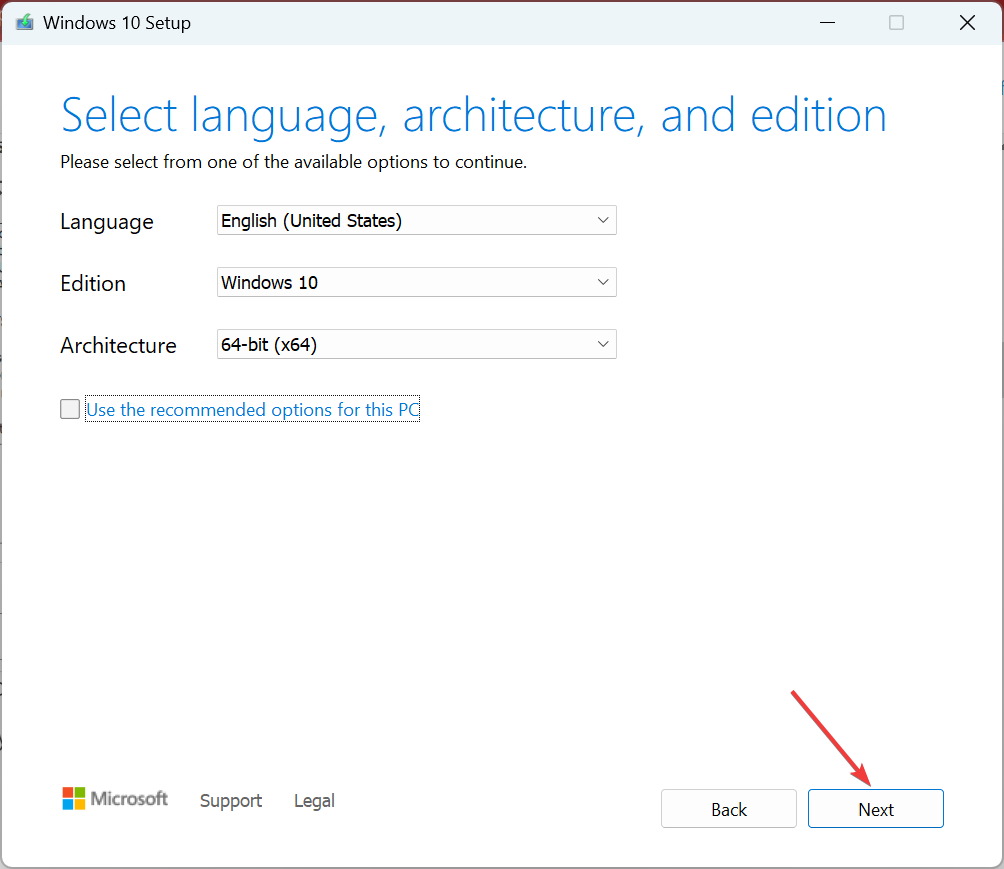
- Select the preferred options from the dropdown menus, go with the default settings, and click Next.
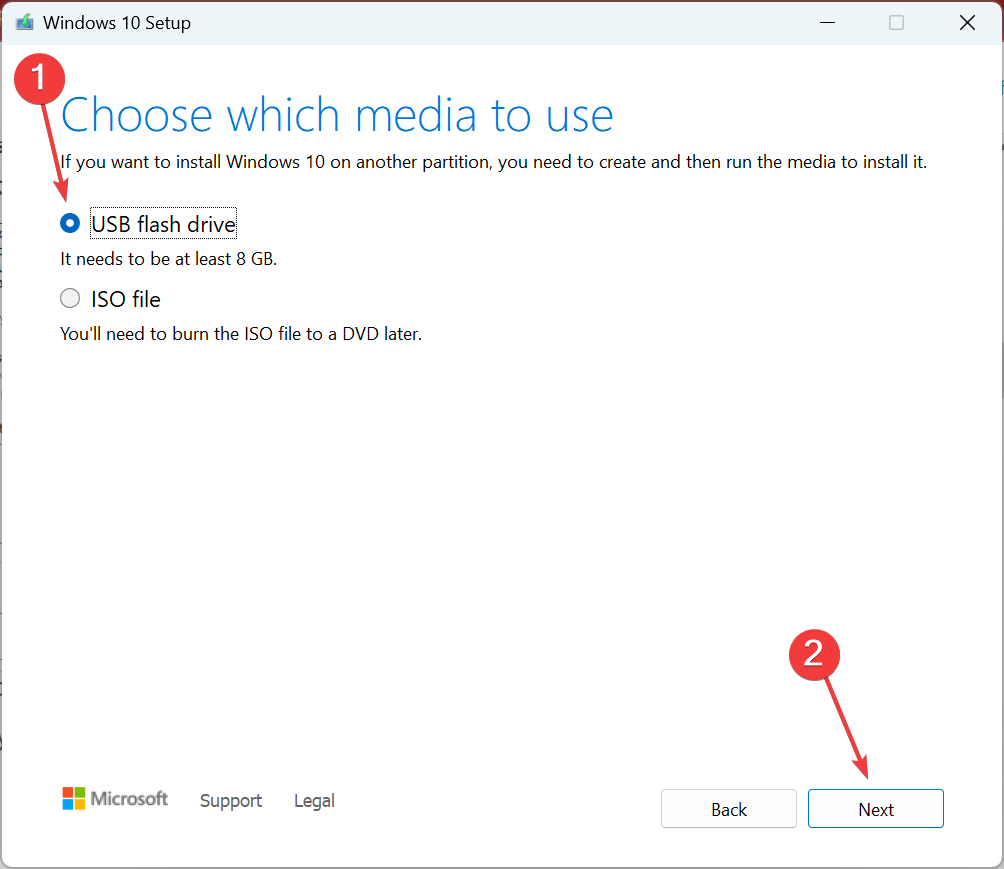
- Now, choose USB flash drive and click Next.
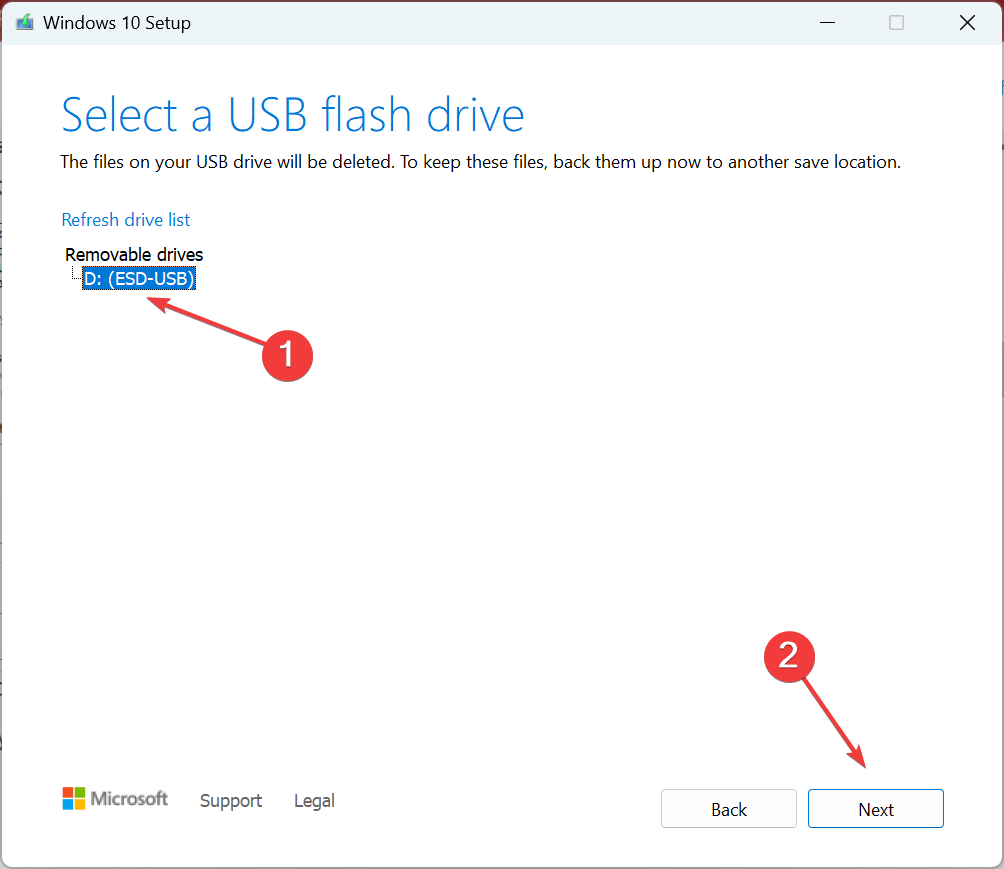
- Select the USB drive you connected earlier from the list, click Next, and wait for the process to complete.
- After the bootable drive is created, you will see the message, Your USB flash drive is ready.
- The next step is to connect the USB flash drive to the computer where you want to clean install Windows 10 on SSD, press F10 or Del to enter the BIOS, and select the USB drive as the boot device.
- Choose the appropriate responses to continue with the process.
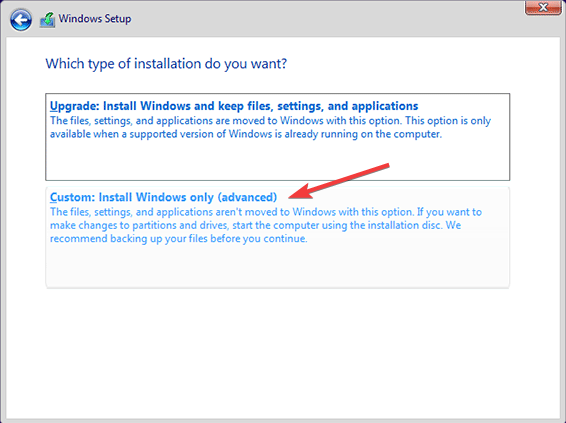
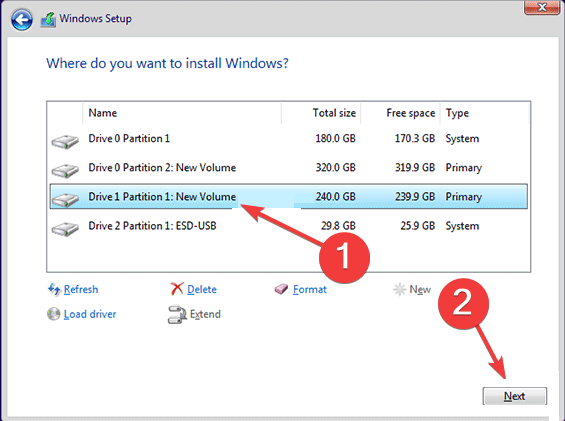
- When asked, choose Custom: Install Windows only (advanced).
- Select the SSD from the partitions listed here, and click Next.
- All that’s left for you is to wait for the installation to complete.
That’s it! Within a while, you would have completed a clean install of Windows 10 on m.2 SSD and should notice a considerably shorter boot time and better performance.
Also, if the C: drive already exists on the SSD, you can clean install Windows 10 on the new SSD without USB. Besides, if you don’t have an SSD yet, check the best SSDs available, and get one today!
Tell us your experience of running Windows 10 on SSD in the comments section below.
Read our disclosure page to find out how can you help Windows Report sustain the editorial team. Read more


Improve this guide


User forum
1 messages