FIX: The system cannot move the file to a different disk
Key notes
- Users report getting the error message The system cannot move the file to a different disk when trying to move a file to a different disk drive.
- We will explore the steps you need to do in order to fix this issue, so make sure to keep on reading.
- In our dedicated Fix Hub, you can read more related articles that will help you solve any problem like a pro.
If you’re getting the ERROR_NOT_SAME_DEVICE error code with The system cannot move the file to a different disk drive description, follow the troubleshooting steps listed in this article to fix it.
Bear in mind that the error is also known as ERROR_NOT_SAME_DEVICE 17 (0x11), so the next solutions and recommendations will apply to this as well.
The system cannot move the file: Error background
The system cannot move the file to a different disk drive error, also known as error 0x80070011 or 17 (0x11), occurs when users try to install updates on their computers. There are various elements triggering this issue:
- Damaged or corrupted files and folders.
- Missing EXE, DLL, or SYS files.
- Deleted registry values.
- Malware infection.
- Outdated software versions, etc.
Before you proceed with the troubleshooting methods listed below, make sure that the updates are installing to the same drive where you installed your operating system.
How can I fix The system cannot move the file to a different disk drive error?
1. Run a full system scan
Malware may cause various issues on your computer, including errors. Perform a full system scan in order to detect any malware running on your computer.
You can use Windows’ built-in antivirus, Windows Defender, or third-party antivirus solutions.
In choosing from the above options, we would recommend that you try a dedicated too for this task.
Not only it will save you a lot of time, but you will avoid doing any mistakes whatsoever.
ESET HOME Security Essential is one of the best tools that will scan your system completely and detect potential issues that are responsible for this issue.
By choosing this reliable antivirus, you benefit from thorough security against different forms of malware, plus avoid ransomware attacks and other online threats.
Hence, you should get high detection services to entirely protect your PC and repair such issues within your system.
2. Repair your registry
The simplest way to repair your registry is to use a dedicated tool. Don’t forget to first backup your registry in case anything goes wrong.
Plus, it’s more beneficial to repair your PC using registry cleaner tools that can also optimize the system and improve startup speeds.
You can also use Microsoft’s System File Checker to check for system file corruption. However, this utility is only available on Windows 10. Here’s how to run an SFC scan:
- Go to Start, type cmd and right-click Command Prompt.
- Next, select Run as Administrator.
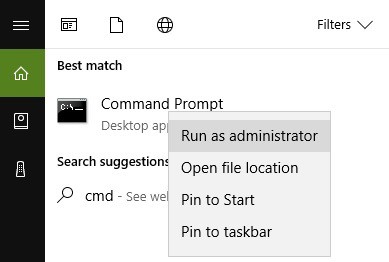
- Now type the sfc /scannow command.
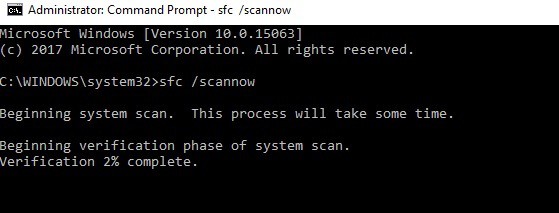
- Wait for the scanning process to complete and then restart your computer. All corrupted files will be replaced on reboot.
3. Update your OS
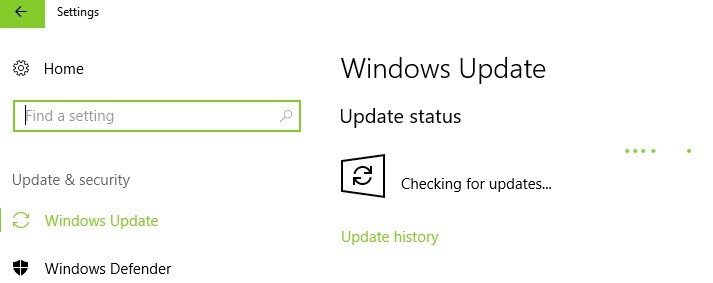
Make sure that you’re running the latest Windows OS updates on your machine. As a quick reminder, Microsoft constantly rolls out Windows updates in order to improve the system’s stability and fix various issues.
Go to Windows Update, check for updates and install the available updates. To access the Windows Update section, you can simply type “update” in the search box. This method works on all Windows versions.
If you’re looking for a particular update, go to Microsoft’s Update Catalog website. Simply type the KB number of the respective update, hit Enter, and then click on the download button.
4. Remove recently installed software
If you recently installed new software on your computer, try uninstalling it. Go to Start, type Control Panel and select the program(s) recently added. Then click Uninstall.
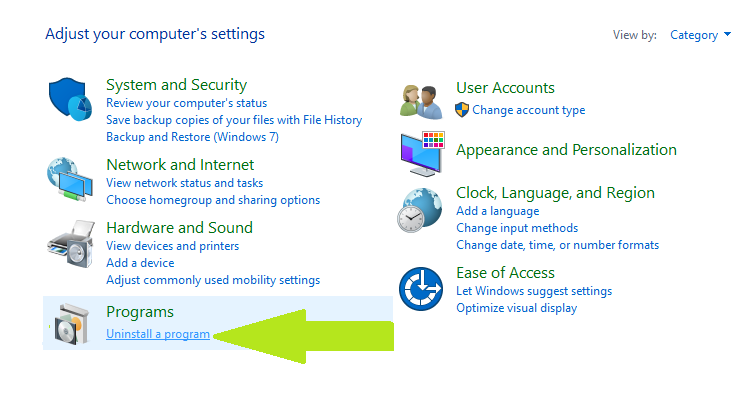
Then restart your computer, and try to install the updates again.
5. Check your disk for errors
On Windows 10, you can run a disk check using Command Prompt.
Start Command Prompt as administrator and type the chkdsk C: /f command followed by Enter. Replace C with the letter of your hard drive partition.
6. Format your drive
If none of the solutions listed above worked, try formatting the problematic drive. Formatting and restoring the default drive settings should fix this problem.
Keep in mind that formatting your drive means deleting all the files and folders stored on the respective drive.
Before exploring how you can do this manually, we would recommend that you use a dedicated tool that will safely format your drive without affecting other PC services.
Using these practical tools, you can format overused drives and wipe out unused software accumulated in your hard drive over time.
In this way, you can repair disk troubles like this with reliable drive formatting tools, and clear your storage without any difficulties.
Here are the steps you can do to manually format your drive
- Go to Start and type disk management.
- Next, select the Disk Management utility.
- Right-click the drive that you want to format and select the Format option.
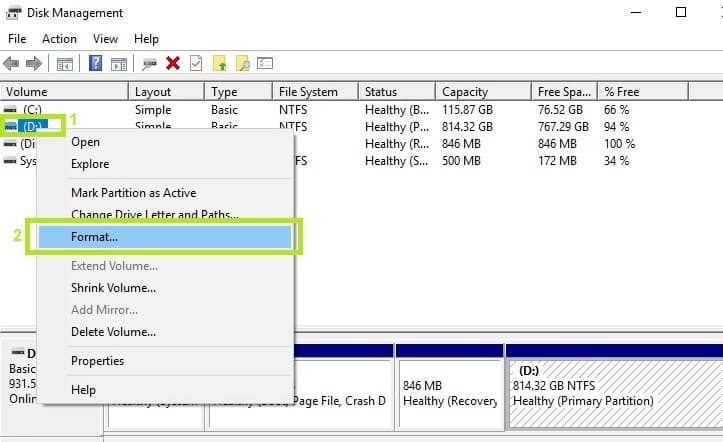
- Follow the on-screen instructions to further customize the format process and click OK on the warning window.
- Once the format process finishes, you can use your drive.
- Try to install the updates again to see if this action fixed the problem.
7. Clean your temporary files and folders
The simplest and quickest manner to delete your temporary files and folders is to use Disk Cleanup. As you use your computer or browse the Internet, your PC accumulates various unnecessary files.
These so-called junk files may affect your computer’s processing speed, causing apps to respond slowly and may also trigger various error codes, including the ‘ERROR_NOT_SAME_DEVICE’ error code.
Here’s how to use Disk Cleanup on Windows 10:
- Go to Start and type Disk Cleanup.
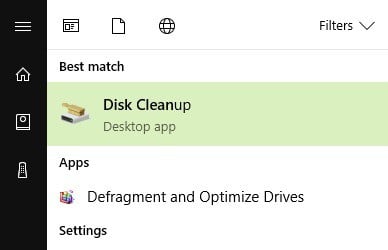
- Select the disk that you want to clean, the tool will tell you how much space you can free up.
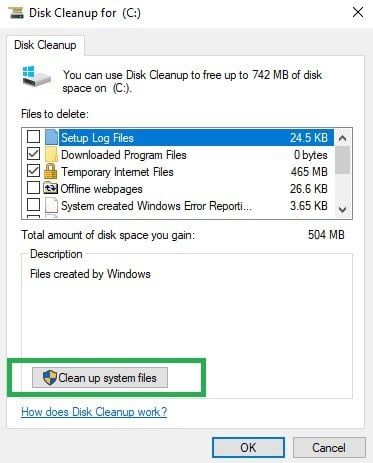
- Select Clean up system files.
8. Temporarily change registry keys
- Save your original registry key values. In case anything goes wrong, you will be able to restore your previous functional Windows version.
- Change the following registry key values from C: or %SystemDrive% to D (or another drive):
- HKEY_LOCAL_MACHINESOFTWAREMicrosoftWindowsCurrentVersion
- HKEY_LOCAL_MACHINESOFTWAREMicrosoftWindows NTCurrentVersionProfileList
- Install the updates
- Restore the registry key values to back to the original drive.
9. Use system recovery options
The System Restore option allows you to restore the previous well-performing system configuration without losing any files, except for a few customizable features and settings.
If System Restore is enabled, follow the instructions listed below:
- Go to Search, type system properties, and open System Properties.
- Go to System Protection and click on System Restore.
- Click Next and choose the preferred restore point in the new window.
- Once you’ve selected your preferred restore point, click Next and select Finish.
- Your PC will restart and the restoring process will start.
After the procedure has been completed, try to update your computer to see if the problem still persists.
Windows 10 offers a series of advanced recovery option that allows users to clean install the OS. If you’re a Windows 10 user, you can also use the Reset this P’ recovery option.
- Go to Settings and select Update & Security.
- Next, click on Recovery under the left pane.
- Click on Get Started under Reset this PC and choose the Keep your files option.
- Follow the on-screen instructions to complete the reset.
We hope that the solutions listed above helped you fix The system cannot move the file to a different disk drive error.
If you’ve come across other workarounds to fix this problem, you can help the Windows community by listing the troubleshooting steps in the comments below.
Read our disclosure page to find out how can you help Windows Report sustain the editorial team. Read more


Improve this guide


User forum
0 messages