How to fix screen problems in Windows 10
![]() 6 min. read
6 min. read
![]() Updated on
Updated on
Share this article

Read our disclosure page to find out how can you help Windows Report sustain the editorial team Read more
Key notes
- Ever since Windows 10 was in its testing phase, users were facing screen problems.
- Using an automatic driver updater will certainly save you from the hassle of searching for drivers manually, and it will always keep your system up to date with the latest drivers.
- Enter the following command, and press Enter: sfc/scannowWait for the process to finish.

Ever since Windows 10 was in its testing phase, users were facing screen problems. We already showed you how to solve black screen and flashing screen problems in Windows 10, but with the final release of the system, new problems appeared.
So, in this article, we’ll try to solve a couple of screen problems in Windows 10.
But first, here are some more examples of this issue:
- Windows 10 screen flashing on and off – Your screen may not flash constantly, but only in certain time intervals.
- Windows 10 flickering start menu – There’s a chance your screen will flash only when you open the Start Menu.
- Black screen windows 10 with the cursor – Black screen usually appears if you have two monitors. Simply detach one of your monitors and the problem should disappear.
- Windows 10 black screen without cursor – In some cases, you won’t even see a cursor when the black screen appears. This can be caused by your BIOS configuration. To fix the problem, you need to check BIOS configuration and make sure that you’re using only the dedicated graphics.
- Windows 10 white screen crash – If your computer crashes after a white screen, it’s possible that your graphics card is faulty, so be sure to test it and replace it if needed.
How do I deal with screen problems in Windows 10?
1. Black screen during Windows 10 installation
- Restart your computer and press the key for entering BIOS (Probably DEL)
- Go to Advanced BIOS Features (or something like that)
- Select Video Configuration or Internal Graphics
- Look for an option Primary Video Adapter
- Select PCI to switch to your PCI graphics card
- Save changes and exit BIOS
This issue doesn’t usually appear on regular computers. All people who reported black screen during the Windows 10 installation also said that they have two graphics cards or two monitors connected to the computer.
So the solution is very simple, just unplug the second monitor or disconnect the second graphics card, and you should be able to install Windows 10 normally.
While disconnecting the second monitor is easy (you just have to unplug the cable), to disable the second graphics card (probably integrated) you’ll have to go to BIOS.
In most cases, people told us that one of these methods worked, and I hope that it will work for you too. However, if you have black screen problems after you installed Windows 10, check for the solution below.
2. Flashing screen in Windows 10
2.1. Check if your drivers are compatible
Users are having driver compatibility problems ever since upgrading to Windows 10, because a lot of older graphic cards still don’t have compatible drivers.
Also, even if there are Windows 10-compatible drivers for your graphics cards, maybe you didn’t download them.
So reach for the Device Manager and see if your drivers are updated.
Update drivers automatically
Searching for drivers on your own can be time-consuming. So, we advise you to use a tool that will do this for you automatically.
Using an automatic driver updater will certainly save you from the hassle of searching for drivers manually, and it will always keep your system up to date with the latest drivers.
For example, a third-party driver updater and repair tool like Outbyte Driver Updater could do the job much faster and better.
Just download and install it on your PC, and launch it to start a full system scan to identify all the outdated, broken, or missing drivers.
Once the scan is finished simply select which drivers you need taken care of, and let Outbyte Driver Updater do the rest.
After the new drivers have been downloaded and installed, restart your PC for good measure, and you’re all set.
Concluding here, using automated support to manage drivers and update them accordingly can fix display issues with your Windows 10 PC.
2.2. Change monitor refresh rate
- Right-click on Desktop and click on Display Settings
- Go to Advanced display settings
- Under Related settings, go to Display adapter properties

- Go to Monitor tab and select another refresh rate from Screen refresh rate:
- Click OK
Some people reported that reducing the monitor refresh rate helped them to get rid of the flashing screen in Windows 10. So it won’t hurt if we try this solution as well.
2.3. Disconnect all the peripherals
Some users reported that certain peripherals may cause the screen issue. To eliminate the doubt, simply disconnect all your peripherals to see if it makes any difference.
If a peripheral indeed causes the problem, search online for some further troubleshooting steps.
2.4. Update Windows
If this is a widespread problem, Microsoft usually acknowledges it relatively fast. That means the company will release a workaround in form of an update. To make sure you get that update, simply go to Settings > Windows Update, and check for updates.
2.5. Run the Troubleshooter
- Go to Settings.
- Head over to Updates & Security > Troubleshoot.
- Select Hardware & devices, and go to Run the Troubleshooter.

- Follow further on-screen instructions and let the process finish.
- Restart your computer.
If none of the previous solutions resolved the issue, let’s turn to troubleshooters. The first one we’re going to try is Windows 10’s own troubleshooting tool.
This feature can help you deal with various system issues, including our problem with the screen.
2.6. Run the SFC scan
- Go to Search, type cmd, right-click Command Prompt, and select Open as Administrator.
- Enter the following command, and press Enter: sfc/scannow
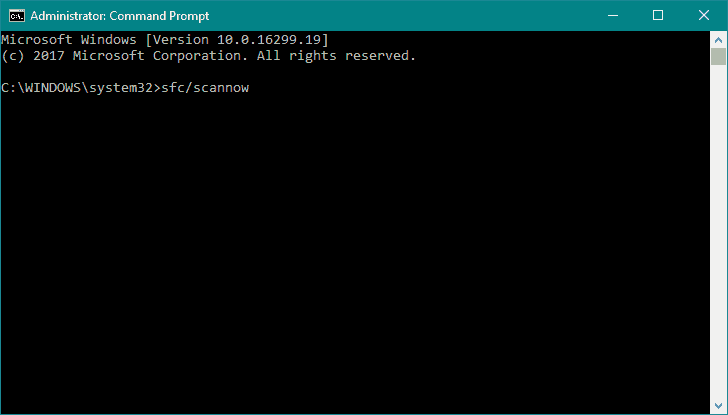
- Wait for the process to finish.
- Restart your computer.
The next troubleshooter we’re going to try is the command-line tool called the SFC scan. As its name says, this tool scans your computer for various system issues. Hopefully, it’ll also be able to resolve our screen problem.
That would be all, I hope this article covered all reported screen problems in Windows 10 so far. But, if none of this solved your problem, you can search for the solution in the above-mentioned black screen and flashing screen articles as well, or you can tell us in the comments if you need further assistance.
If you have any other Windows 10-related issues you can check for the solution in our Windows 10 Fix section.