FIX: Startup folder not working in Windows 10/11
![]() 11 min. read
11 min. read
![]() Updated on
Updated on
Share this article

Improve this guide
Read our disclosure page to find out how can you help Windows Report sustain the editorial team Read more
Key notes
- Usually, the startup programs tend to bloat your system and slow down the startup process. If you have the oposite problem, when programs in Windows Startup folder won't start, take a look below for a complete list of solutions.
- One of the advanced solutions is to repair the registry. You might want to take a look at our most recent top12 registry cleaners.
- We wrote extensively about Windows 10 problems so please find all our Windows 10 fix articles.
- If you experienced any other Windows 10 errors we have solutions for you. Check out our Windows 10 errors hub.

The most common problem with startup programs is that they tend to bloat your system and slow down the startup process.
The dozens of programs in combination with an old HDD mean that you’ll wait for some time until the PC finally boots.
However, there’s also the opposite of it – when programs in Windows Startup folder just won’t start no matter what you do.
For the sake of dealing with this annoyance, we prepared an in-depth list that should provide you with enough resources to address this problem.
In case you’re trying to make a program start with the system without success, make sure to take a look below.
What can I do when programs from Startup folder won’t start?
1: Check the Startup manager
Back in the days, you had to turn to System Configuration in order to tweak the startup programs. There were all Windows services, too, so there are a lot of things you couldn’t touch.
A tad overcomplicated for a standard user. Others turned to third-party tools that were more of a bloatware than the solution. Luckily, that’s not the case with Windows 10.
Now, you can navigate to good old Task Manager and find all startup programs you need.
You can enable or disable any of them based on your needs.
This might seem like a simple solution, but it’s worth starting from the simplest one and gradually advancing to more complex solutions in the troubleshooting procedure.
If you’re not sure how to use newly added Startup manager in Windows 10, follow the instructions below:
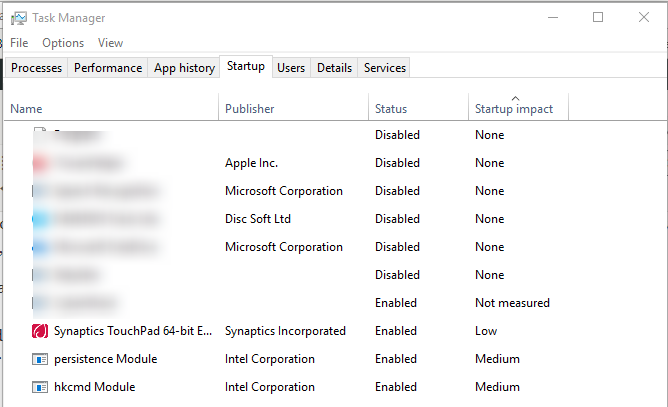
- Press Ctrl + Shift + Esc to open Task Manager.
- Open the Startup tab.

- Select the programs you want to start with the system and enable them.
- Confirm changes and restart your PC.
2: Reinstall the program
After every installation, the program or application should automatically create a shortcut in the system’s startup folder.
However, sometimes and for no apparent reason, the installation sequence simply skips on doing so.
Even though the way of manipulating startup programs changed, the containing folder is still there with Windows 10. And it still needs those shortcuts to run as intended.
You might also be interested in our guide on how to reinstall Windows Store apps in Windows 10
What you should do in this scenario is to try to repair the installation or reinstall the program.
Most programs offer the Repair option, but even the reinstallation shouldn’t take too much of your time, with only the largest ones being an exception.
Here’s how to repair or reinstall the troubling program and, hopefully, enable it to create a startup entry:
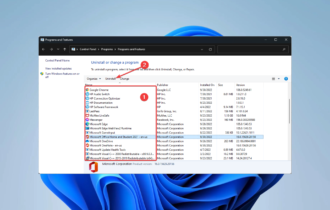
- In the Windows Search bar, type Control and open Control Panel.
- In the Category View, open Uninstall a program.
- Navigate to a problem that refuses to start with the system, right-click on it, and choose Uninstall.
- Navigate to Program files or Program files (86) and delete the remainings in folders.
- Also, you can use a third-party cleaner like CCleaner to delete the remaining traces stored in the registry.
- Run the installer and install the program again.
3: Run DISM
Most of the steps we provided in this article relate to third-party programs. However, if some of the Windows-native applications won’t run at the startup, there’s an alternative way to address this.
We’re referring to DISM or Deployment Image Servicing and Management tool.
This tool can come in handy for various system-related issues, and since you’re unable to reinstall the, let’s say Task Manager, you can at least restart it with the little help of DISM.
If you’re not confident running this tool, we made sure to present you two ways it can be used in Windows 10. Follow the instructions below:
- Type cmd in the Windows search bar, right-click on the Command Prompt and run it as an administrator.
- In the command line, type the following line and press Enter:
- DISM /online /Cleanup-Image / ScanHealth
- DISM /Online /Cleanup-Image /RestoreHealth
- Wait for the procedure to finish (it might take up to 10 minutes) and restart your PC.
And here’s the alternative way to run DISM:
- Mount your Windows 10 installation media, either USB or ISO DVD.
- Open Command Prompt (already explained how to above).
- In the command line, type the following commands and press Enter after each:
- DISM /online /Cleanup-Image /CheckHealth
- If there’s not any single error, enter this command and press Enter:
- DISM /online /Cleanup-Image / ScanHealth
- If DISM finds any errors, enter the following commands and tap Enter:
- DISM /Online /Cleanup-Image /RestoreHealth /Source:repairSource\install.wim
- Have in mind that you’ll need to replace the ”repair source” part with your installation media.
- Wait for the procedure to end and restart your PC.
Although this is should help you with the majority of issues, it may not be the final solution for your issue. If that’s the case, make sure to continue with the steps we provided below.
4: Insert the shortcut manually
Now, the fact that you can’t locate the Startup folder in the Start menu like before, doesn’t mean that you can’t find it at all. It’s still there in Windows 10, hidden from the prying eyes.
Now, we already informed you about automatically created shortcuts that are made just after the installation process is finished.
However, since that’s not always the case, you’ll need to take the matters into your own hands and create the shortcut on your own.
This shouldn’t be too much of a problem if you follow these instructions closely:
- Navigate to the installation folder of the troublesome program.
- Right-click on the exe file (program’s main executable) and create a shortcut.
- Press Windows + R to open the elevated Run command line.
- In the command line type to open the Startup folder:
- shell:startup
- Copy the shortcut and paste it into the Startup folder.
- Restart your PC and look for changes.
5: Create a batch file
Another possible solution also requires a manual approach. Namely, you can create a batch file and force a program to start with the system.
You’ll still be prompted with UAC message informing you about the program at every startup, nonetheless. But, đ at least you’ll be able to make it work.
Some users advised this as the best workaround for the current state, at least until the problem is dealt with formally in the future.
Here’s how to create and run the batch file that enables you to run any program at the startup:
- Right-click on the desktop and open New > Text document.
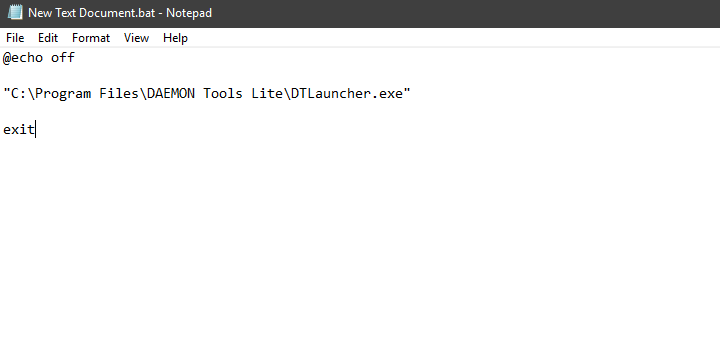
- In the document, paste the following lines but don’t forget to change the example with the path to the program’s exe file.
-
@echo off
C:\Program Files\DAEMON Tools Lite\DTLauncher.exe
exit
-
- After that, click on the File > Save as, and change the document’s extension to .bat instead of .txt.

- Close the document and double-click on it to run it.
- After the system starts next time, the program should start. Although, you’ll be prompted with UAC message.
6: Force the elevated program with Task Scheduler
The Task Scheduler is a built-in tool that enables you to create, schedule and run various tasks with the implementation of triggers and criteria you set.
This, obviously, means that you can set an EXE file to run with the system startup, setting At Startup as criteria or trigger.
If you never had a chance to use Task Scheduler to force a program to start with the system, make sure to follow these steps and we should be good to go:
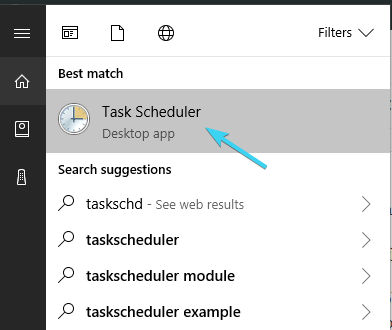
- In the Windows Search bar, type taskschd and open Task Scheduler.

- Expand Task Scheduler Library and click on Create Task under the right pane.
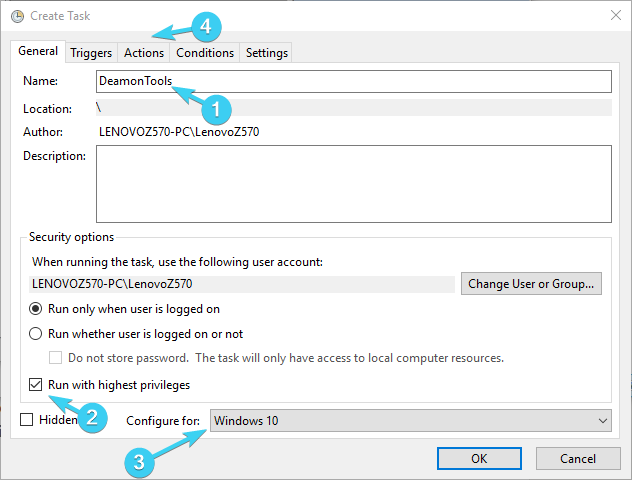
- Under the General tab, name the Task same as the program you’ll try to run. In this case, we’ve chosen DeamonTools for a showcase.
- Check the Run with highest privileges box.
- Select Windows 10 from the ”Configure for” drop-down menu and open the Actions tab.

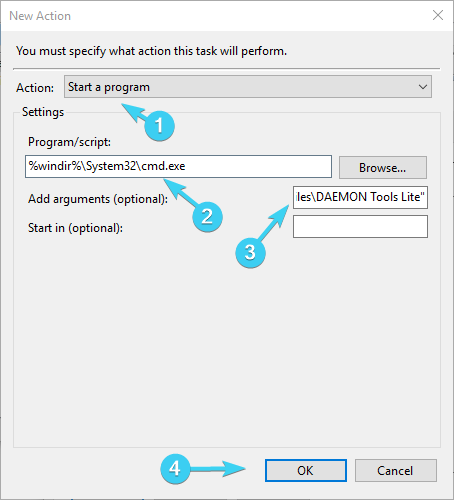
- Under the Actions tab, click New.
- From the Action drop-down menu, select Start a program.
- In the Program/script field, paste the following command:
- %windir%\System32\cmd.exe
- In the ”Add arguments (optional)” section, add the Task name and the path to the program’s EXE file (installation folder) in this manner:
- /c start Task Name Full Path of Program

- /c start Task Name Full Path of Program
- Don’t forget to replace the Task name and Full path to program’s EXE file above.
- Now, finally press OK to confirm changes and you should be able to see the newly-created task.
- Now press Windows + R to open the elevated Run command line.
- In the command line type to open the Startup folder:
- shell:startup
- Copy the program’s shortcut and paste it into the Startup folder.
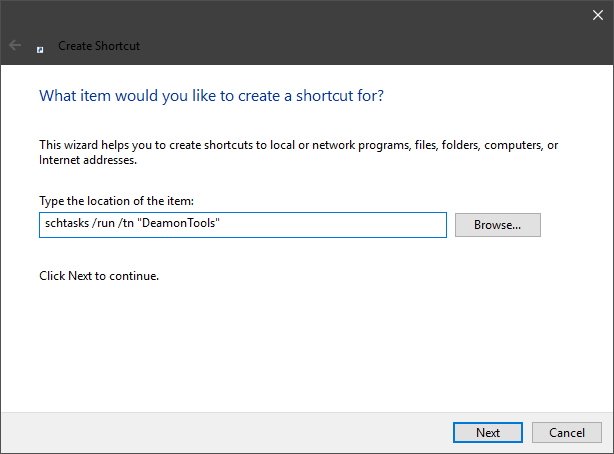
- Right-click on the empty space in the folder and click New > Shortcut.
- In the empty field, type the following line and click Next:
- schtasks /run /tn “Task Name”

- schtasks /run /tn “Task Name”
- Don’t forget to change the task name with the name of your actual task we just created. In our case, DeamonTools.
- On the next screen, name the shortcut as the program is named. In our case DeamonTools Lite.
- The last thing is to right-click on the newly-created shortcut, open Properties > Shortcut, and change the icon.
7: Disable UAC
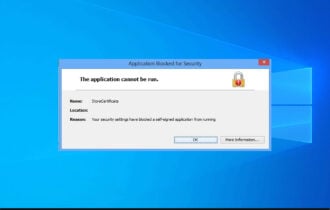
User Account Control or UAC is one of those security measures that are certainly helpful to some extent but can become bothersome over time.
Especially if a certain program requires administrative permissions in order to run. By default, UAC will block these kinds of programs on startup, so the only thing that comes to our mind is to disable it completely.
Now, have in mind that this can affect security and overall performance of the system, and it’s highly unadvised to turn UAC off.
I’ve always turned it Off on Windows 7 for various reasons, but it seems that the drawbacks are higher when it comes to Windows 10.
If you’re not sure how to disable User Account Control in Windows 10, follow the instructions below:
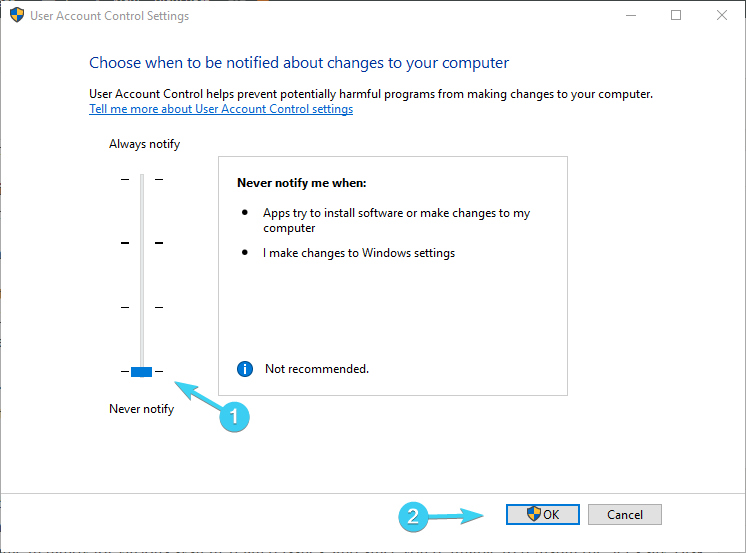
- Type UAC in the Search bar and open Change User Account Control settings.
- Move the slider to the bottom and confirm changes.

- This should stop further prompts and enable you to start some of the troubled programs.
We don’t advise you to keep this setup permanently since it can affect the performance of Windows Firewall and other related security features. It might not, but it’s always better to be safe than sorry.
8: Edit registry
Mostly everything that you do within the Windows interface can be taken to a higher authority, which is Registry.
As you probably know, Windows Registry keeps all low-level settings of both system and third-party processes that appear in everyday use.
That makes it quite dangerous, so make sure not to meddle with registry inputs if you’re not 100% sure what you’re doing.
Nonetheless, with a careful approach, you should be able to easily force certain programs into starting with the system from the Registry Editor.
Make sure to follow the steps below closely and we should be good to go:
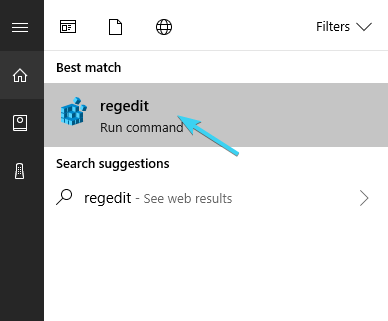
- In the Windows Search bar, type regedit, and open Registry editor.

- Open the File option and create a backup of your current registry state.
- Follow this path:
HKEY_LOCAL_MACHINE\Software\Microsoft\Windows\CurrentVersion\Run
- Right-click on the empty space and choose New > String value.
- Name value exactly as the program you want to run is named.
- Right-click on the newly-created value and choose Modify.
- In the Value data field, paste the exact path of the program’s EXE file (including the exe file, like all the above-enlisted programs).
- Save changes and restart your PC.
9: Reset this PC
Finally, if you’ve reached the brink of your nerves and the system just won’t comply, the only remaining solutions we can offer is to start from a scratch.
We won’t go as far as to recommend a clean reinstallation, and luckily, with Windows 10 you don’t need it. What you can do is to check for the recovery options and use Reset this PC.
Restoring the system to its default values should be the final resort, but also it can help.
In addition, you get to keep your files without losing any important data in the process. If you’re up for the task, follow the instructions below:
- Press Windows key +I to open Settings.
- Open Update & security.
- Select Recovery from the left pane.
- Click on Reset this PC and then on Get started.
That should do it. In case you have anything to add to our list of solutions, make sure to do so in the comments section below.