[Fix] Windows 10 Creators update causing 100% disk activity
![]() 6 min. read
6 min. read
![]() Updated on
Updated on
Share this article

Improve this guide
Read our disclosure page to find out how can you help Windows Report sustain the editorial team Read more
Key notes
- The Windows 10 Creators Update might just bring to the table a bit more than you bargained for like for instance, an unwanted increase in disk usage.
- Follow the steps below to locate the resource-hogging programs and get CPU usage back to normal values.
- Check out more useful information about the Windows 10 Creators Update.
- Don't be shy to explore our Laptop & PC Guides as well.
One of the good sides of Windows is that the system requirements are not overdemanding. You can run Windows 10 even on an outdated PC and still manage to use resource-hogging programs.
However, it’s not unusual to see a sudden increase in CPU or RAM usage depending on the processes you run. On the other hand, this isn’t exactly a common occurrence for HDD.
Or it did not use to be, at least. Some users reported that, after they obtained the Creators Update, their HDD activity hit sky-high values for no apparent reason. And to make things even worse, that affected the performance radically.
Since this is a grave problem for a lot of users, we compiled a list of solutions. So if you have major HDD issues after the update, check the workarounds below.
How to fix 100% disk usage caused by the Creators Update
1. Use Ashampoo WinOptimizer

Keeping your CPU consumption under control has never been easier, nor has disk space optimization and these two major resource-hogging culprits are easily manageable with the WinOptimizer.
What’s more, you can monitor all running background processes, identify bottlenecks and get a clear overview of all HDD health parameters in just one place with enhancement and optimization recommendations and a system maintenance plan included.
Let’s quickly look at its key features:
- Accurate and comprehensive dashboards presenting valuable details on all system components in one single location
- SSD-ready next-gen Defrag tool (merge free space, automate drive analysis and defragmentation)
- Sophisticated algorithms to detect junk files more efficiently
- Reclaim precious disk space by eliminating web browsing traces, redundant files, and useless Registry entries
- monitor all running background processes and get instant notifications on bottlenecks plus potential enhancements
- Auto-Clean function to reduce clutter before it impacts your system automatically
- Live Tuner to provide a smart launch boost to all applications and allow custom fine-tuning
- Integrated Browser Extension Manager

Ashampoo WinOptimizer
Keep CPU usage and disk space under control at all times with this one-of-a-kind system optimization software.2. Check the HDD health and inspect hardware
In order to move on to the system inspections, make sure that your HDD is in good shape and not defective. Namely, it may come as a surprise but HDD is the least durable PC component. Except for the SSD drives, those things are as tough as a nail.
So, if you are even mildly accustomed to hardware tweaks, open up your PC case and check out the cables that are connecting your HDD to the motherboard. SATA cables are prone to malfunction so make sure everything is well-connected.
Additionally, you can download any 3rd-party software to check your HDD health, fragmentation levels, and bad sectors.
If you’re keener to use a built-in tool, Windows offers you just enough to start with. This is how to check for errors and perform defragmentation on your PC:
- Open This PC, right-click on the system partition, and open Properties.
- Under the Tools tab, you’ll see Error Checking and Defragmentation tools.
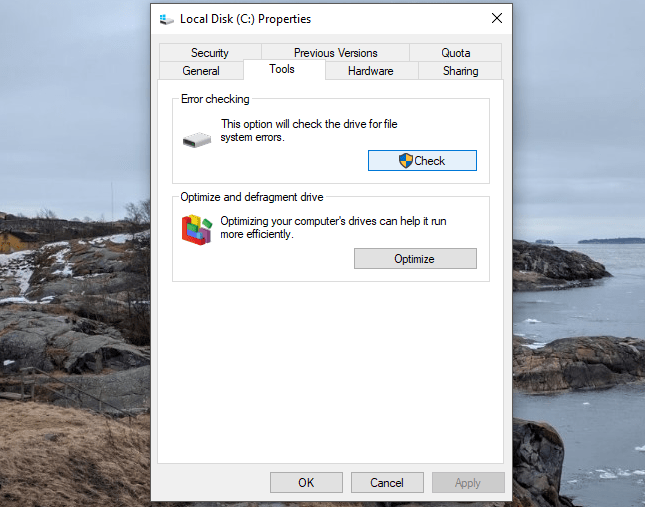
- After you’ve checked your HDD for errors and defragmented it, restart the PC.
The defragmentation part goes only for standard disk drives. SSD drives shouldn’t get fragmented and defragmentation of those can cause a lot of problems.
3. Find the process that hogs on your HDD
Occasionally the rogue system process can be the culprit for this issue, like with some earlier updates. However, sometimes the initiator of the HDD burn might be a 3rd-party program.
And there’s a way to locate and prevent that program from feasting on your resources without control.
Follow these steps to locate the resource-hogging applications:
- Under Windows Search, type resource, and open the Resource Monitor.
- Open the Disk tab.
- Sort the processes by total bytes usage.
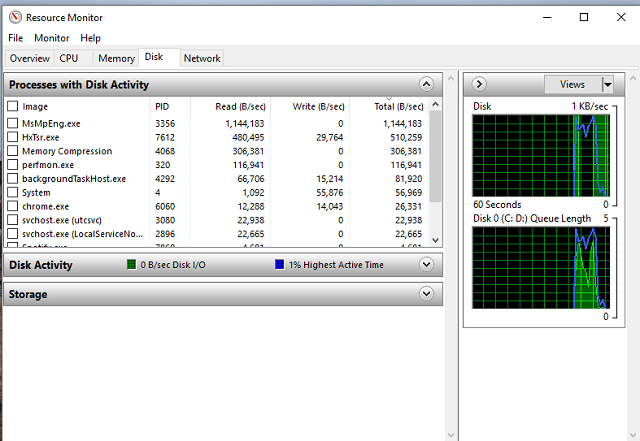
- At the top of the list, you should see the process that consumes the most bytes.
- If the process belongs to a 3rd-party application, navigate to a Control Panel, and remove it.
Have in mind that this goes only for the 3rd-party applications. Don’t make any rash actions with the system processes, since that may lead to a lot of issues and even break your system apart.
4. Disable demanding applications from starting
Another action you should take to considerably decrease HDD activity is related to startup. Namely, as you’re probably aware of, certain applications can start with your system in order to make things easier.
However, that may heavily impact your PC performance, increase startup time, and even, in the worst-case scenario, affect your HDD activity.
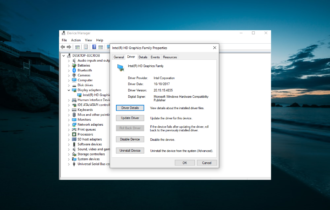
In the previous Windows versions, users were compelled to use a dubious application in order to disable certain programs from starting. Luckily, that’s not the case with Windows 10. You can easily select the startup programs within the Device Manager.
And this is how to do it:
- Right-click the Taskbar and open Device Manager.
- Under the Startup tab, you should see all of the applications that start with the system.
- Make sure to disable all except the essential ones.
That should increase your startup loading time and, hopefully, decrease HDD activity.
5. Disable Windows Search from indexing
Another thing worth checking is related to Windows Search indexing. Namely, some users reported that the HDD issues were gone after they disabled Search Indexing.
As you already know, in order to speed up the search process, Windows may index your searches. That is quite practical, but, apparently, it may inflict an issue or two.
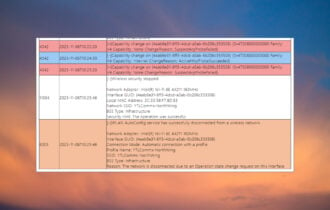
This is how to disable the Windows Search index and decrease the HDD usage to standard values:
- Press Windows key + R to bring out the Run console.
- Under the command line, type services.msc and hit Enter.
- Navigate to Windows Search service, right-click, and open Properties.
- Under Startup Type, choose Disabled.
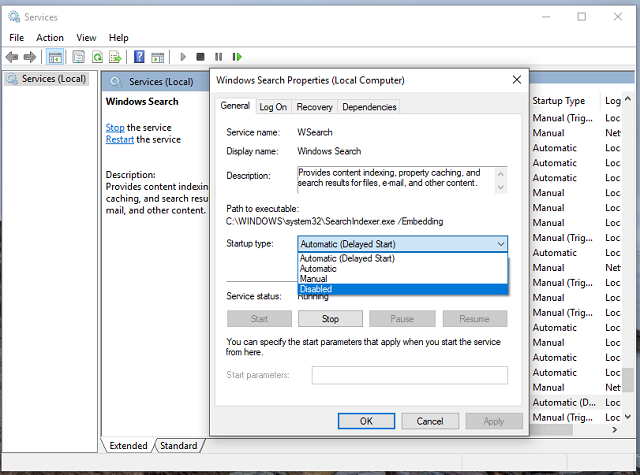
- Click Stop to stop the service.
- Restart the PC and look for changes.
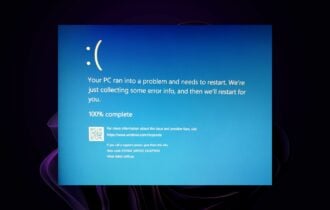
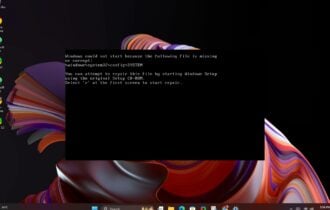
That should do it. We hope this was helpful. Still, if you weren’t able to resolve the issue with all of those steps, your best bet is the clean reinstallation. You can find a detailed explanation in this step-by-step guide link.
Moreover, if you have any alternative solutions or questions regarding the subject, make sure to share them with us. The comments section is just below.
[wl_navigator]