FIX: Wireless Autoconfig Service not running [error 1067]
Key notes
- You might get a WLAN Autoconfig error when upgrading to a newer OS version on your PC.
- By following the guide below you should be able to fix the issue by yourself.
- Whatever other PC error you might get, we probably got it covered in the Troubleshooting Hub.
- Check out the Windows 10 page for similarly useful guides and recommendations.

It seems that the error message WLAN AutoConfig Service Not Running (Error 1067) mainly happens to users who have upgraded their operating systems to Windows 8.1 or Windows 10.
We have some tweaks and workarounds that you can follow in order to fix this error on your Wireless LAN network in the shortest time possible.
First, we will try first to update your WLAN drivers as these are the first to cause issues when upgrading to Windows 8.1 or Windows 10.
Then, we’ll be adjusting the network settings you currently have in your Windows operating system and see how it goes from there.
So follow the tutorial below, taking one step at a time.
How do I fix the WLAN AutoConfig Service (wlansvc) error?
- Uninstall the WLAN adaptor
- Reset IP/ TCP
- Set WLAN Autoconfig to Automatic
- Run SFC command
- Check for updates
- Use System Restore
- Run the Network troubleshooter
- Reinstall your OS
- Additional solutions
1. Uninstall the WLAN adaptor
- Type device manager in the homepage search bar and open it.
- Go to the Network adapters list.
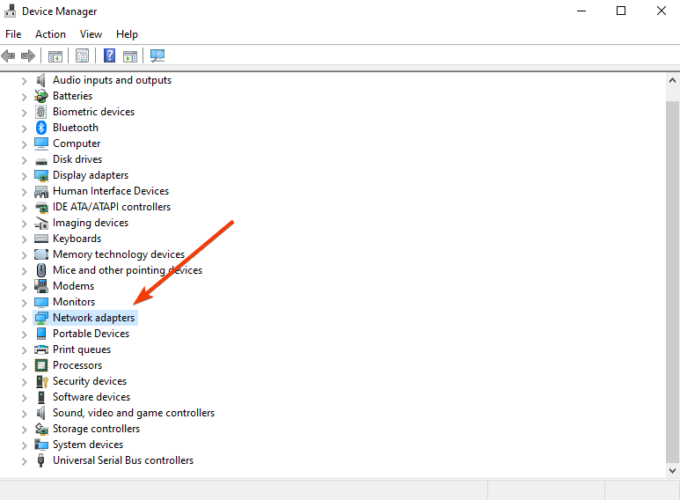
- Right-click on the WLAN adaptor and uninstall it.
- Go to the manufacturer’s website and install the latest version of the driver corresponding to your Windows 8.1 or Windows 10 system.
Alternatively, we strongly recommend using a third-party dedicated tool to download and update all the outdated drivers on your PC.
Once installed, the software will safely scan your PC and inform you of any outdated, damaged, or missing device drivers, so you can take the necessary actions.
2. Reset IP/ TCP
- Type Command Prompt (admin) in the search bar and open it.
- Write the following command and press Enter:
netsh winsock reset catalog
- Then write the following command and press Enter:
netsh int ip reset reset.log hit - Now you will need to restart your Windows 8.1 or Windows 10 operating system.
- Check and see if you can connect to your wireless network.
3. Set WLAN Autoconfig to Automatic
- In the Start window, write the following: services.msc and open the app.
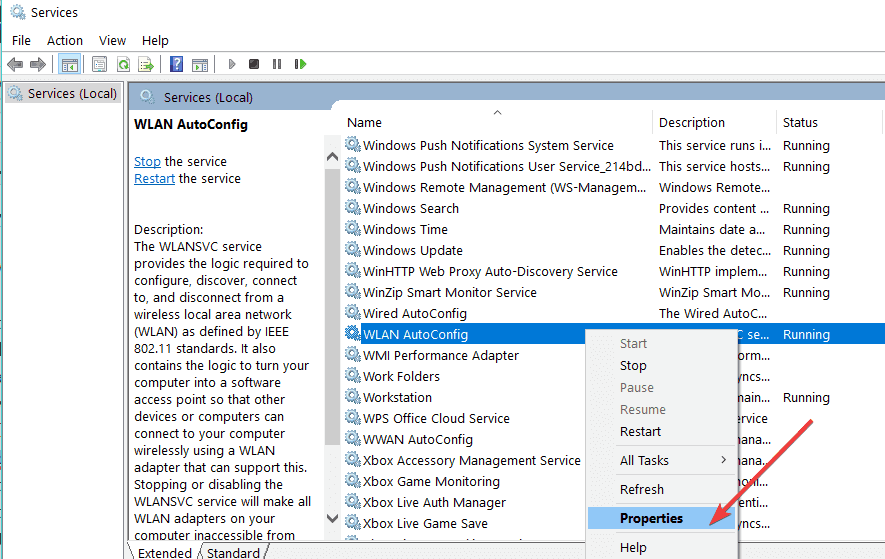
- Look on the right-side panel in this window for WLAN Autoconfig.
- Right-click or hold tap on the WLAN Autoconfig feature.
- Left-click or tap on Properties for the WLAN Autoconfig option.

- Click or tap on General.
- To the right of Startup type, click on the drop-down menu and select Automatic feature.
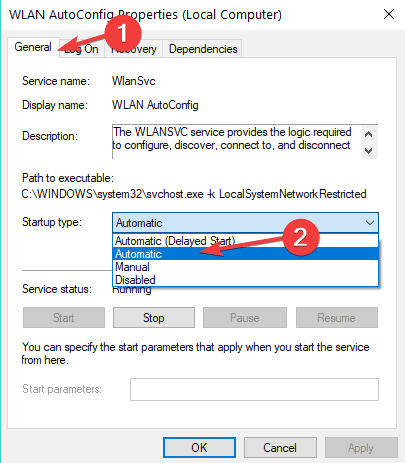
- Click or tap on Start, then on Apply and OK.
- Close all the windows you opened so far and reboot your device.
- Check to see if you have your wireless up and running again.
This may also help when you’re getting an intermittent connection because the WLAN Extensibility module has stopped.
4. Run SFC command
- Open Command Prompt (admin) as mentioned before.
- Write the following and press Enter:
sfc /scannow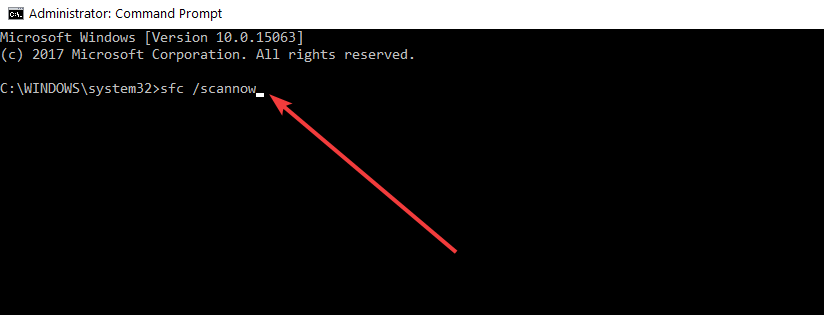
- Let the system file checker finish the process.
- Reboot your system and check to see if you still have this issue.
Note: Sometimes, the scanning process stops out of the blue. Performing a systems restore should help.
5. Check for updates
- Write Updates in the search bar and open the dedicated menu.
- Press the Check for updates button.
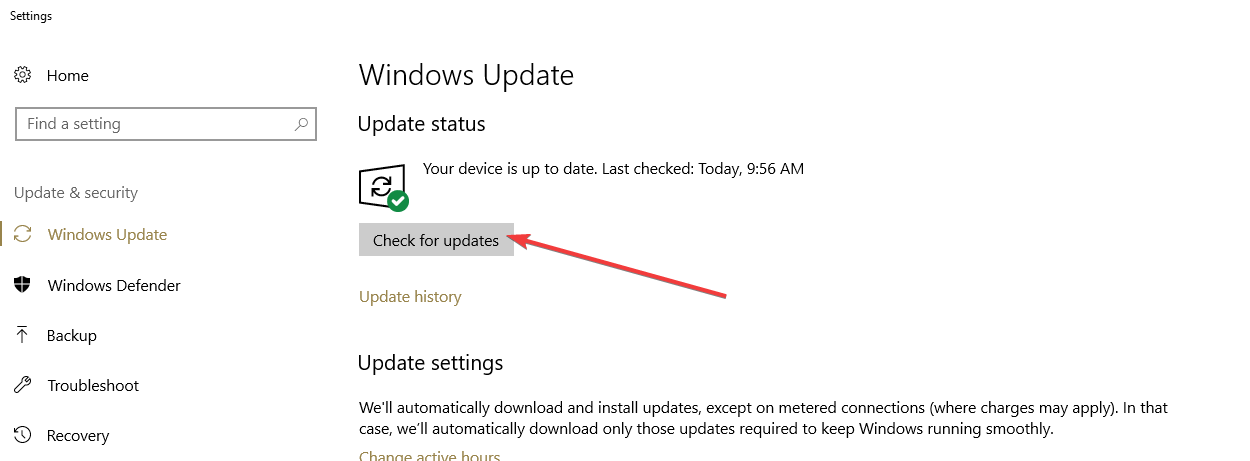
- Now you will need to install all the available updates for your device.
- Reboot your PC and check to see if your wireless network is working for you now.
6. Use System Restore
- Type Control Panel in the home screen search box.
- In the upper right corner, type Recovery.
- Click on the Open System Restore feature.
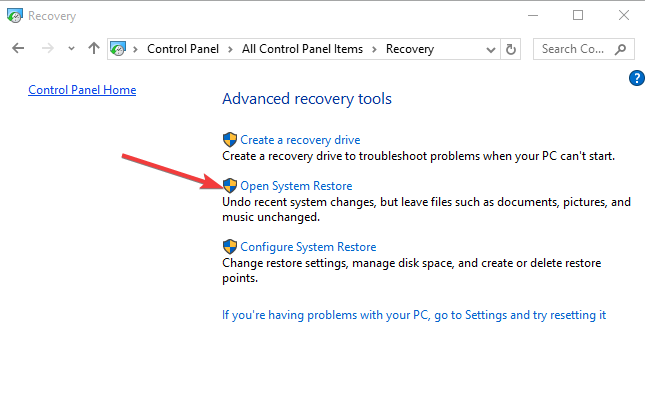
- Follow the instructions on the screen to finish the system restore and bring your operating system to an earlier point in time and solve your Wlan issue.
Note: As a reminder, you should always make a backup copy of your files before attempting this particular step.
7. Run the Network troubleshooter
- Select Control Panel, type troubleshoot, and select Troubleshooting.
- Go to Network and Internet.
- Select Internet Connections.
- Click Advanced, then Run as administrator.
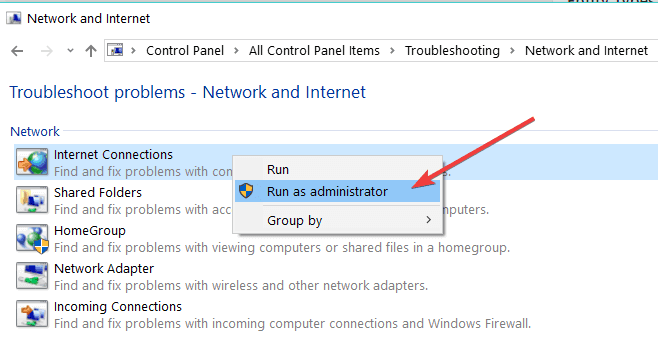
- Press the Next button to run the troubleshooter. Follow the on-screen instructions to fix the problem.
8. Reinstall your OS
As a last resort, you need to completely uninstall and reinstall your Windows 8.1 or Windows 10 operating system.
This is recommended only if the steps above did not solve the Error 1067 WLAN AutoConfig Service Not Running message.
9. Additional solutions
If the issue persists, you can also try to rollback your network drivers and then disable your antivirus and firewall protection.
Sometimes, your antivirus may block your Internet connection, and disabling it can help you to quickly fix this issue.
These were a few methods that can help you with the Wireless feature on your PC. If you have any other questions related to this article or know other solutions, please use the comments section below.
Read our disclosure page to find out how can you help Windows Report sustain the editorial team. Read more


Improve this guide


User forum
4 messages